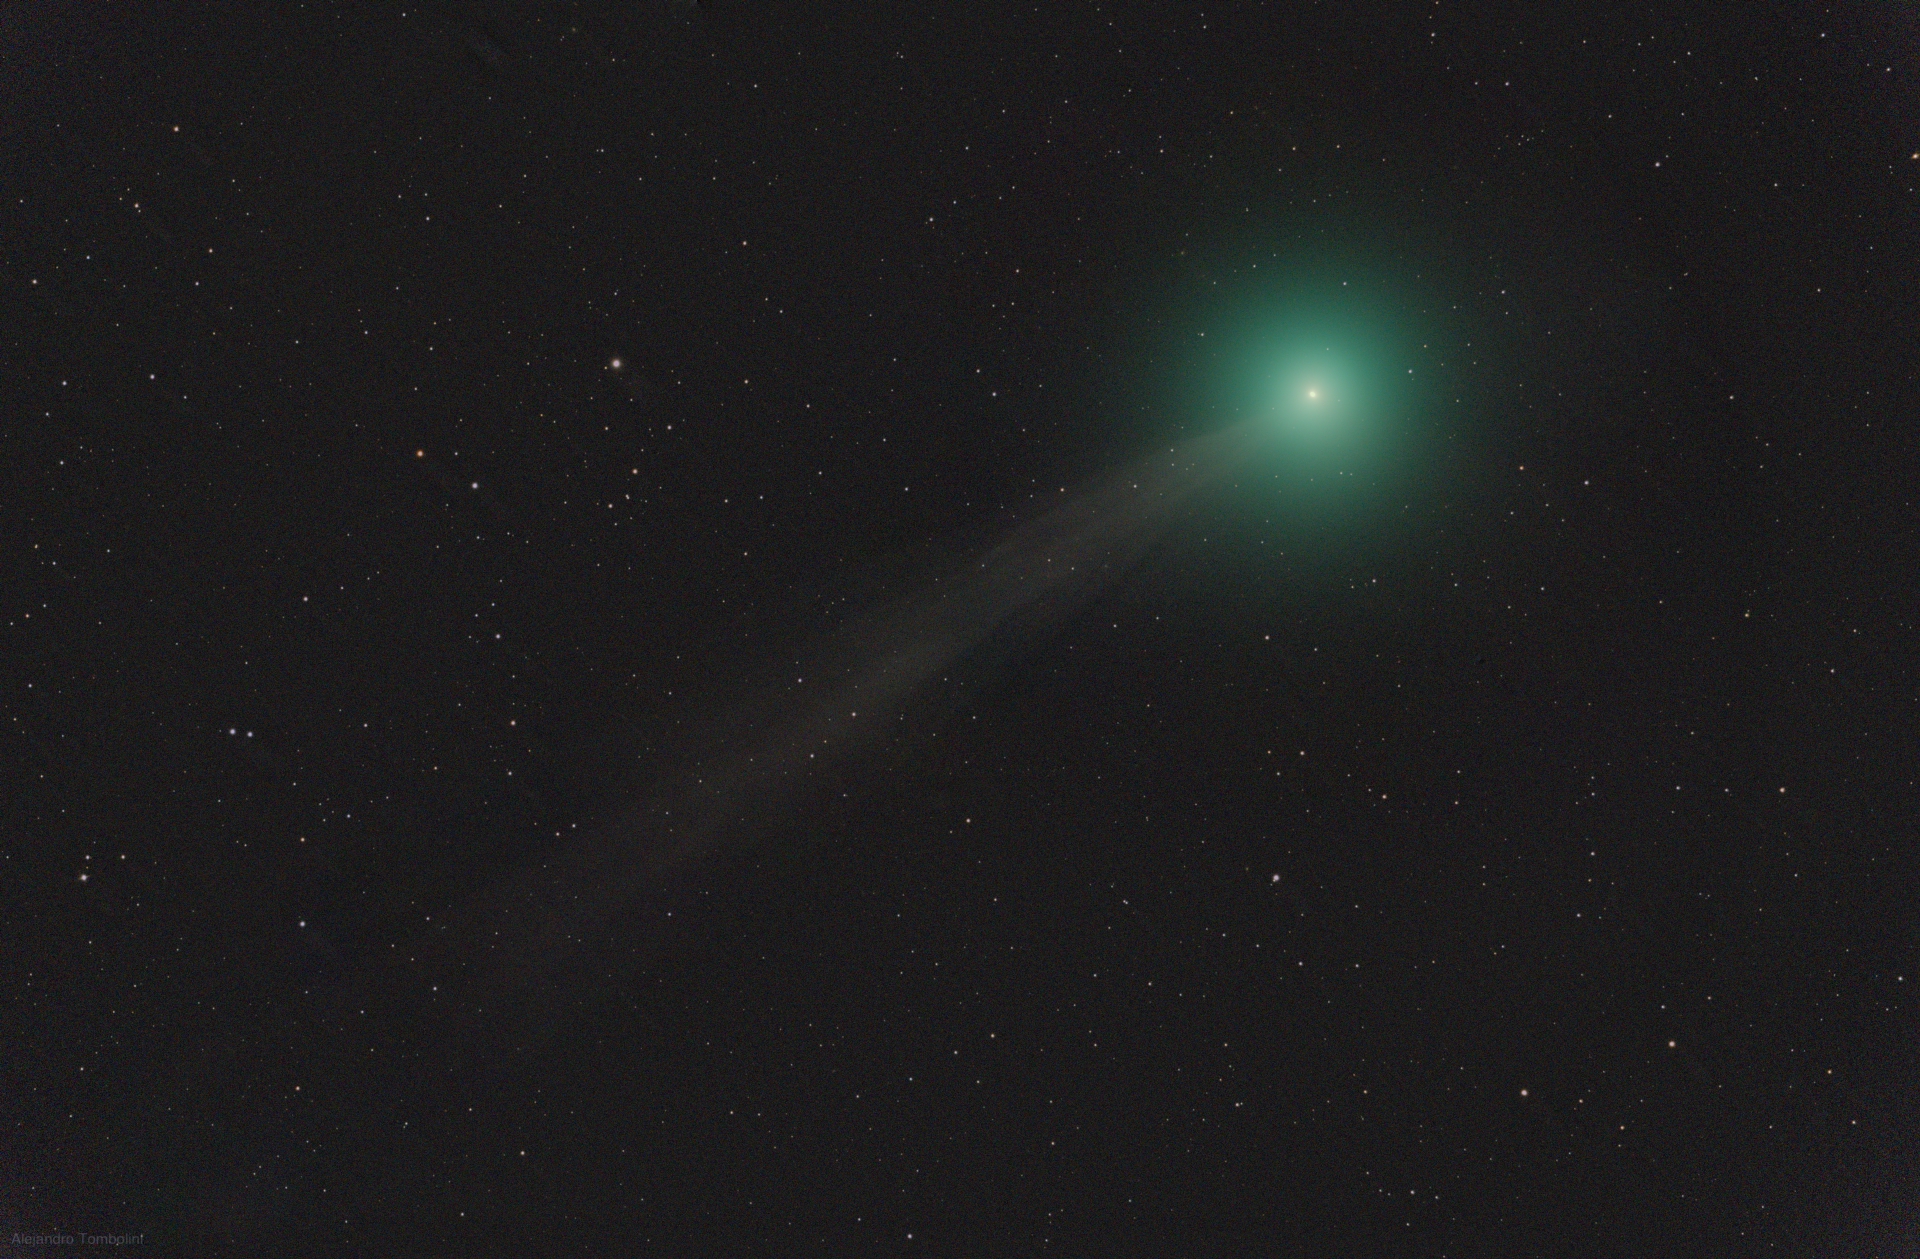
Lovejoy Comet
by Alejandro Tombolini
Introduction
Highlight the faint tail of the comet in an small set of images. Main notes: Blink to inspec and select images. DynamicBackgroundExtraction to remove gradients and vignetting. Date: April 2015.
Image Data
- Object: Lovejoy Comet
- Camera: Canon 5DIII - Filter Type I
- Telescope: William Optics 132 FLT - Focal Lenght 925 mm - f/7
- Images: 13 x 1.5 minutes @ ISO 1600
- Total Time: 19.5 minutes
- Processing Software: PixInsight
- Comments: From Trenel - La Pampa - Argentina
- Author: Alejandro Tombolini
Processing
On January I had the opportunity of photograph Comet Loveyoy, but due to bad wheather and equipment problems I manage to rescate only 13 images.
Also my flats were very bad in that sesion, so calibration of the images remain with vigneting, dust motes and sky gradient.
I expected to take new images the following night, but of course it was cloudy. I could not even take the image of the stars in the place the comet was the previous night.
Anyway I use the images to test the new features that NKV added to the CometAlignment module that allow to integrate only stars from the comet images.
Using BatchPreprocessing Script calibrate and Register the Raw files. First using Blink to inspect all the images. The following video shows a selected group of 13 images after deleting more than 100.
After execute BatchPreprocessing script you can inspect your calibrated _c, debayered _c_d, and registered _c_d_r files.
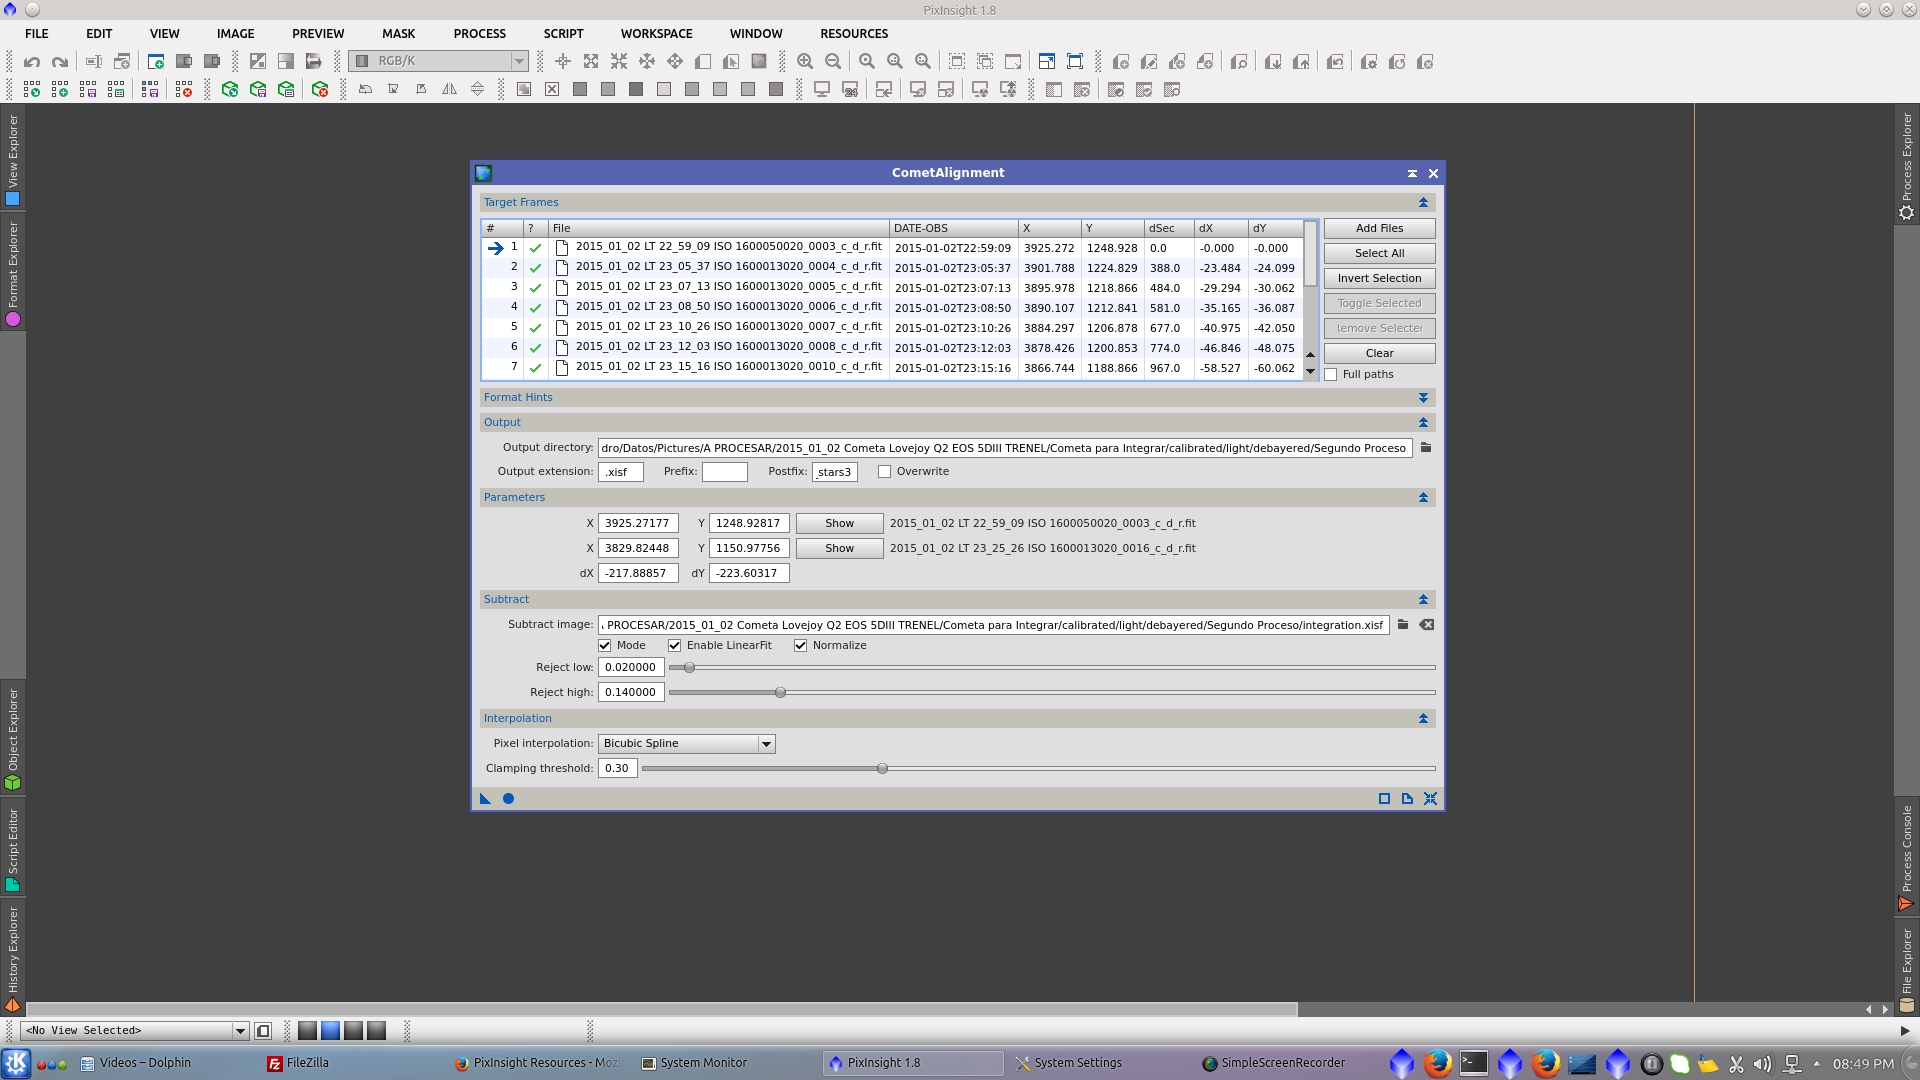
Once you have checked your images, open CometAlignment module and Add Files. Selec the image that you want as reference for the coment to be align, this means that the integrated comet will remain in that position.
Now you have to indicate where the comet is located. Double click on the first image to open it and select the comet (click on the nucleus)
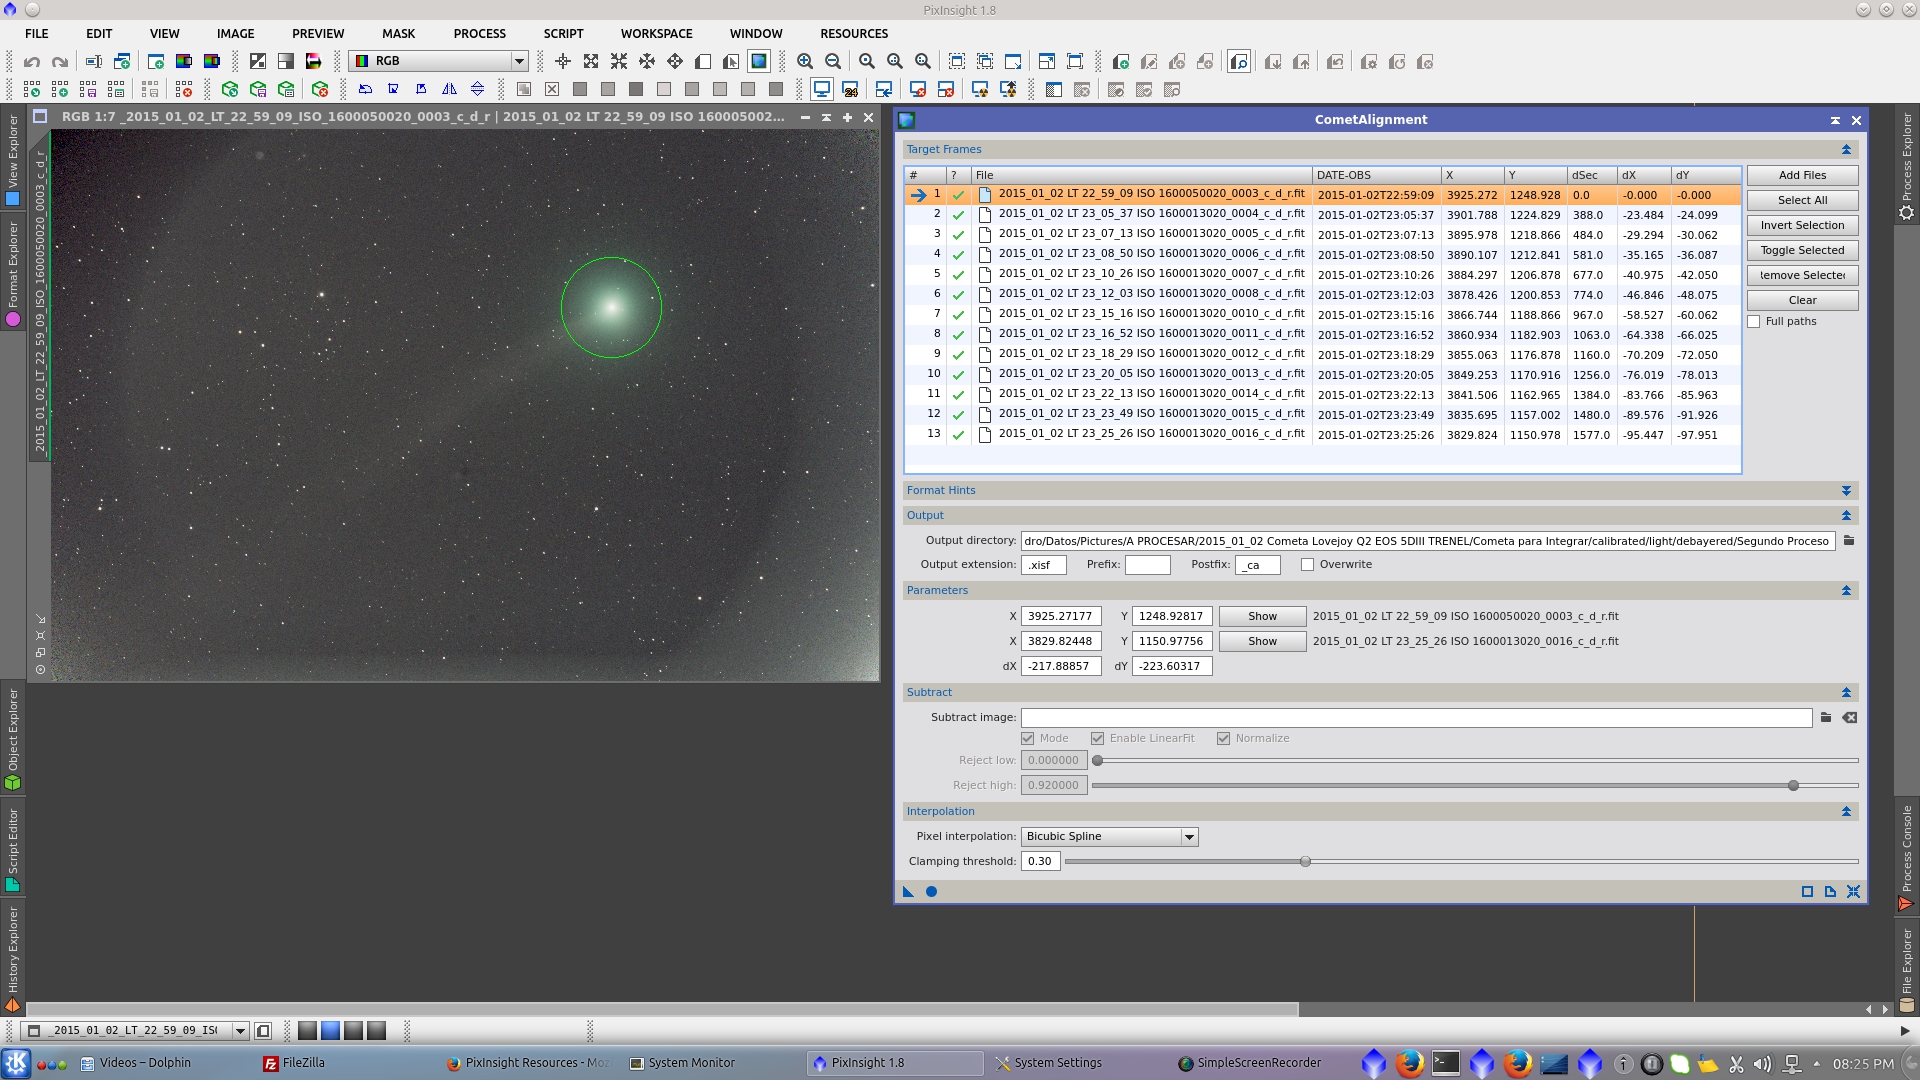
Double click on the last image to open it and select the comet (click on the nucleus)
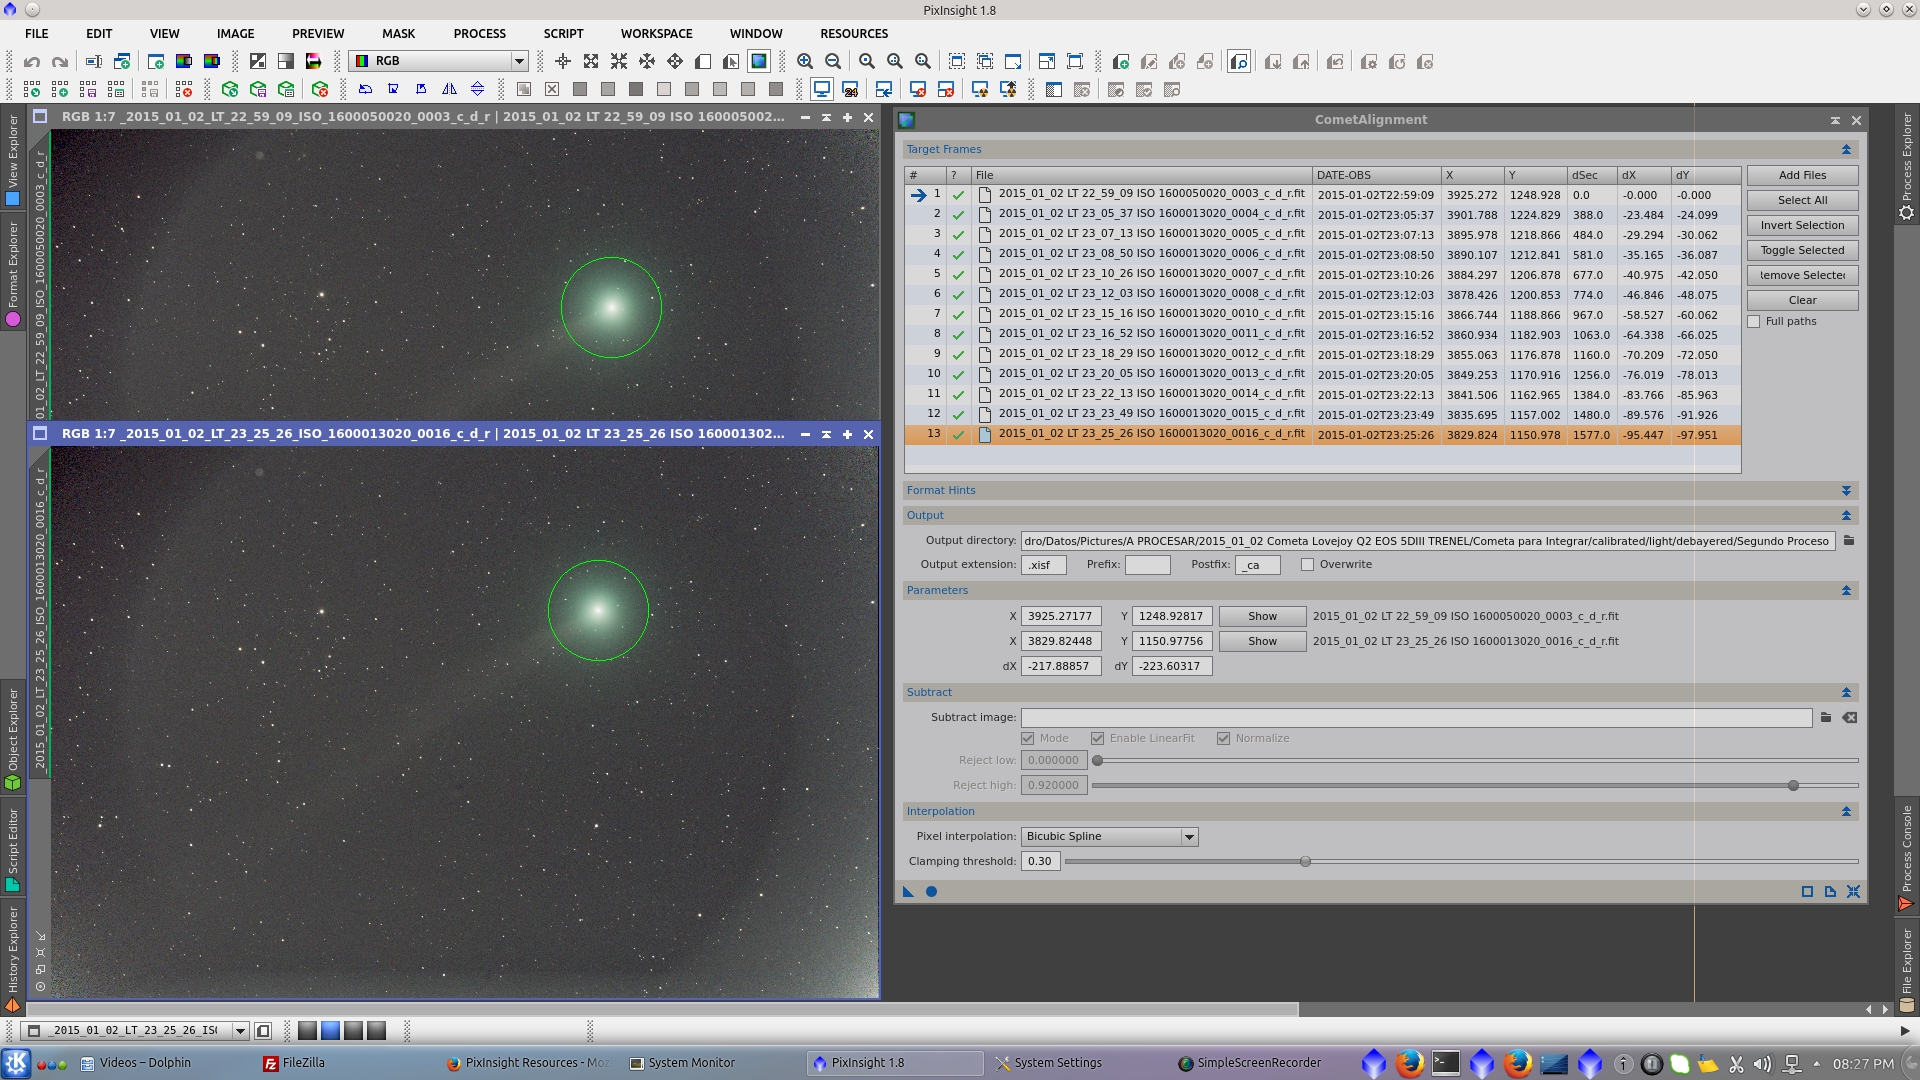
Apply Global and the module will generate the comet aligned images _ca
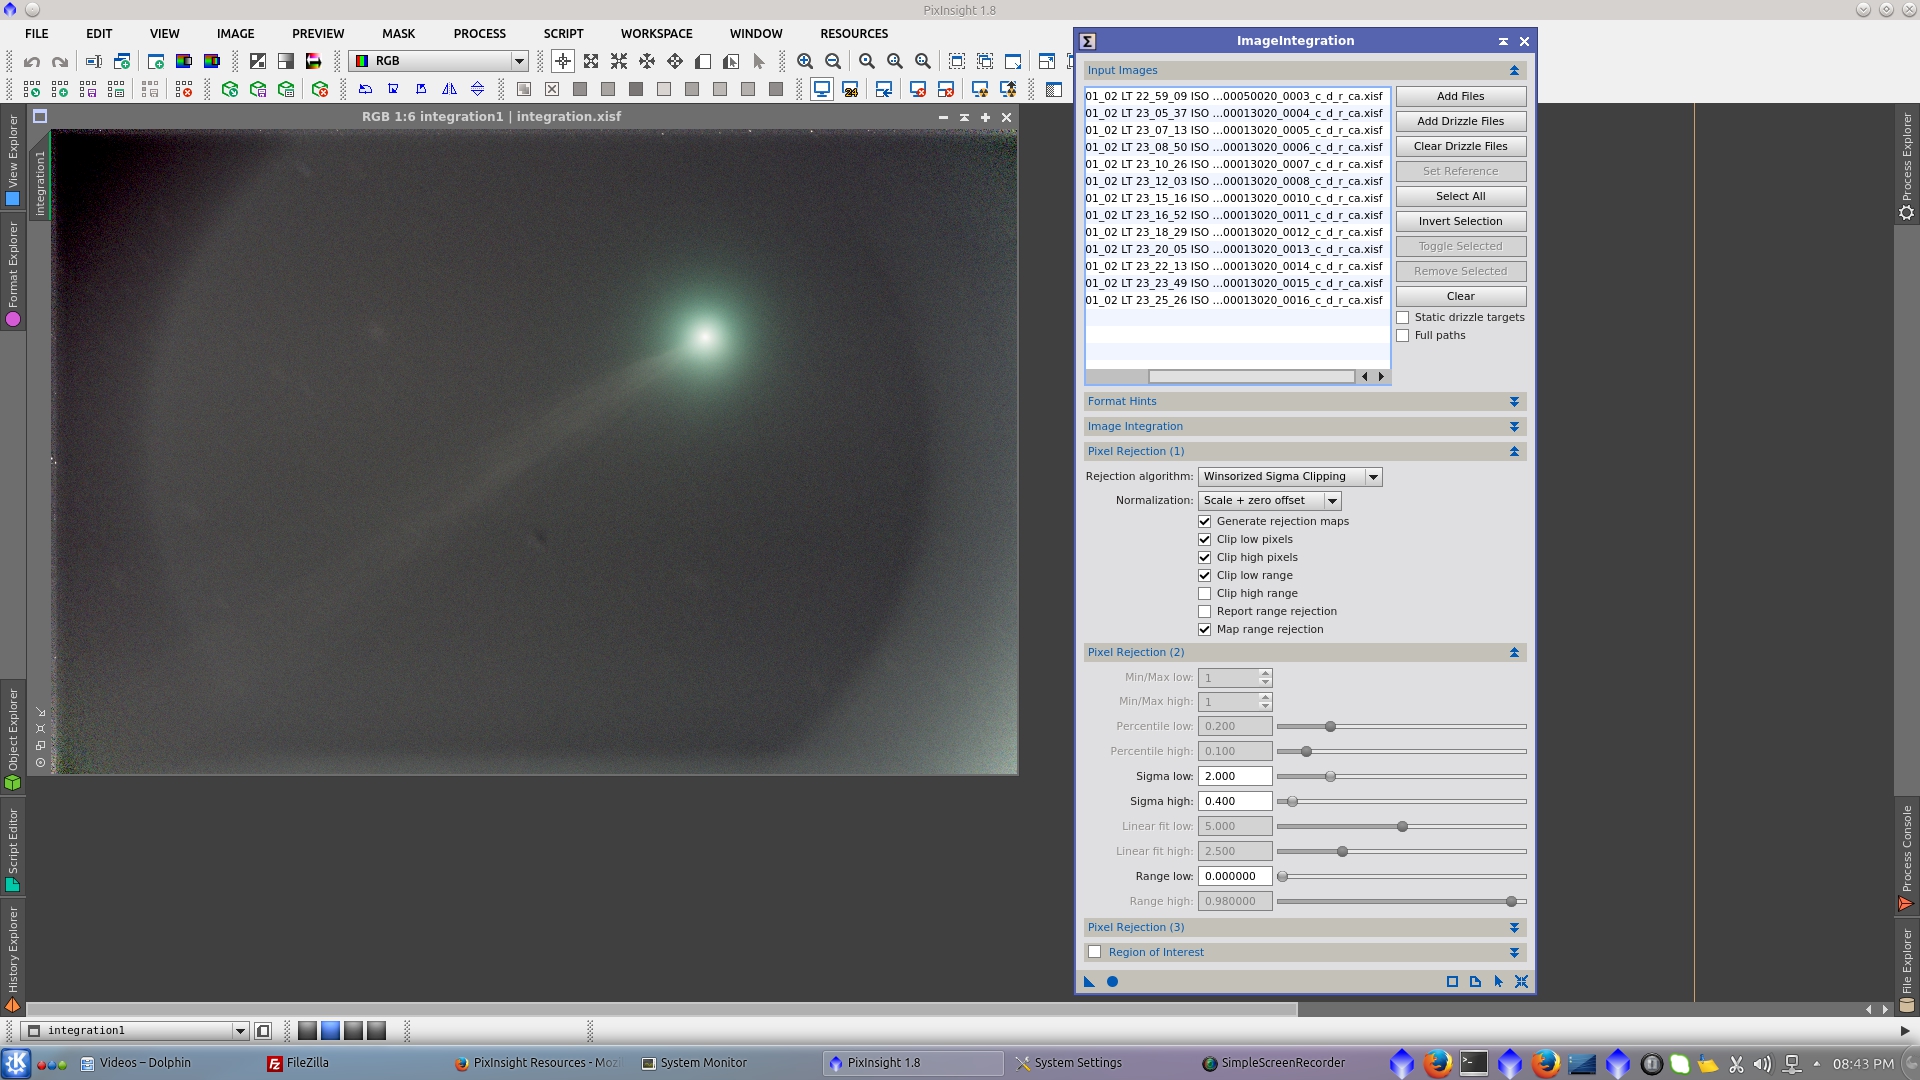
Use ImageIntegration tool for integration of the comet without stars. Choose yours _c_d_r_ca images. Select a suitable rejection algorithm (Winsorized Sigma Clipping in this case) and perform a first integration. Then play with the Sigma low and Sigma high values to find the optimal result.
Open CometAlignment module, be sure that you have added your _c_d_r files and change the Postfix of the name to samething like "stars".
In "Substract Image" selec the Integration of the comet and check "Mode" and the Comet integration will be aligned to the target image and then substracted from it. Apply Global and the module will generate the stars aligned images _stars.
The generated "stars only" images can be inspected using Blink tool
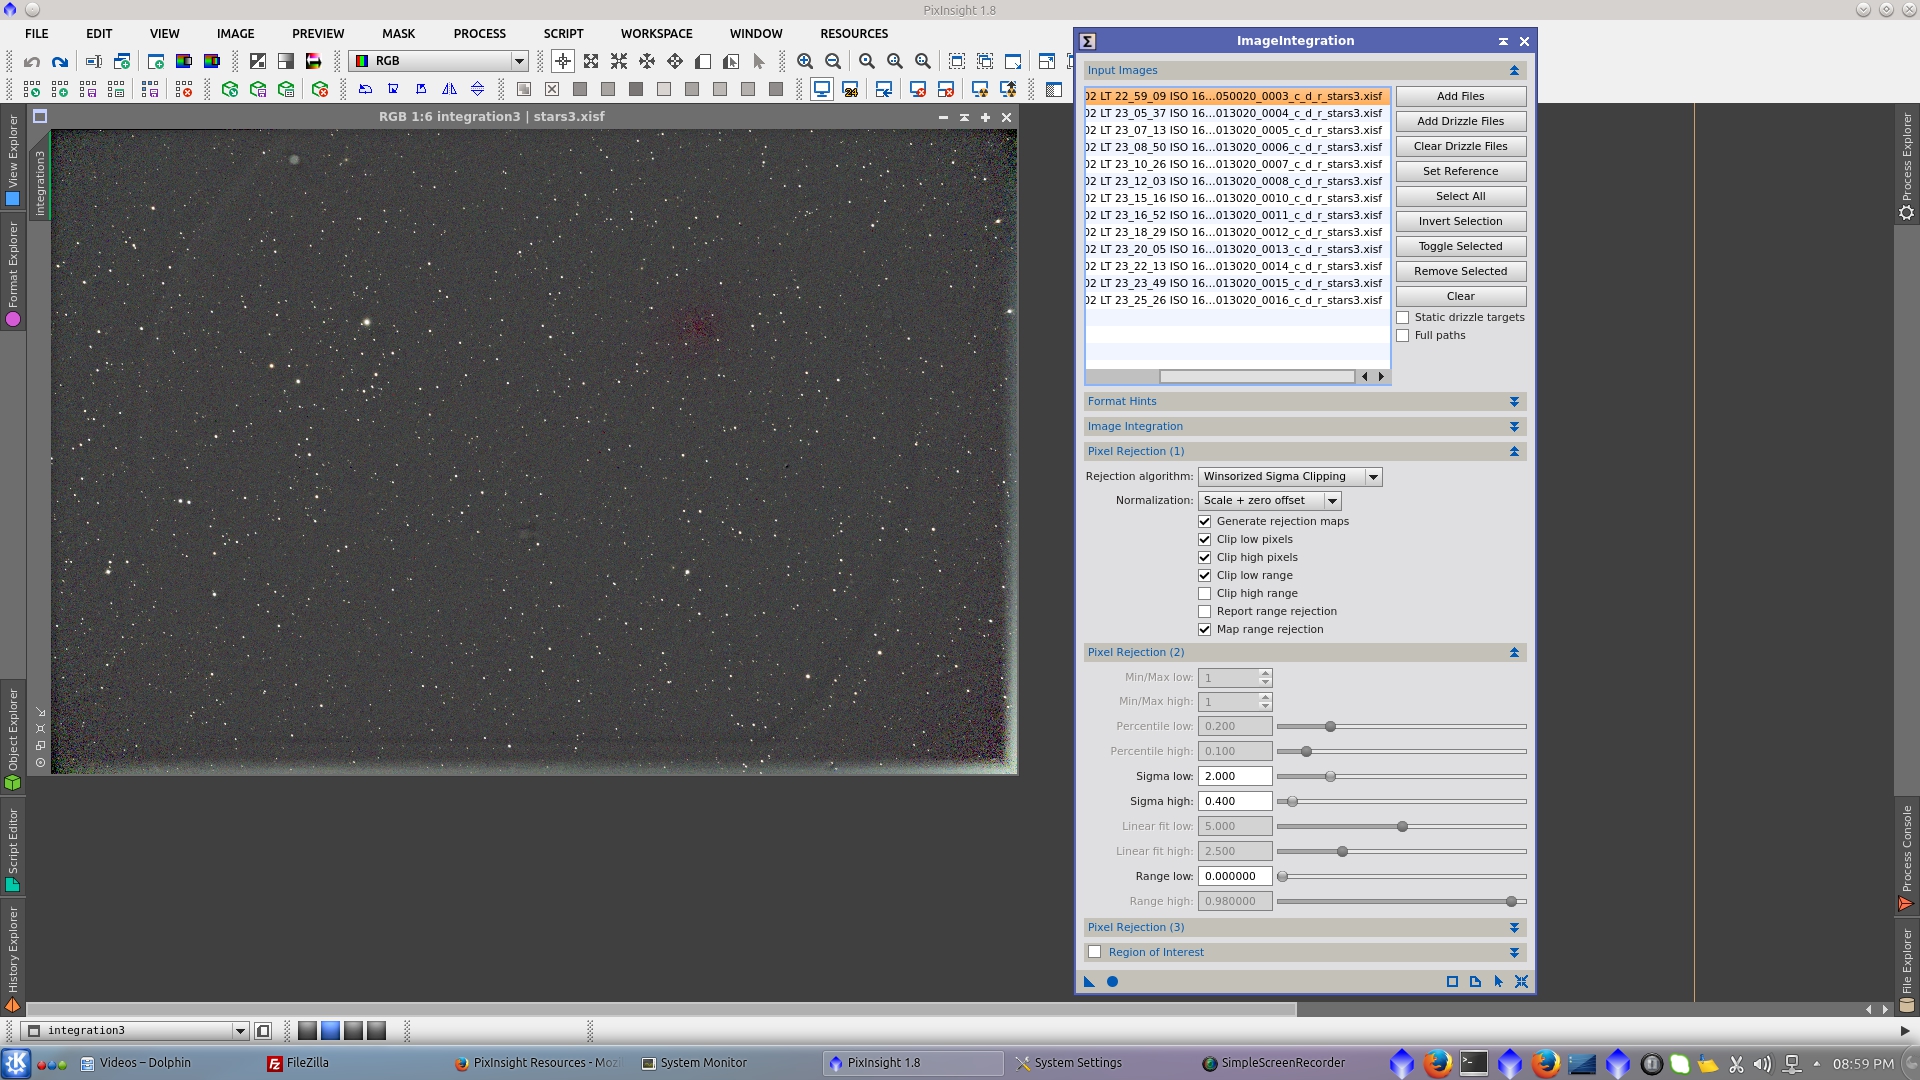
Use ImageIntegration tool for integrate the stars without comet. Choose yours _c_d_r_stars images. Select a suitable rejection algorithm (Winsorized Sigma Clipping in this case) and perform a first integration. Then play with the Sigma low and Sigma high values to find the optimal result.
Now you have both integrations "only comet" and "only stars" ready to be processed. There are different ways to mix both images. In this processing example I am going to mix them without using mask.
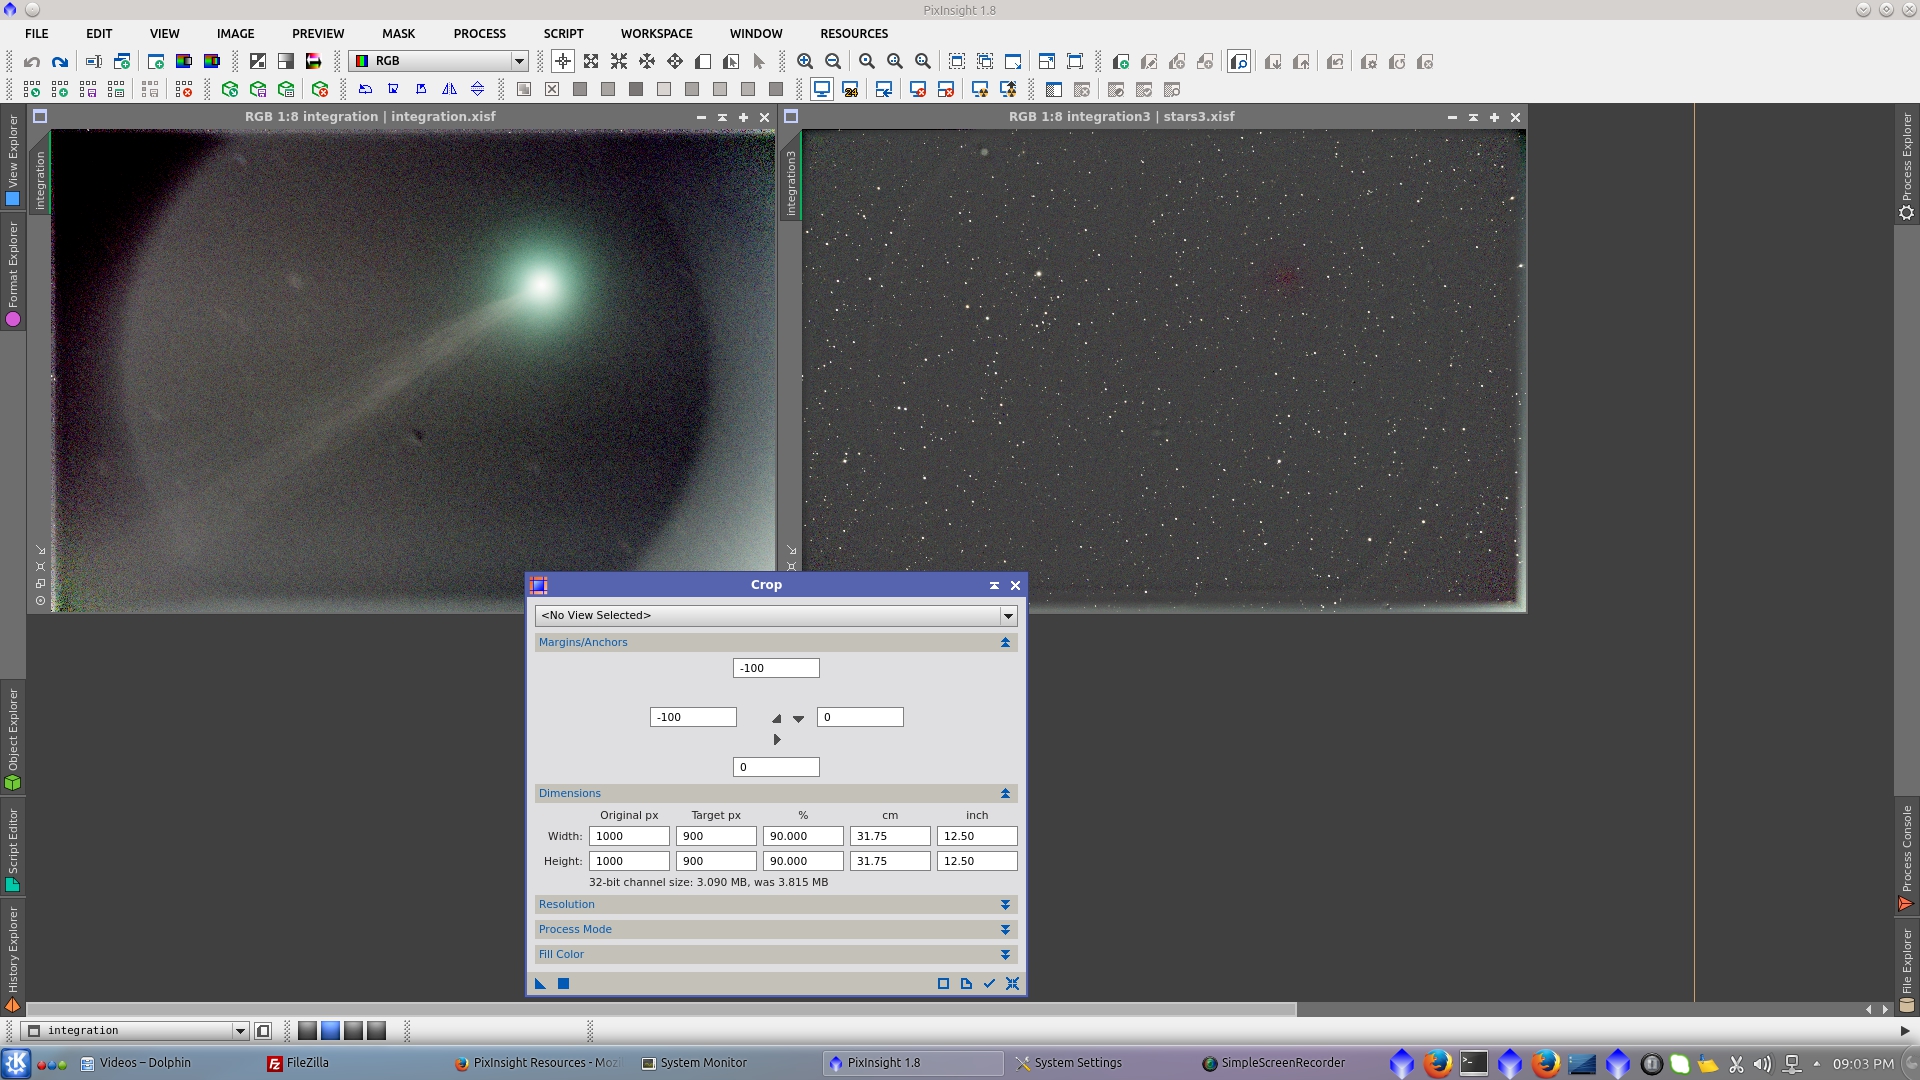
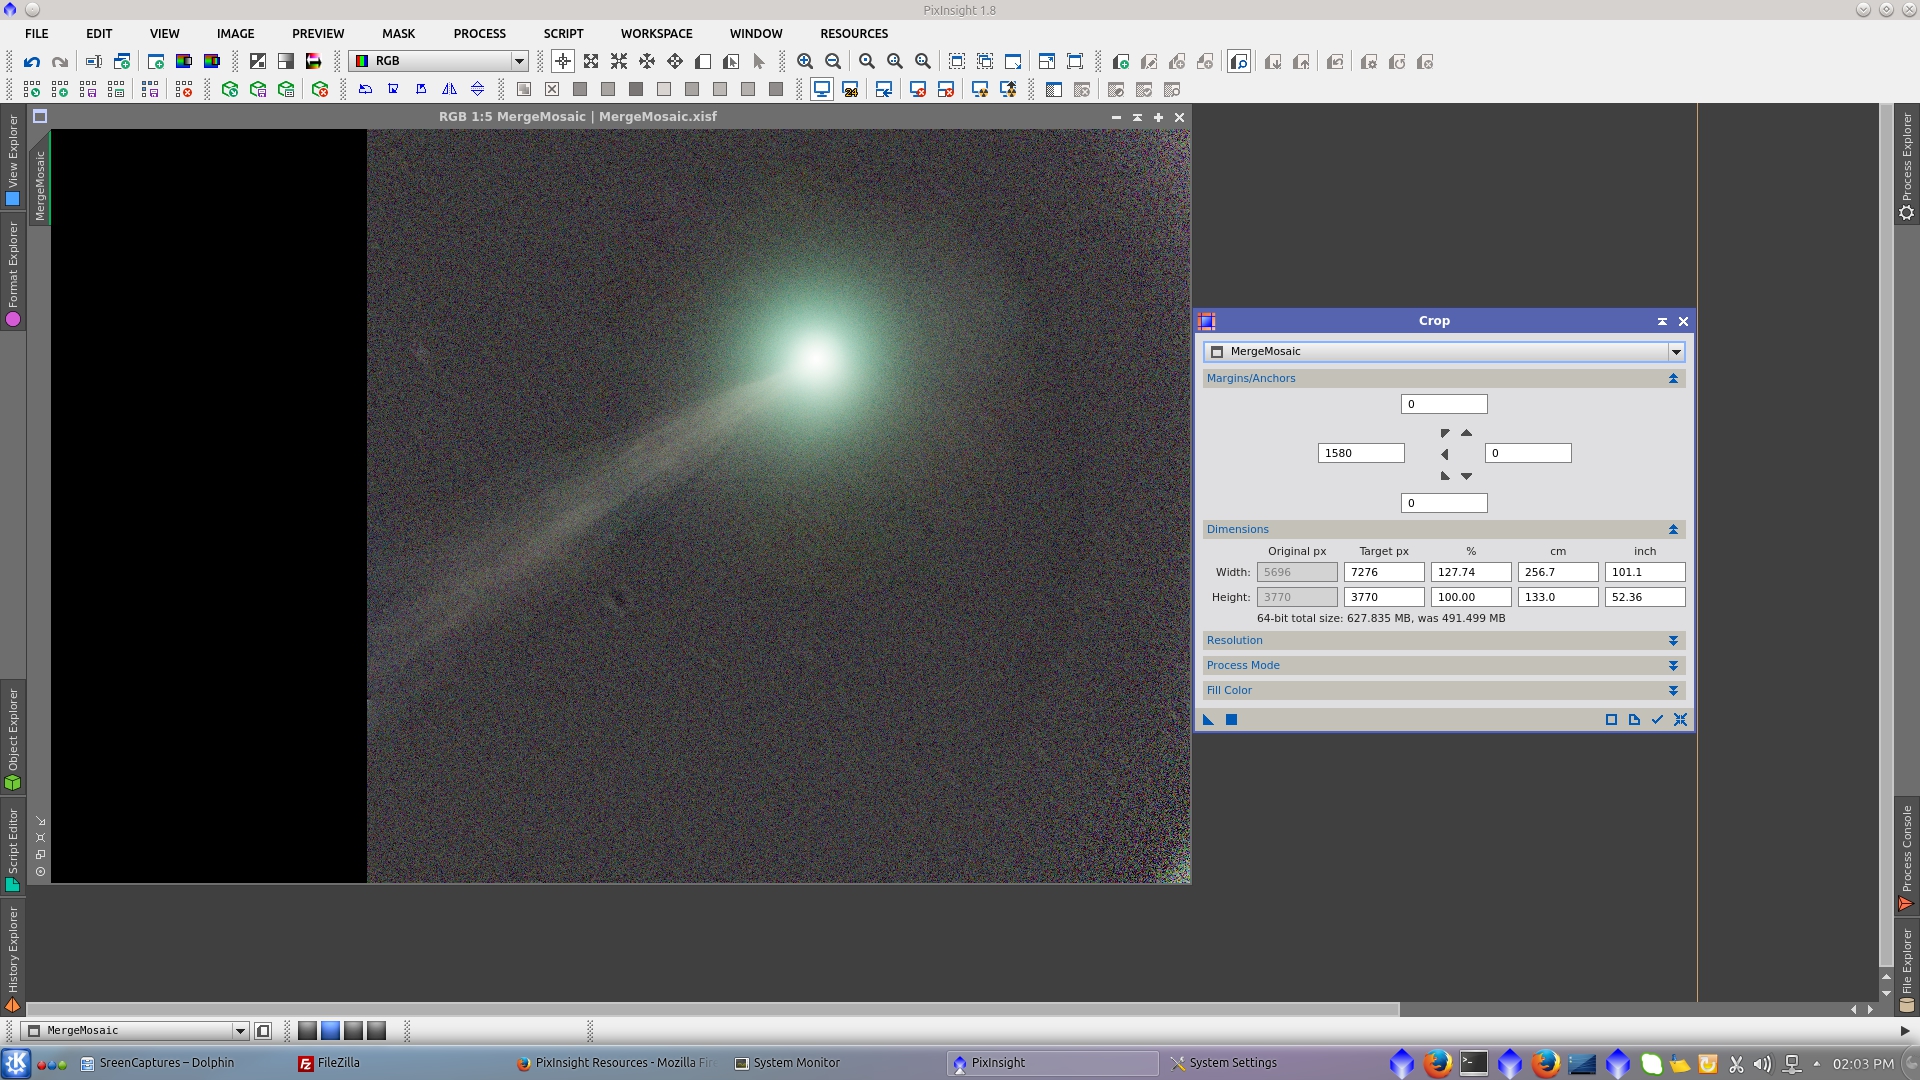
First crop 100 pixels from the left and the top to eliminate the brigh edges and apply the same process to both images.
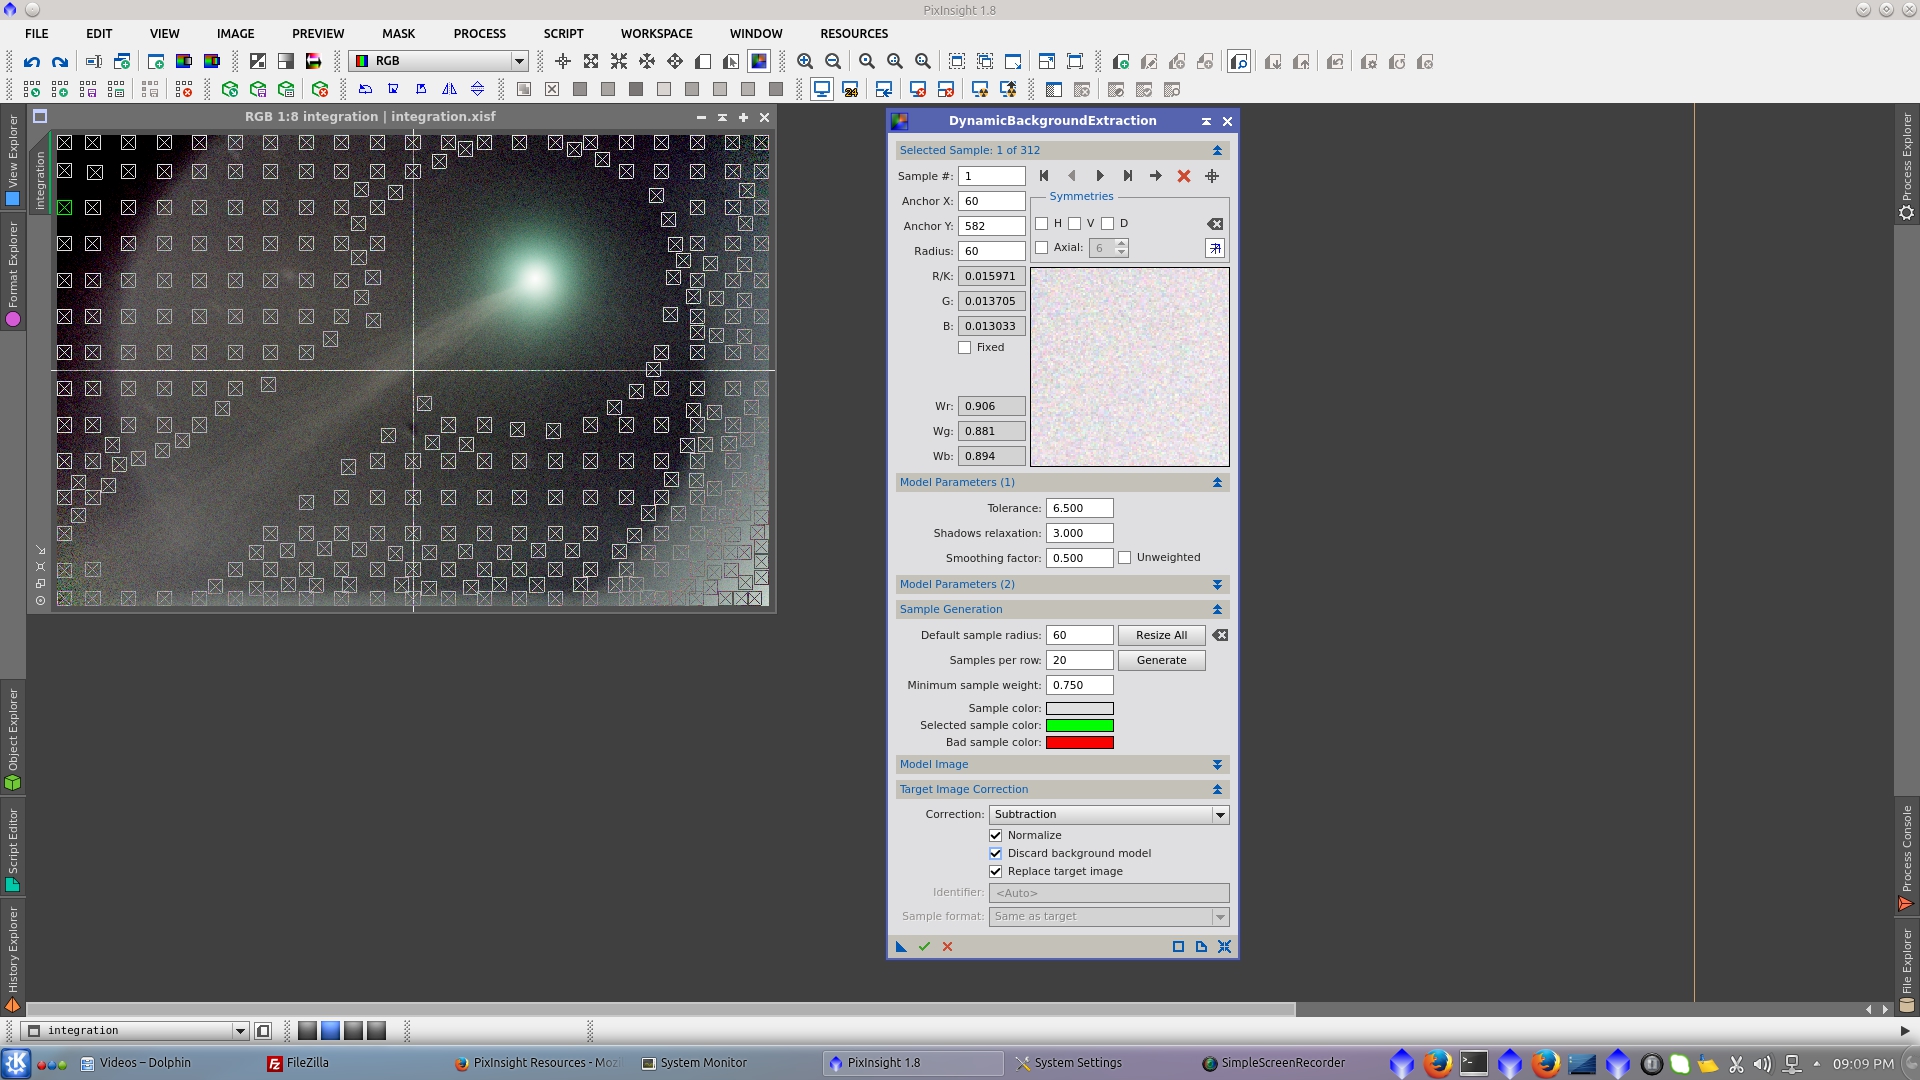
To correct gradients on the comet image, apply DynamicBackgroundExtraction.
The present image has vigneting not well corrected by flats. (which would be easy to correct with better flats)
Dust motes not corrected, (also would be easy to correct with better flats, but some of them are moving from frame to frame)
And in this case there are also star trails that remain from integration. In a long serie of image it had been possible remove it integrating interspersed series, but I have only 13 images in this case.
Then I will apply a serie of DBEs. First setting a high smoothing factor in order to generate a wide model of the background. This model correct the image pretty well and let remain small and more difficult to correct variation on the corners, vignetting and star trails
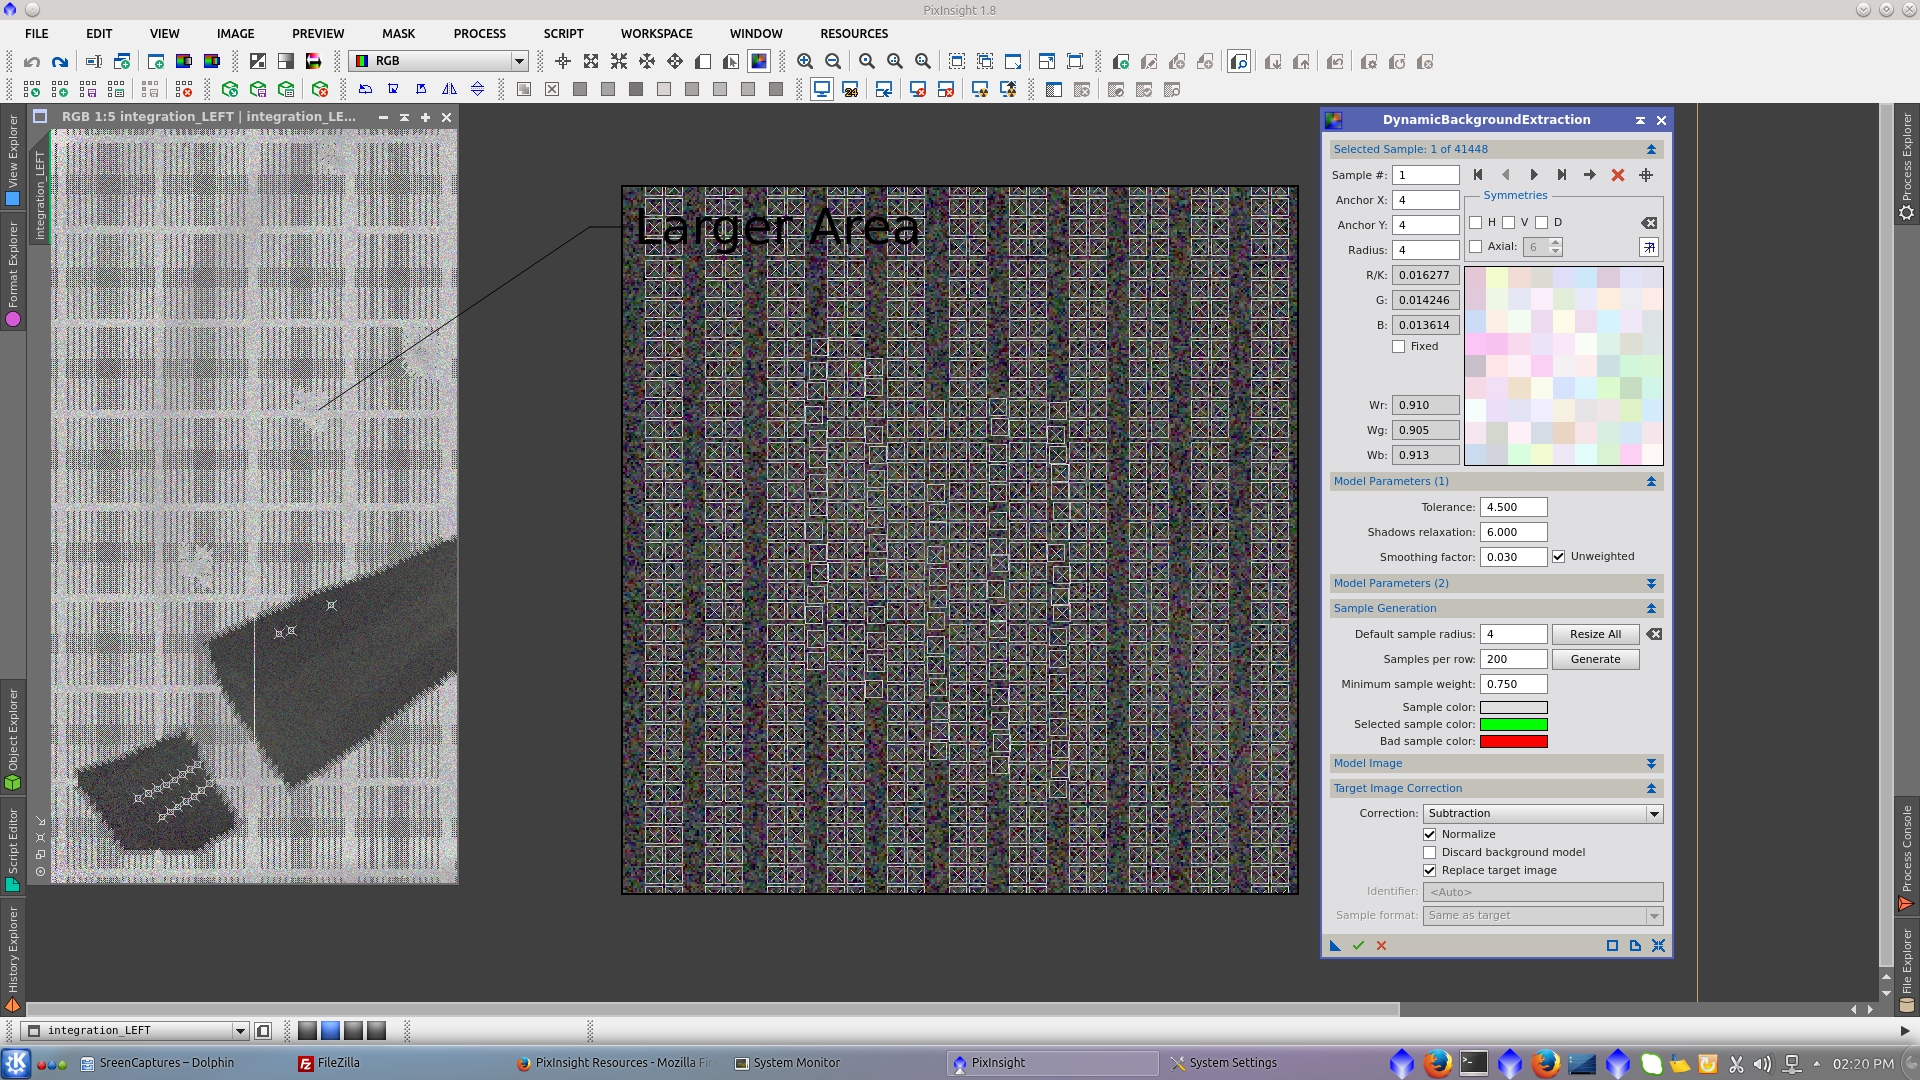
Now, to tell the DBE where the small variations are located it is needed a high dense DBE (HDDBE) made with little samples and very low smooting factor in order to deal with those small variations of the stars trails and remaining circle from vigneting.
The problem that I found was that the HDDBE that I had previosly generated, was not possible to be done. I don know if the limit comes from my computer or from DBE to manage a limited amount of samples on the image.
Then I decided to split the image in three parts and make it separately. The maximun amount of samples that I could manage was arround 41.000. Wow!
Caution!: Not recommended for impatient people. :-)
Generate three previews: LEFT, RIGHT_TOP and RIGHT_BOTTOM big enough to have a superposition between them. This will ensure a correct recomposition of the image.
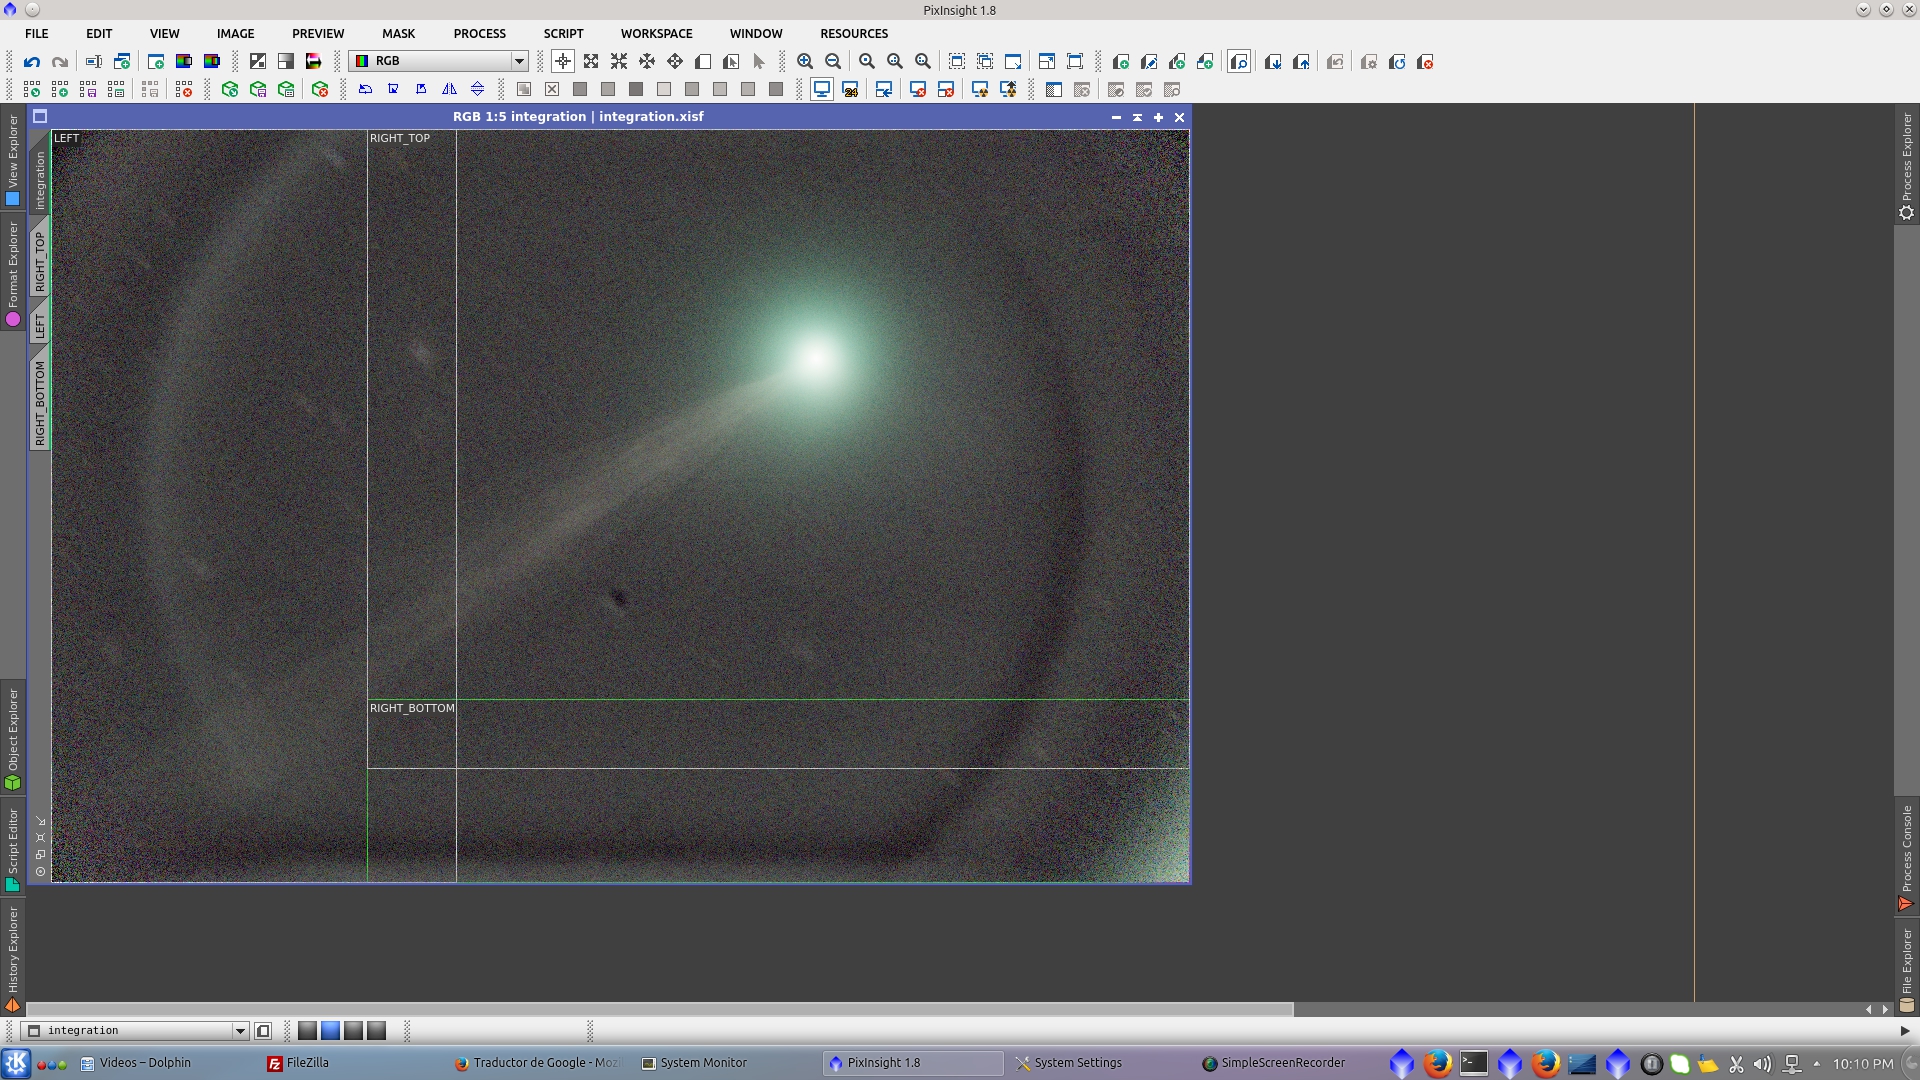
Extract the previews to split the image
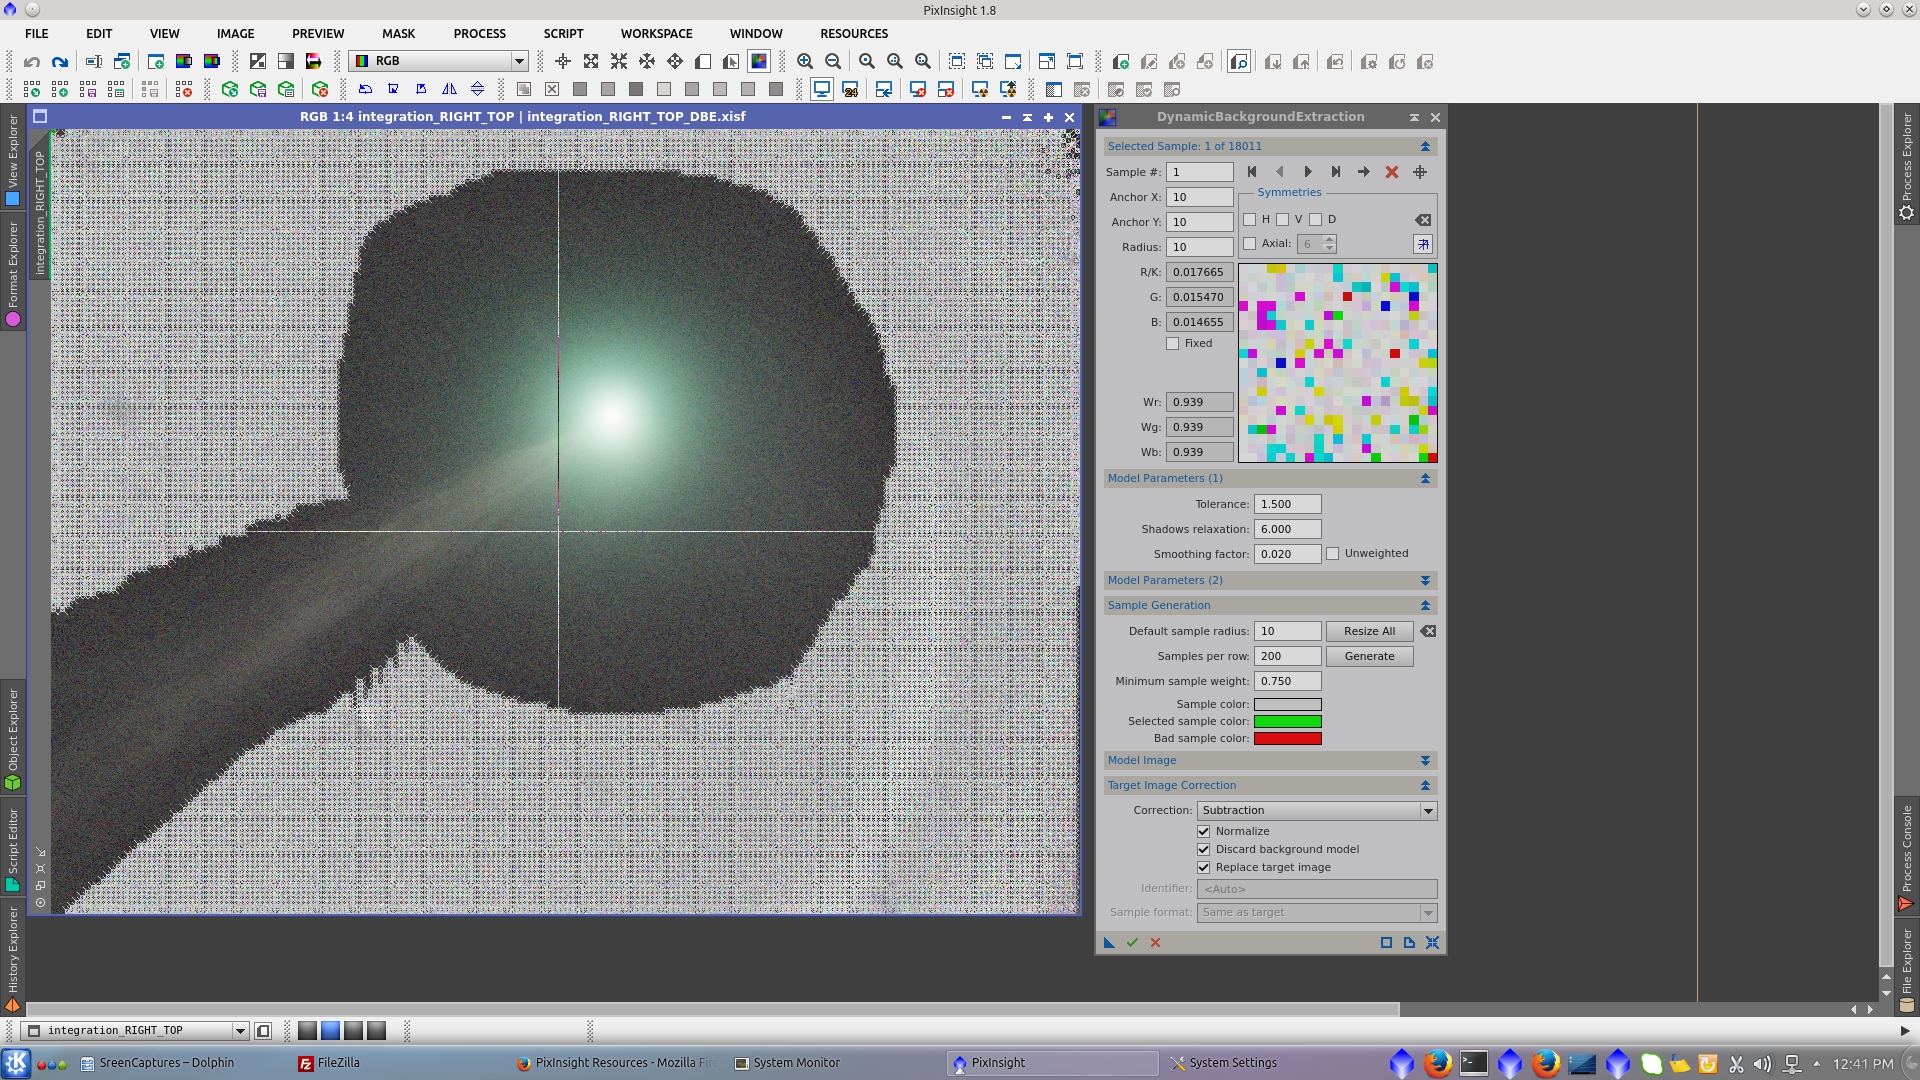
To generate the model, set the desired Samples per row and radious and adjust Tolerance and Shadows relaxation in order that samples cover all the image.
This model parameters also generate samples over the comet that have to be deleted manually.
(At this point I had a couple of wishes about DBE, as having the ability to set different Model Parameters per area of the images and also delete big amount of samples per selected area)
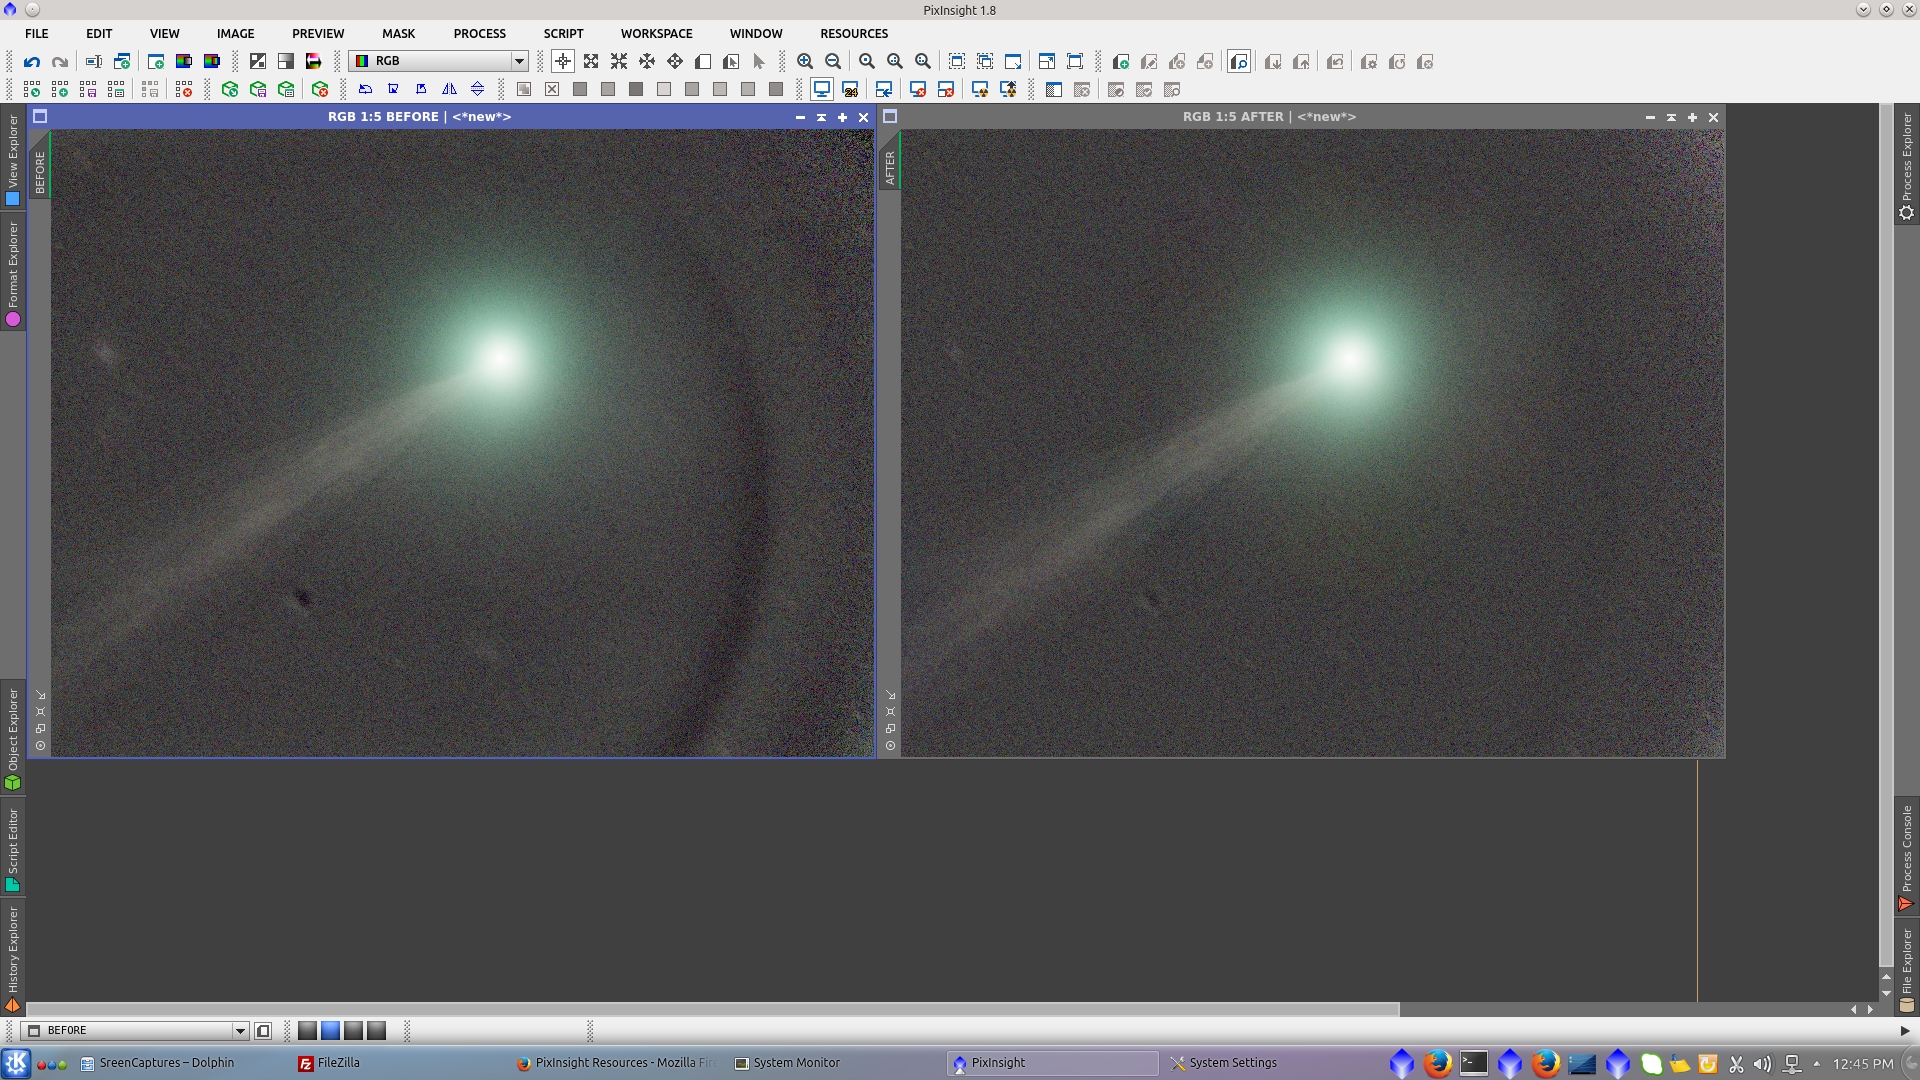
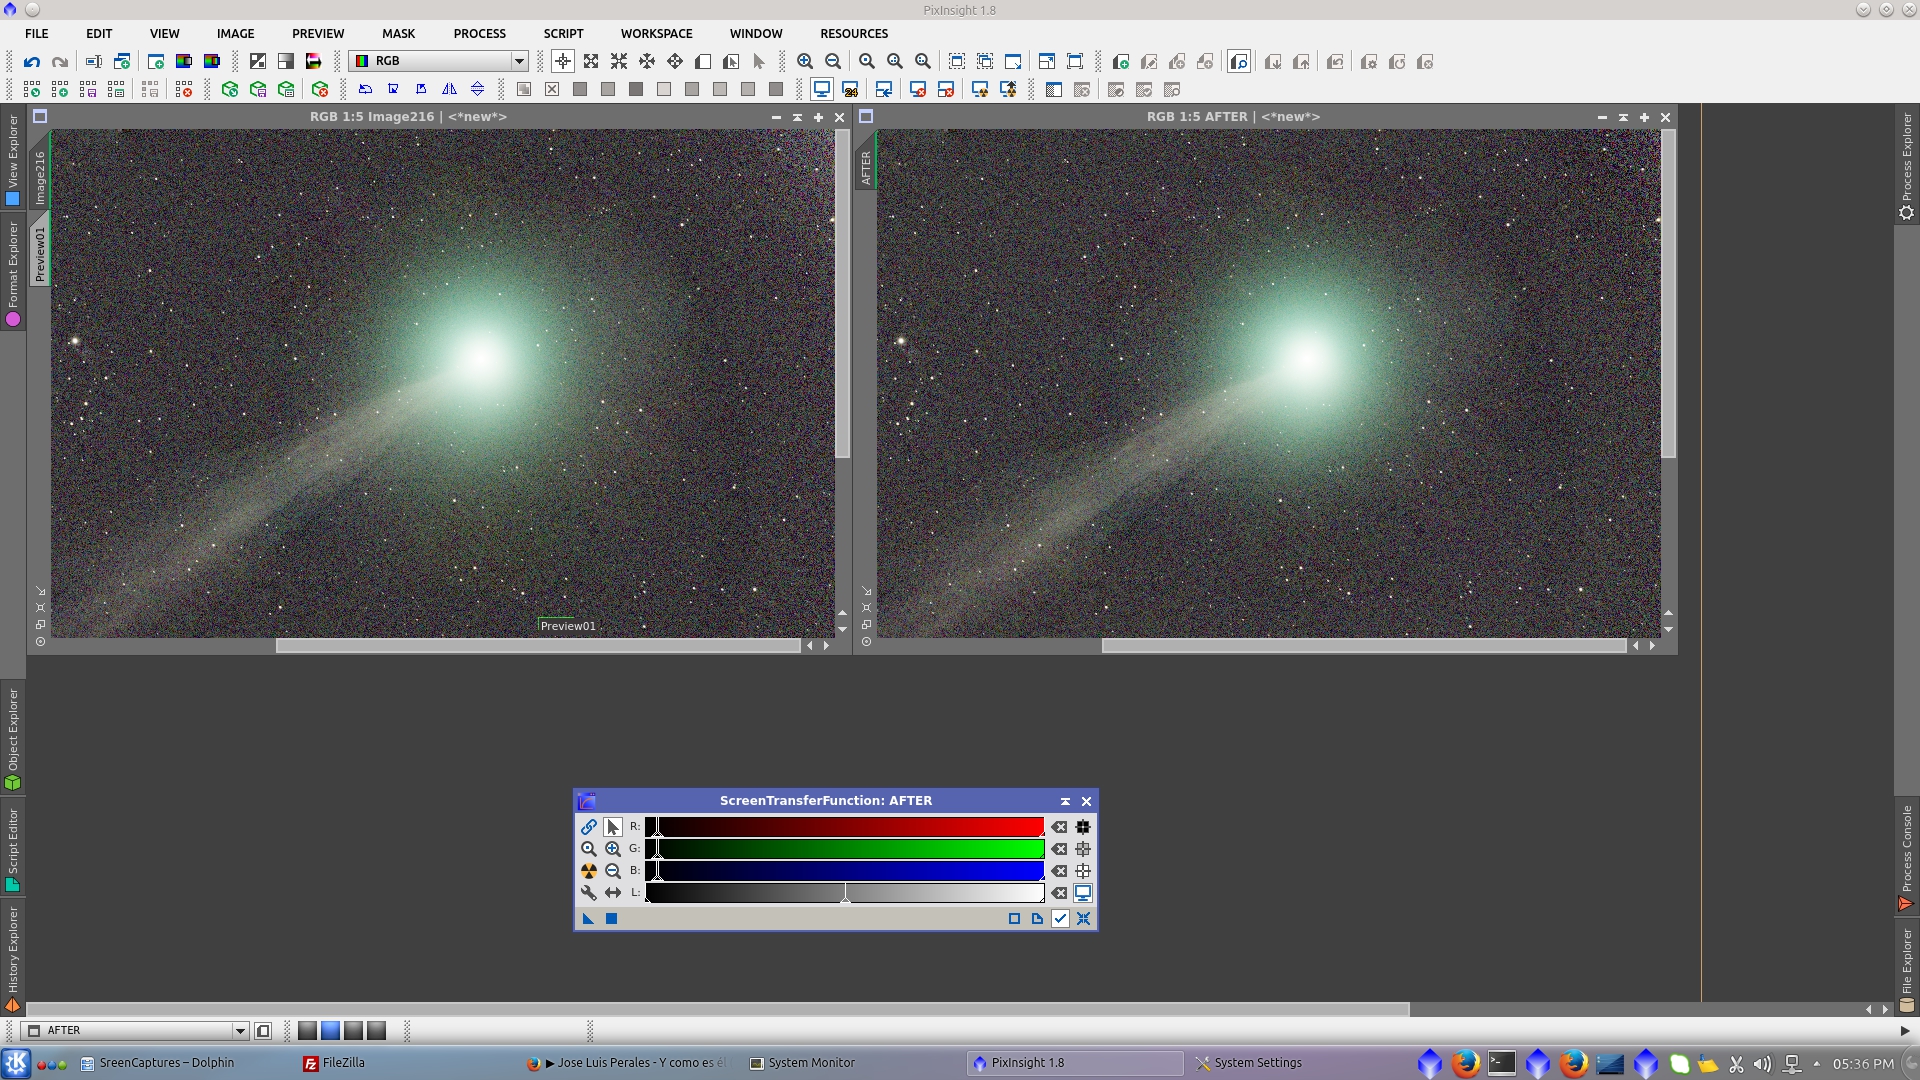
After the subtraction of the model, the image is now better corrected. See before and after of the right top section.
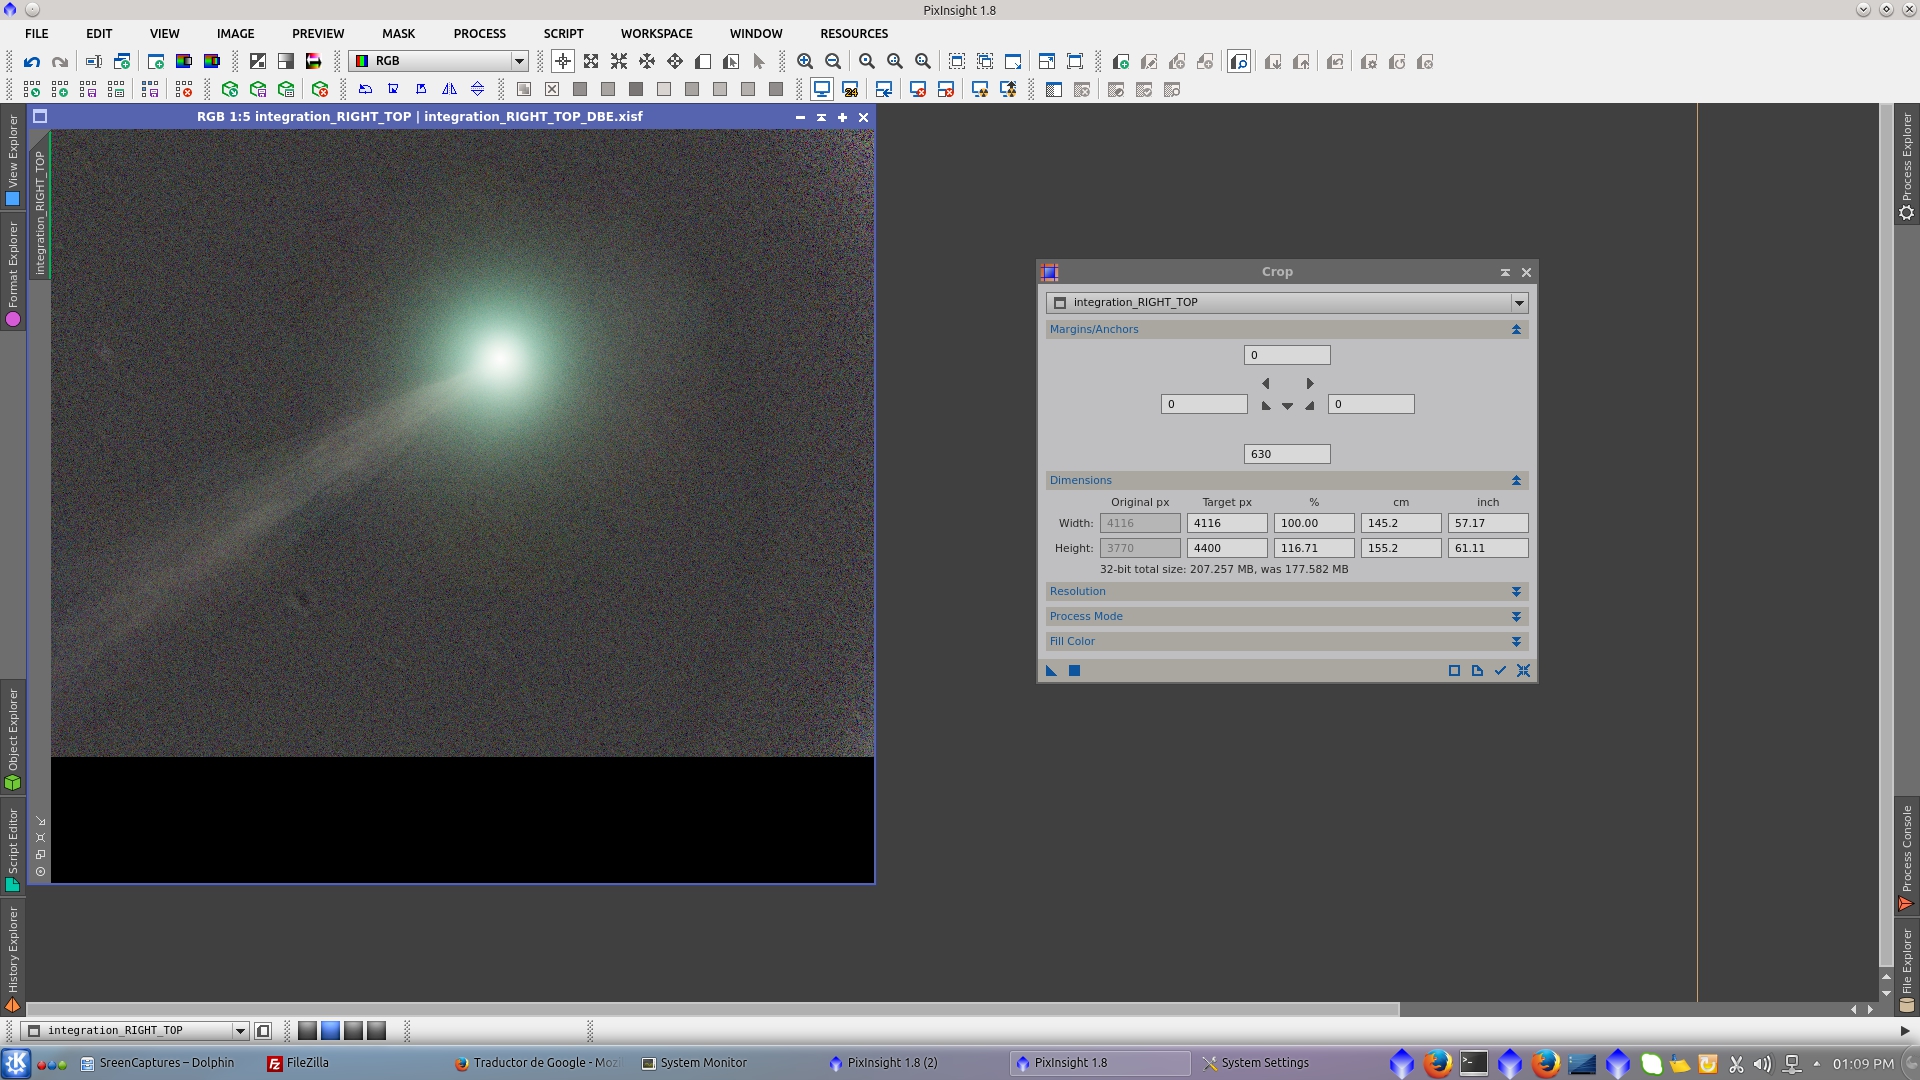
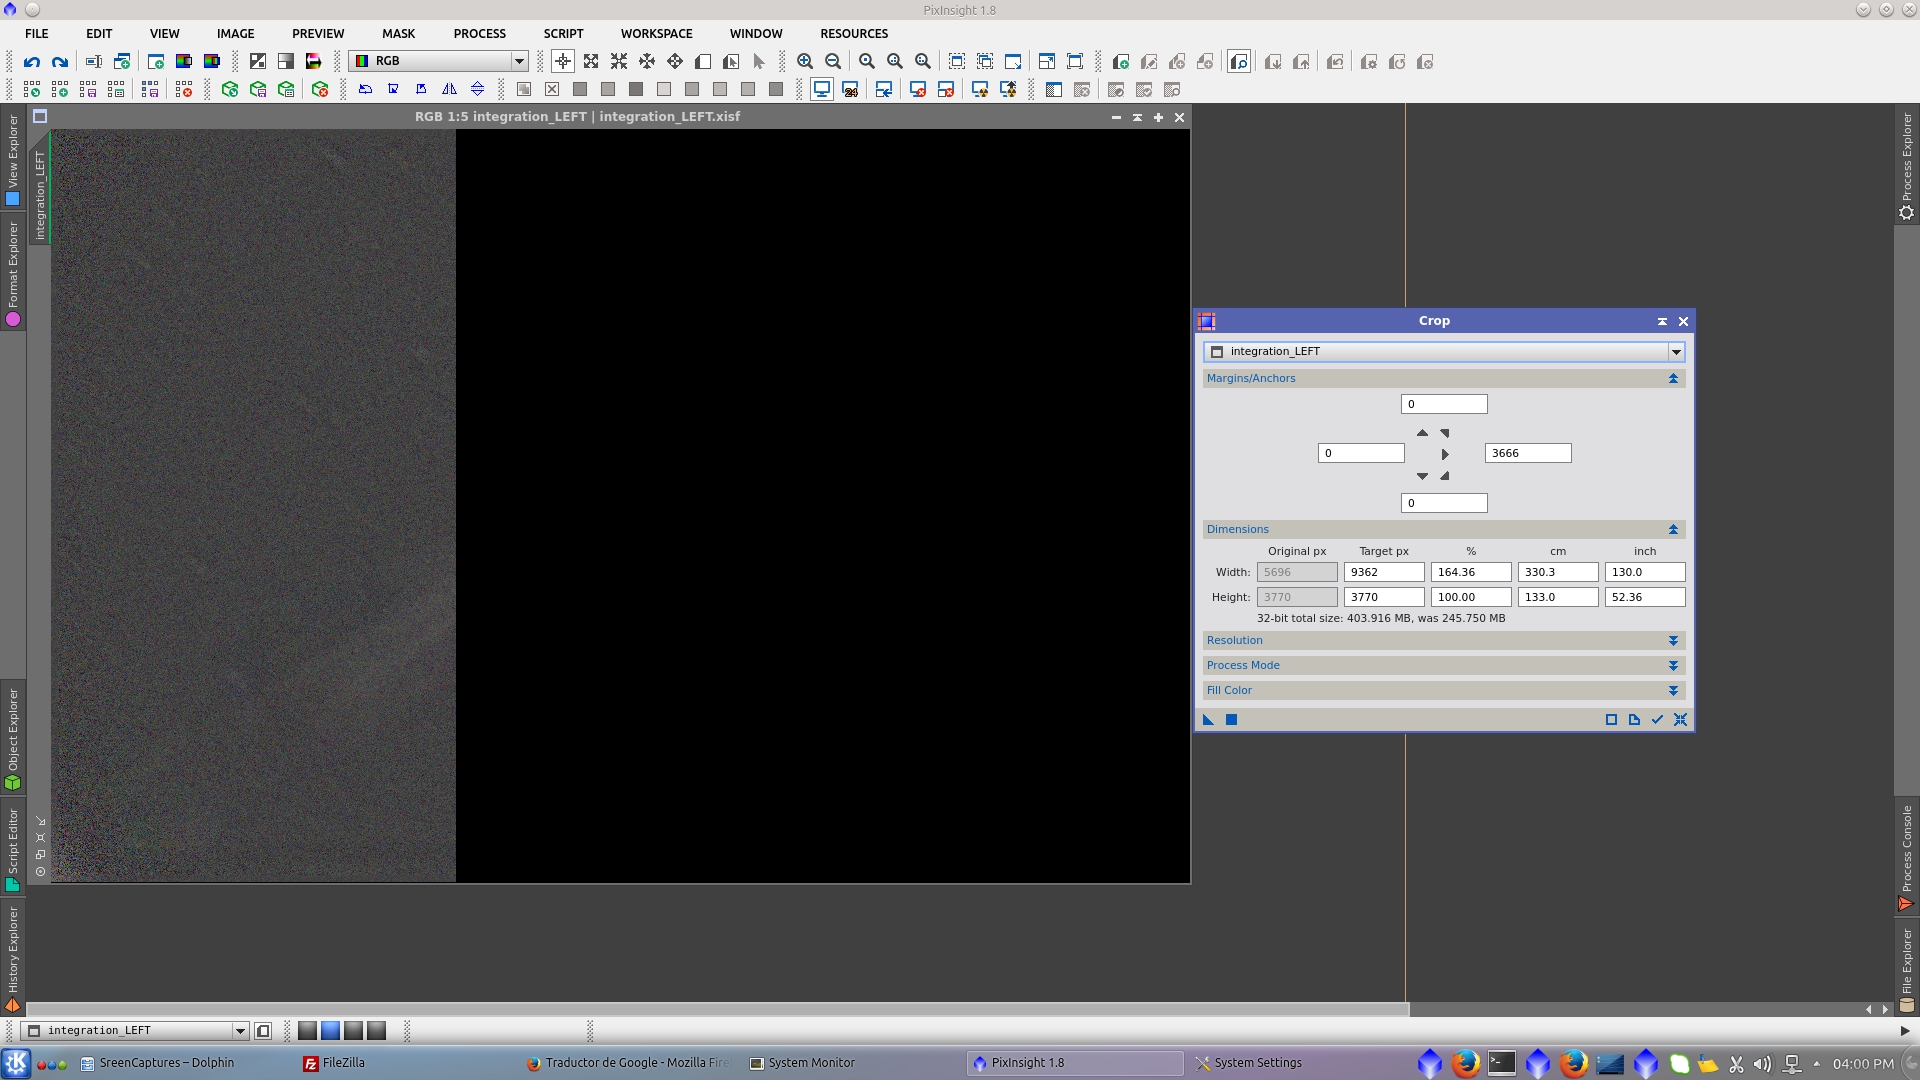
I will leave the image prepared for subsequent reconstruction. I will crop it in the way to add a black area to fit the height of the original image.
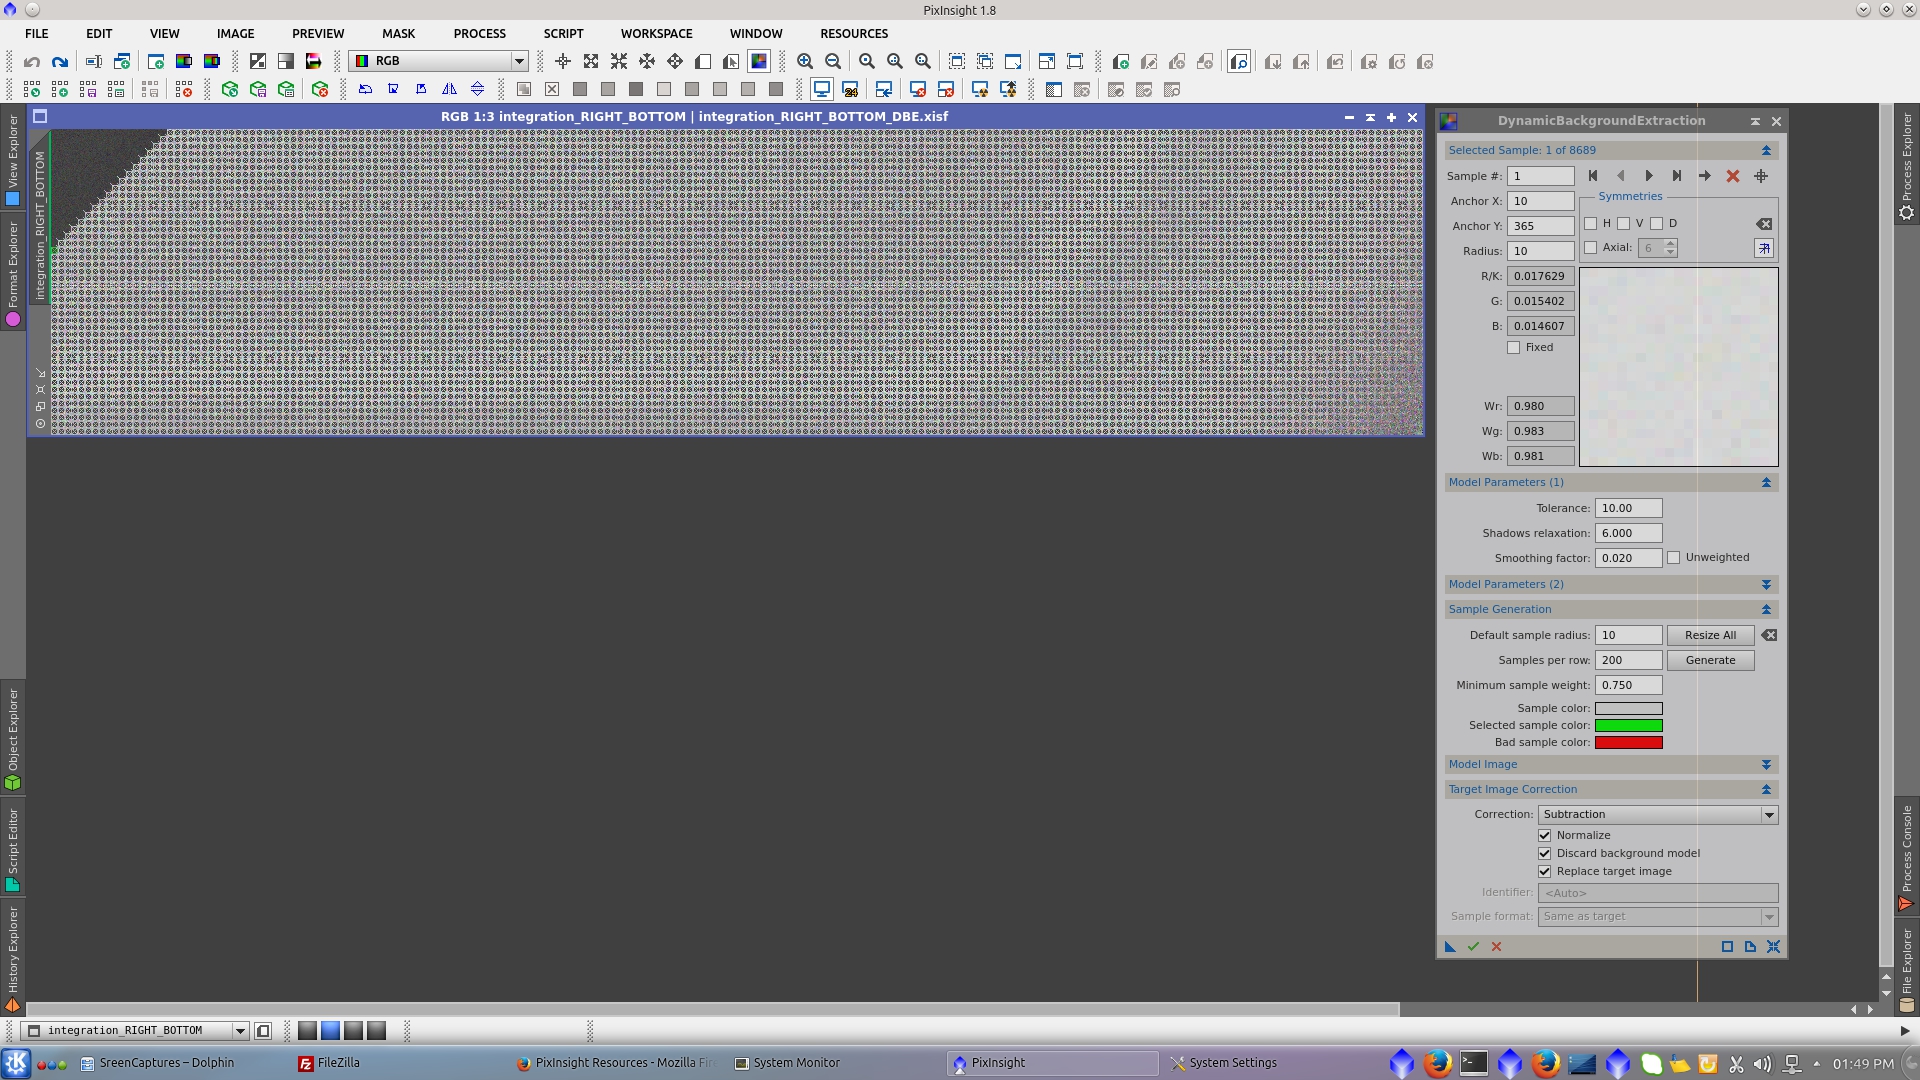
I will repeate the procedure for the other two parts of the images. To generate the model in the right bottom image, set the desired Samples per row and radious and adjust Tolerance and Shadows relaxation in order that samples cover all the image.
This model parameters also generate samples over the tail of the comet in the upper left of the image that have to be deleted manually.
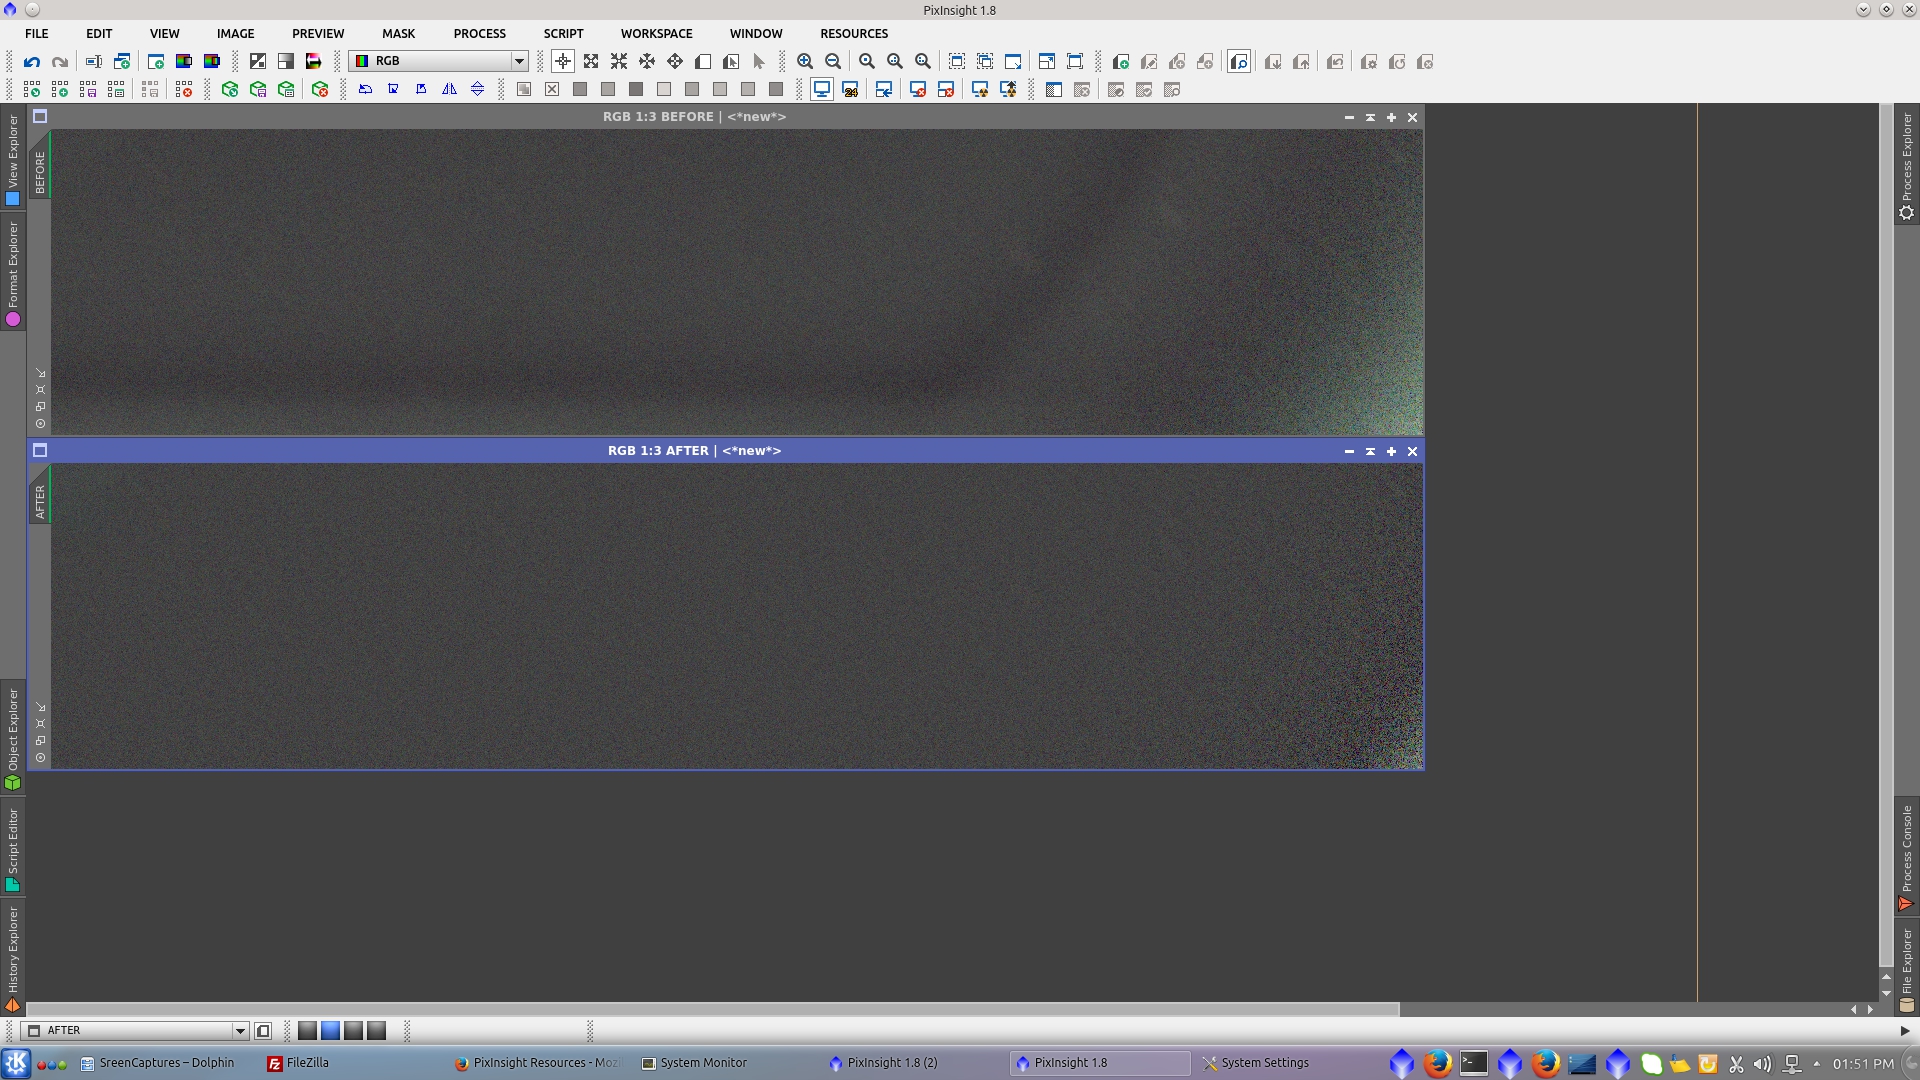
After the subtraction of the model, the image is now better corrected. See before and after of the right bottom section.
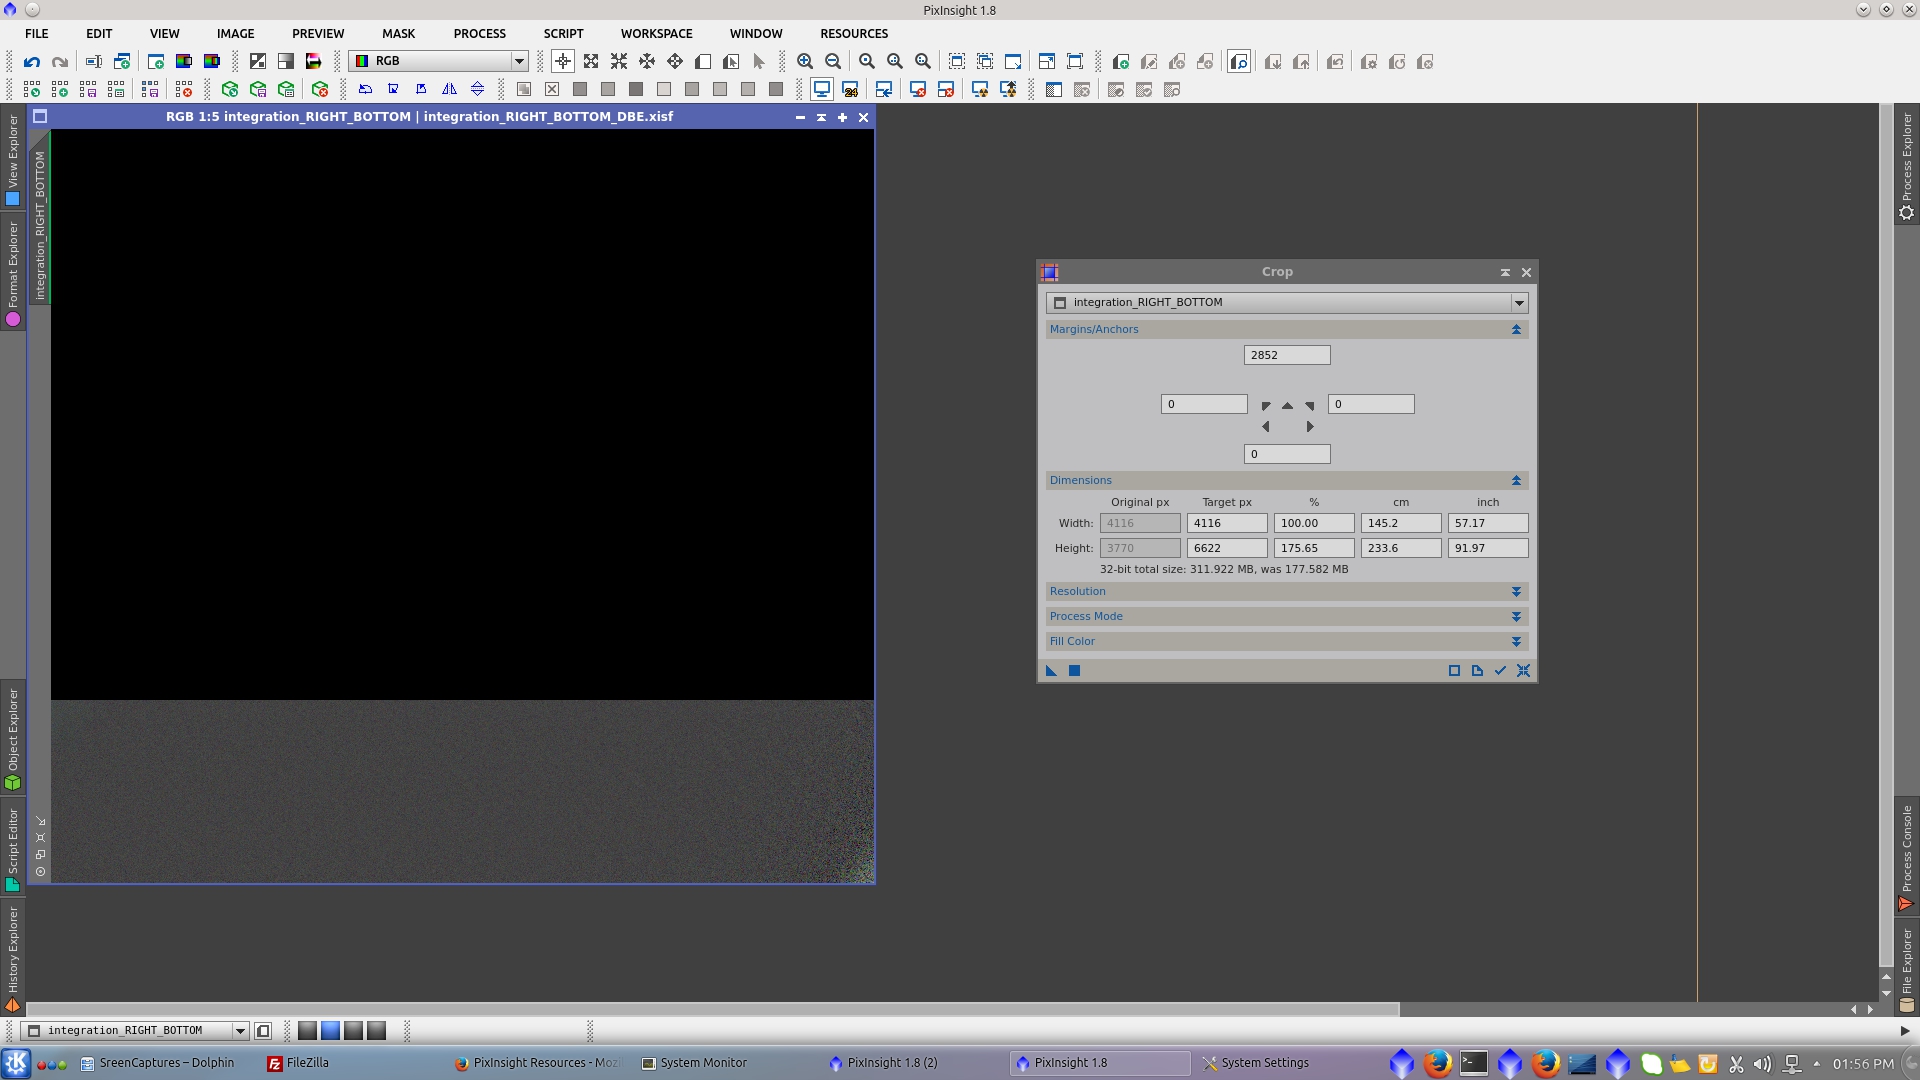
I will leave the image prepared for subsequent reconstruction. I will crop it in the way to add a black area to fit the height of the original image.
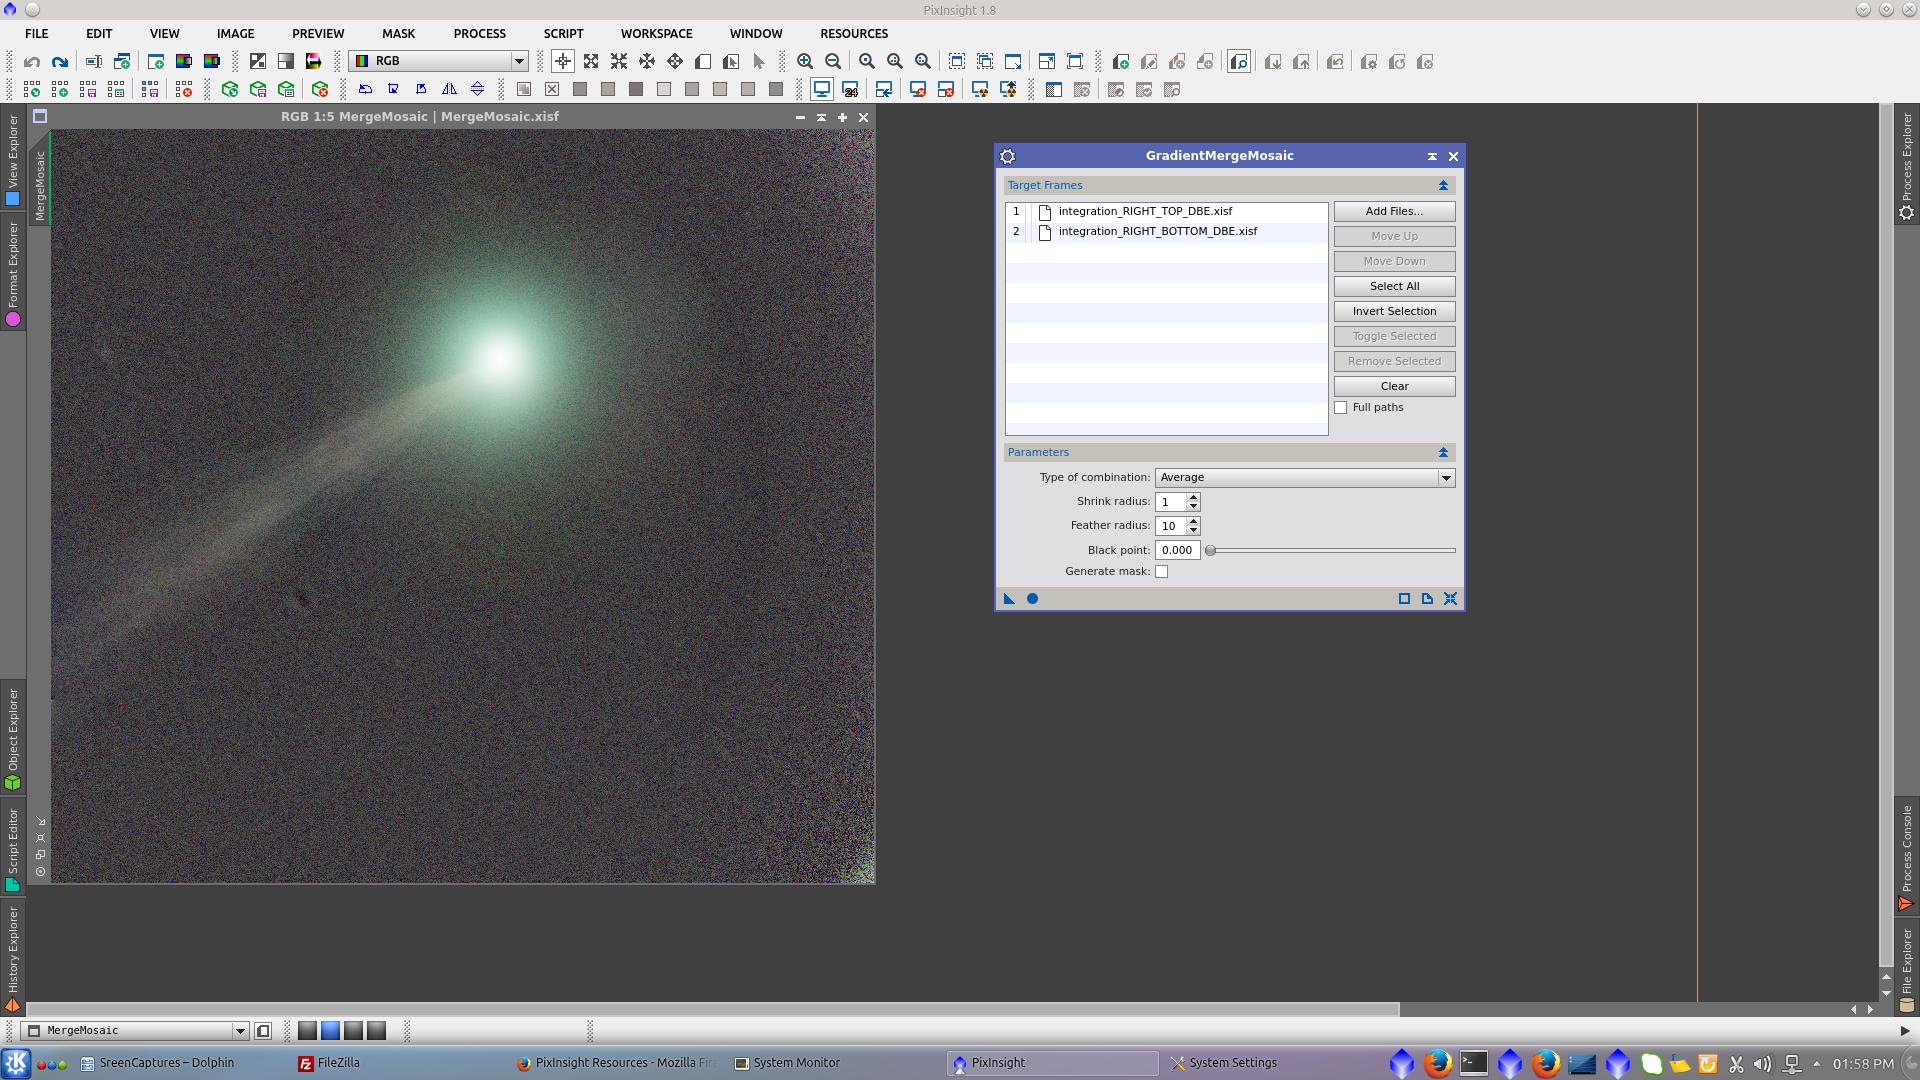
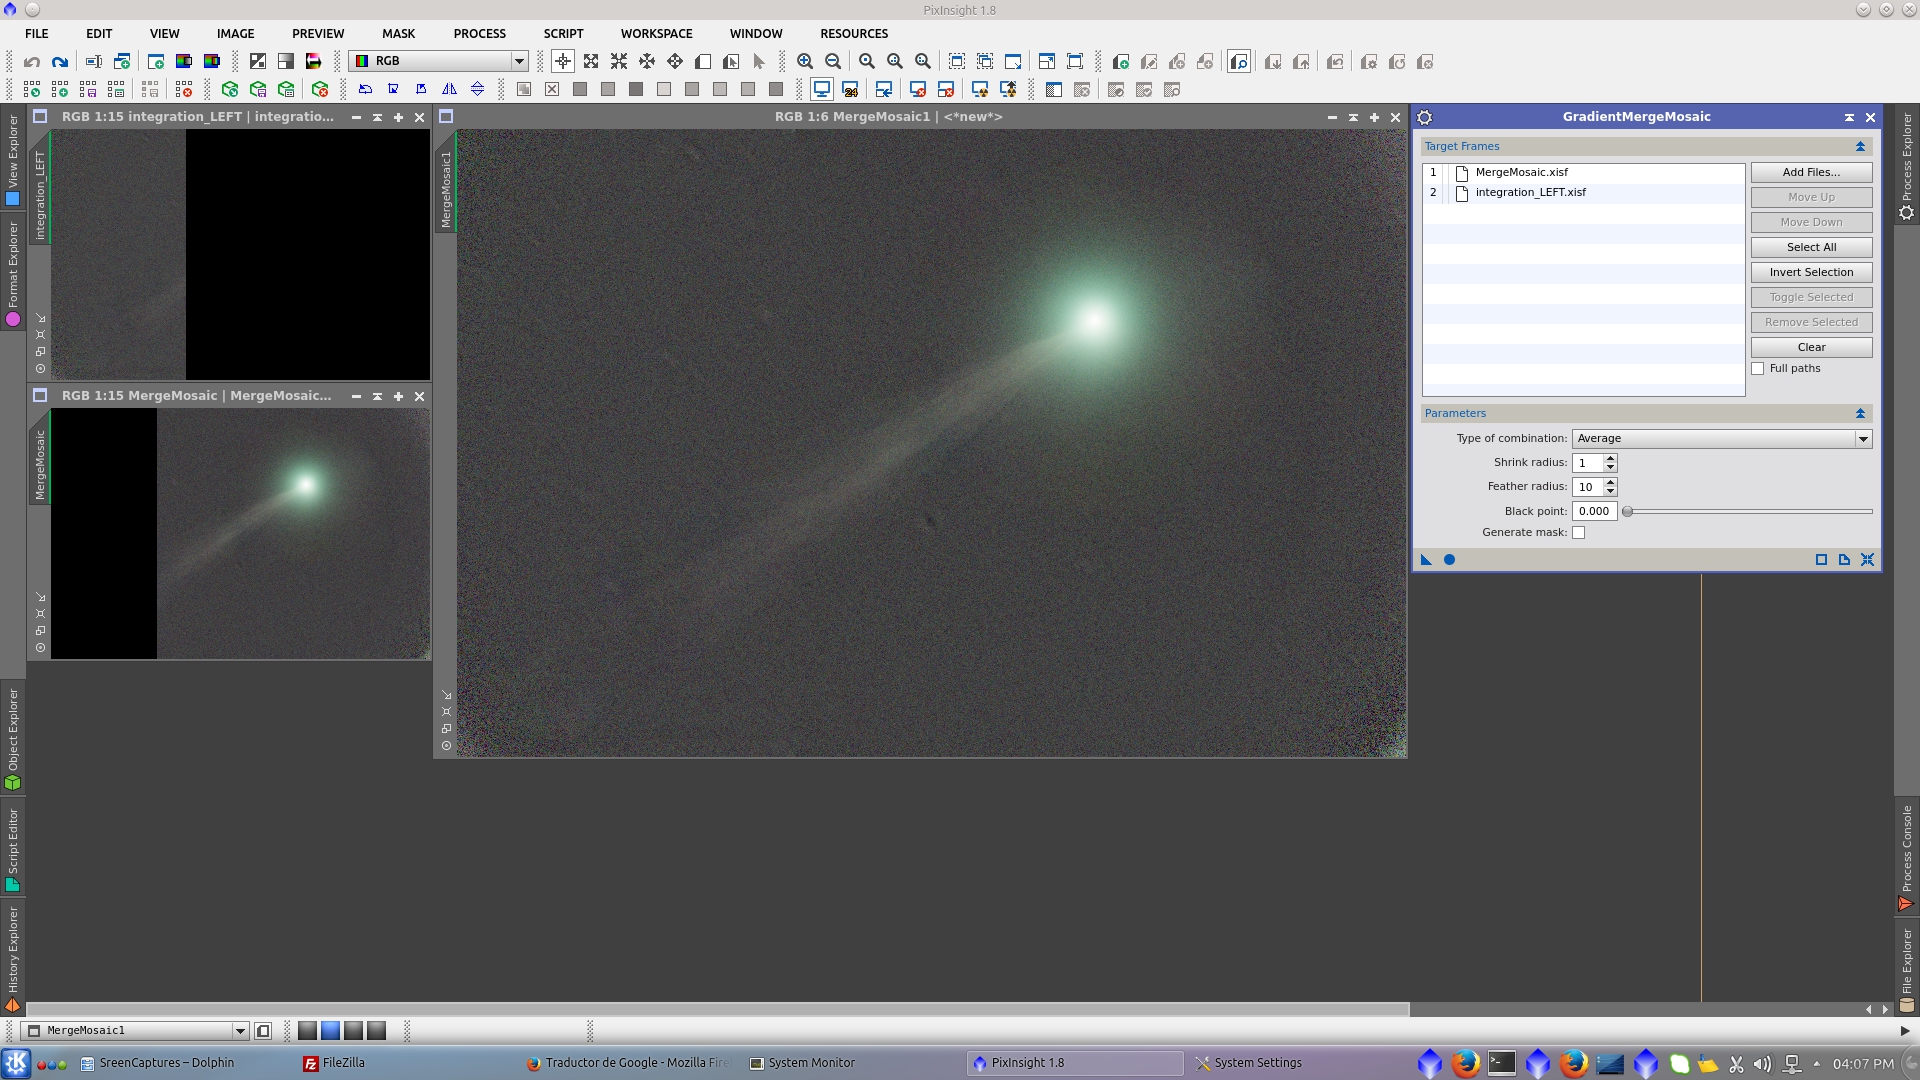
To merge both images, use GradientMergeMosaic tool with defalut parameters.
To leave the image prepared for subsequent reconstruction with the left part of the image. I will crop it in the way to add a black area on the left to fit the width of the original image.
The left part of the images was a little more complicated and time consuming as I had to increase the density of samples to deal with star trails and the circle of vignetting.
The amount of samples overstep the maximum to manage, so I had to delete one every two columns but trying to leave those where there was star trails as showed in the following images.
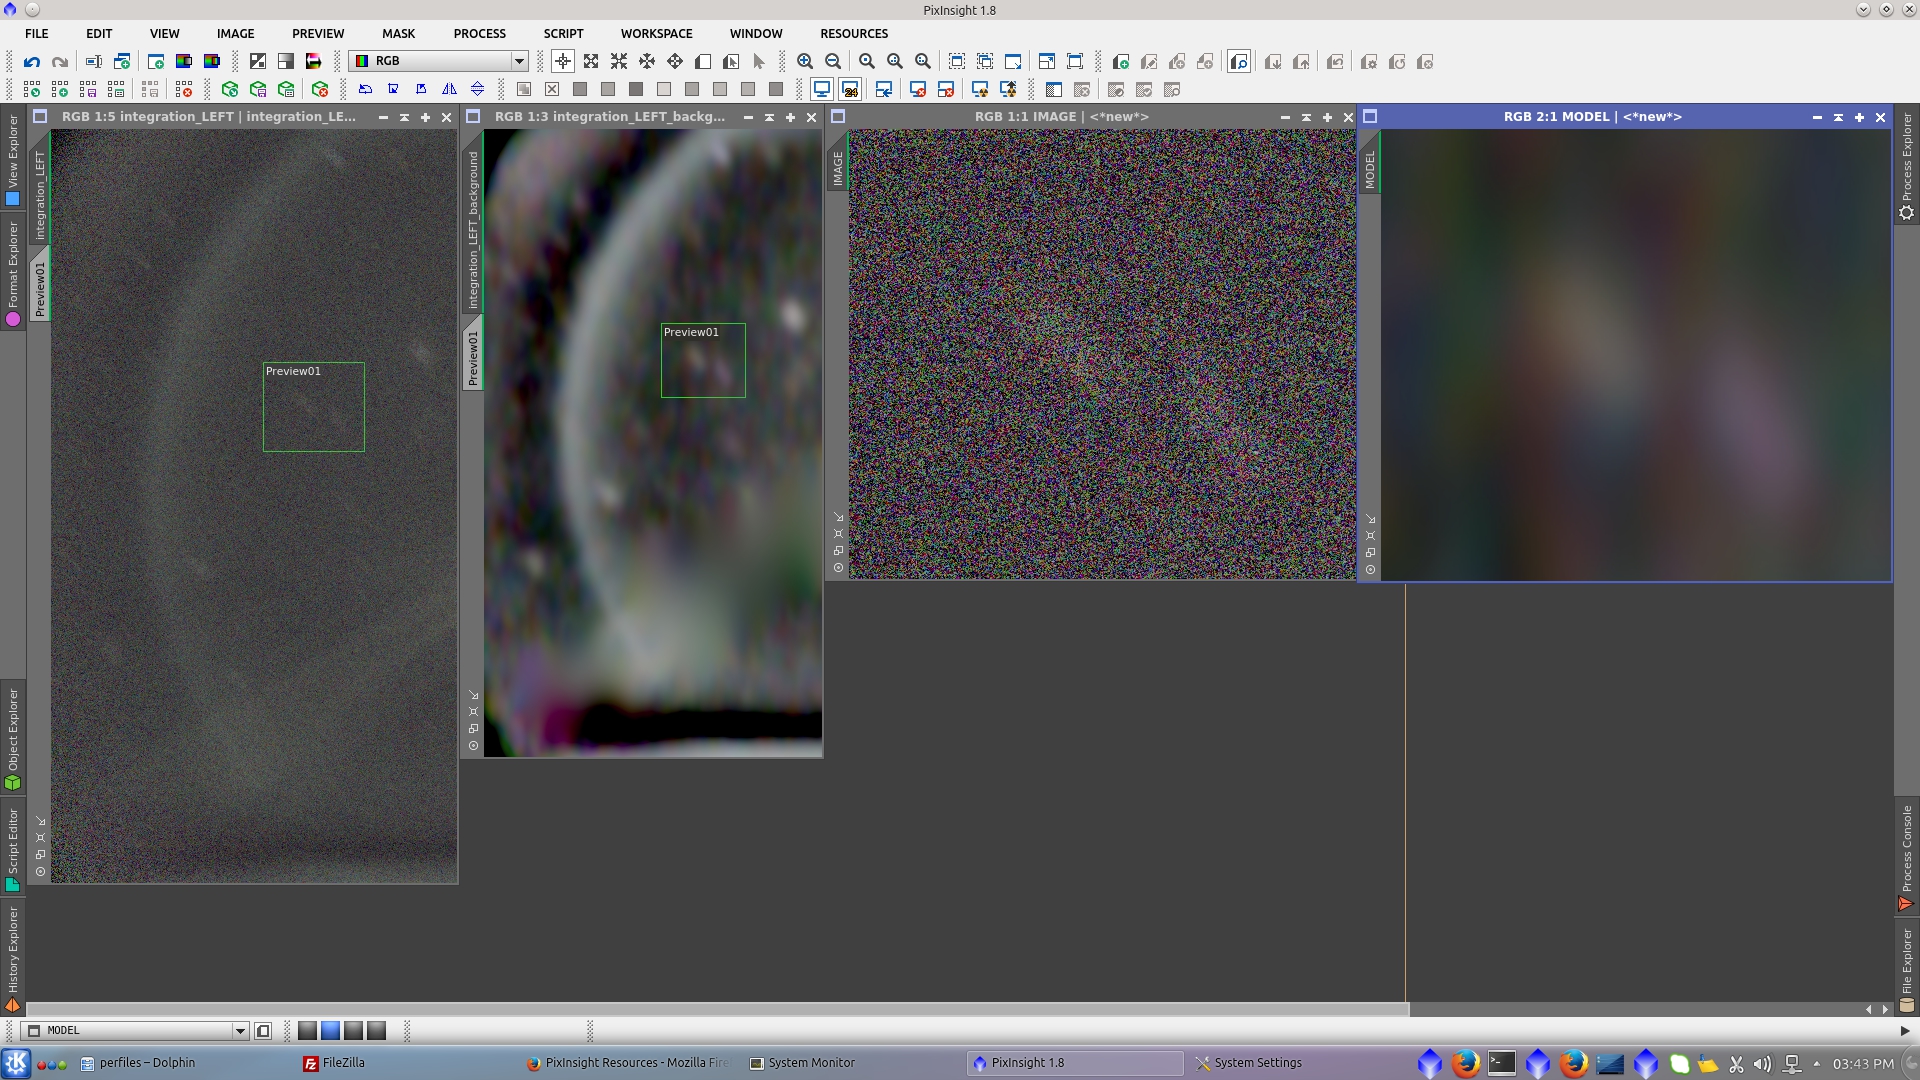
The generated model visualized with the 24 bit option of STF tool shows very well the bright areas containing the circle and the startrails that are going to be subtracted.
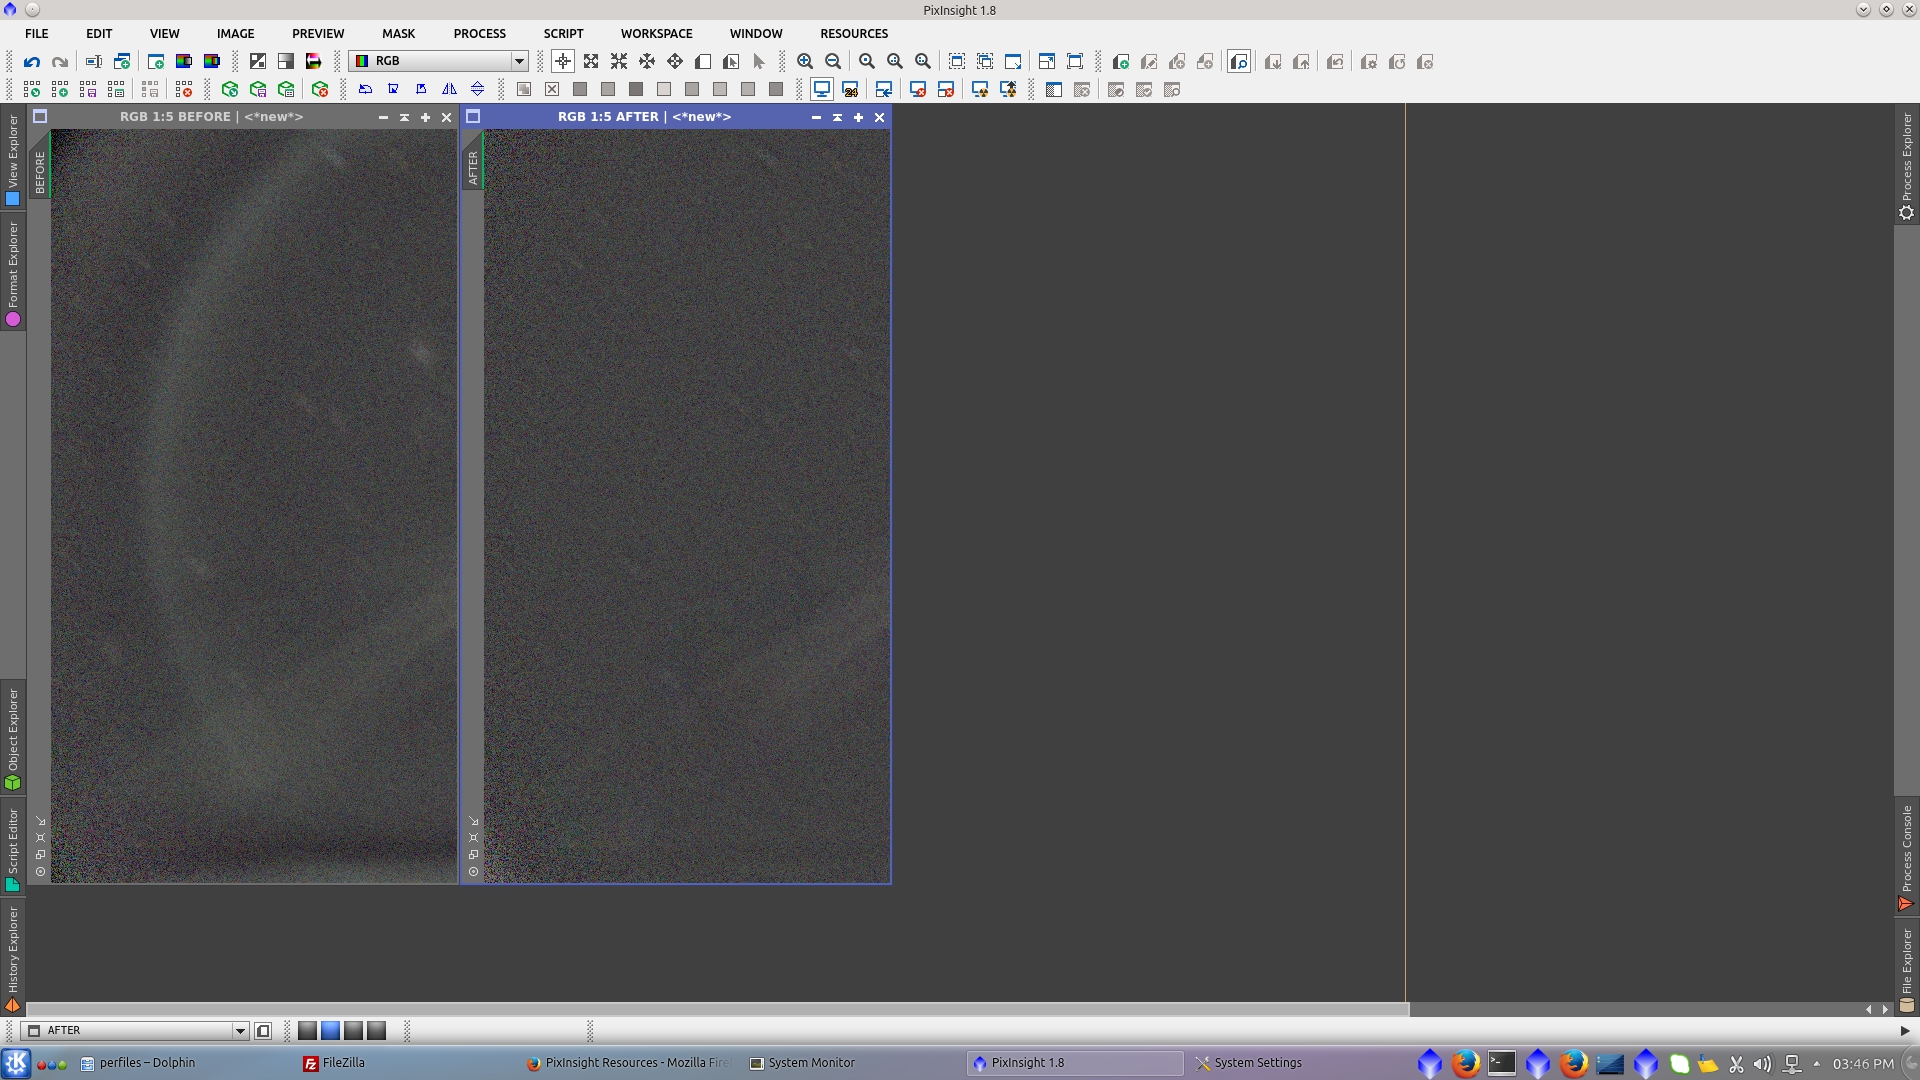
After subtraction of the model, the image is now better corrected. See before and after of the left section.
Tips for HDDBE:
1) Make tests in small images to see the improvement before apply to the big one.
2) In this example I open three instances of PixInsight and let them working at the same time to make it quicker.
To leave the image prepared for subsequent reconstruction with the right part of the image, I will crop it in the way to add a black area on the right to fit the width of the original image.
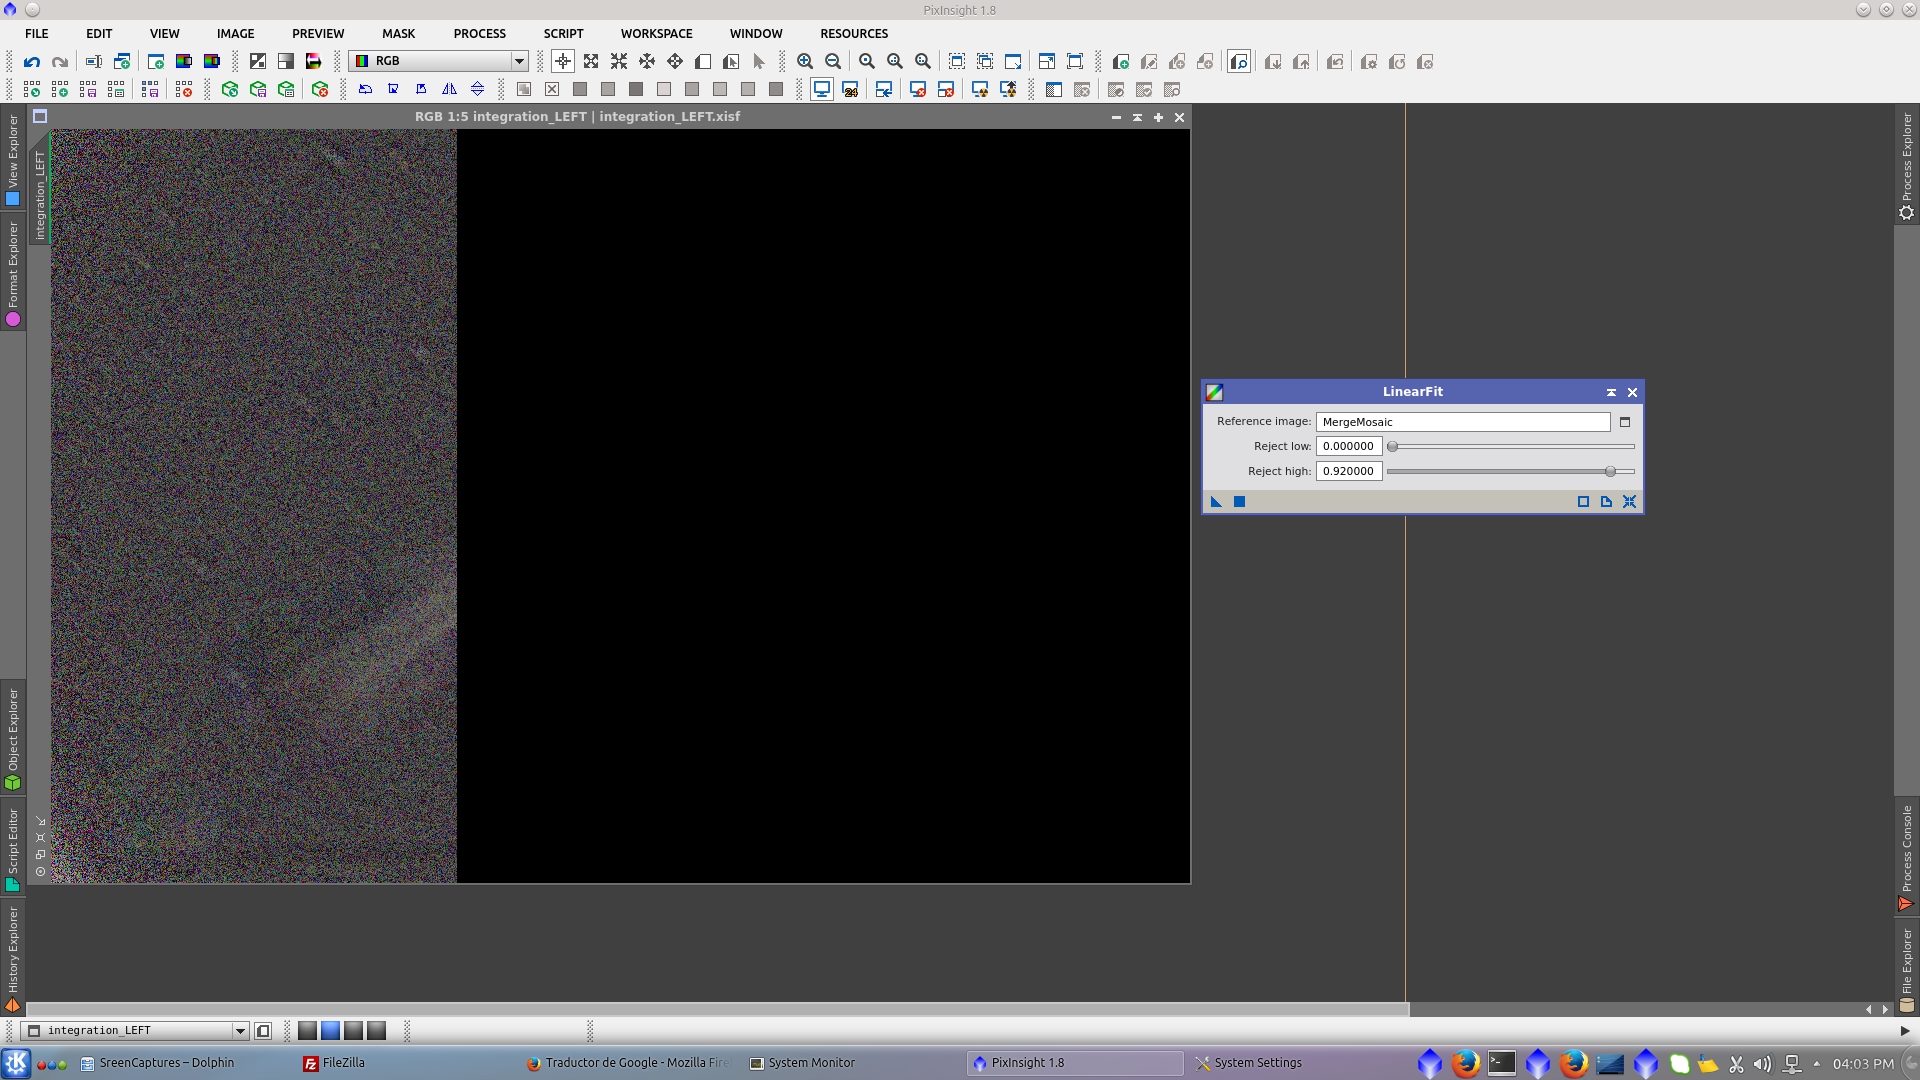
To match the mean background of the left images and the previously created MergeMosiac image, apply LinearFit to the new image.
Finally the image can be reconstructed merging the left part of the image with GradientMergeMosiac tool.
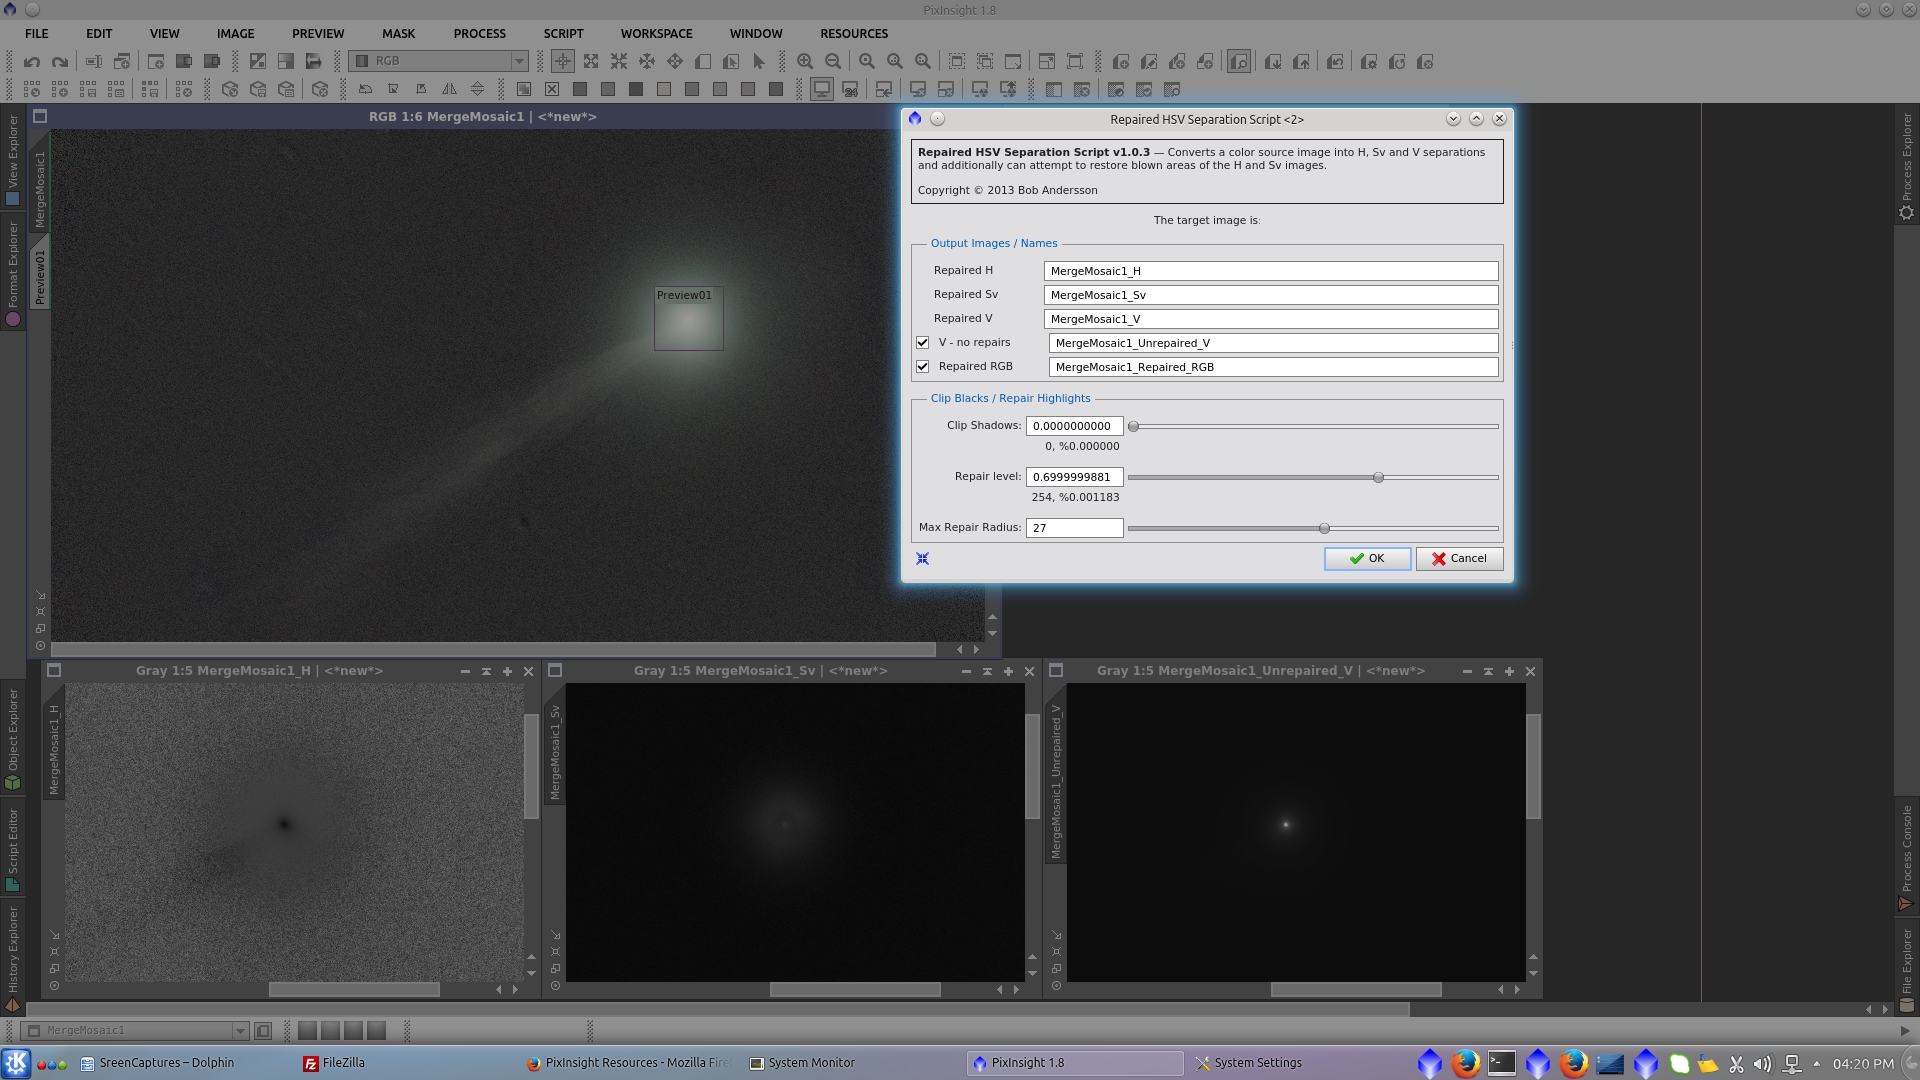
Visualizing the image without STF you can see the saturated nucleus of the comet. To repair it use Repaired HSV Separation script.
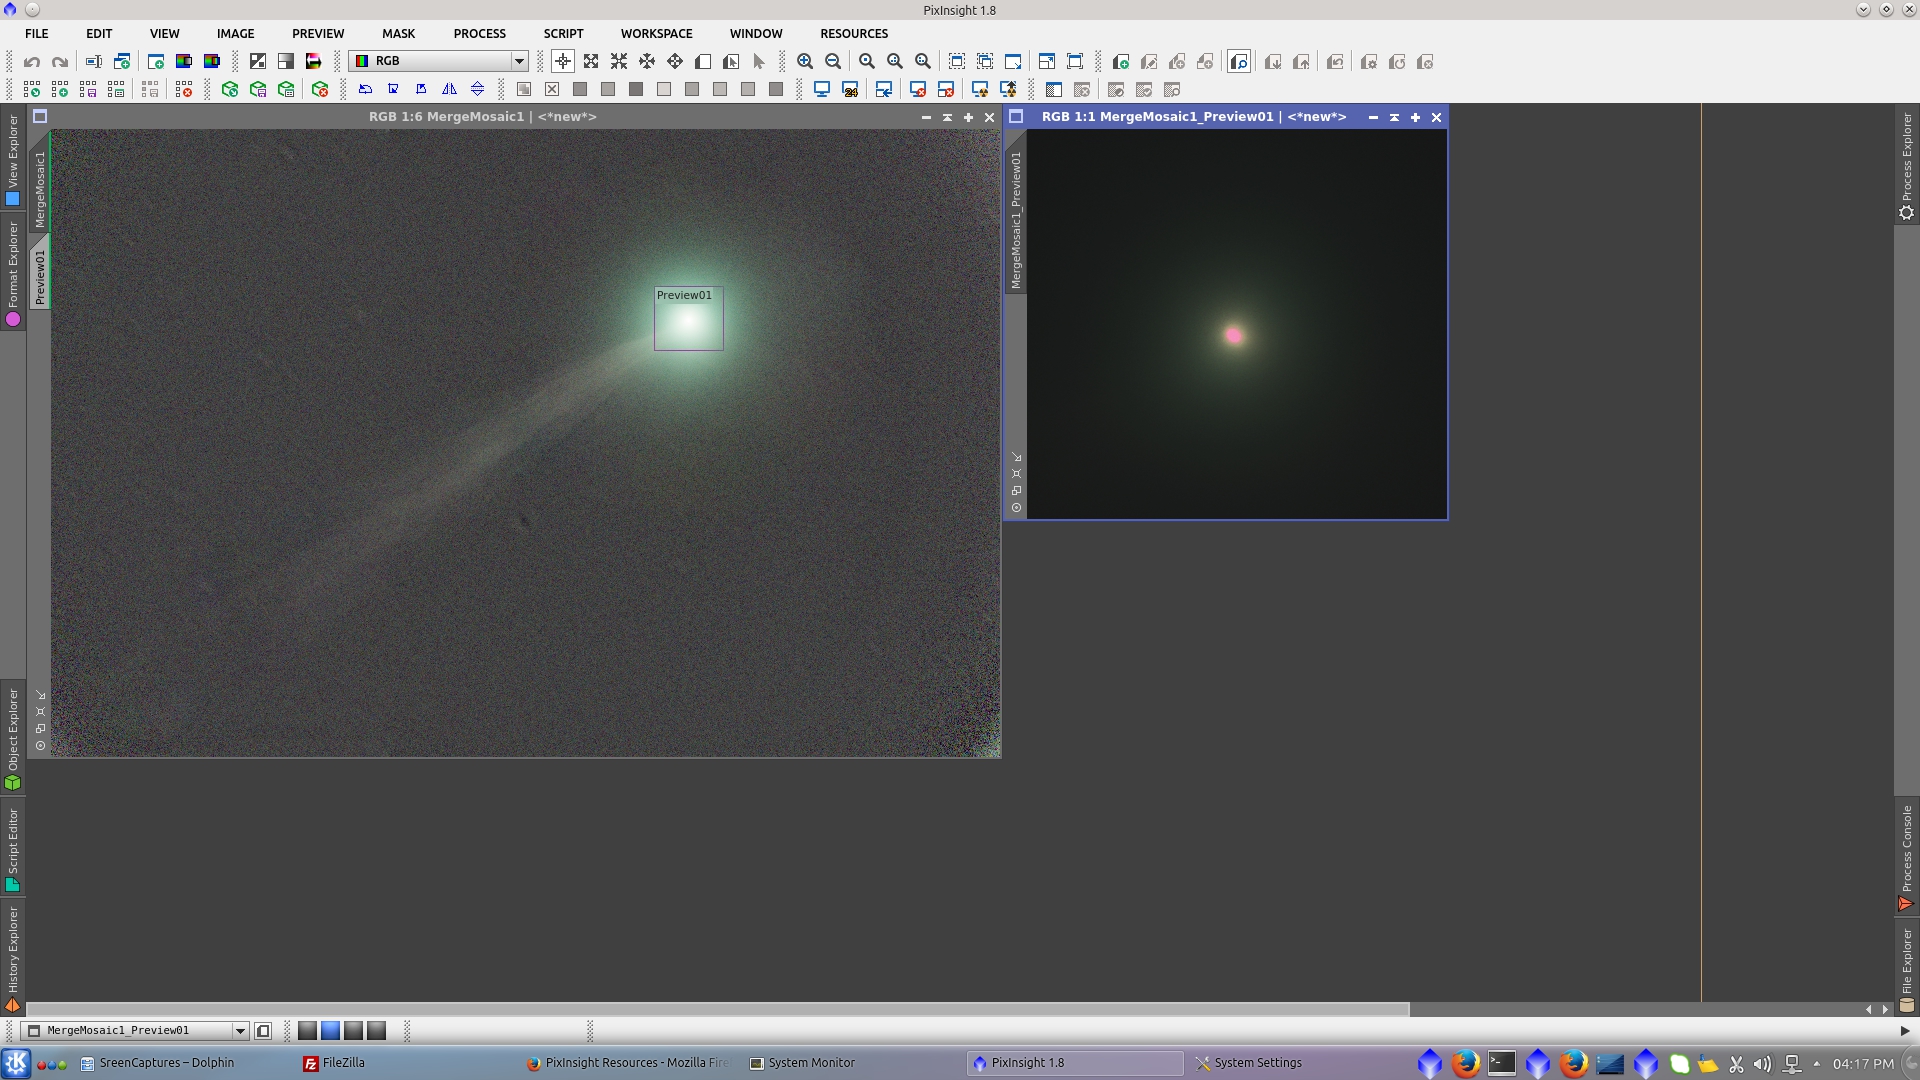
Generate the repaired H and Sv image and also the unrepaired V image with the following parameters:
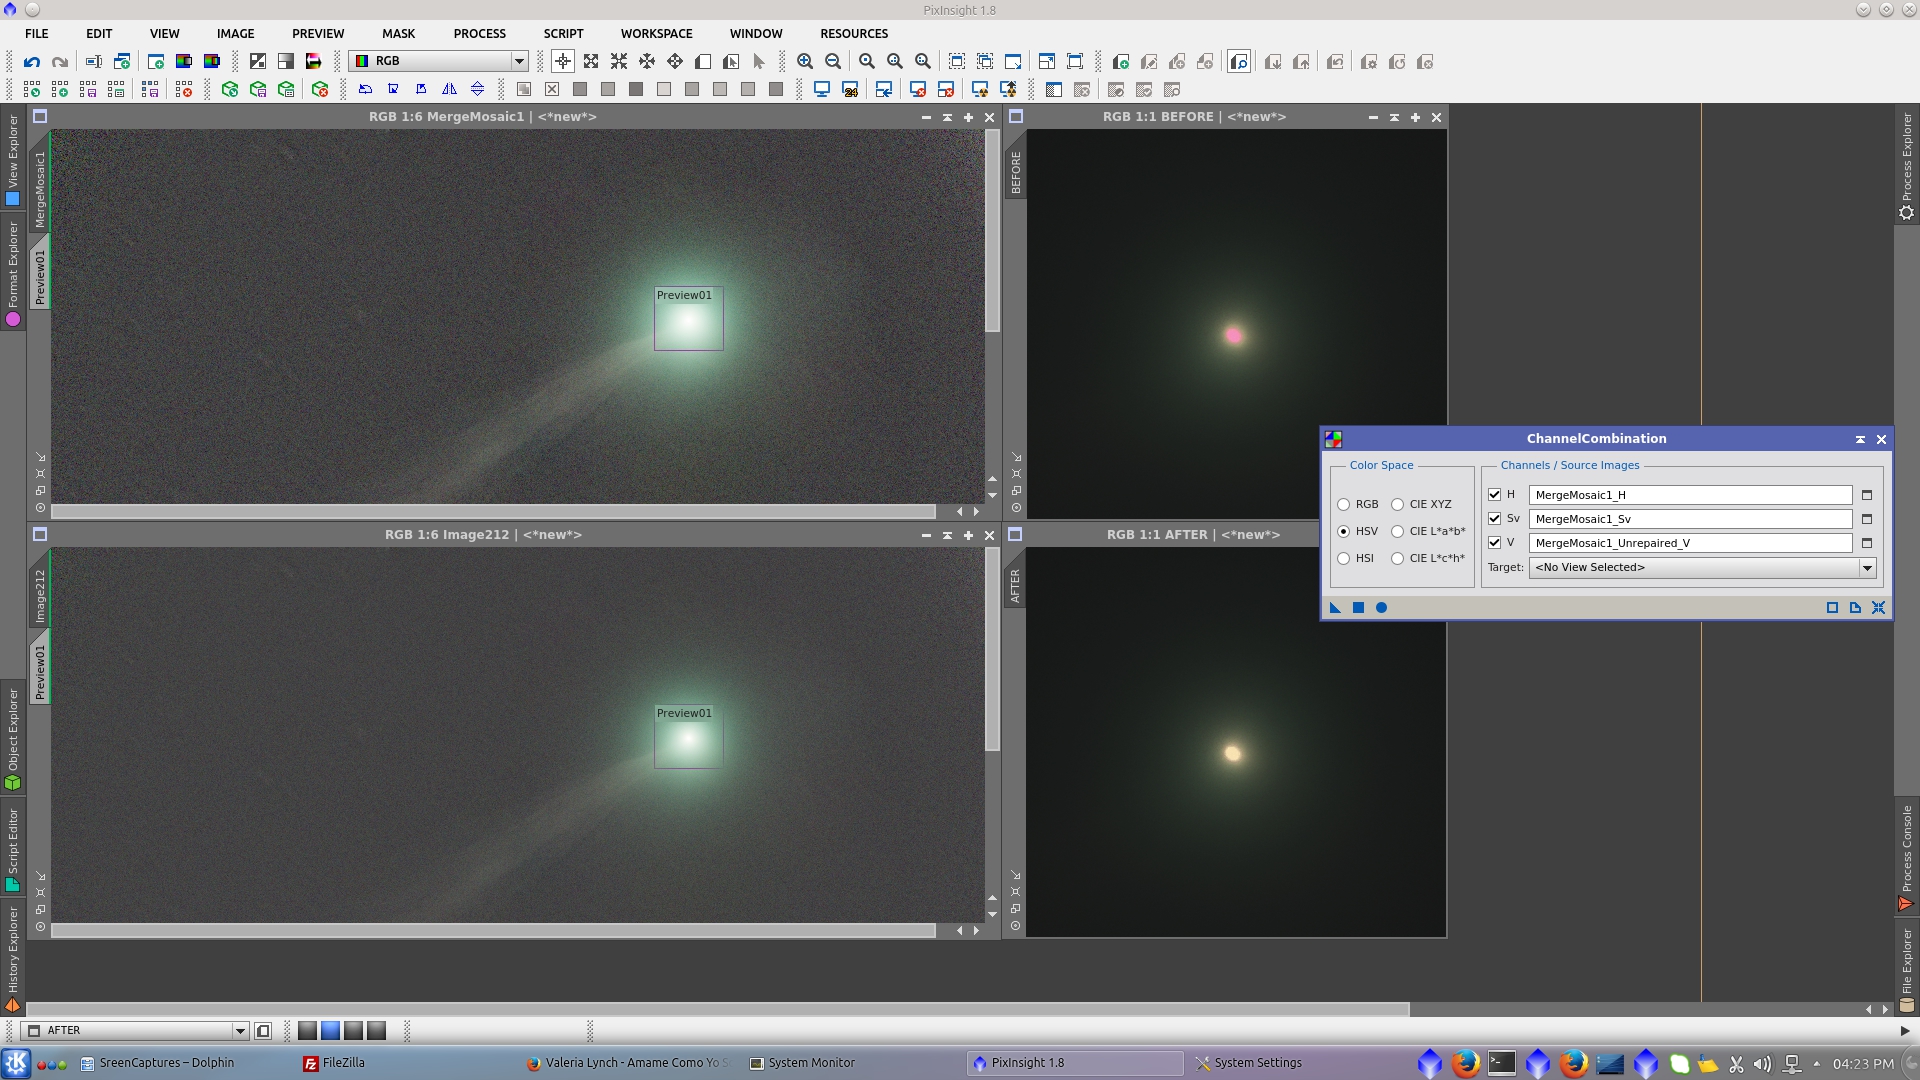
Combine the channels using ChannelCombination tool. See before and after of the nucleus of the comet.
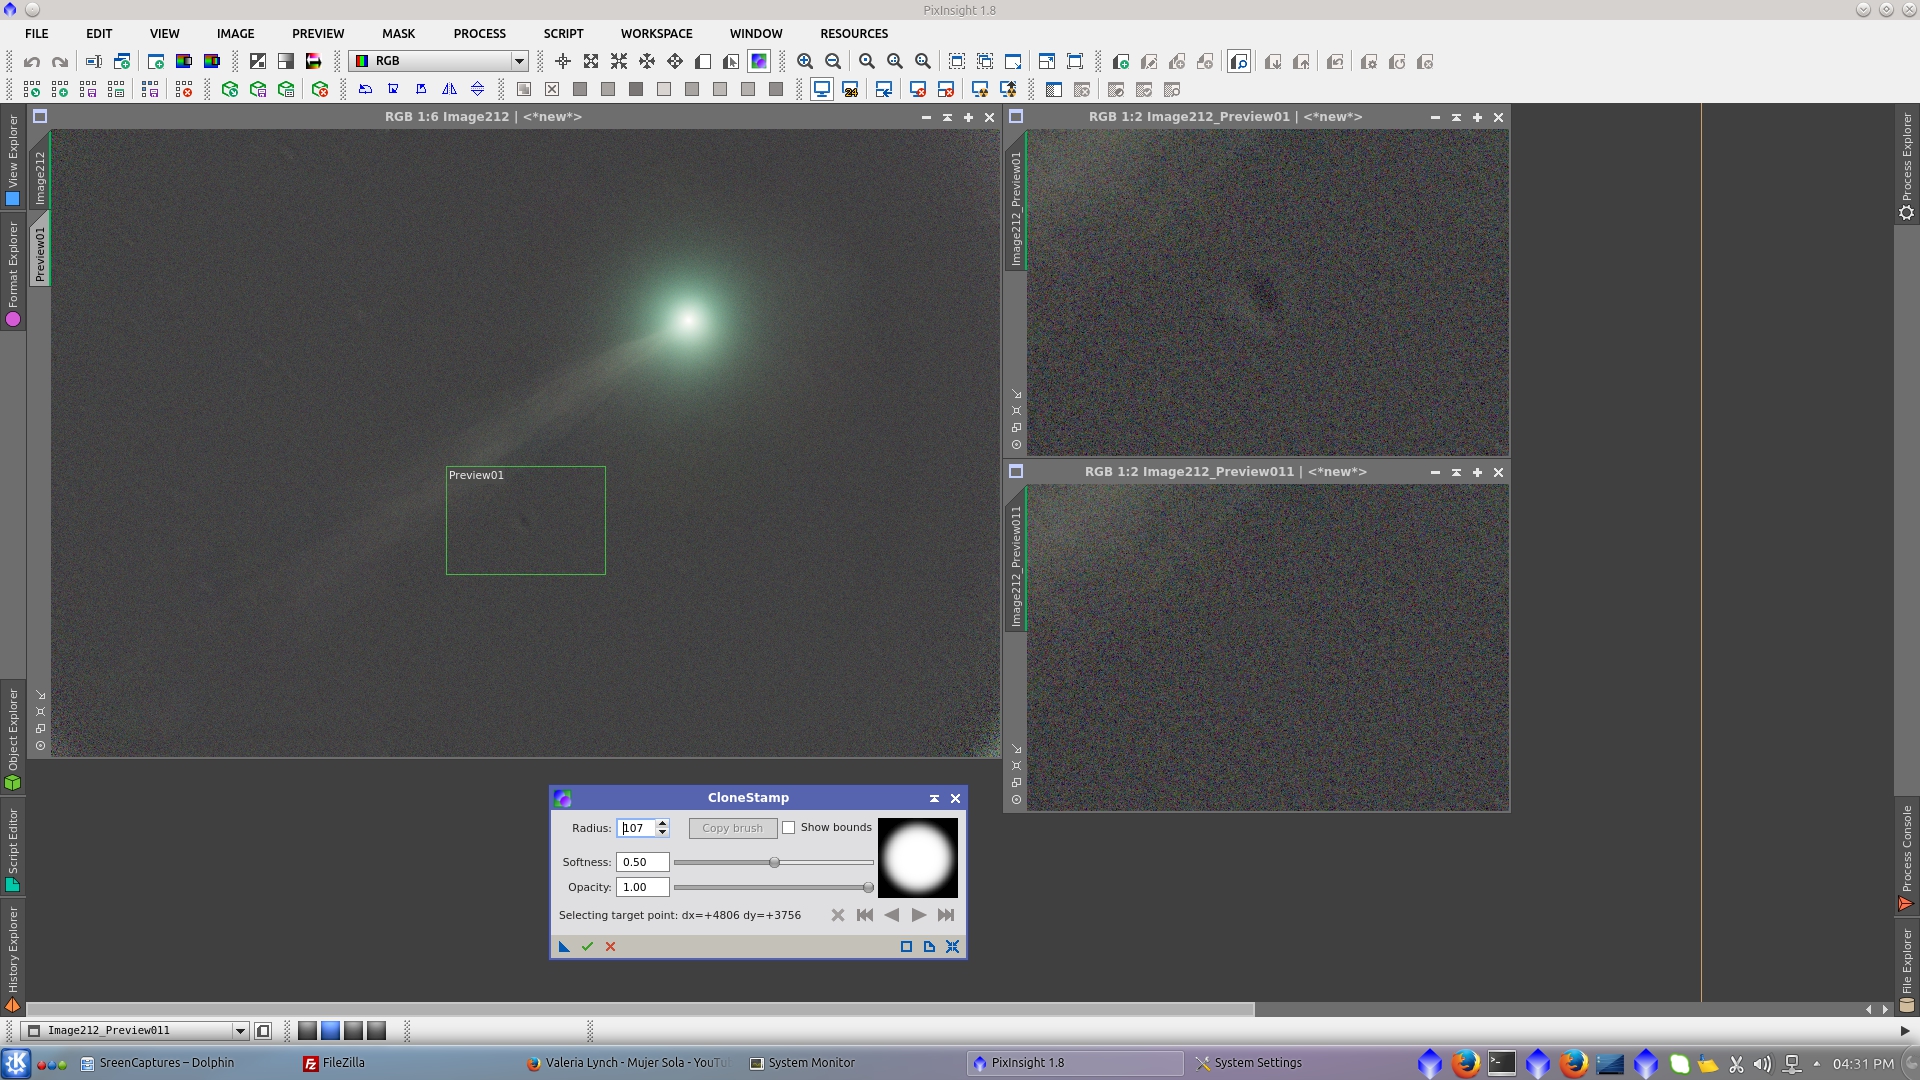
There is a remaining black donut on the background that I will remove using CloneStamp tool
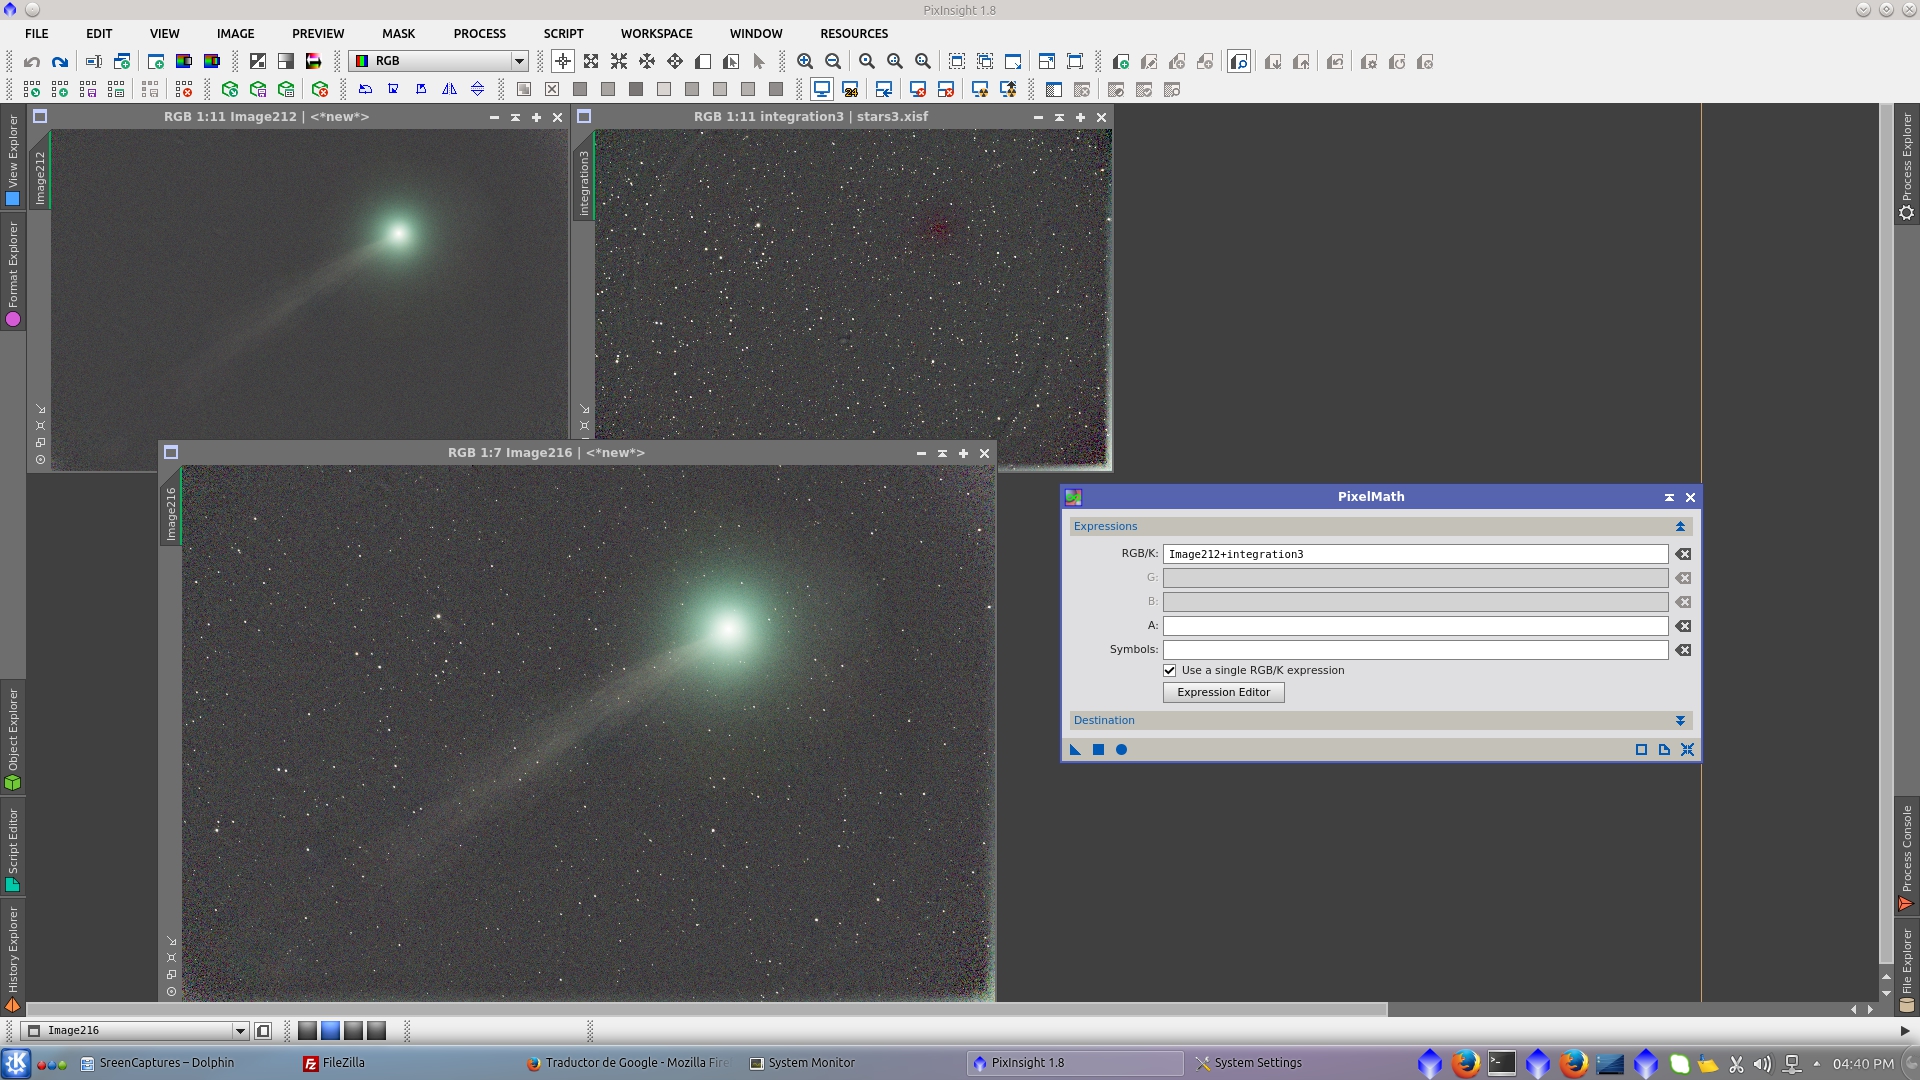
Now both images are ready to be combined. Using PixelMath add the comet image to the stars image.
Crop the bottom and right of the image to eliminate bright pixels in the edges that comes from the star images

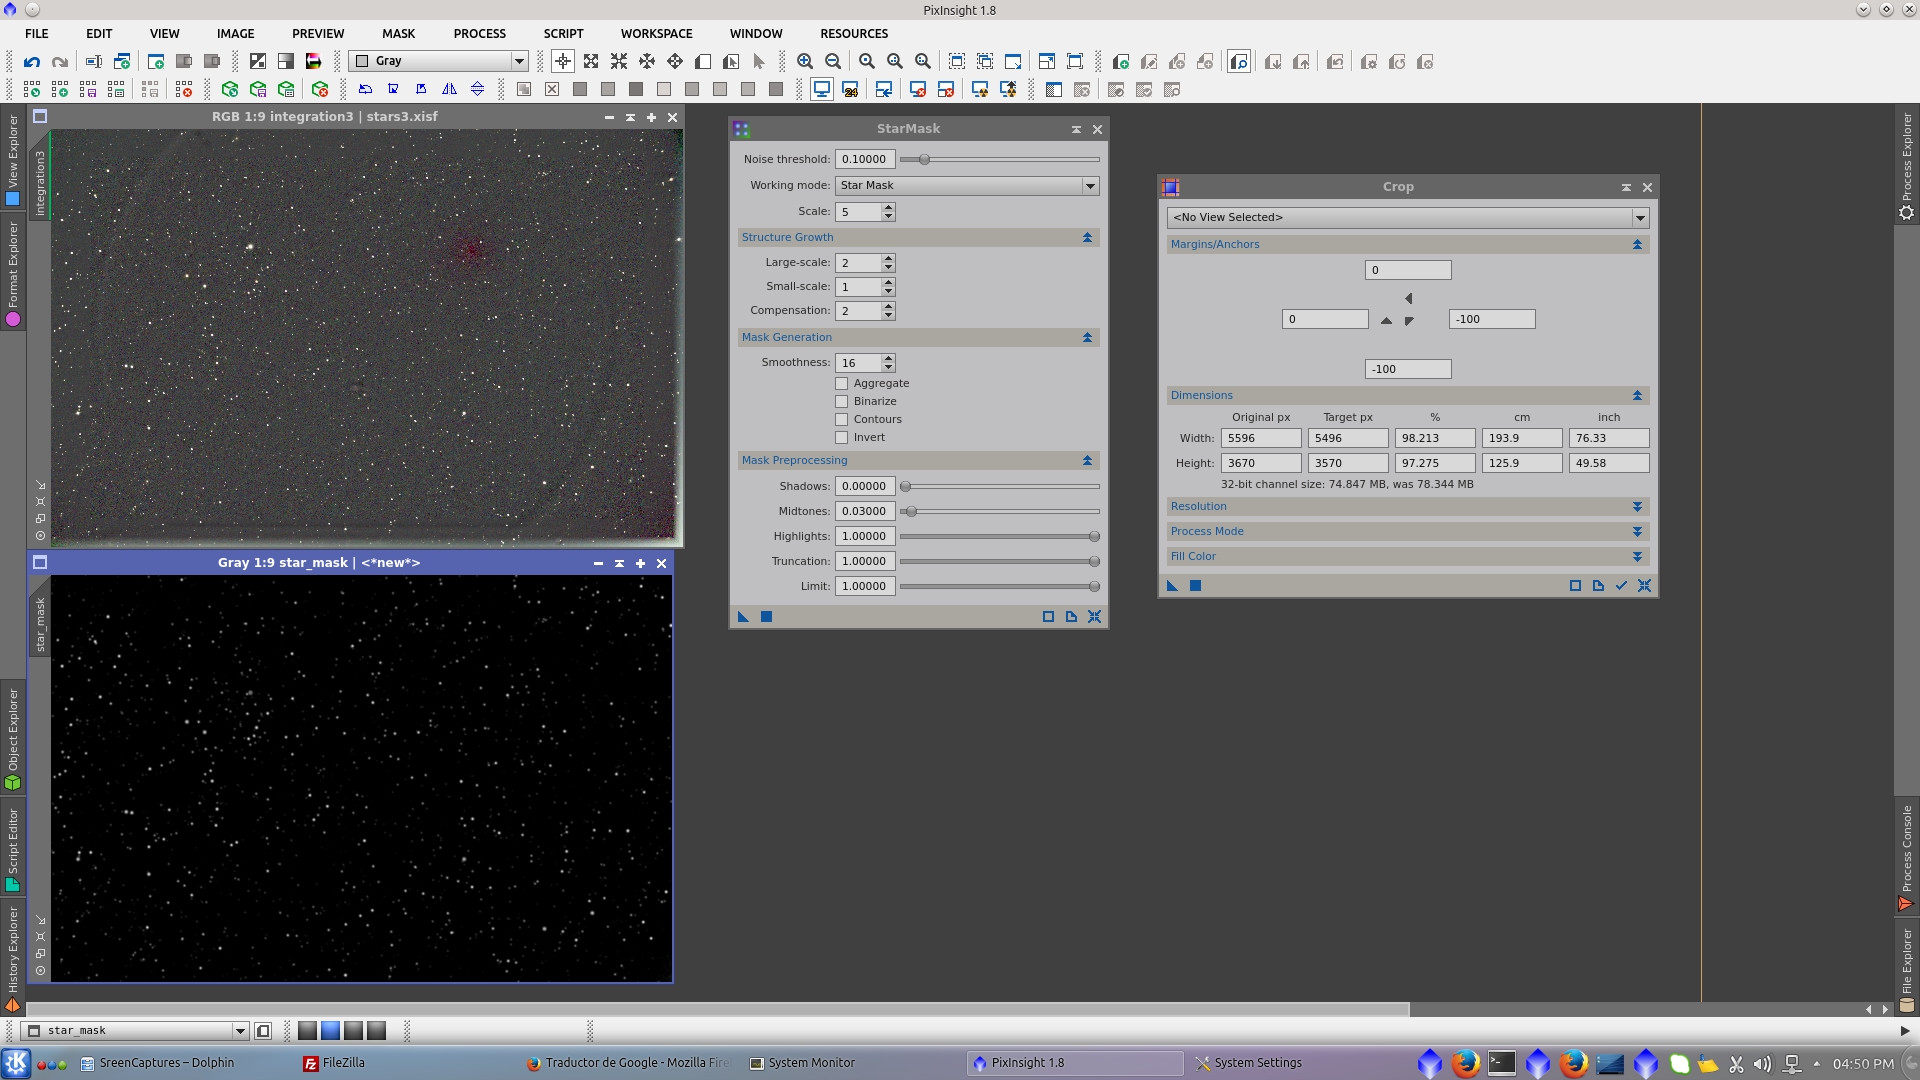
Over the "onlystars" image generate a starmask and after that crop it with the same Crop previously used for the combined image to match the size. This mask will protect the comet during deconvolution of stars.
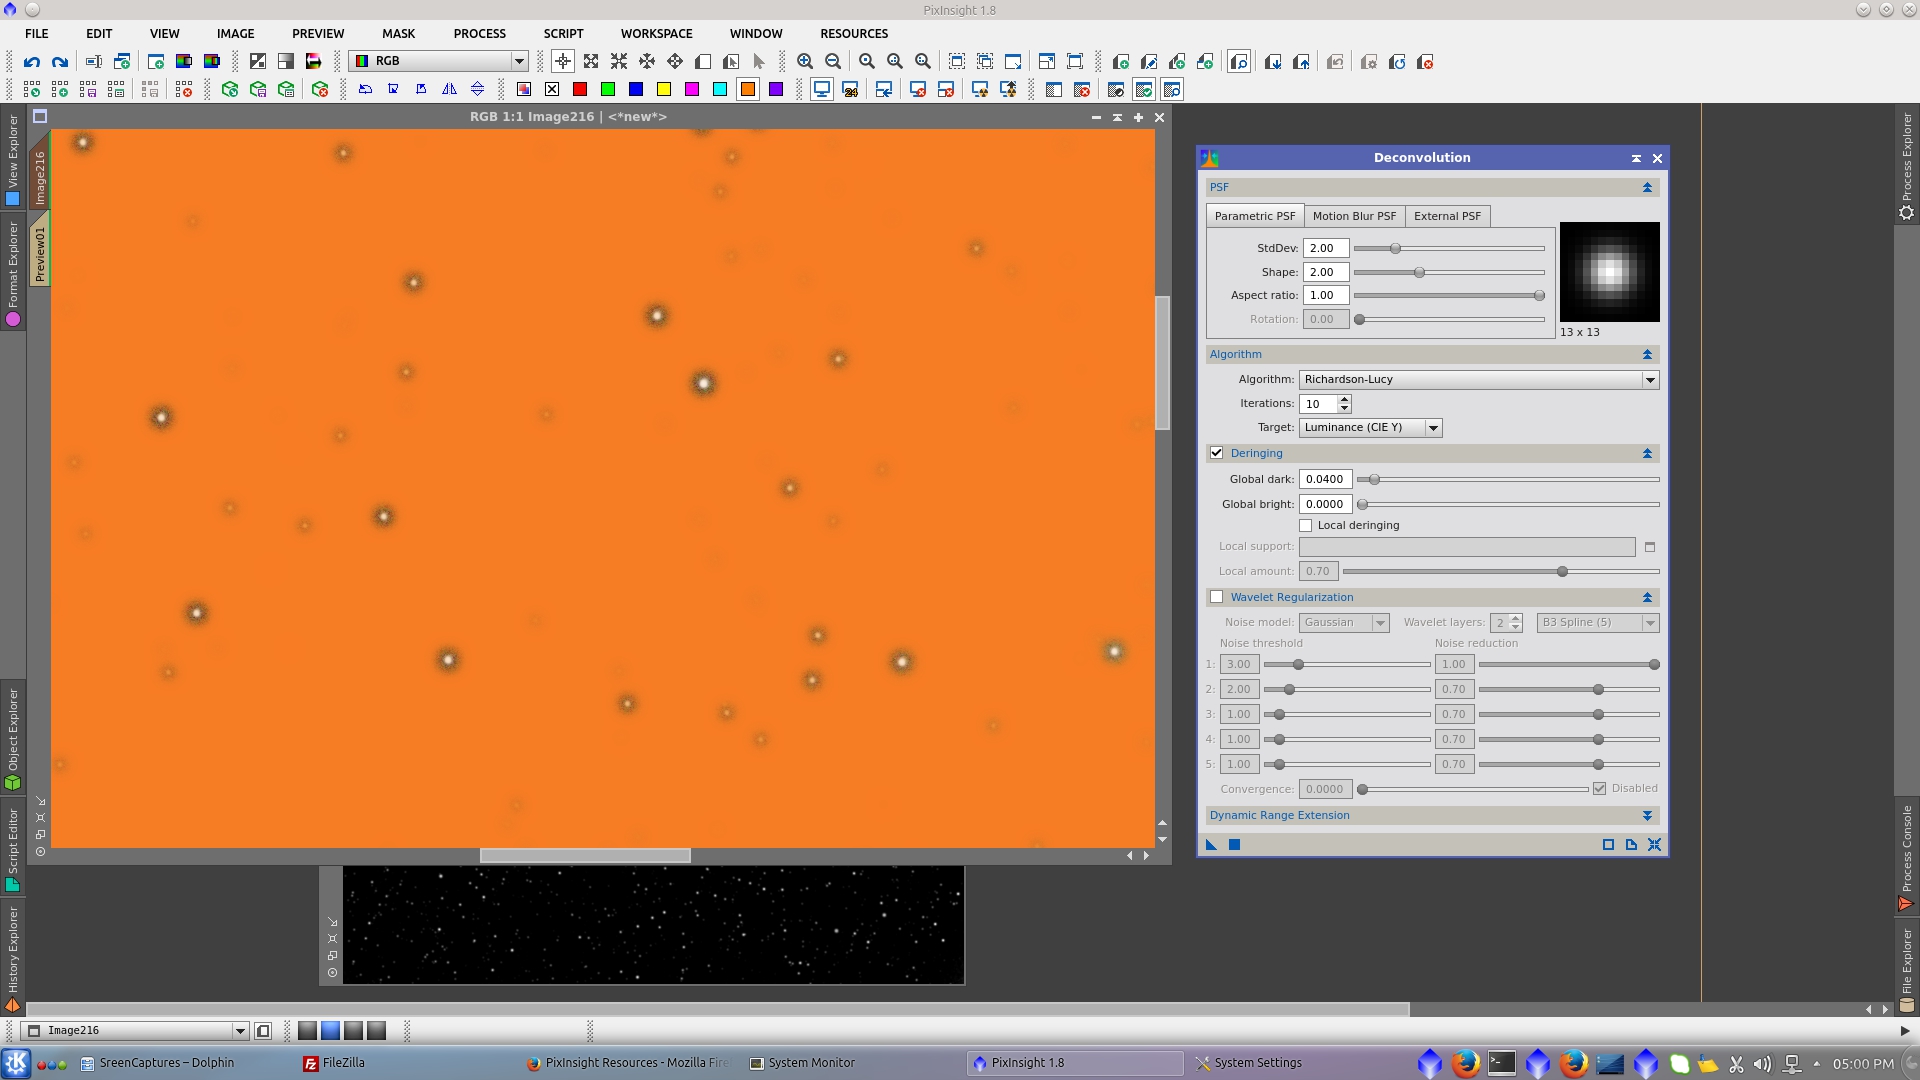
Using the starmask to protect the background of the image, apply Deconvolution tool using a non regularized Richardson-Lucy Algorithm (but protecting the background with the mask) and a little amount of Global dark in Deringing to prevent ringings artifacts.
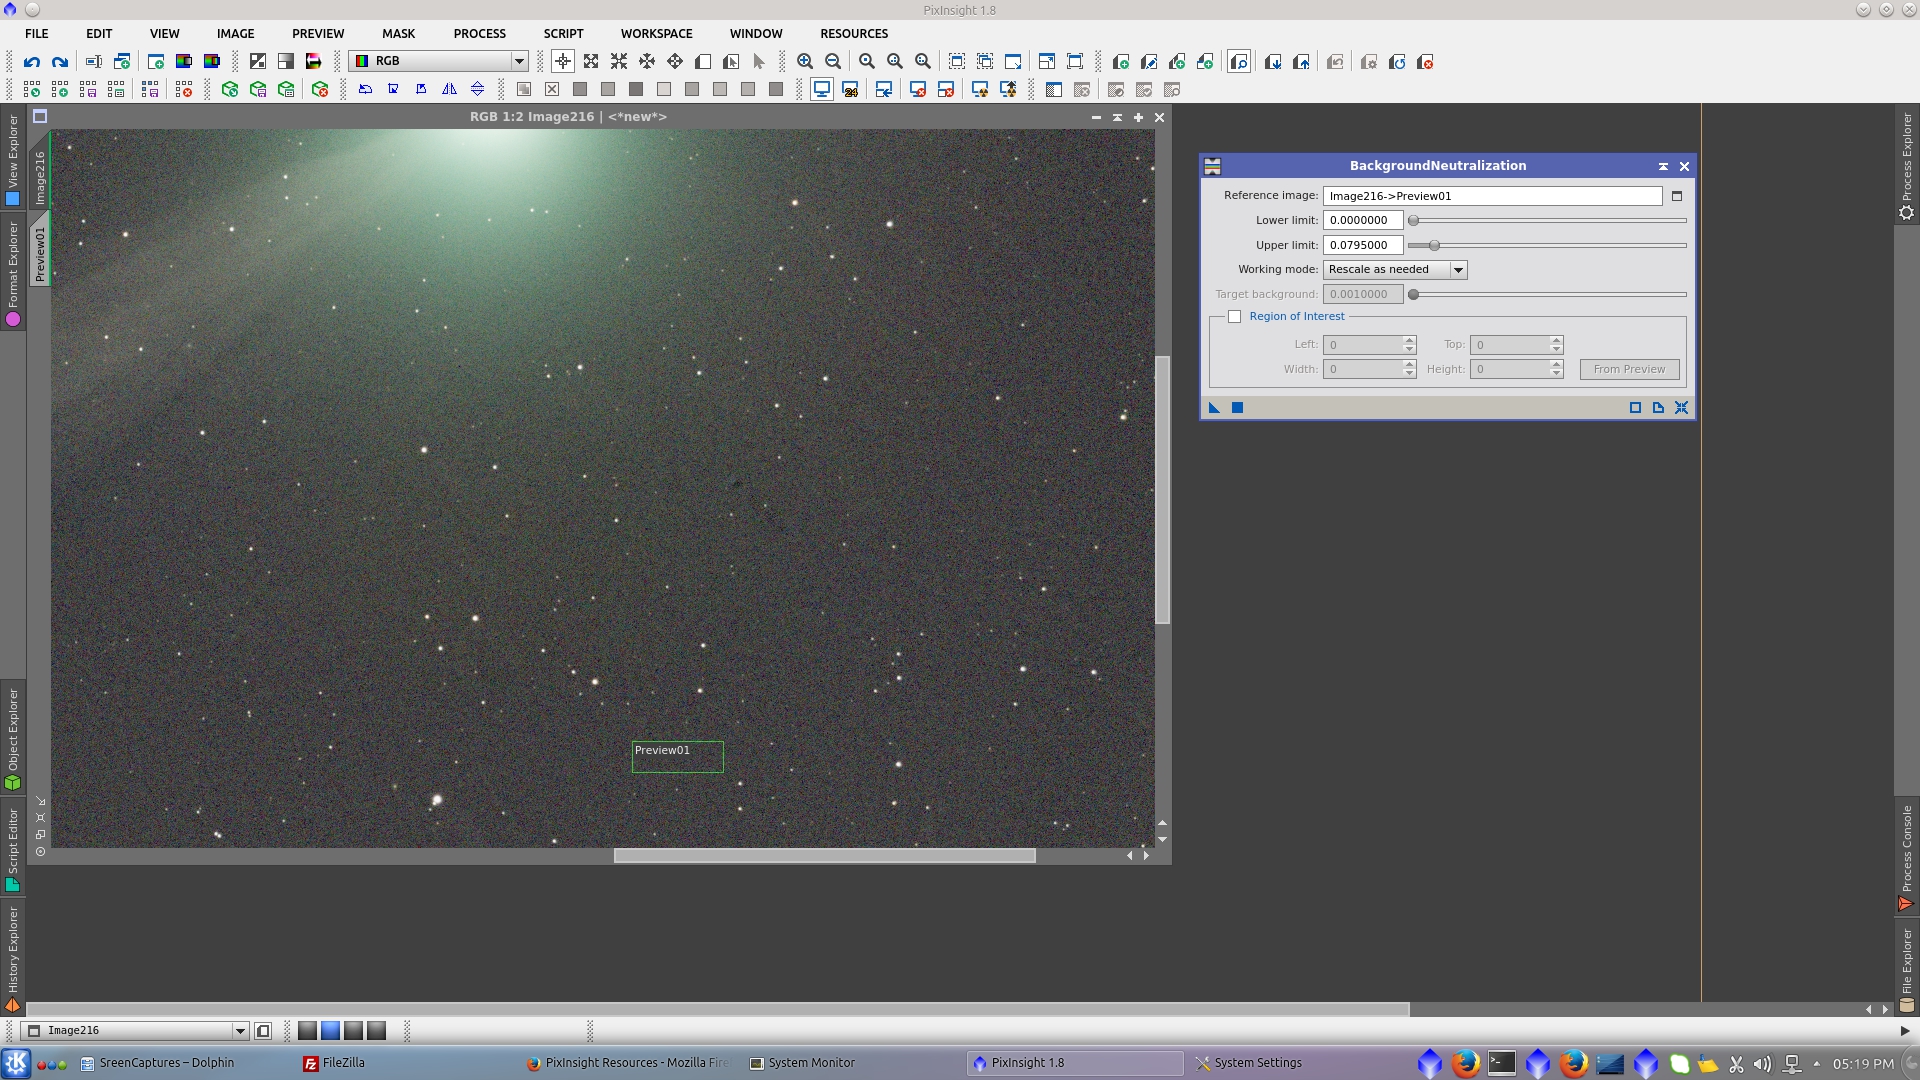
Generate a preview that represent the background of the images to be used as Reference image in BackgroundNeutralization tool
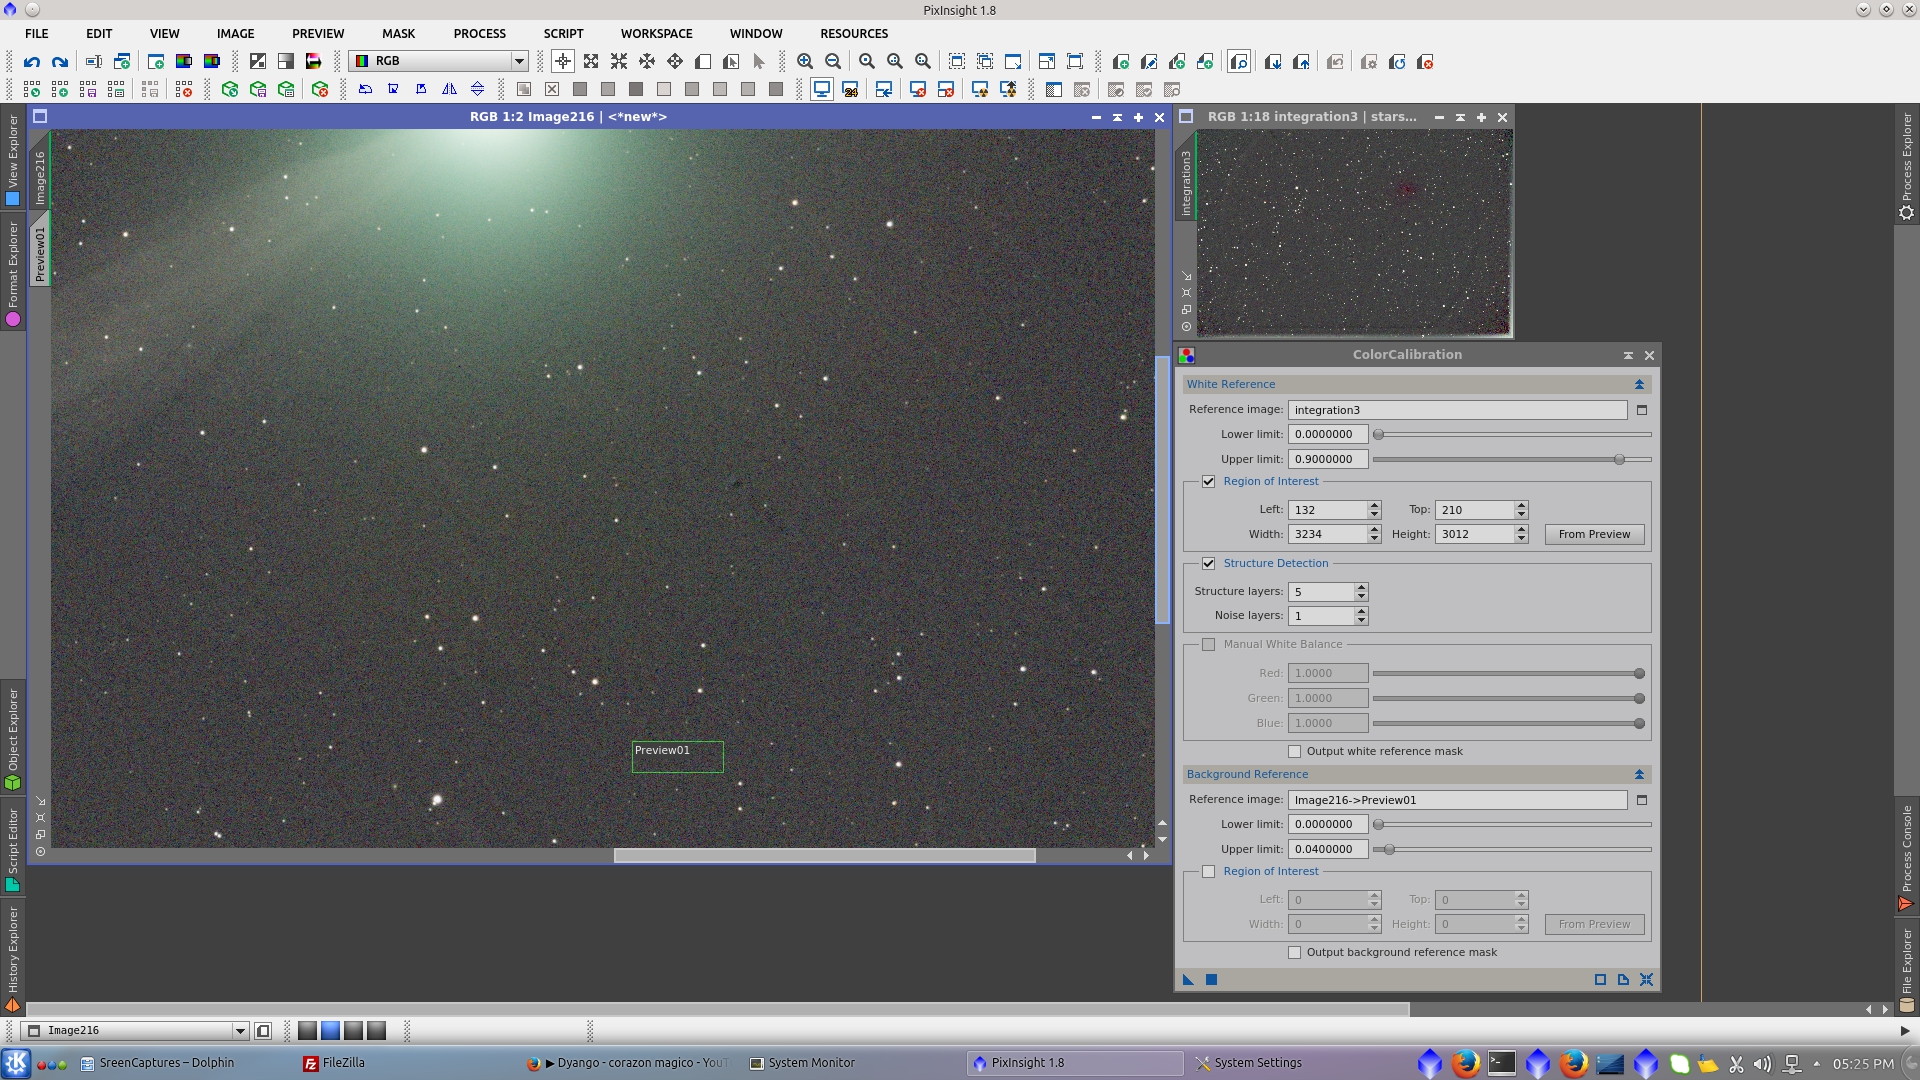
Perform ColorCalibration using the same preview as Reference image for Background Reference and the onlystars image as Reference image for White Reference
Going further in the processing, I notice during color saturation of the image that an area around the core of the comet had remaining color variations, perhaps due to the first HDDBE was not applied in that region. So, I generate a new DBE model to correct it
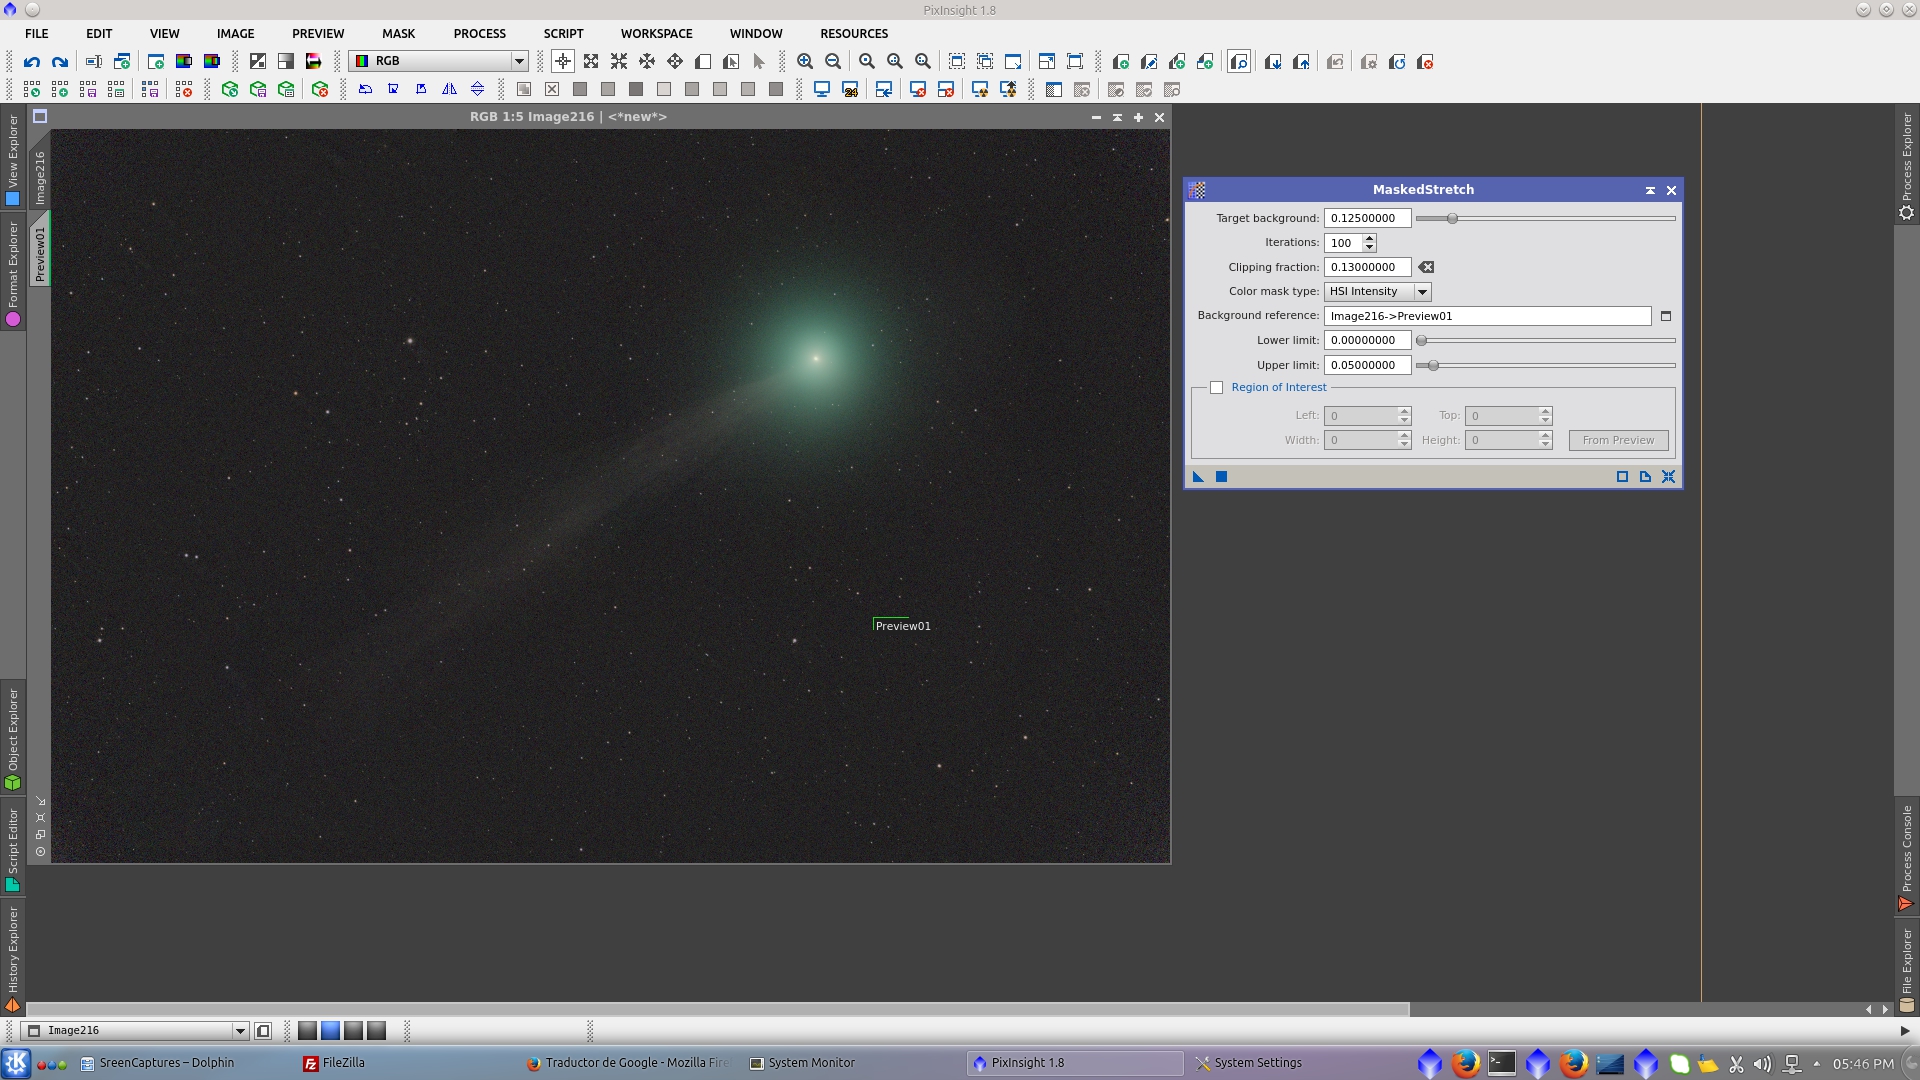
Stretch the image using MaskedStretch tool.
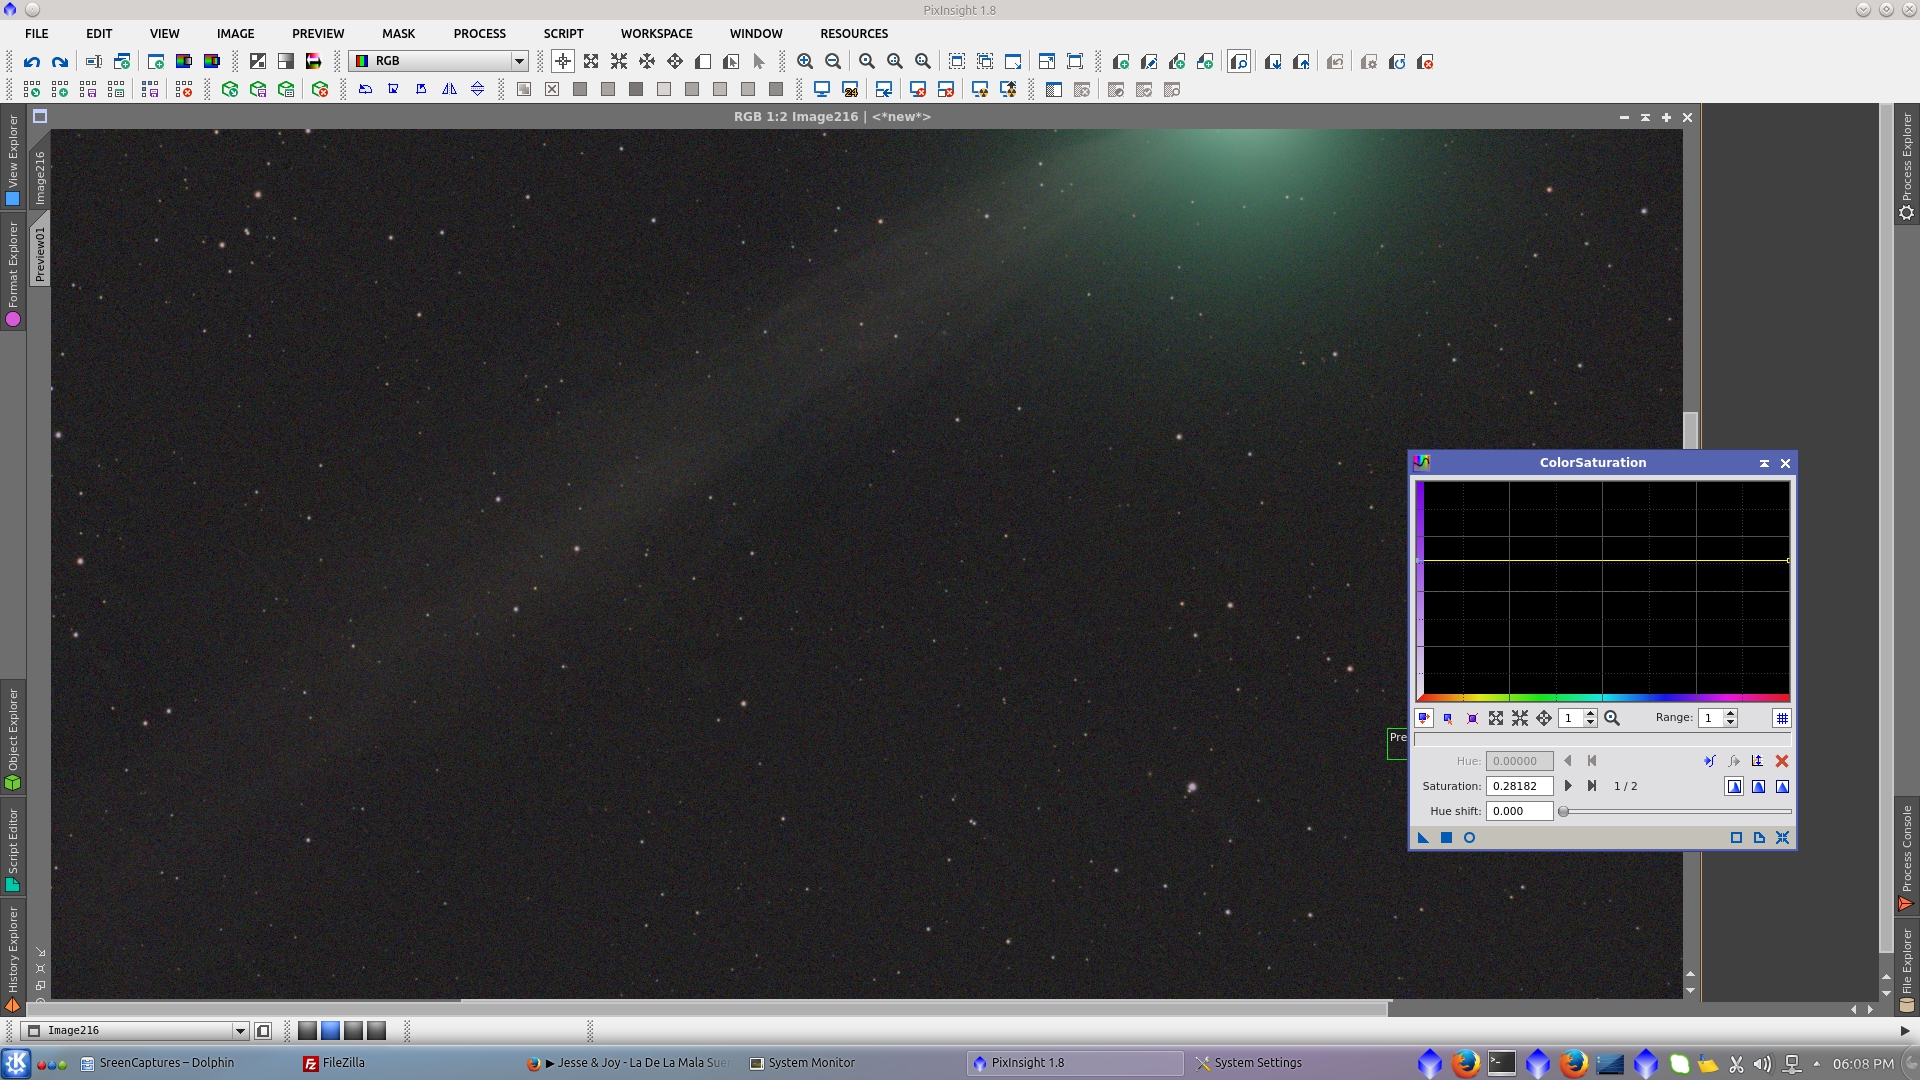
Now is time of color saturation of the image using ColorSaturation tool. It can be built a Lightness mask in order to protect the background from saturation, but in this cases it looks fine wihtout mask due the remaining noise is homogeneous.
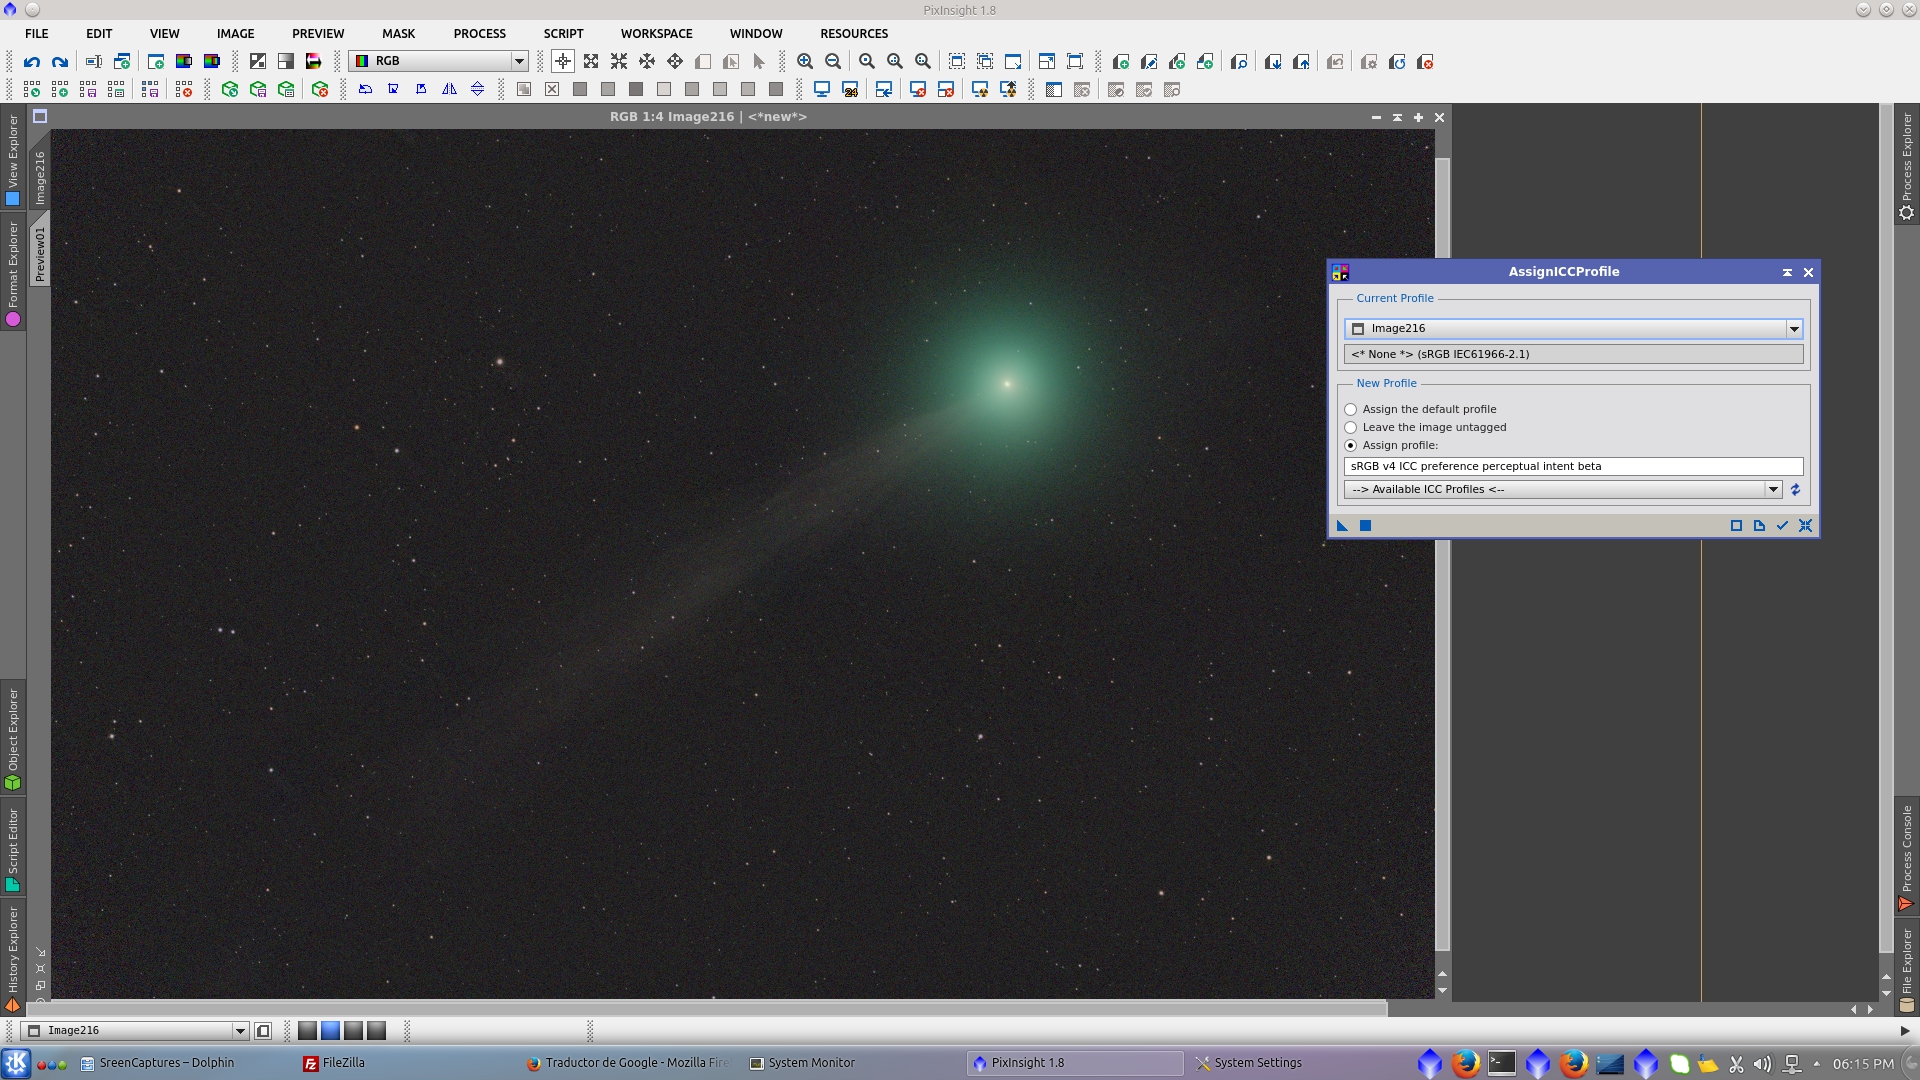
Assing an ICC profile to the image
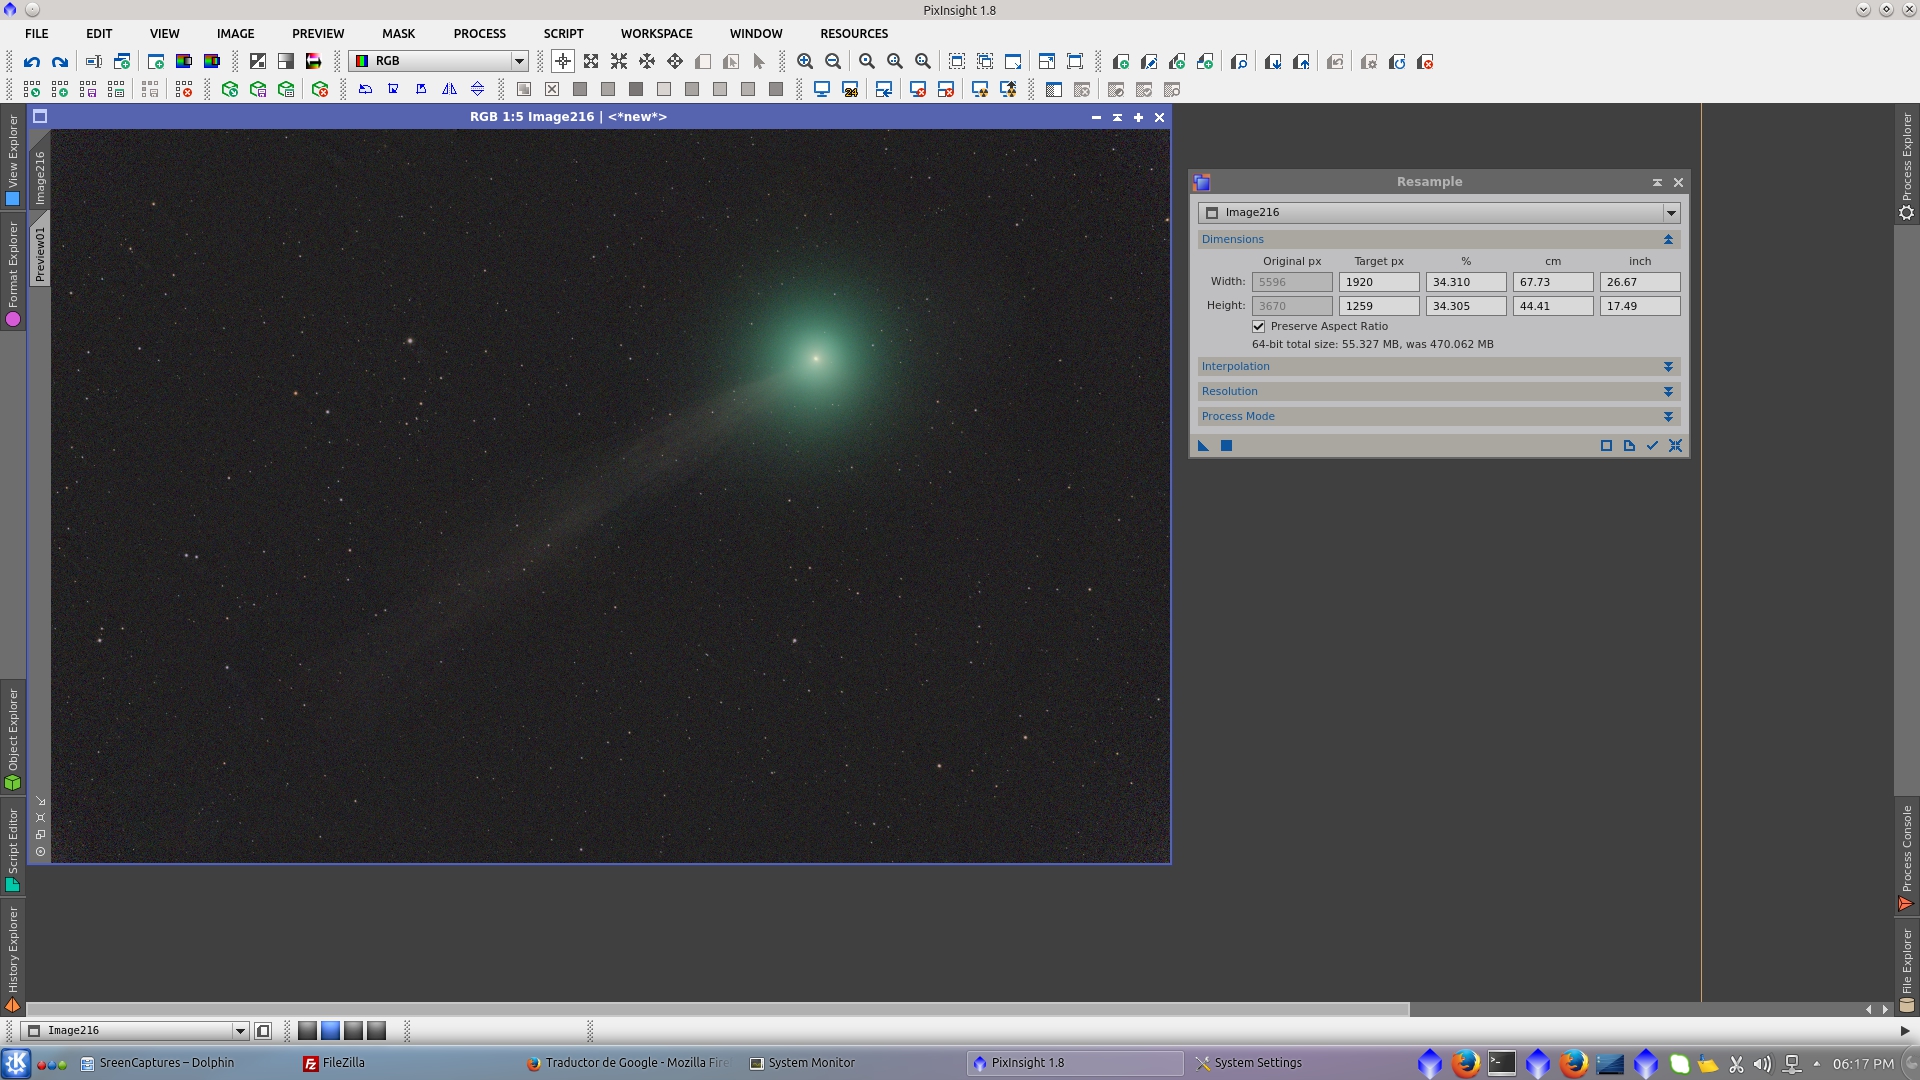
Resample for web publication
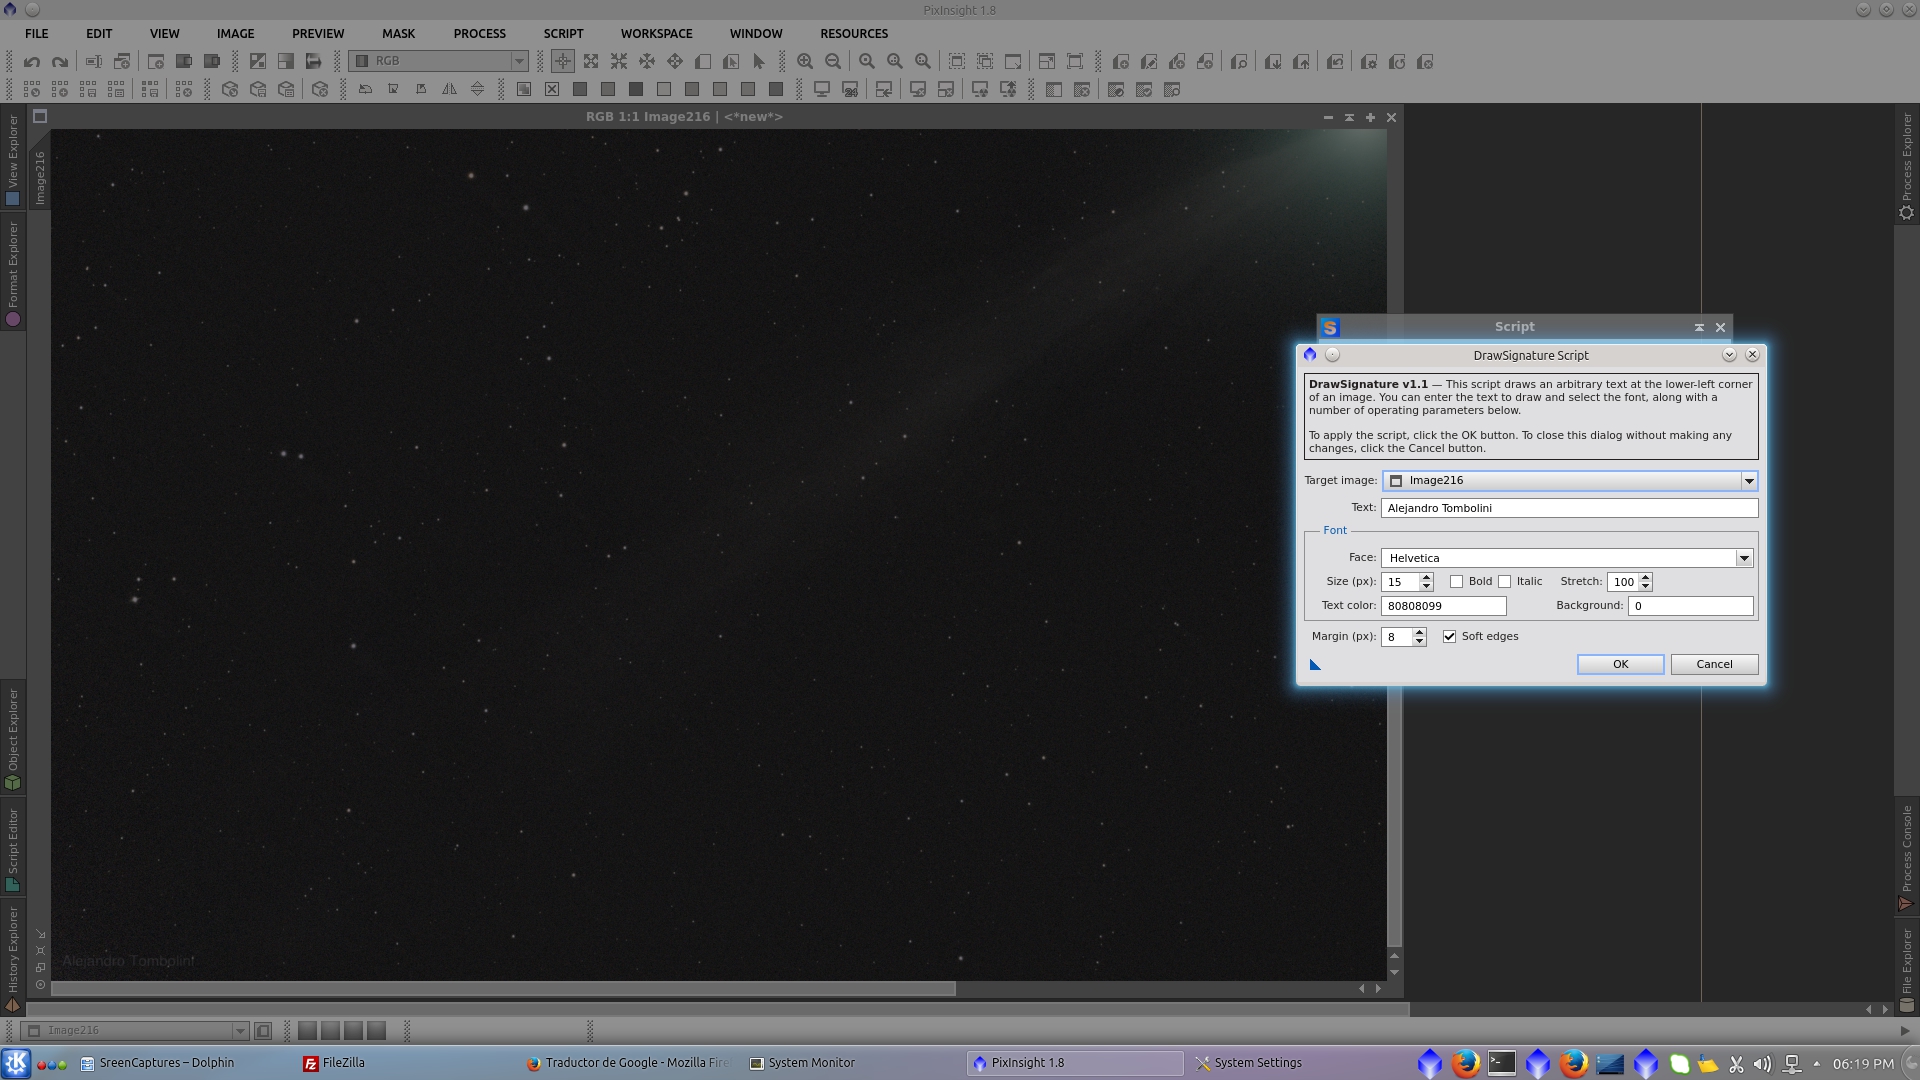
Add Signature with AddSignature Script
Final Image