M42 - Orion Nebula
by Alejandro Tombolini
Introduction
Image of dhb2206i publicated in Image Processing Challenges - There was provided the integrated RGB image of Orion Nebulae made for 282 1 minute light subs - Main notes: DynamicBackgroundExtraction (DBE) to remove gradients, MultiscaleLinearTransformation (MLT) to noise reduction and several tools to increase contrast in nebulosity. Date: Mayo 2019
Image Data
- Object: M42 - Orion Nebula
- Camera: Canon DSRL
- Telescope: Lens - Focal Lenght 300 mm - f/5.6
- Images: 282 x 1 second @ ISO 1600
- Total Time: 4 hs 42 minutes
- Processing Software: PixInsight
- Comments: no darks, no flats and no bias
- Author: dhb2206i
Processing
Saturated stars: Even with one minutes exposure time, there are many saturated stars and also the brighest part of the nebula. In this case would be advaiseble to make a HDR Compotition by adding shorter exposure time images (Migth be 30 sec, 10 sec, 5 sec, 1 sec). There is also some optics problems more noticeable in the stars of the periphery of the image.
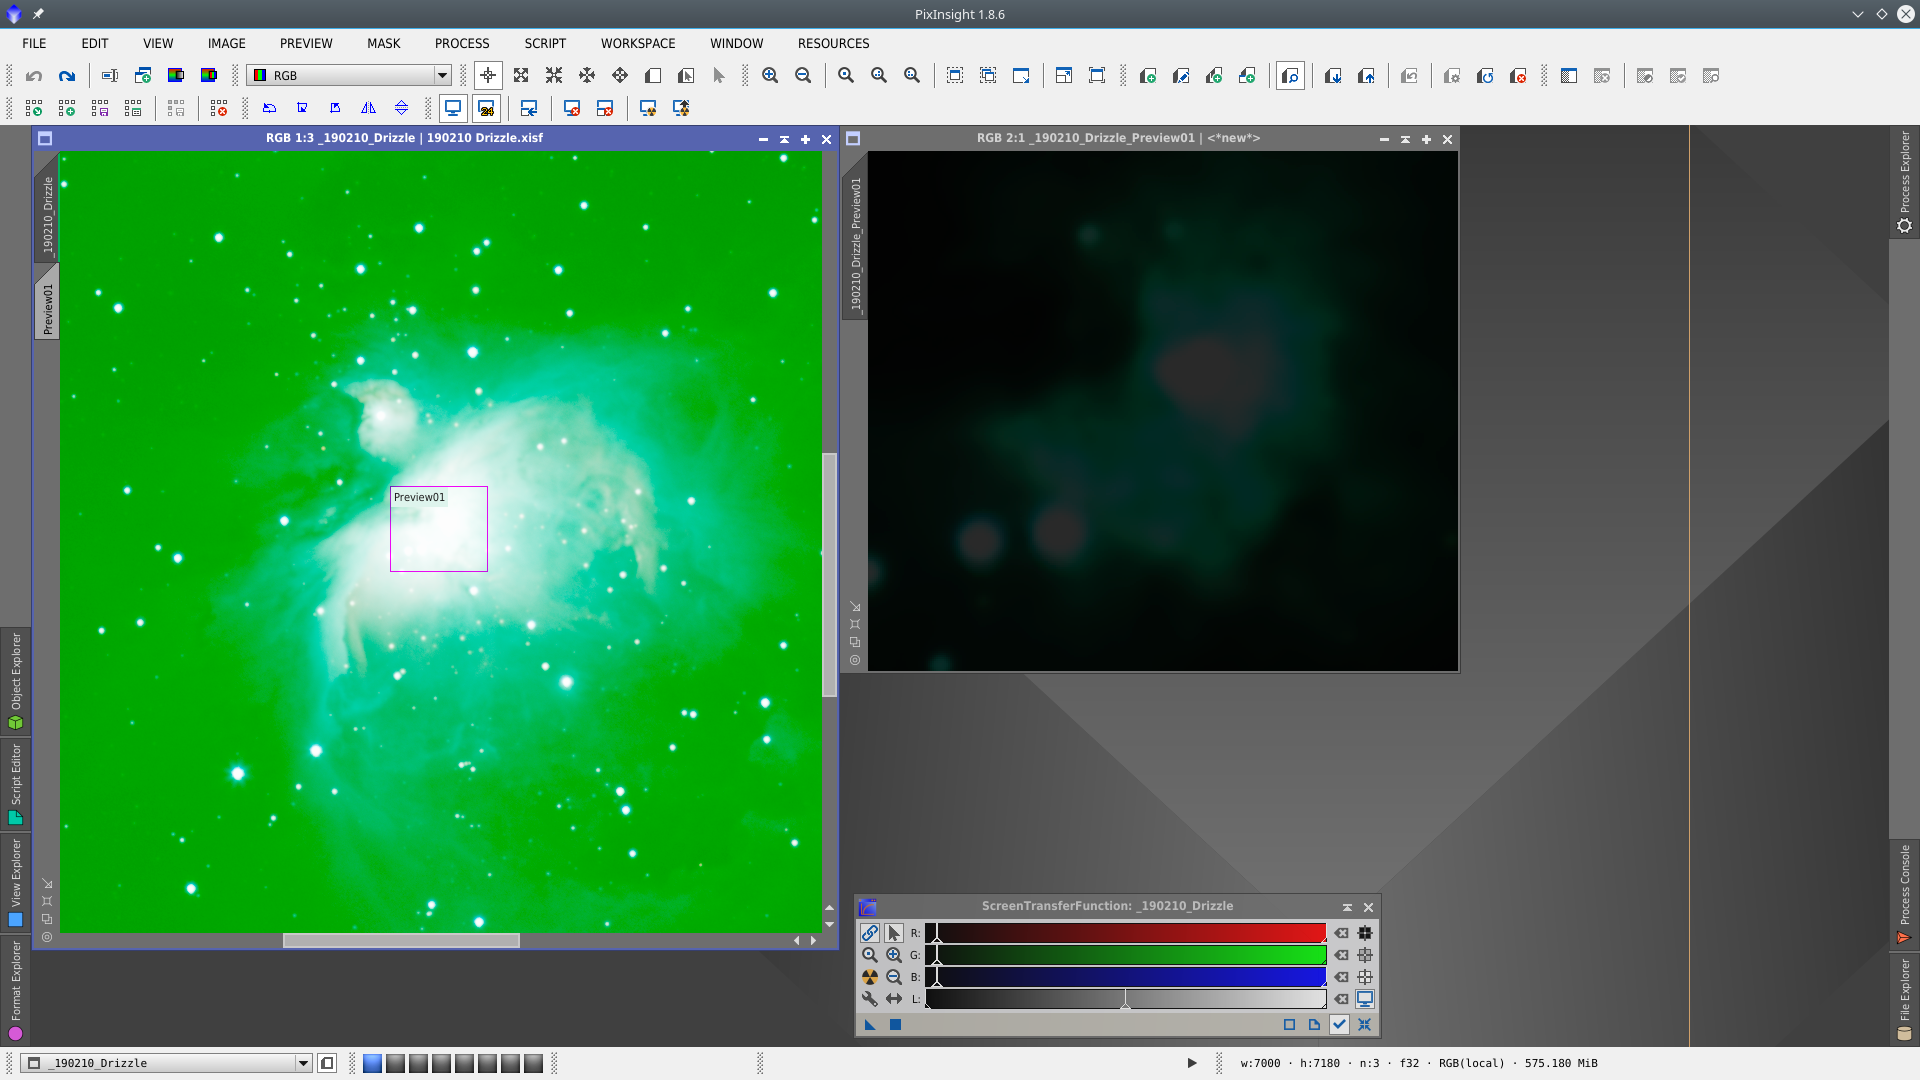
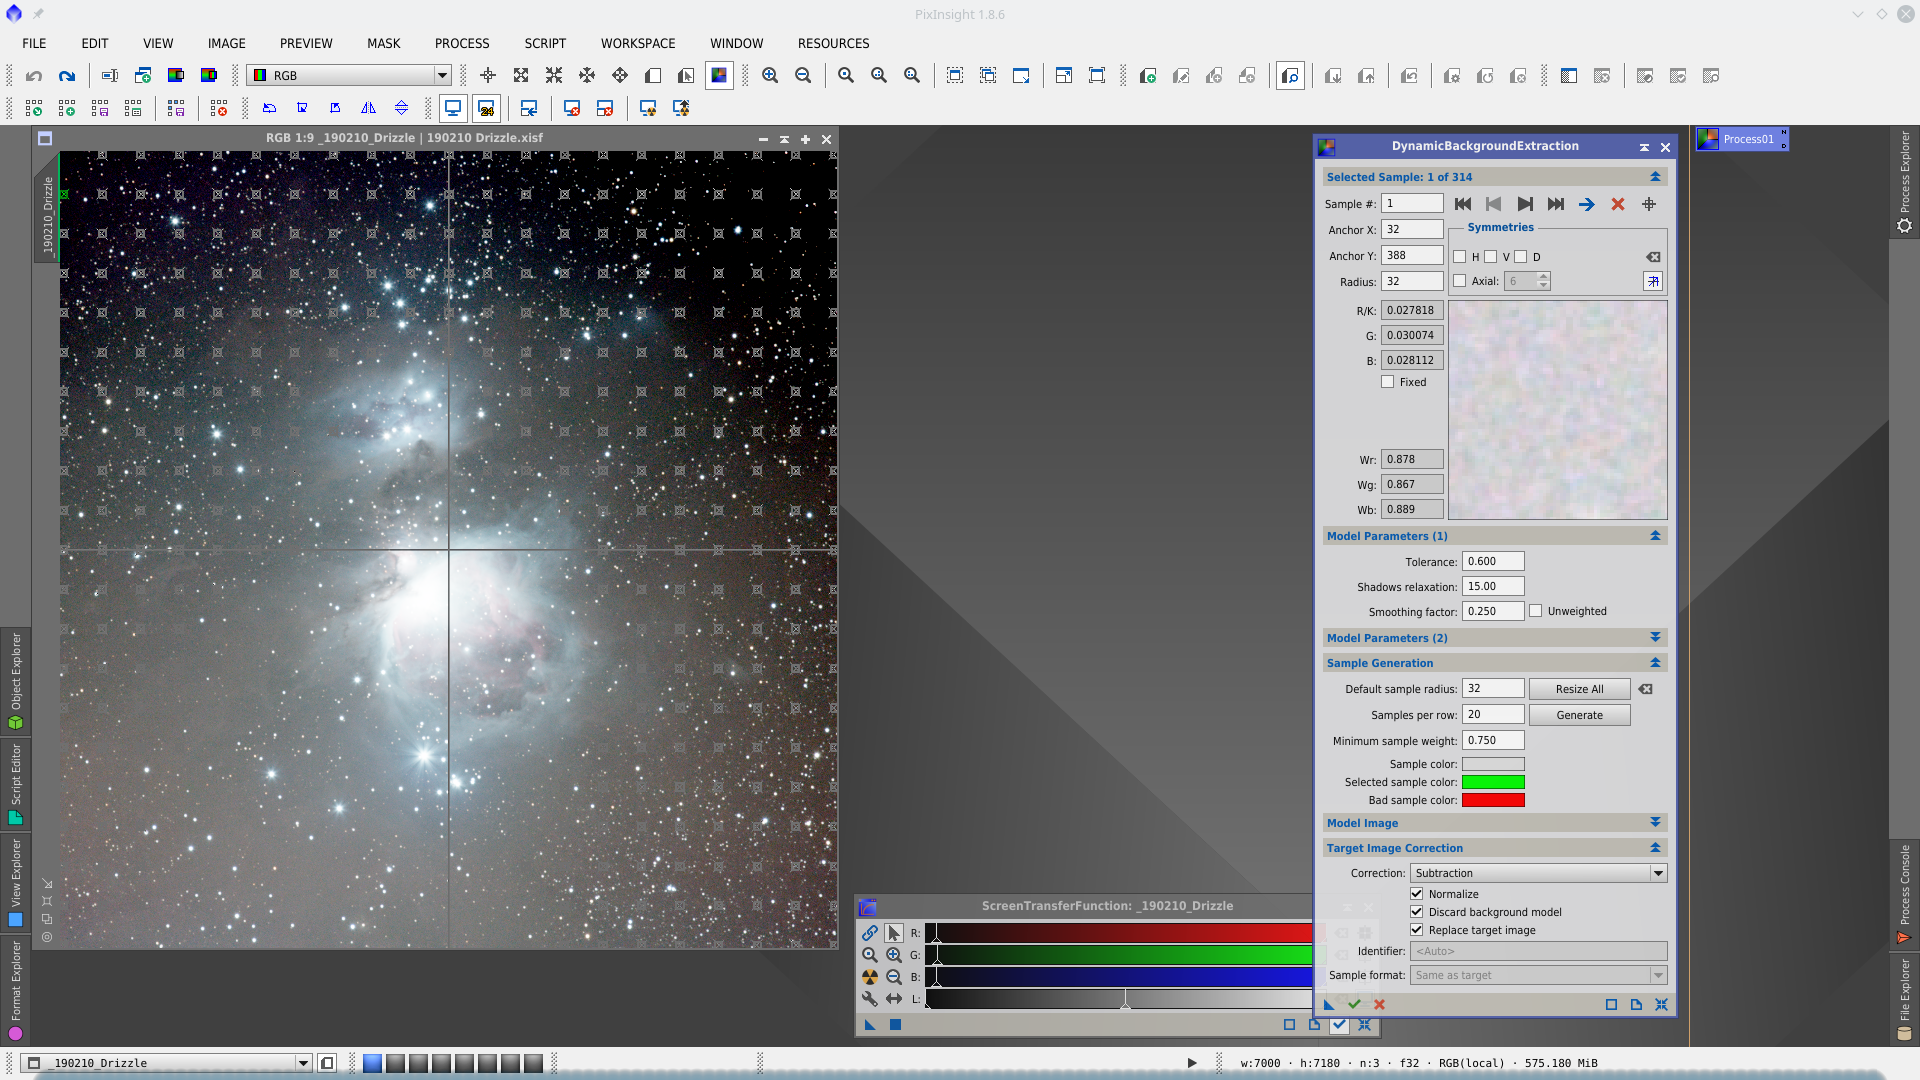
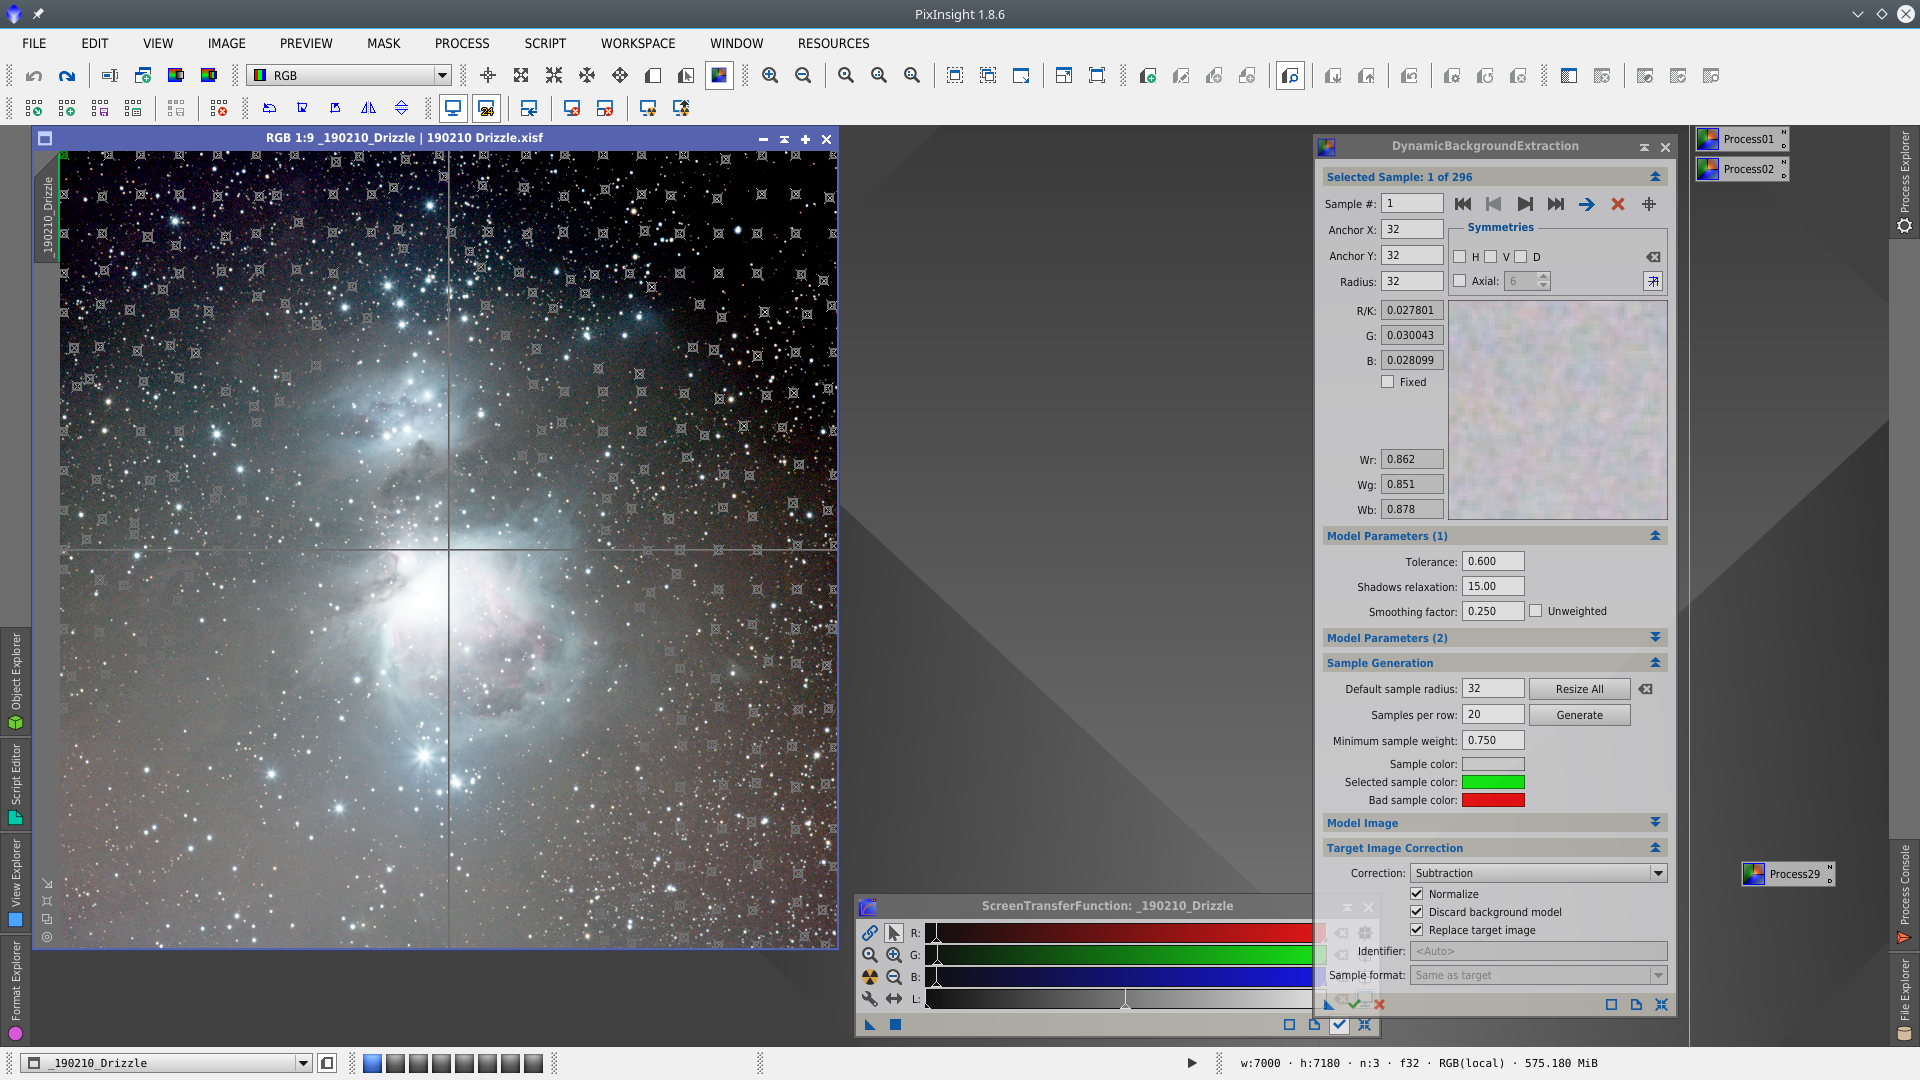
First I will apply DynamicBackgroundExtraction (DBE) to correct the background gradient of the image. To better visualitation of where to place the samples I apply a first DBE to obtain an auxiliar image that will use as reference to define the correct location of the samples.
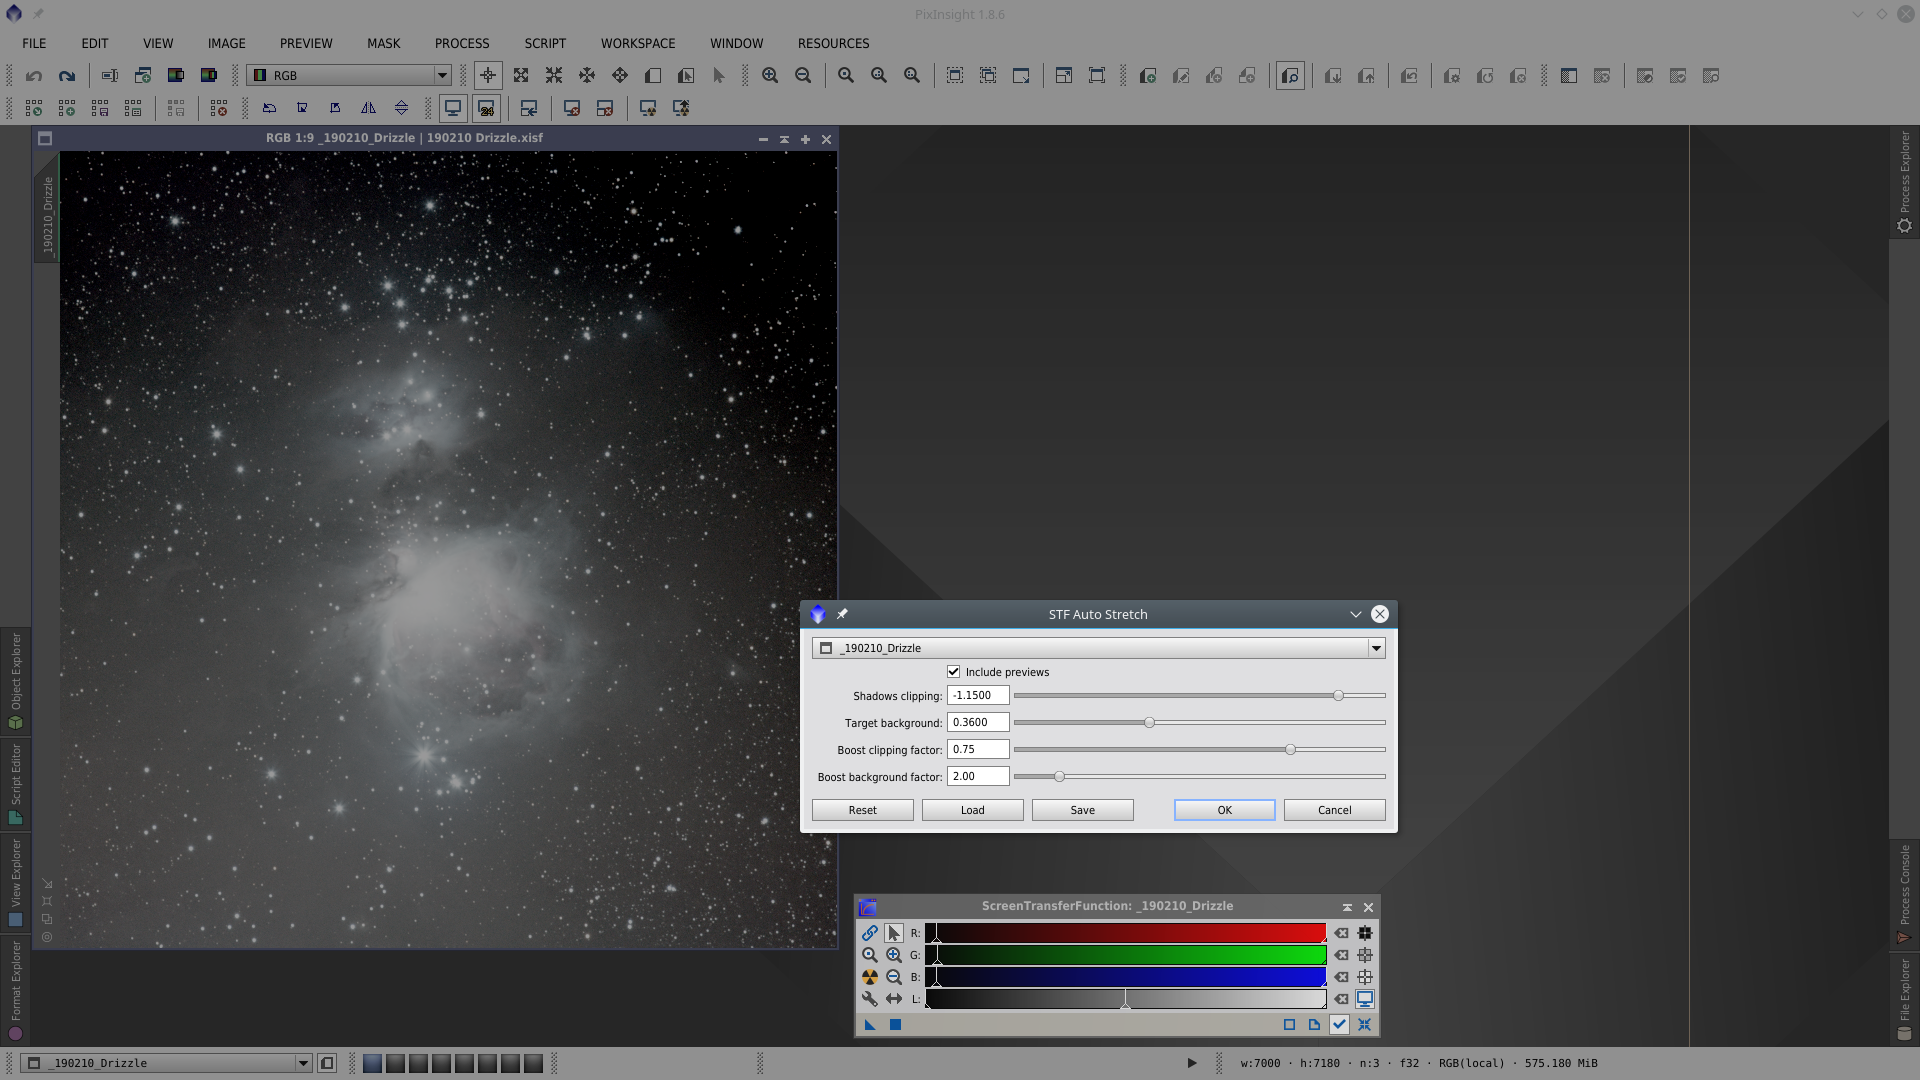
To have an adequate visualitazation I have stretched the image with STF adjusting Shadows clipping to -1.15 and Target background to 0.36.
Apply DBE over the image to obtain the auxiliar Image
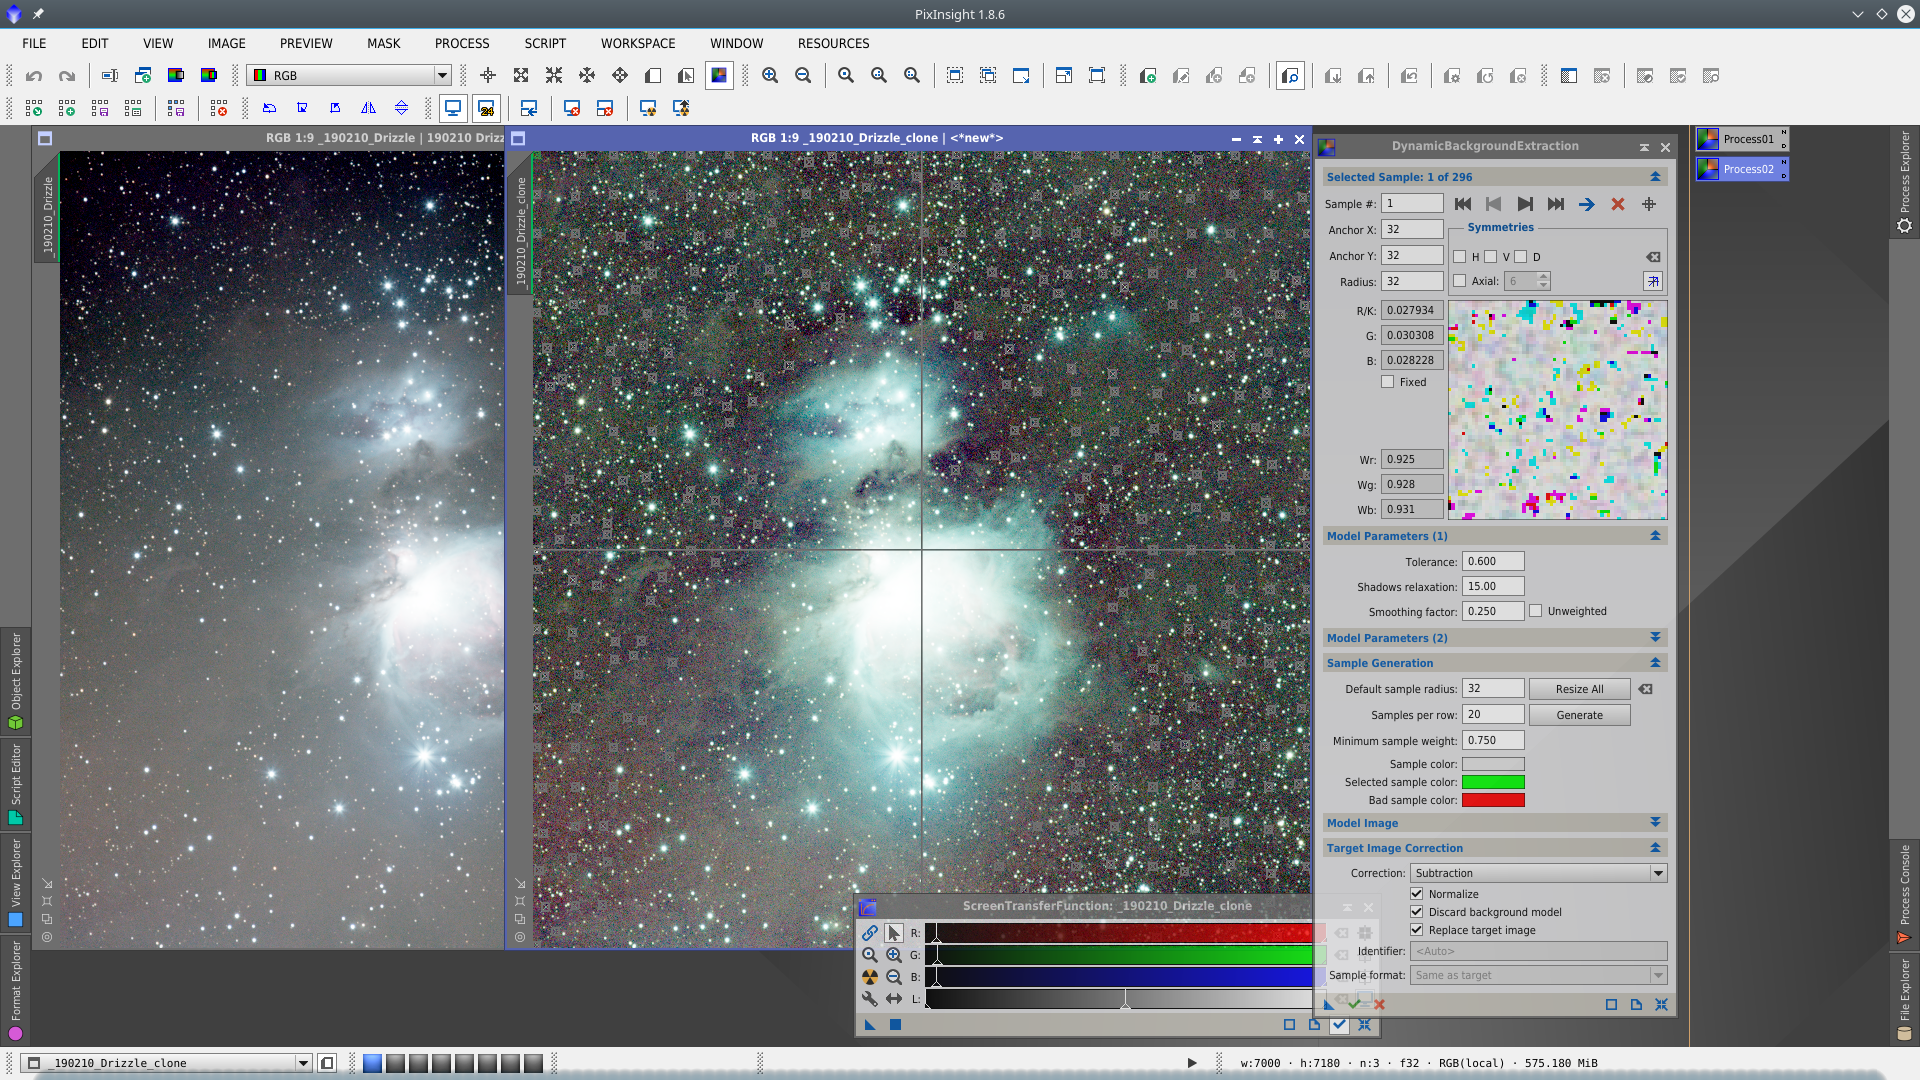
Once DBE is done, clone the image and apply STF on it and place DBE samples taken care of not placing them over stars or nebulosity. Generate the DBE icon dragging the blue triangle over the workspace, close both the tool and the auxiliar image, and apply DBE on the original image
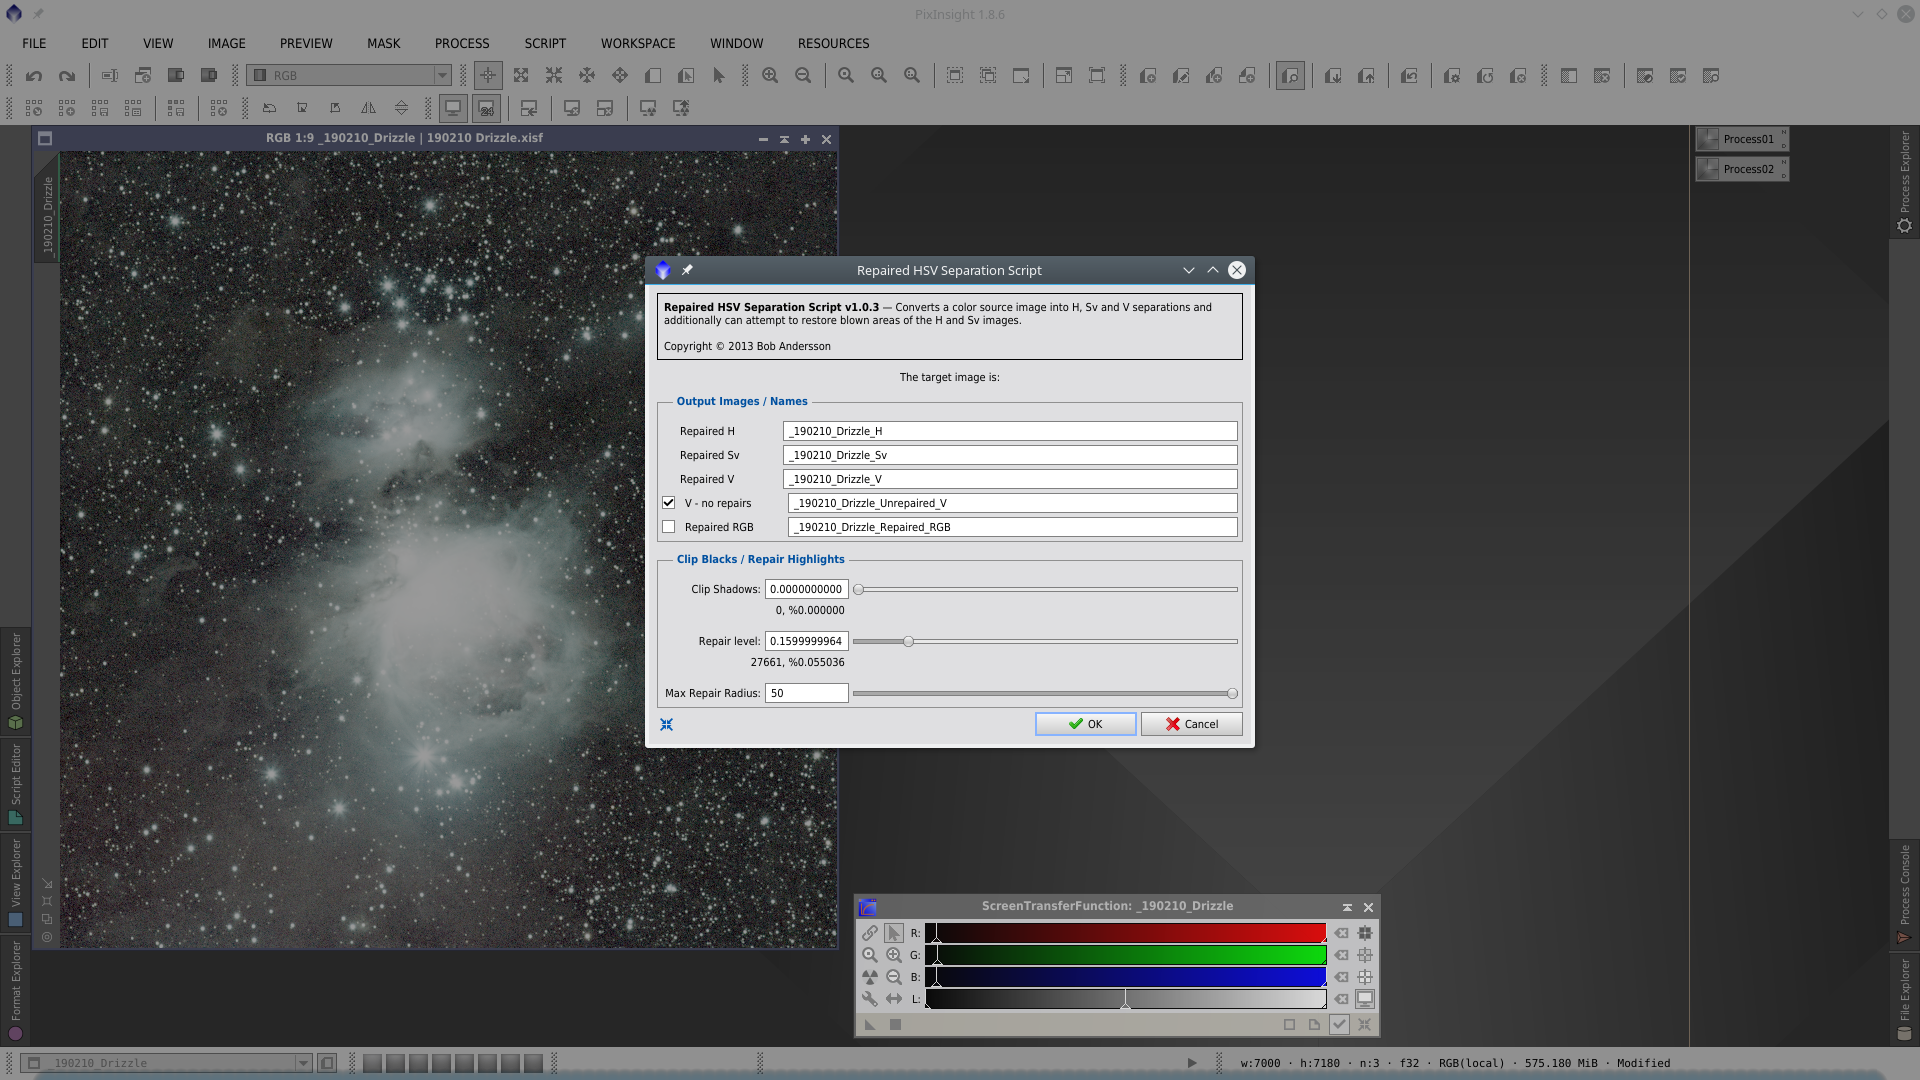
Then I used the scrpit Repaired HSV Separation to repair the star cores that are saturated. This solution is not the best and the result is not so good in this case, the suggestion is always to make HDR Composition for saturated stars.
Using ChannelCombination generate the new image with channels _H, _Sv and _Unrepaired_V

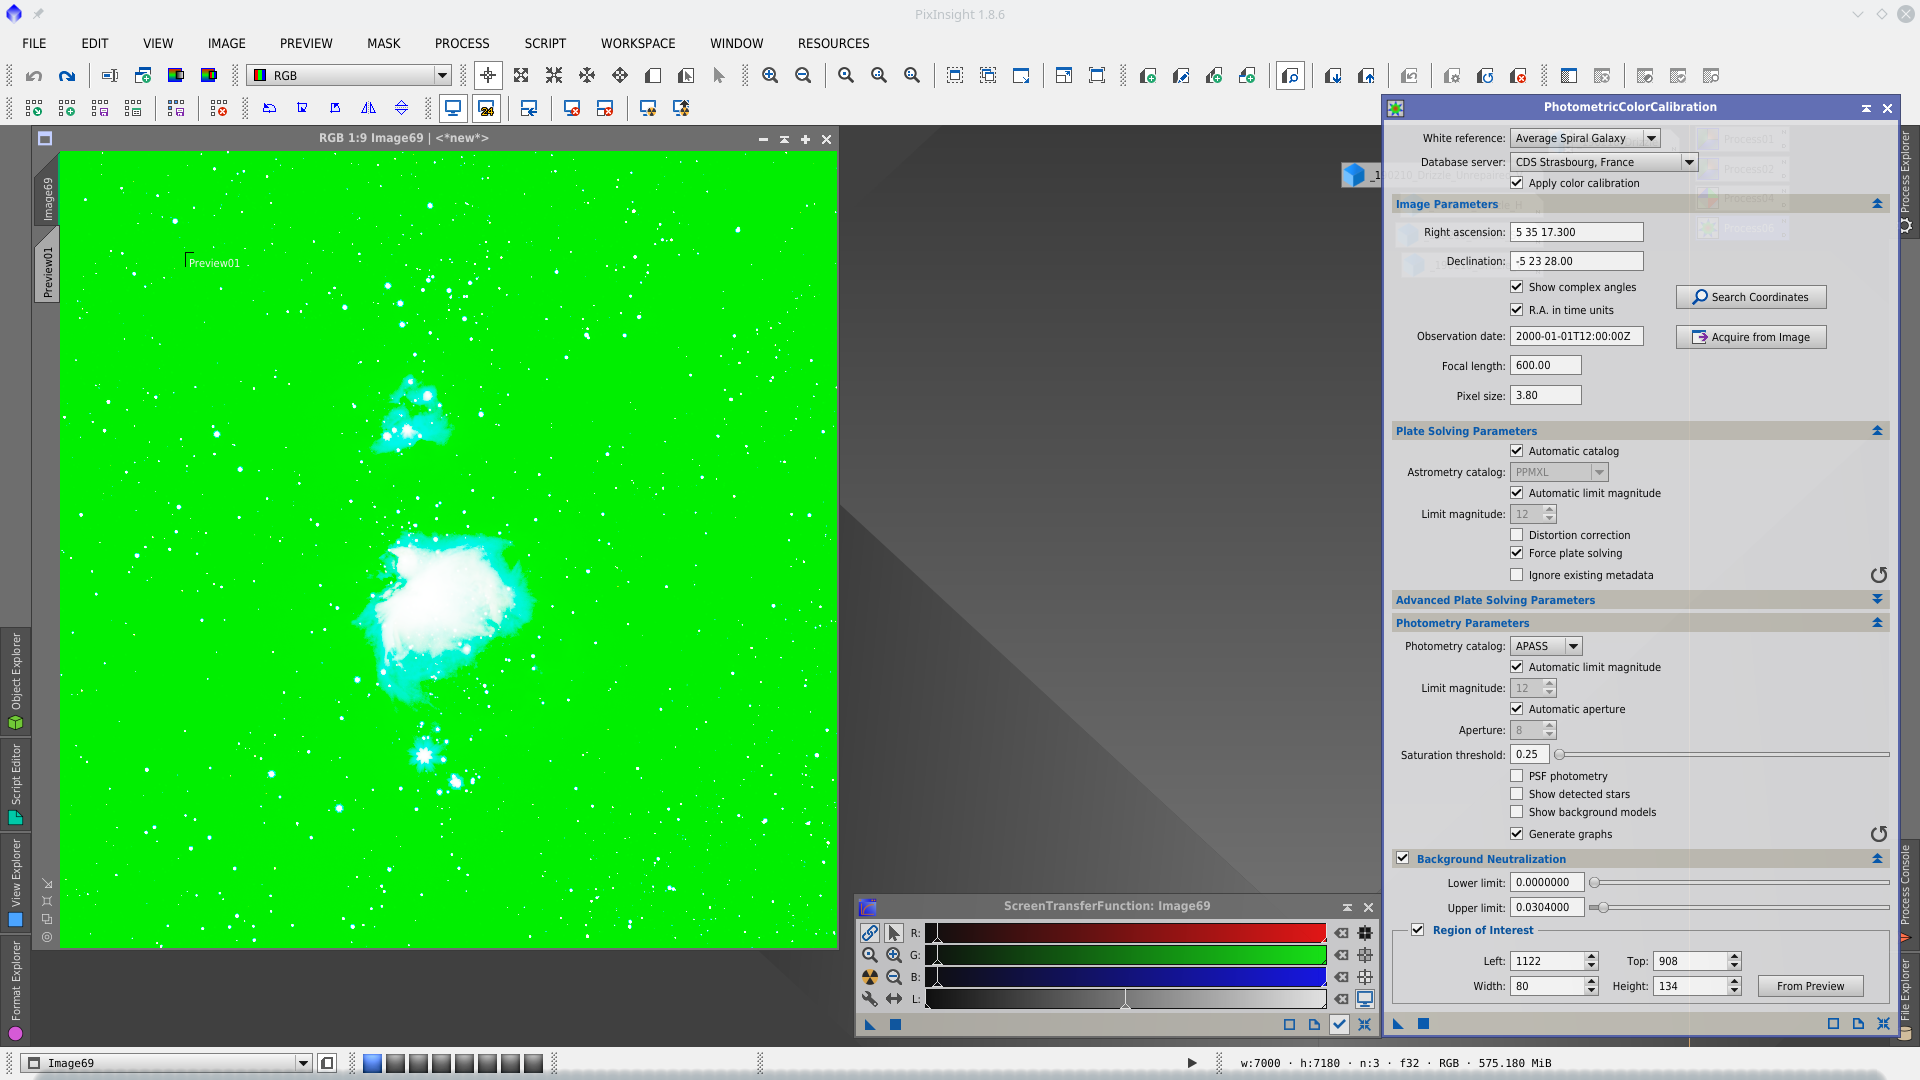
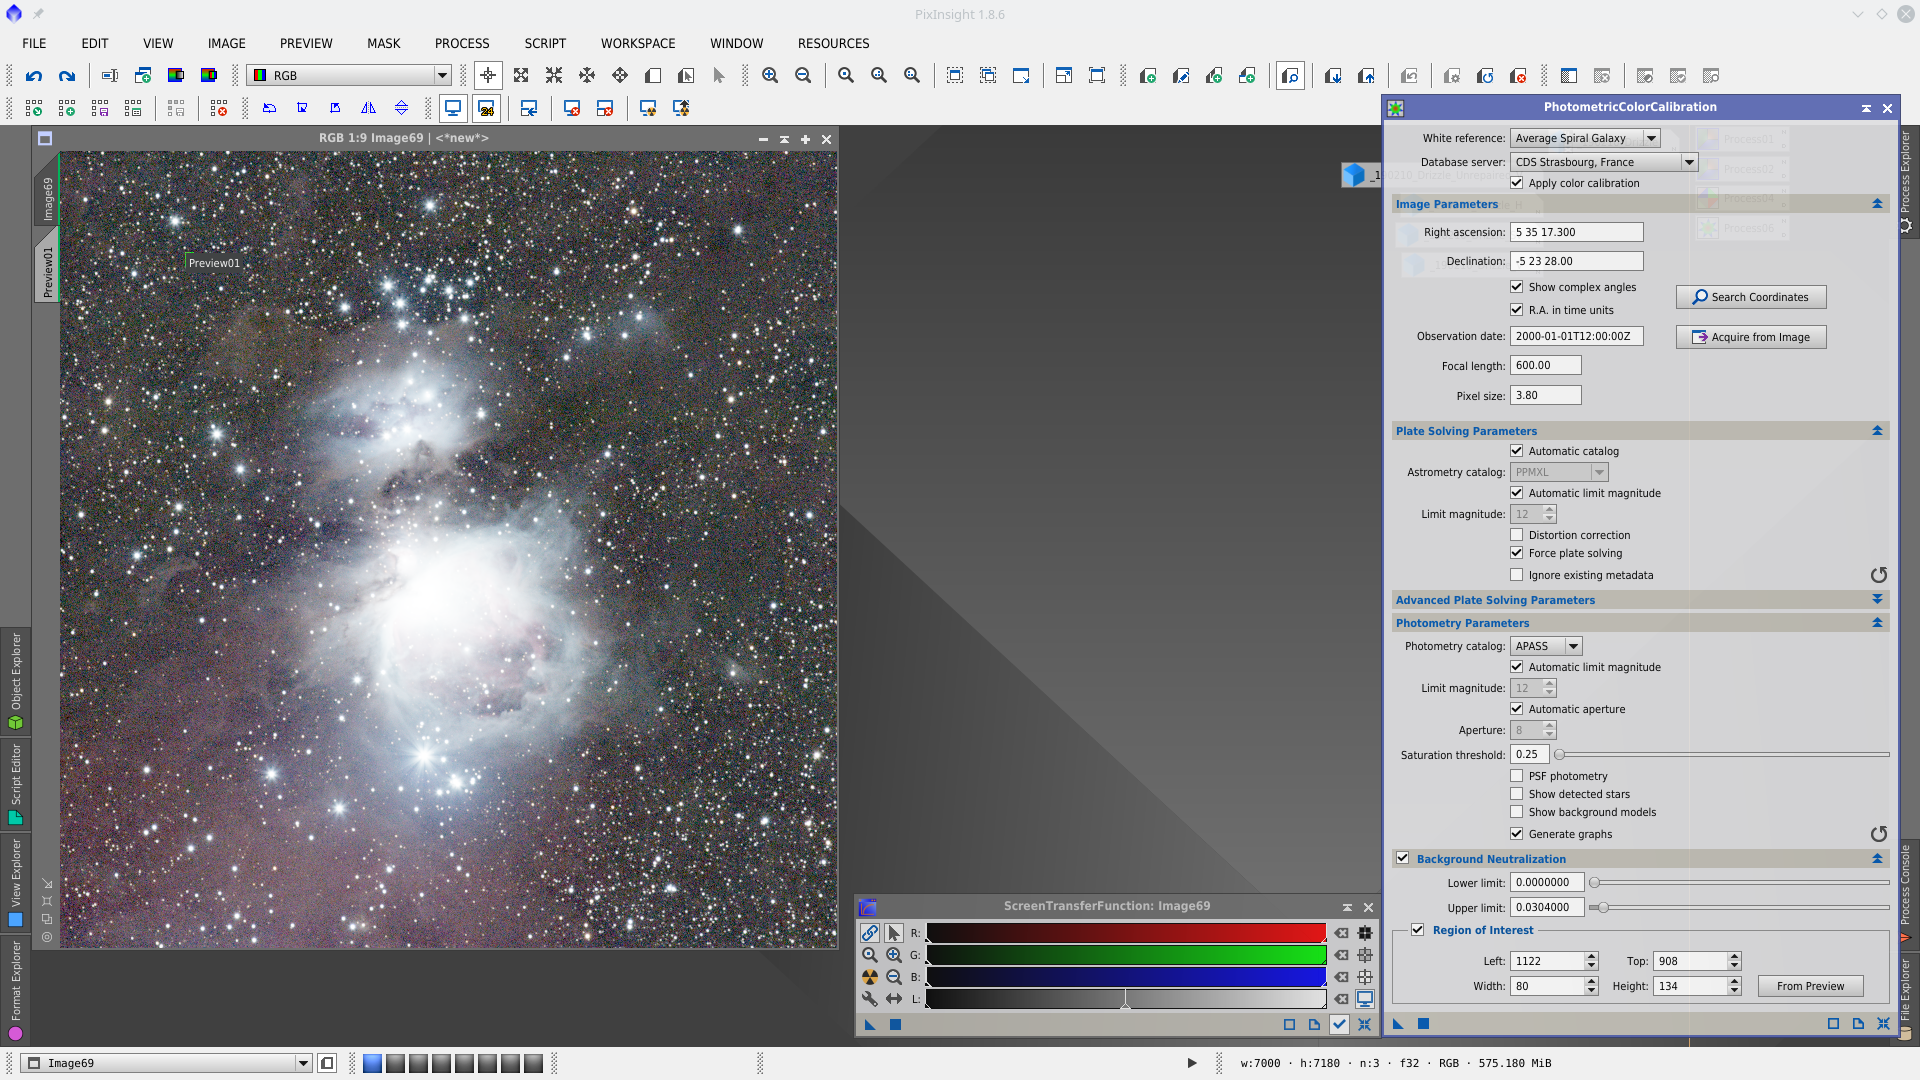
Color Calibration with PhotometricColorCalibration tool (PCC). This tool allows to solve the image, make the Color Calibration and Background Neutralization in the single step.
Next two screencaputes show before and after PCC with STF applied with linked channels in both cases
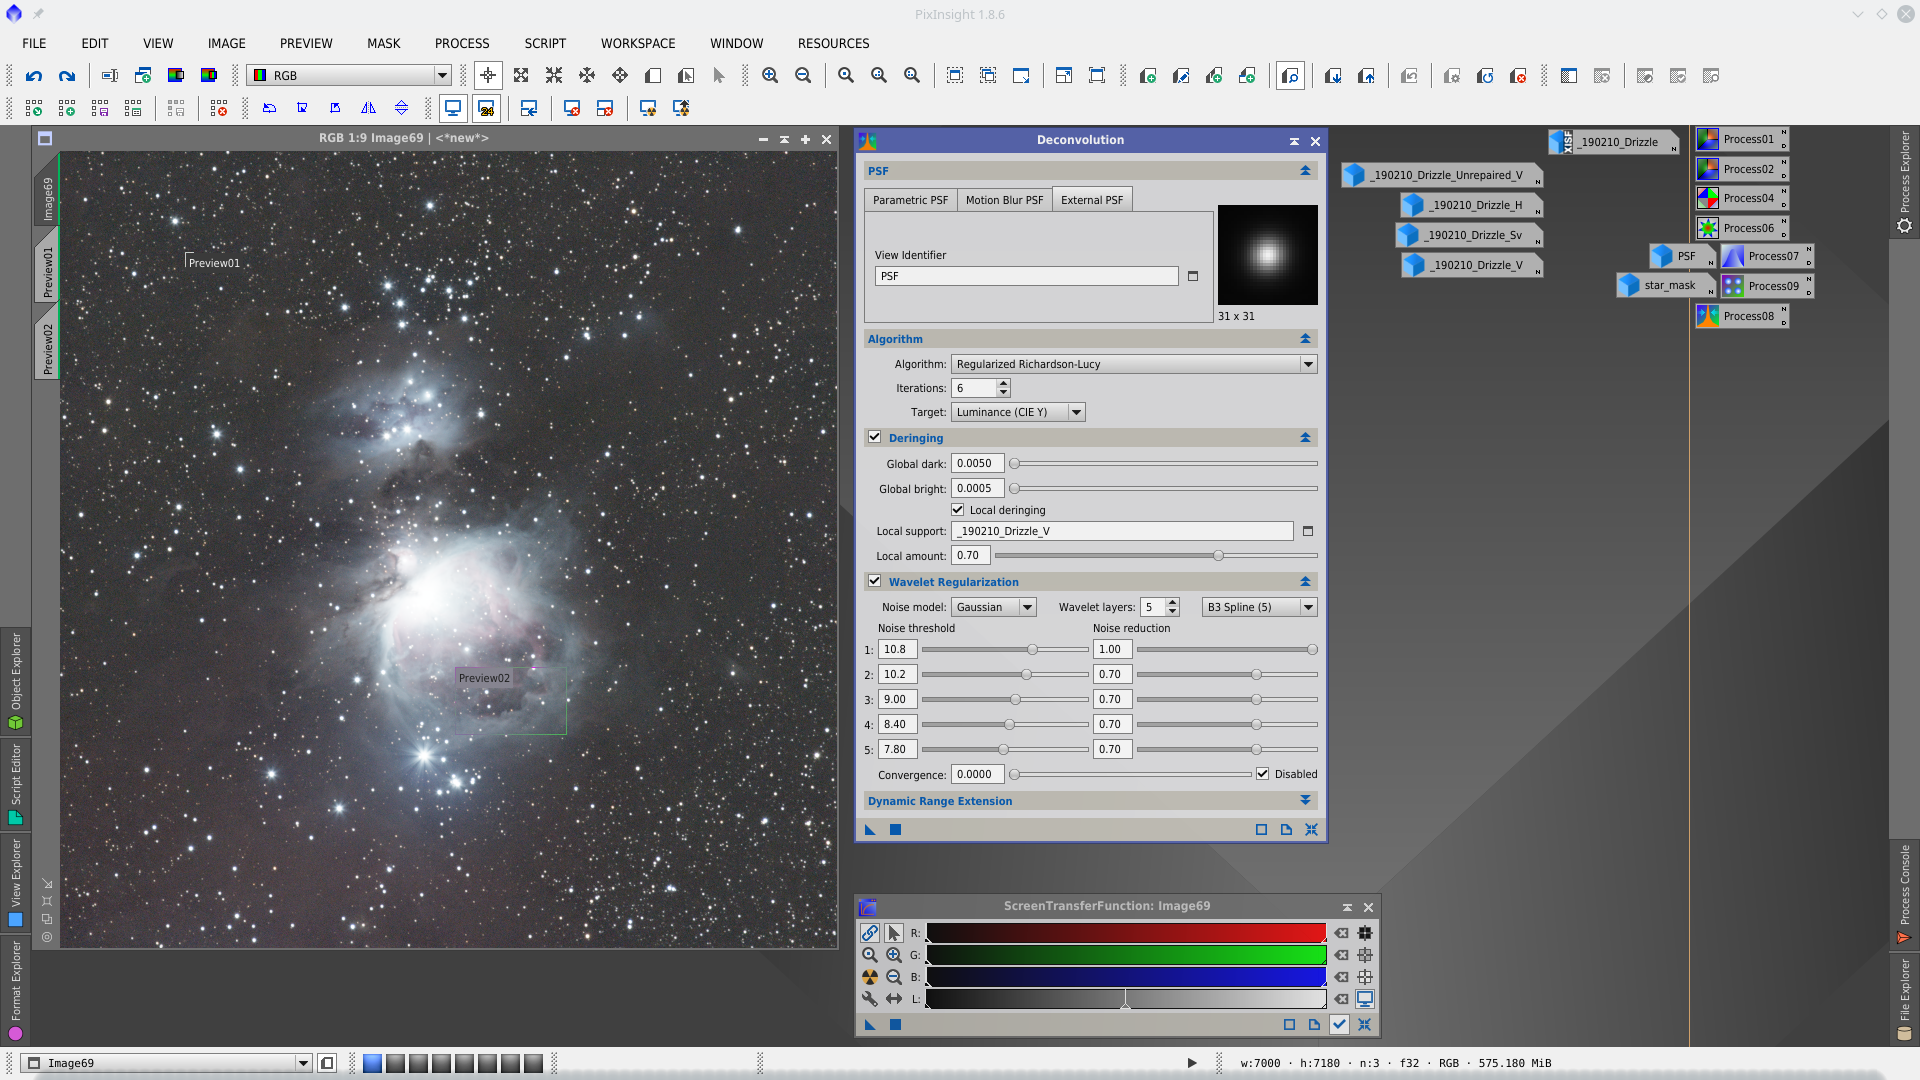
Next step is Deconvolution. With DynamicPSF tool choose reference stars in the center of the image and generate a PSF to be used in Deconvolution tool as external PSF model.
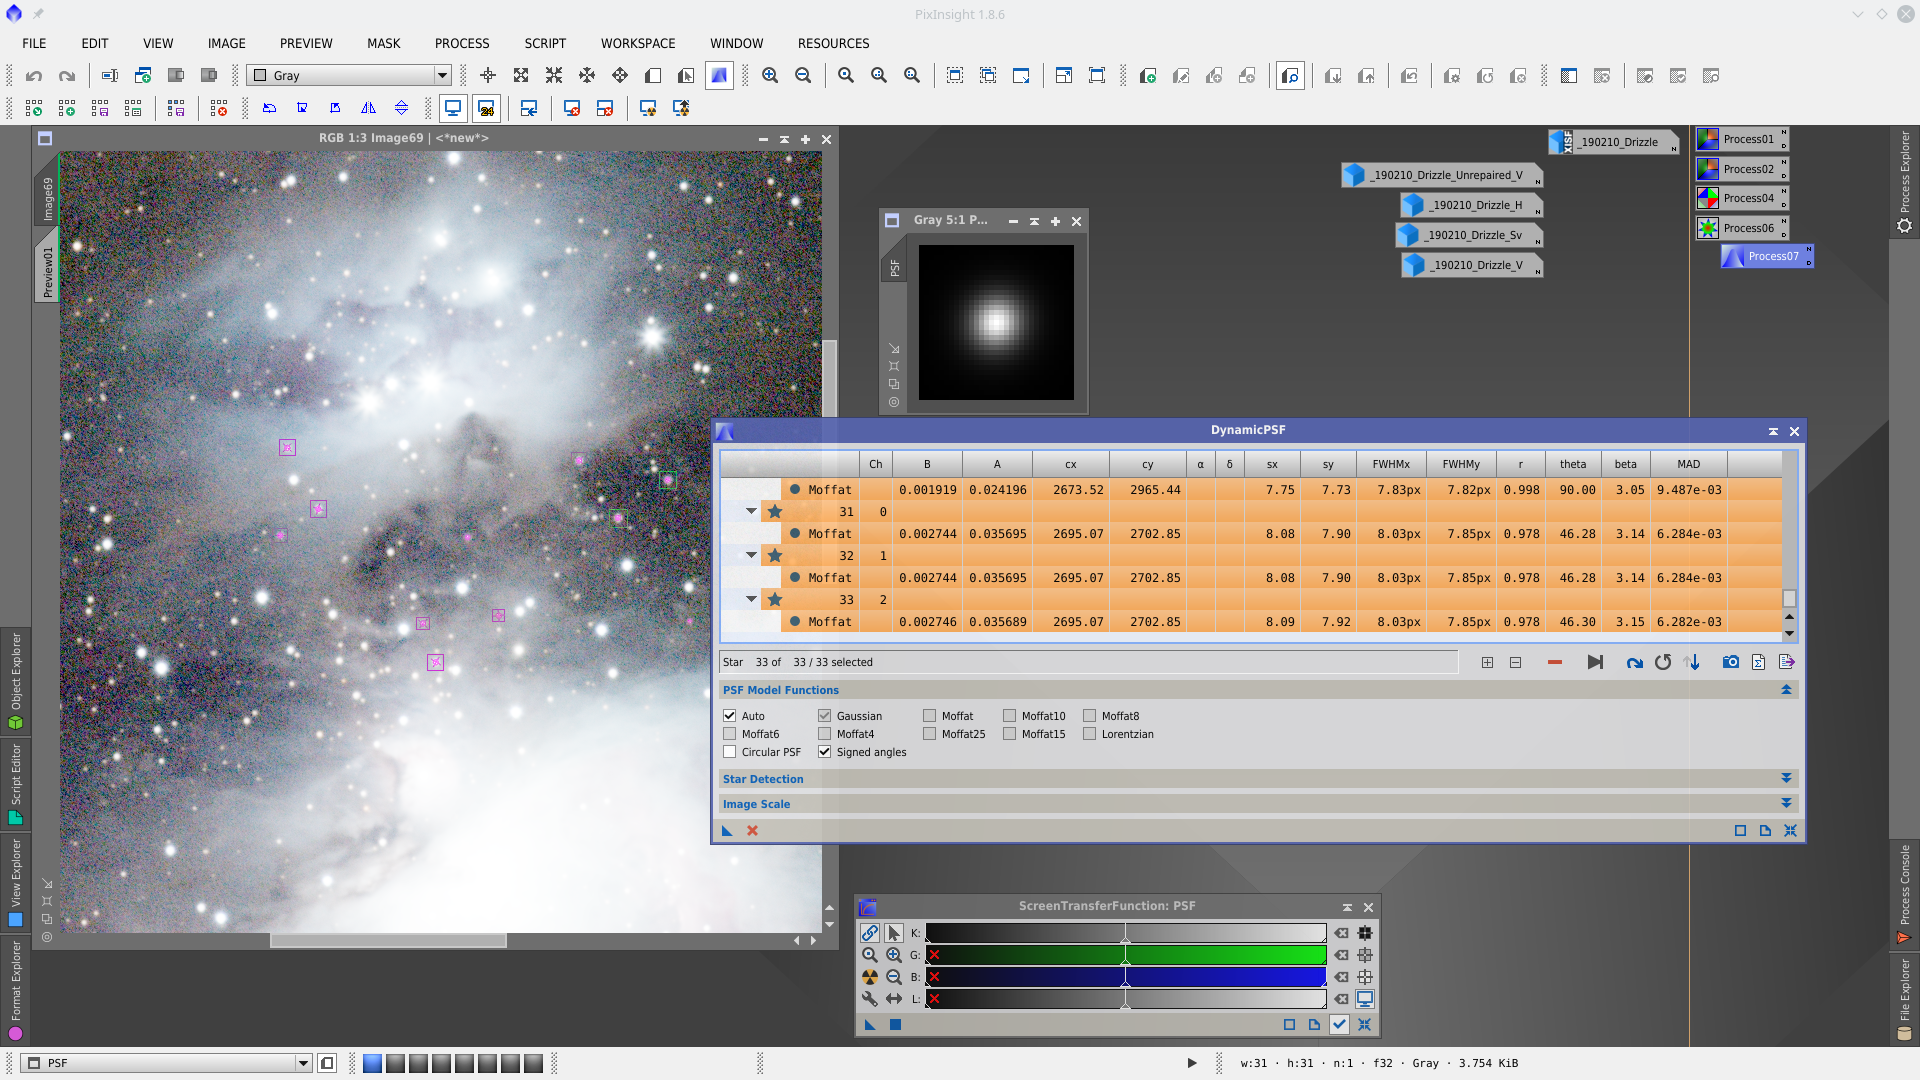
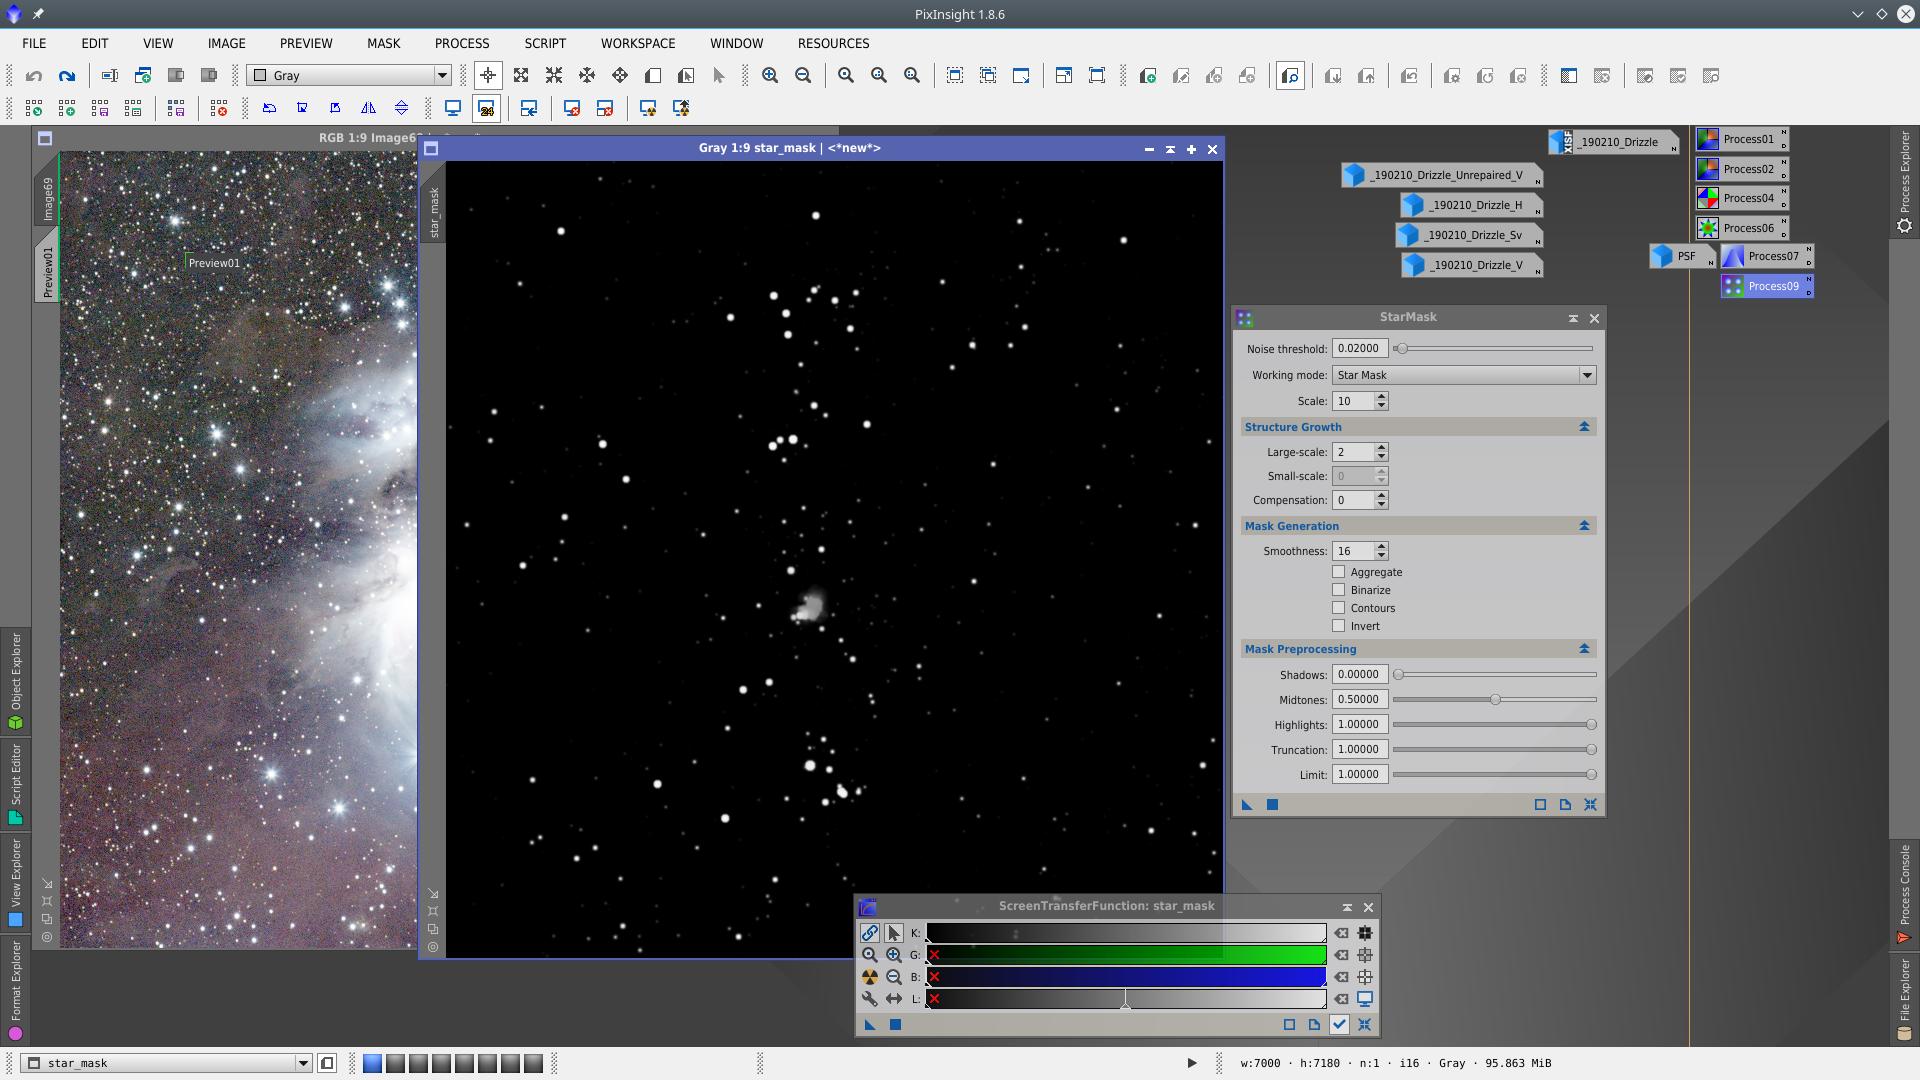
Deconvolution process is applied to medium and small stars while are being protected the brightest stars cores with a starmask.
In StarMask tool set the parameters to obtain a mask that contains only big stars. To see more about masks click here.
Deconvolution:
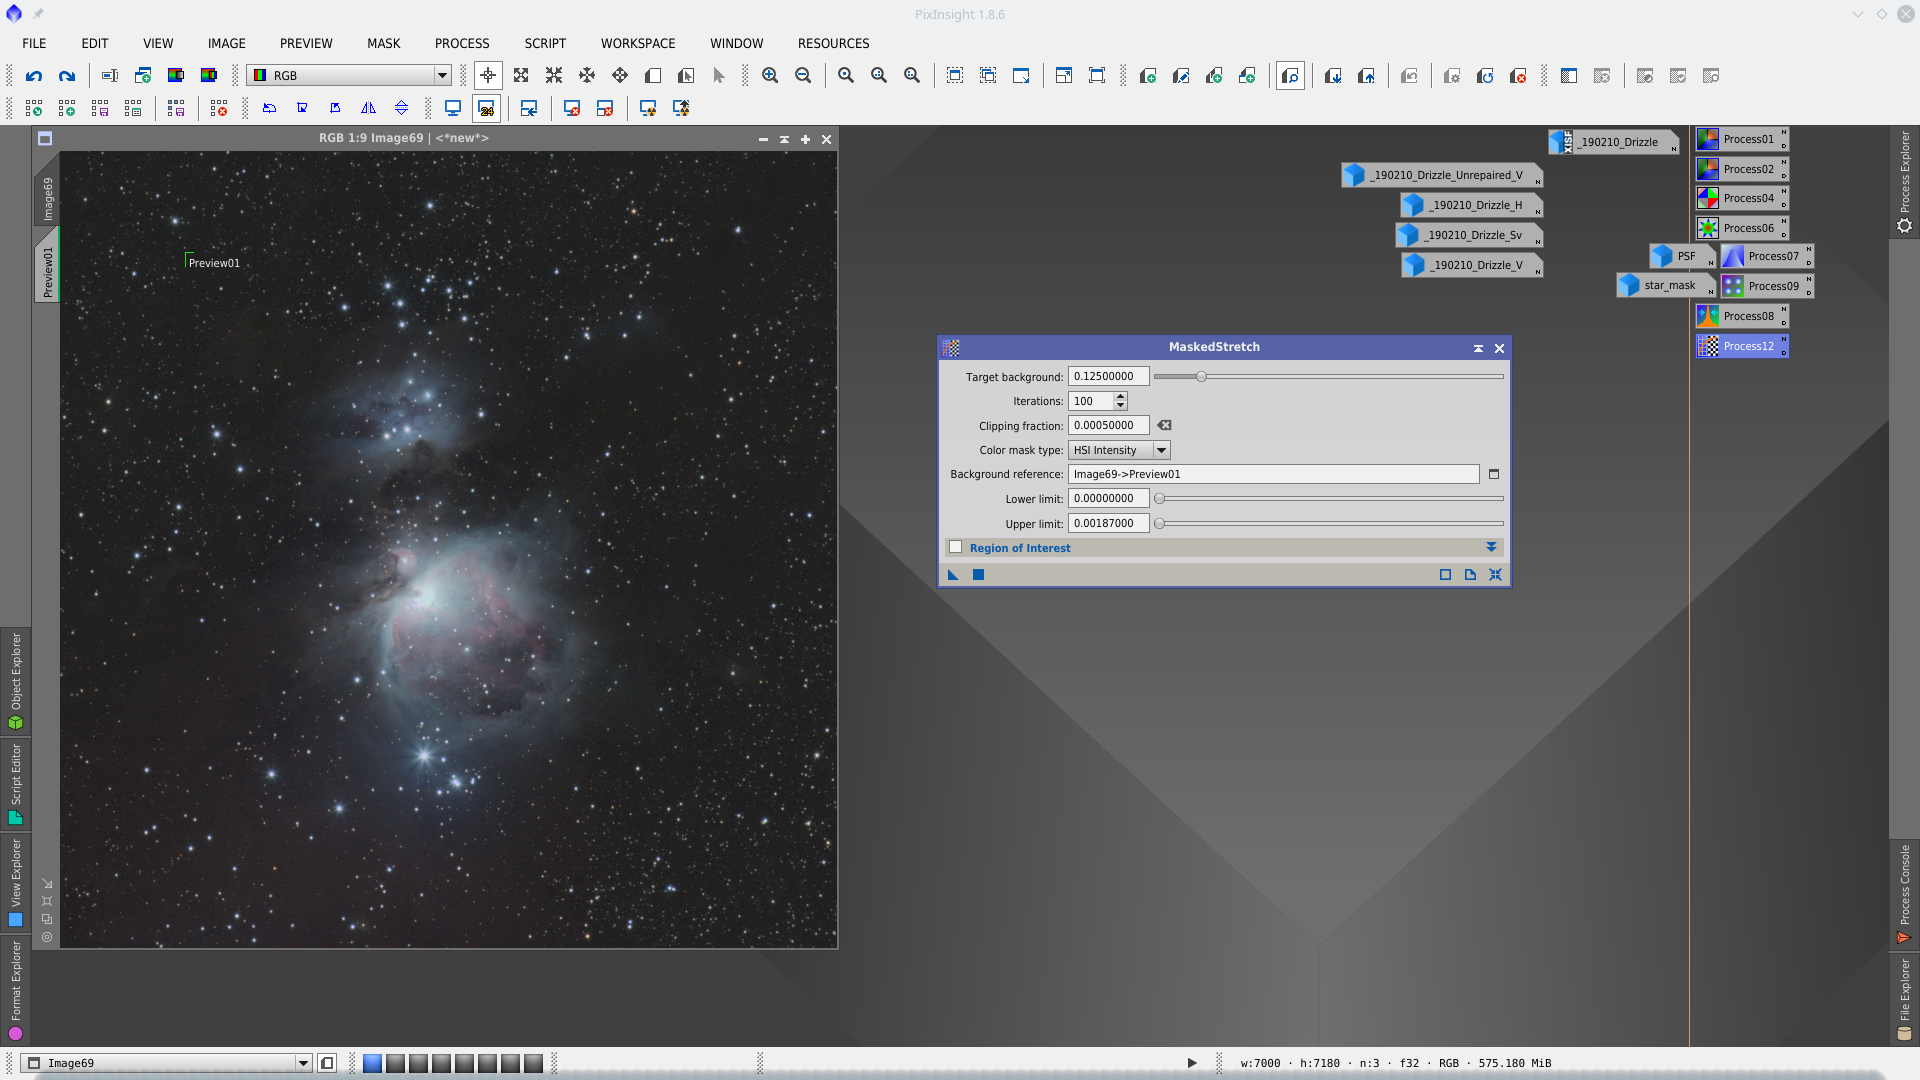
Time to stretch the image. You can try different approaches for this. MaskedStretch brings a good result as increase the background nebulosity that this object has
Using the channel V previously generated with Repared HSV Separation script as base image, generate a mask that will protect Lightness while enhancing the weakest nebulosity. Apply first ExponentialTransformation and then stretch with HistogramTransformation tool
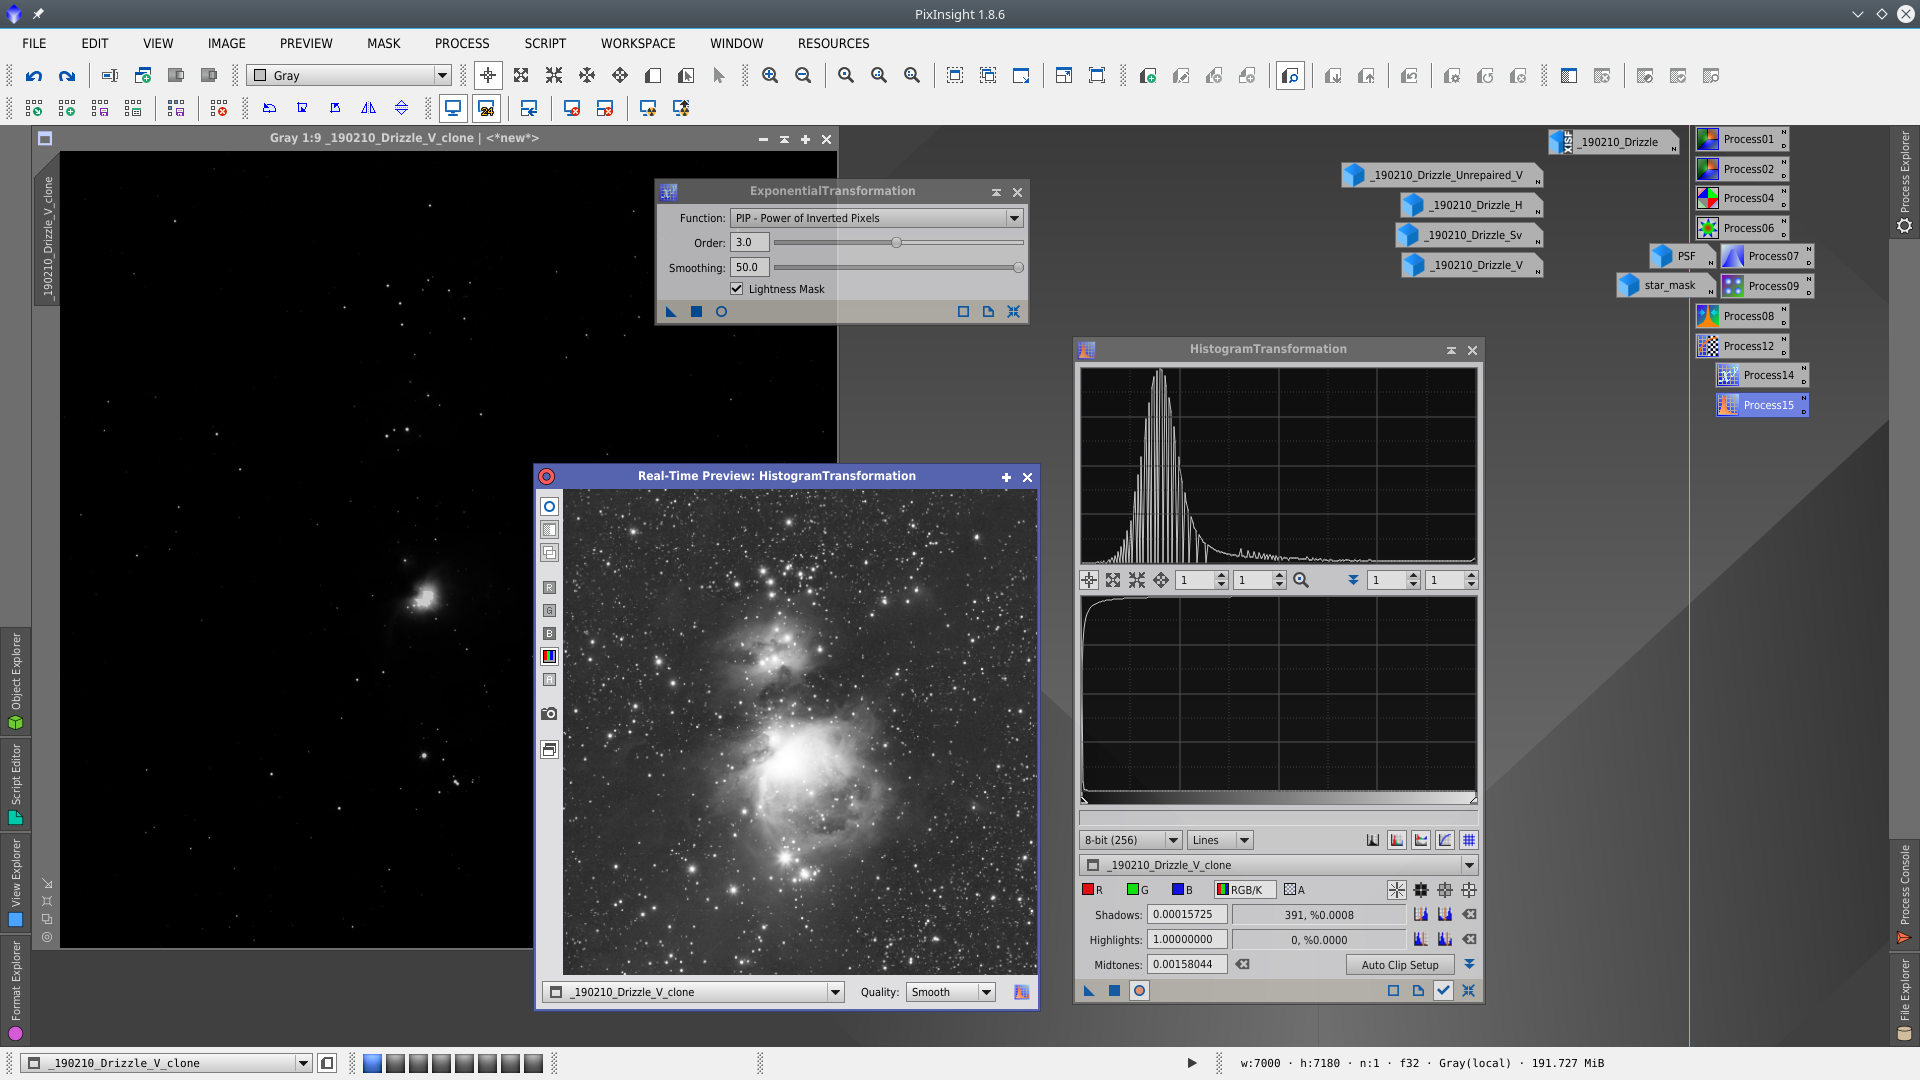
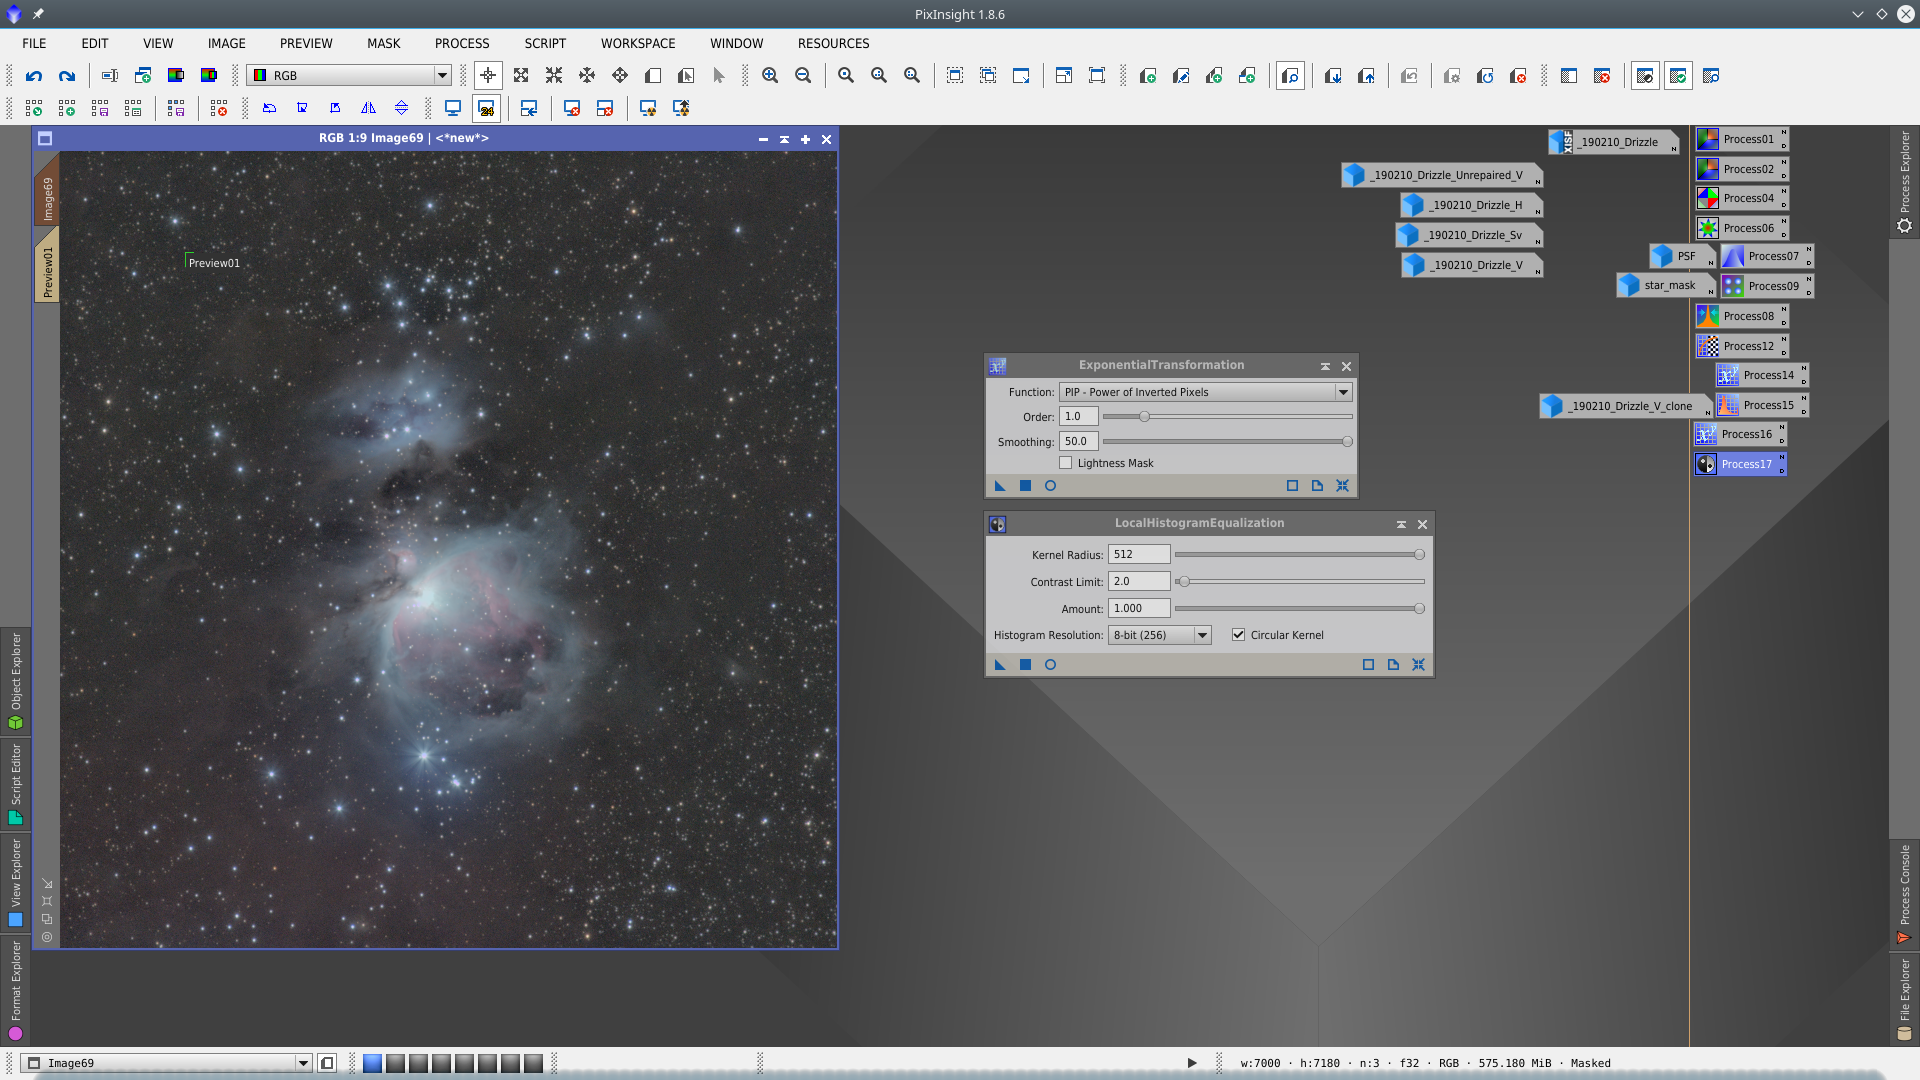
With the mask enabled protecting the nebulae, apply consecutively ExponentialTransformation and LocalHistogramEqualization to the image
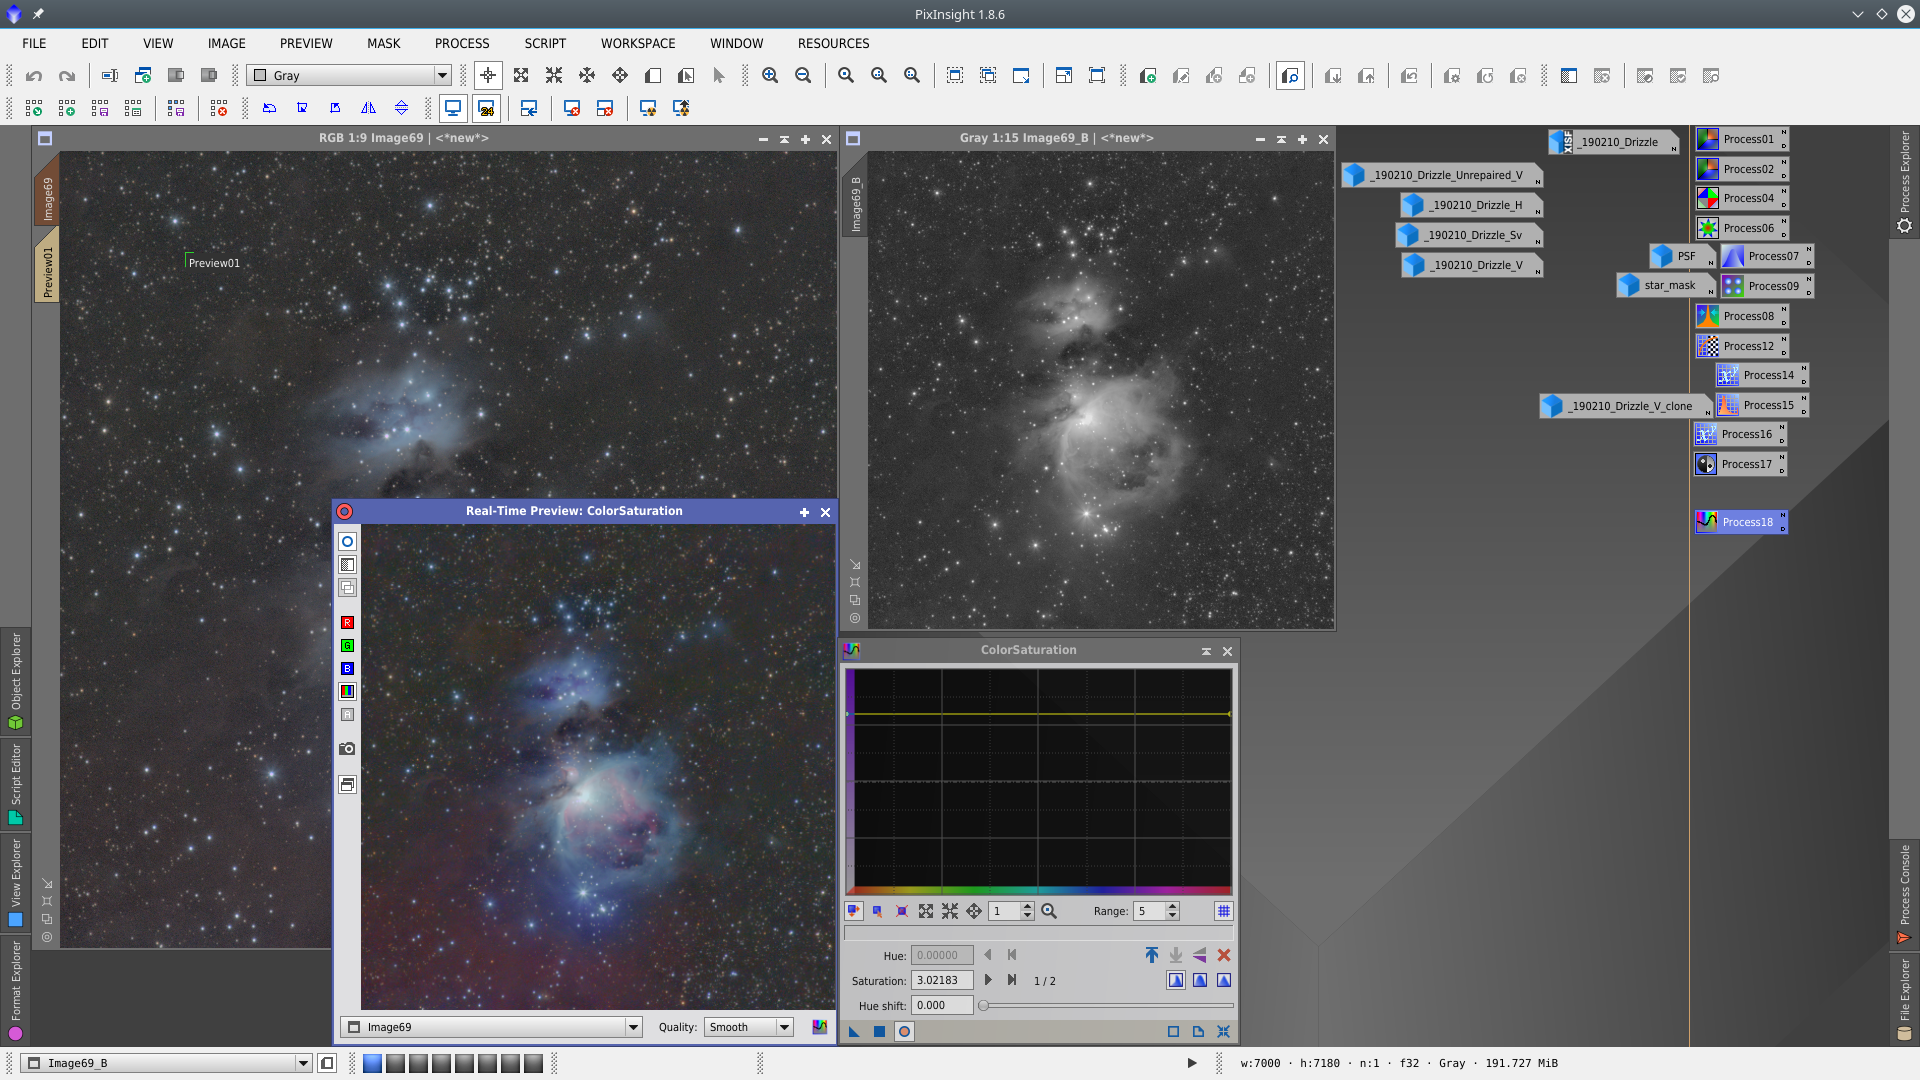
Using the blue channel of the image as mask protecting the background, apply Saturation Tool
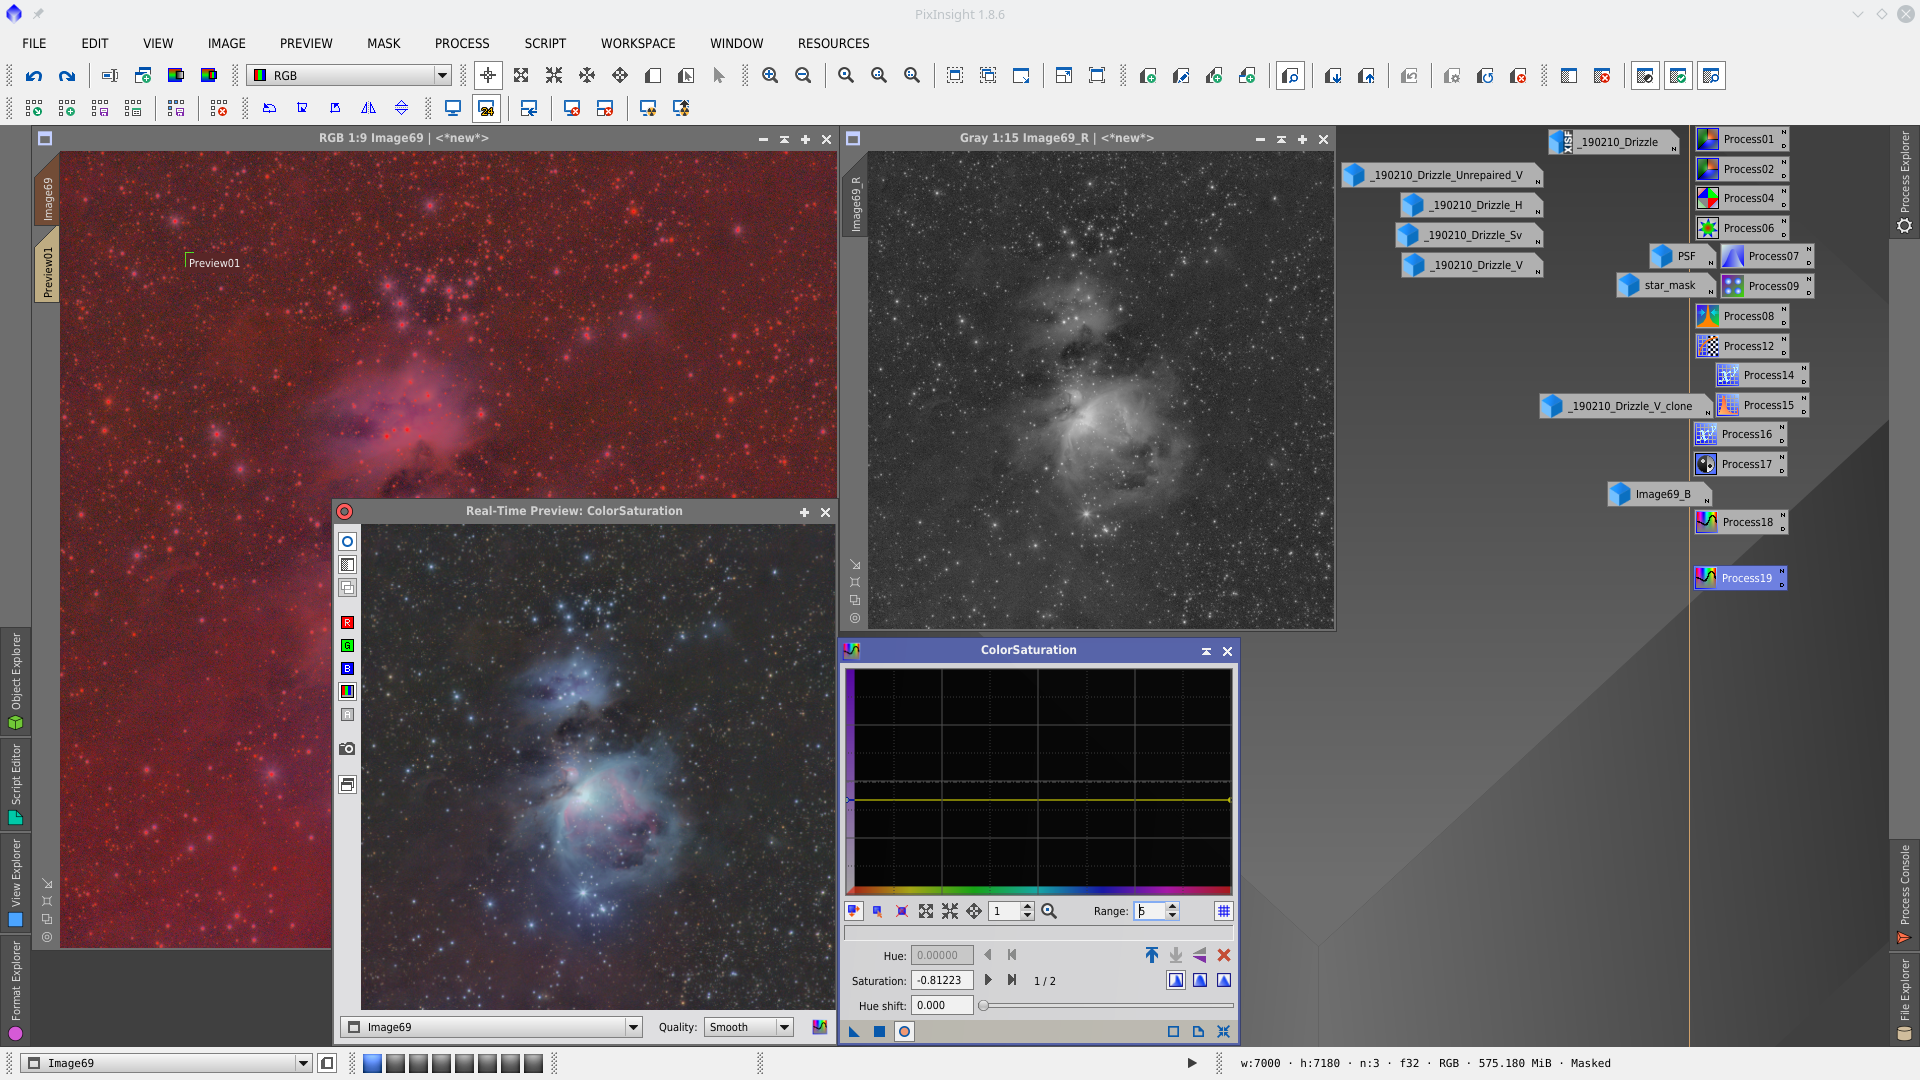
Using the red channel of the image as mask protecting the Lightness , apply Saturation Tool to desaturate the background
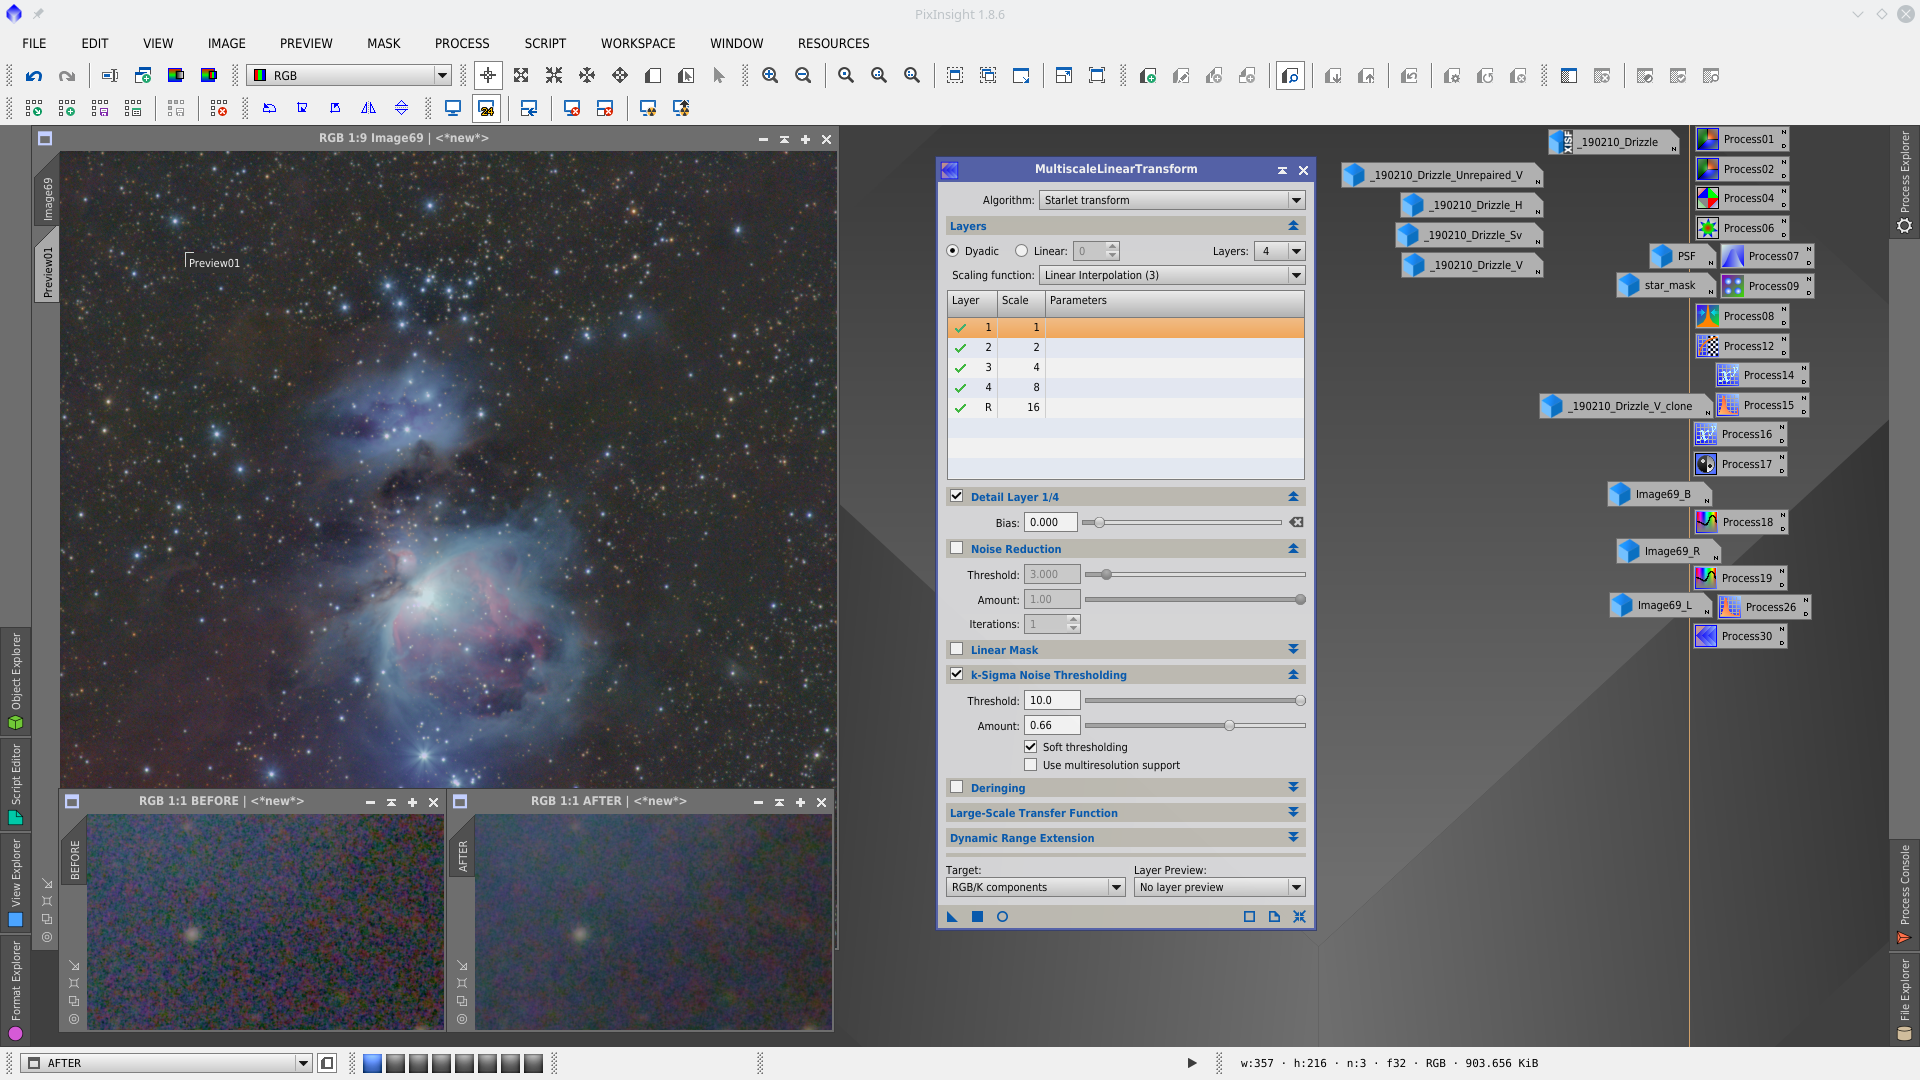
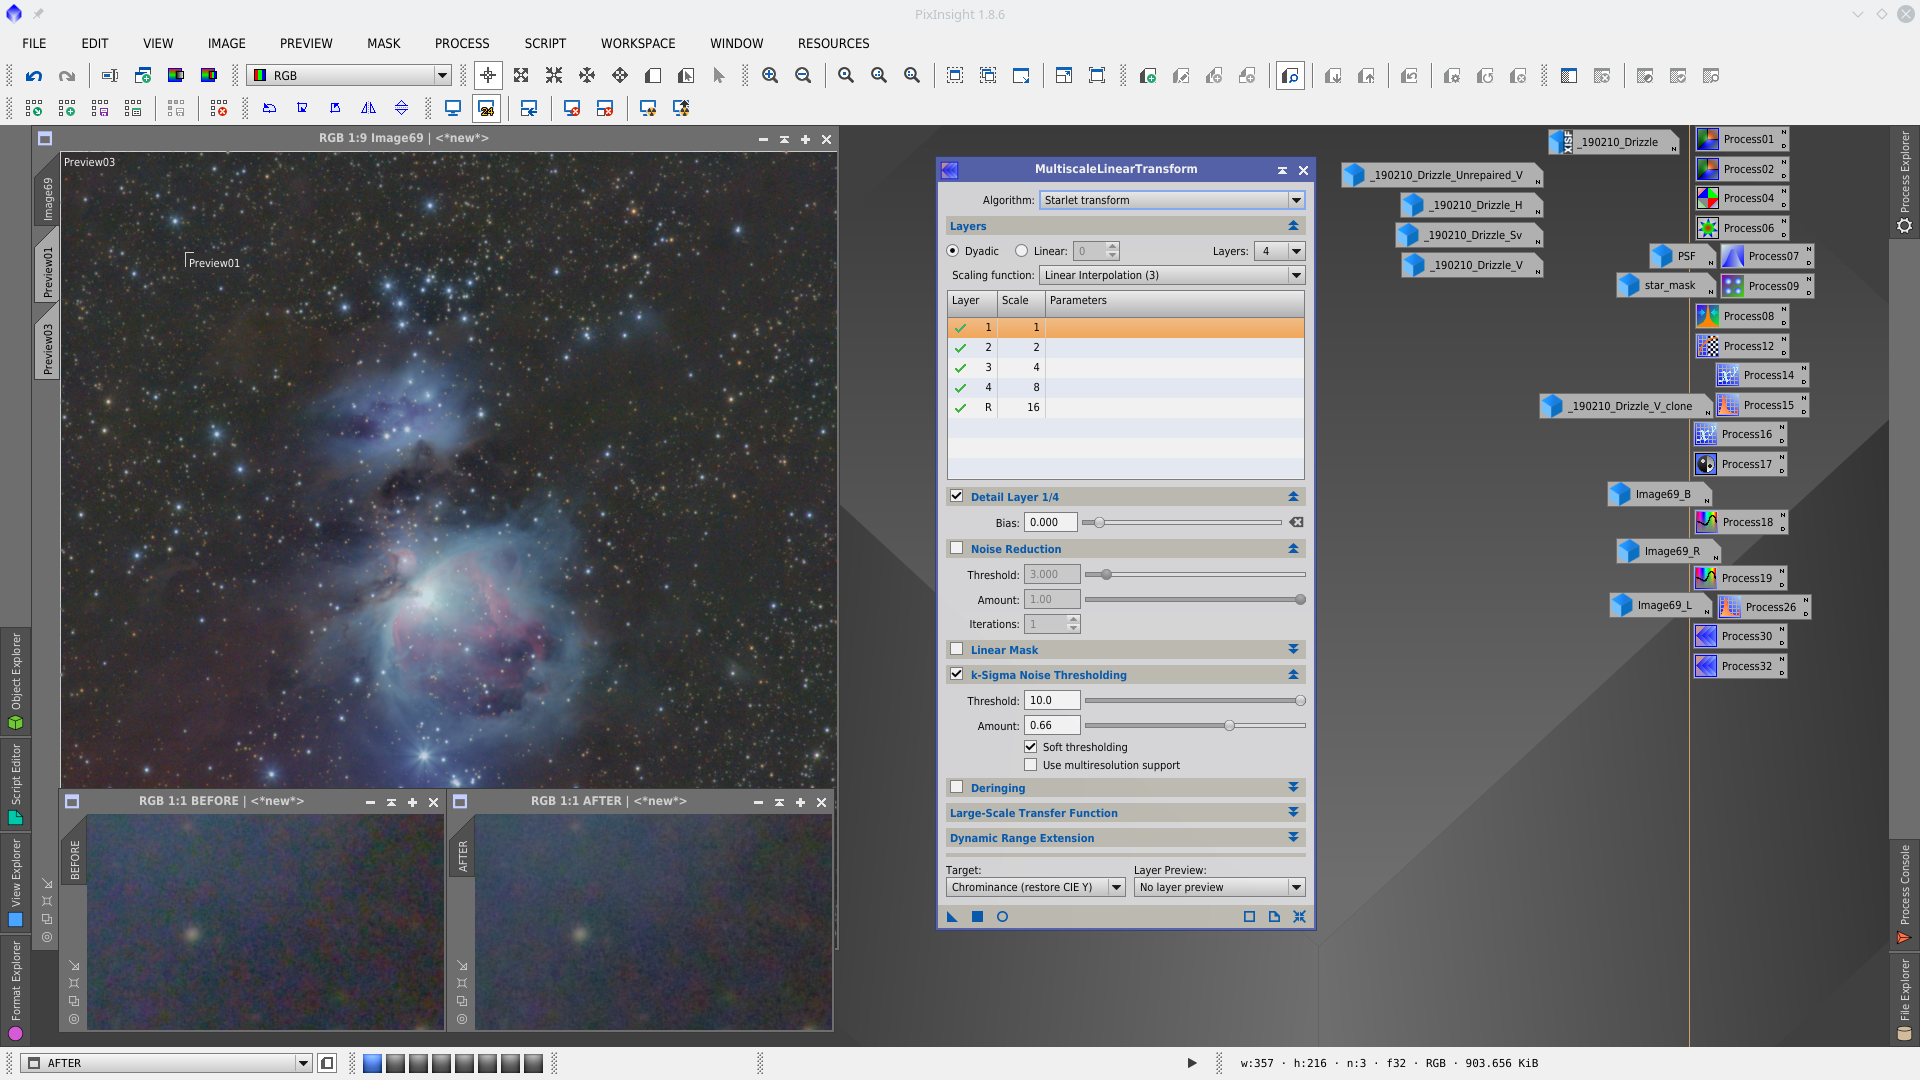
Noise reduction with MultiscaleLinearTransformation, first to RGB with mask and second to Chrominance without mask.
To make the mask extract the Lightness and clip the shadows
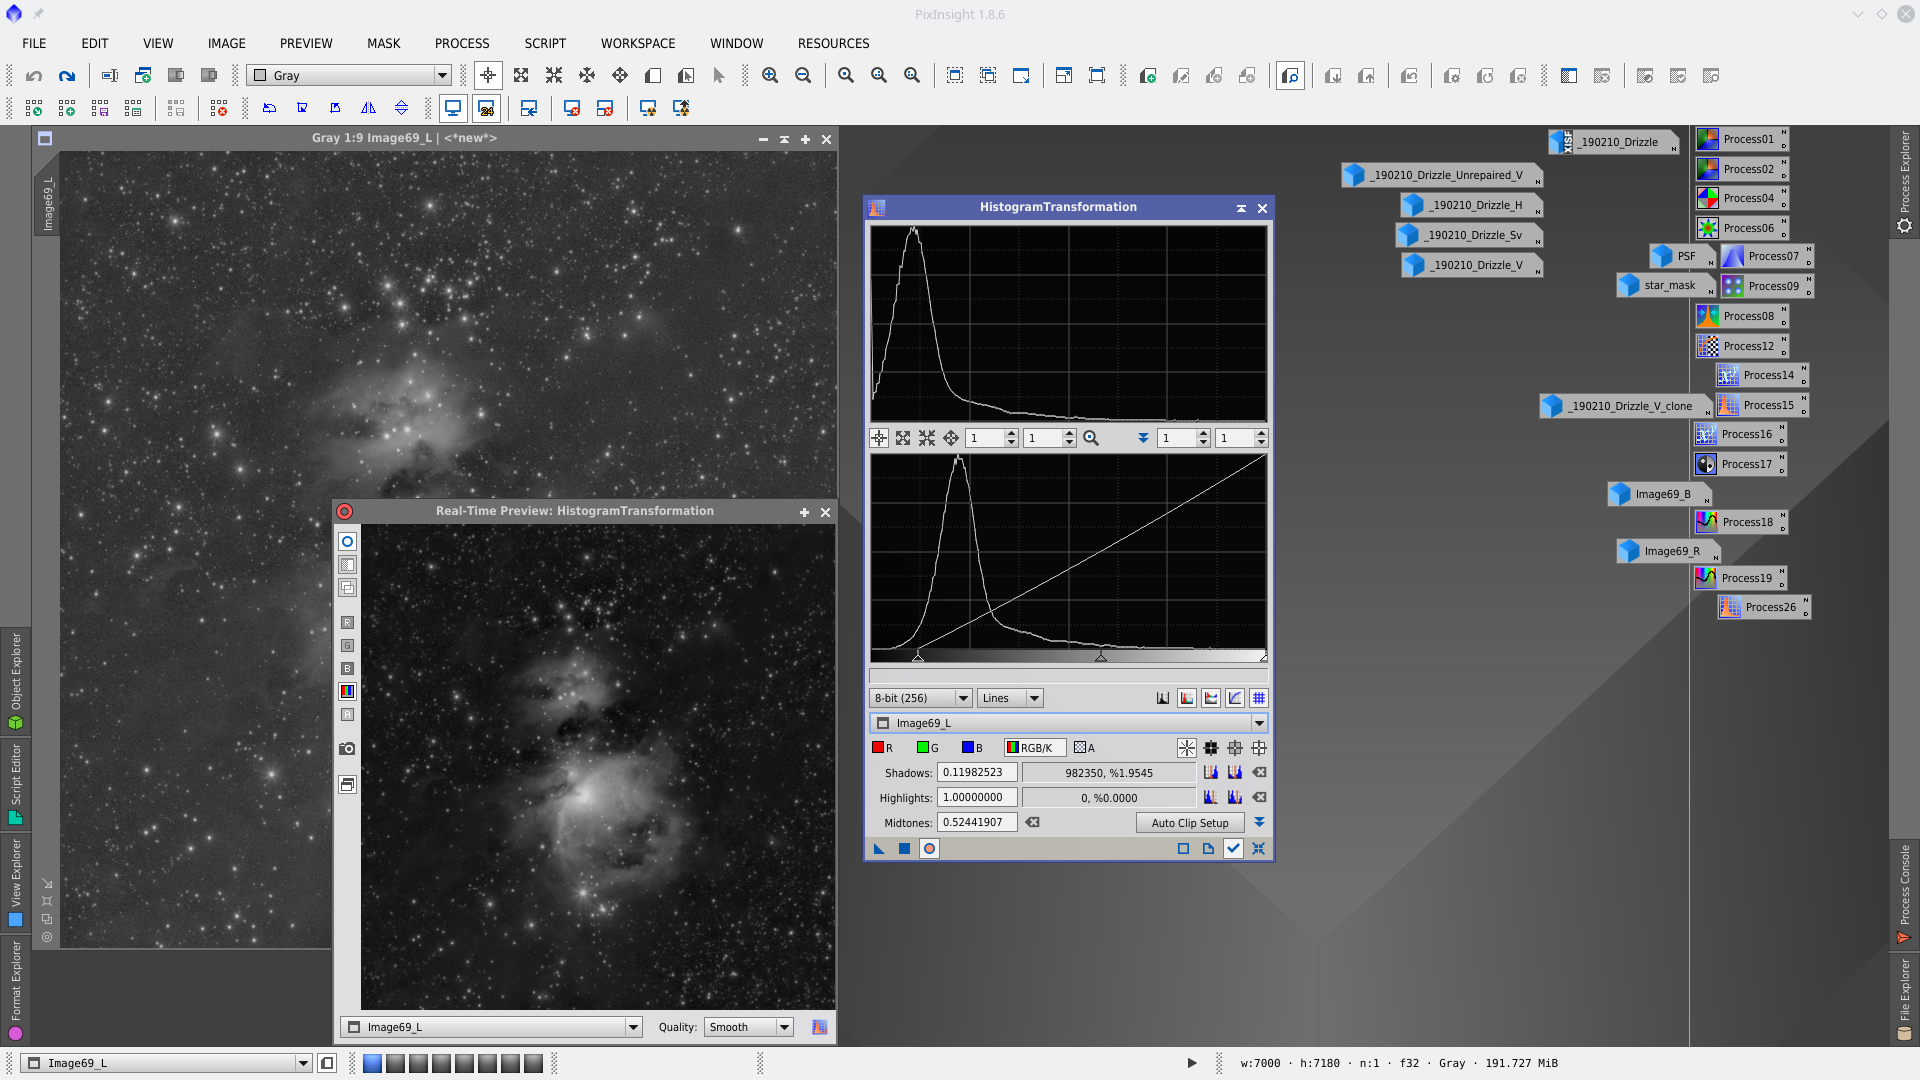
Activate k-Sigma Noise Thresholding and set the adequate parameters to apply noise reduction to RGB/K components protecting with Lightness mask stars and bright nebulosity
Without mask apply MultiscaleLinearTransform to reduce noise in Chrominance
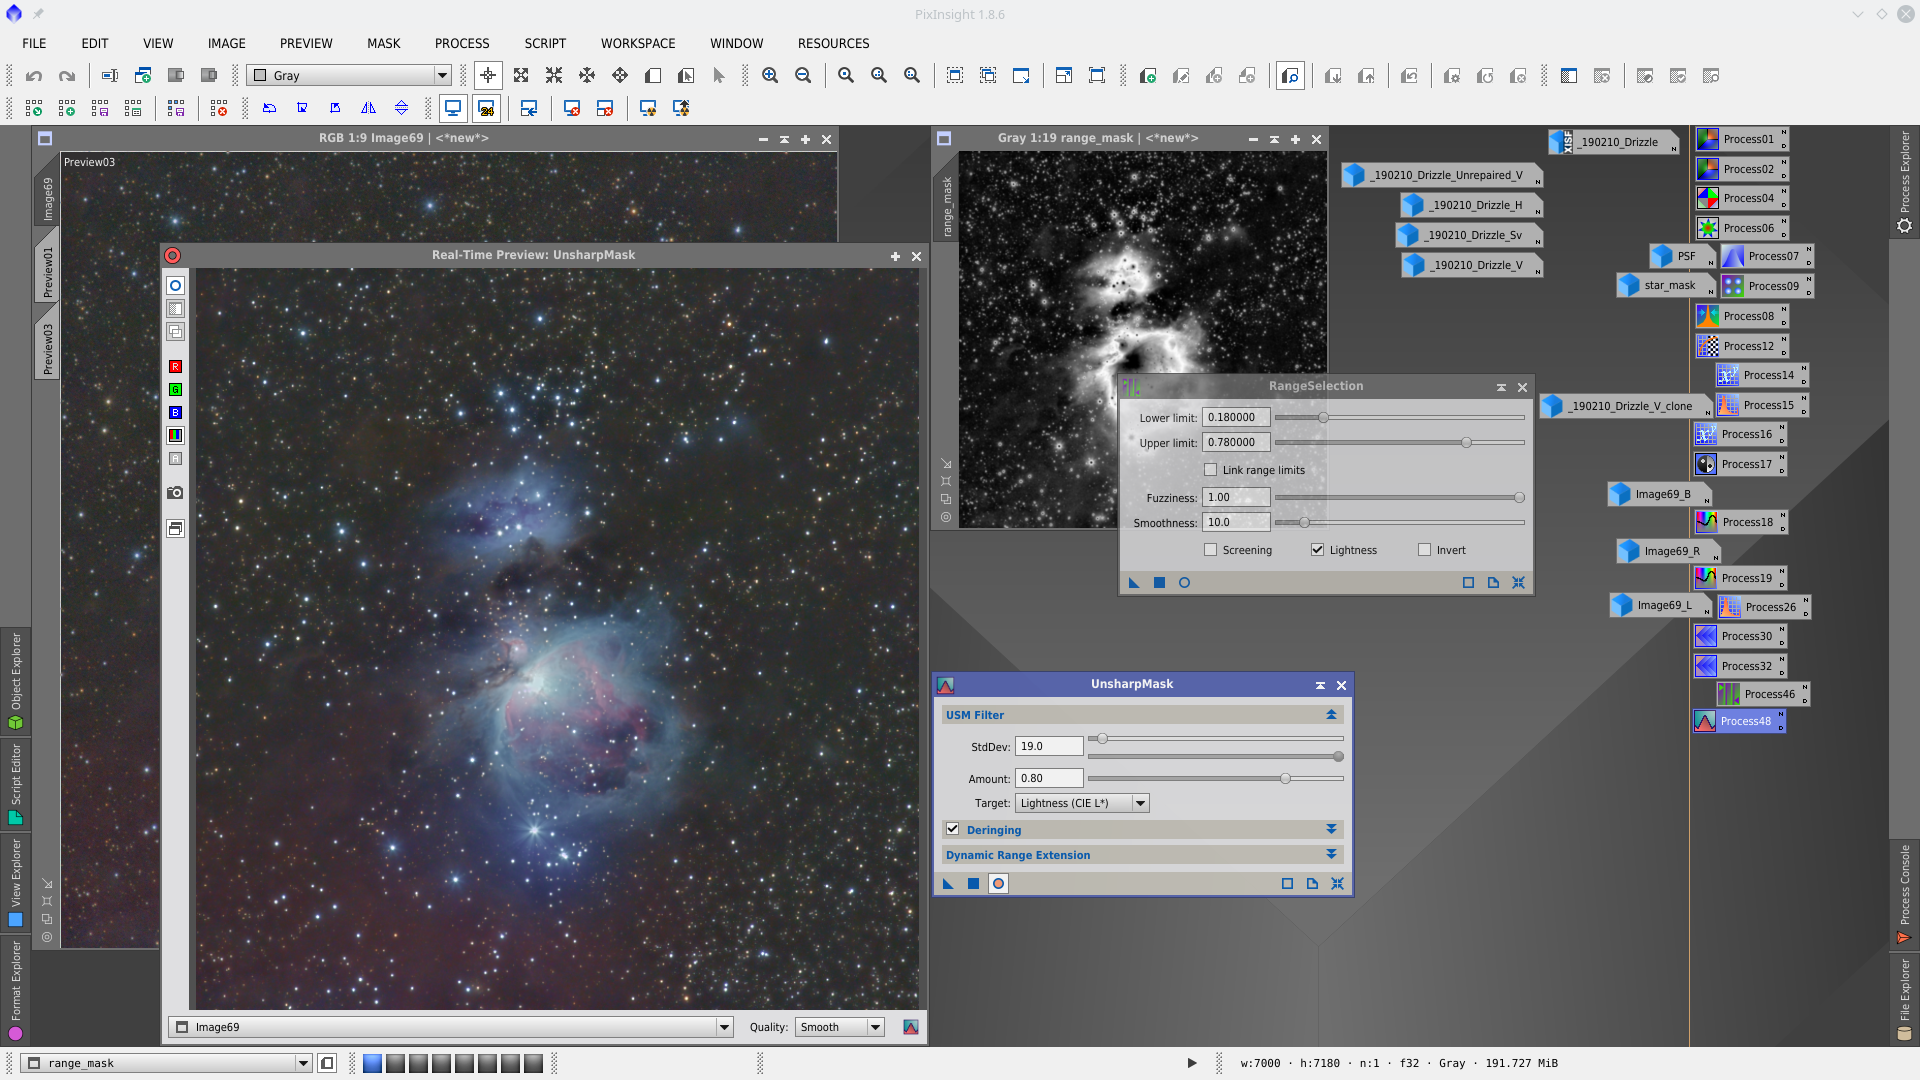
More details with UnSharpMask and ColorSaturation. For this, first make a rangemask with RangeSelection tool that protect background and star cores at the same time.
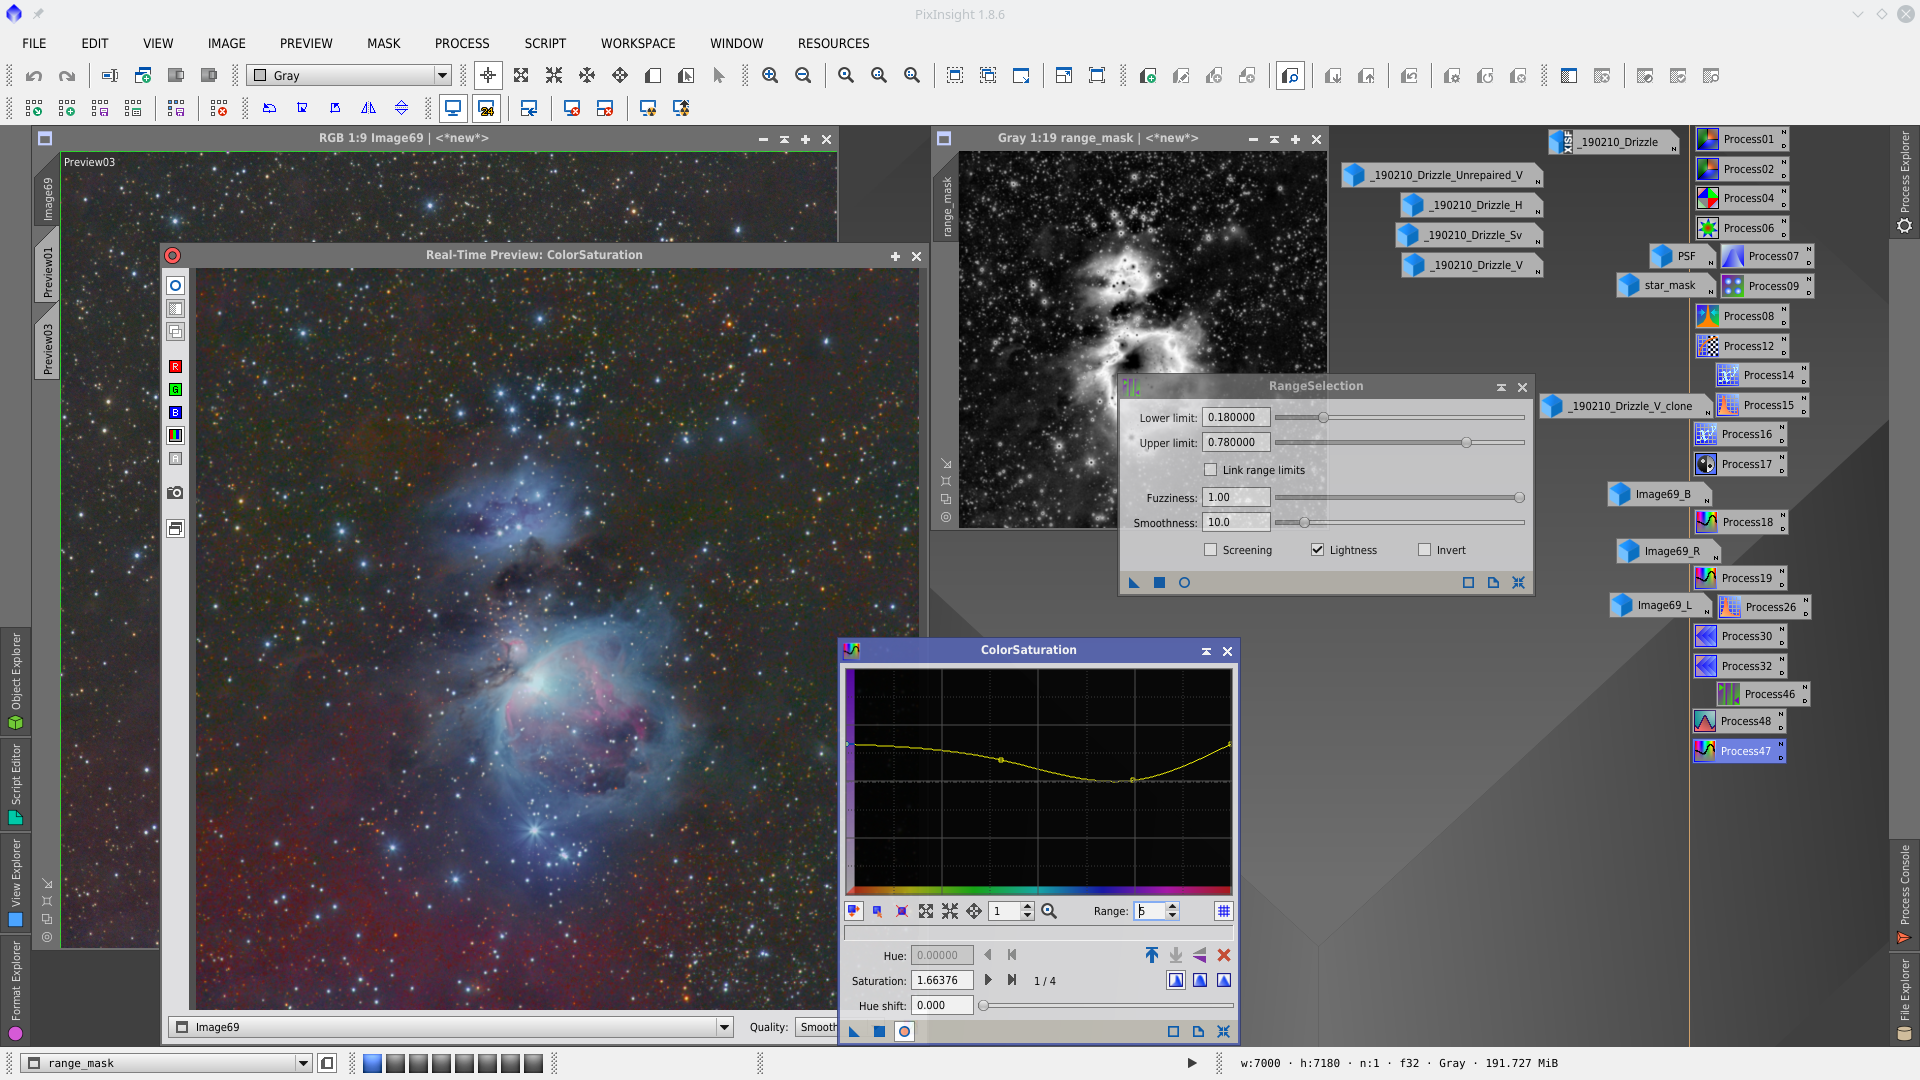
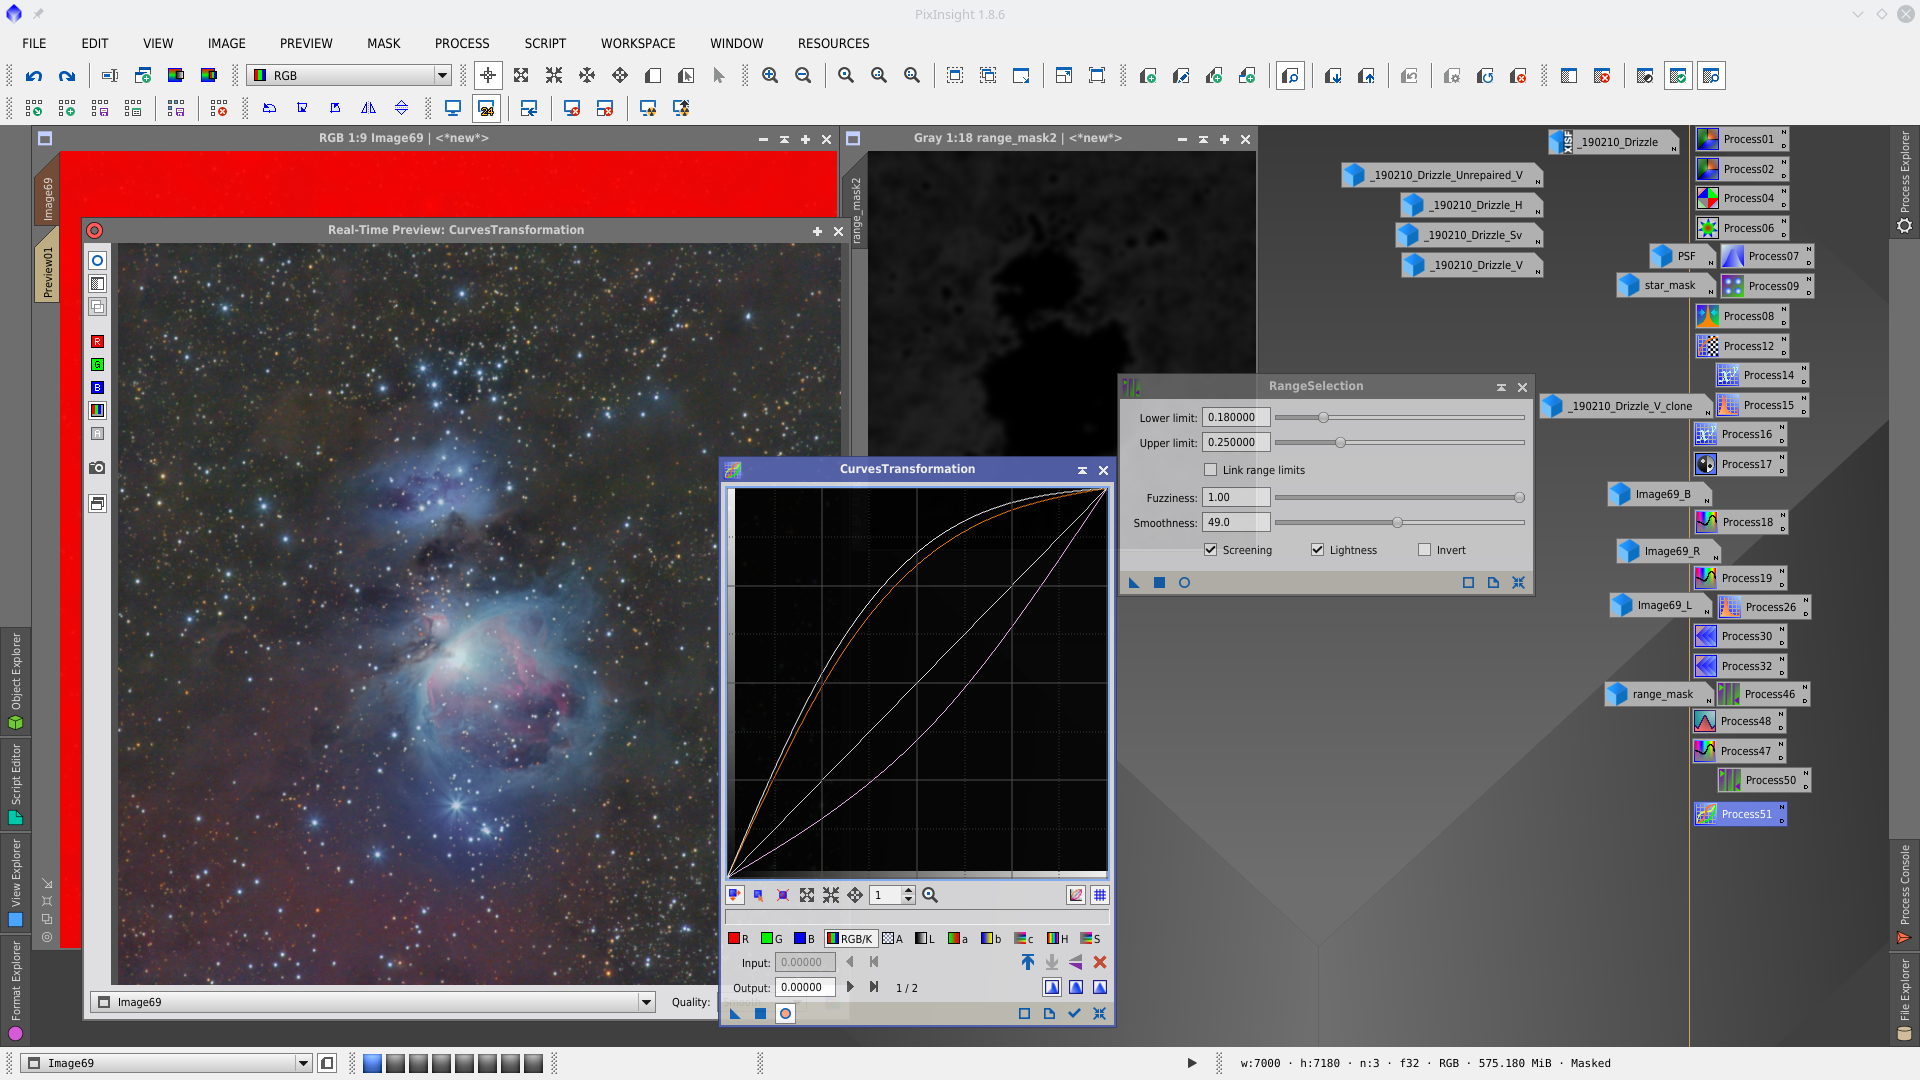
With Curves increase color in the weakest nebulosity using rangemask2 to protect the brightest parts of the image
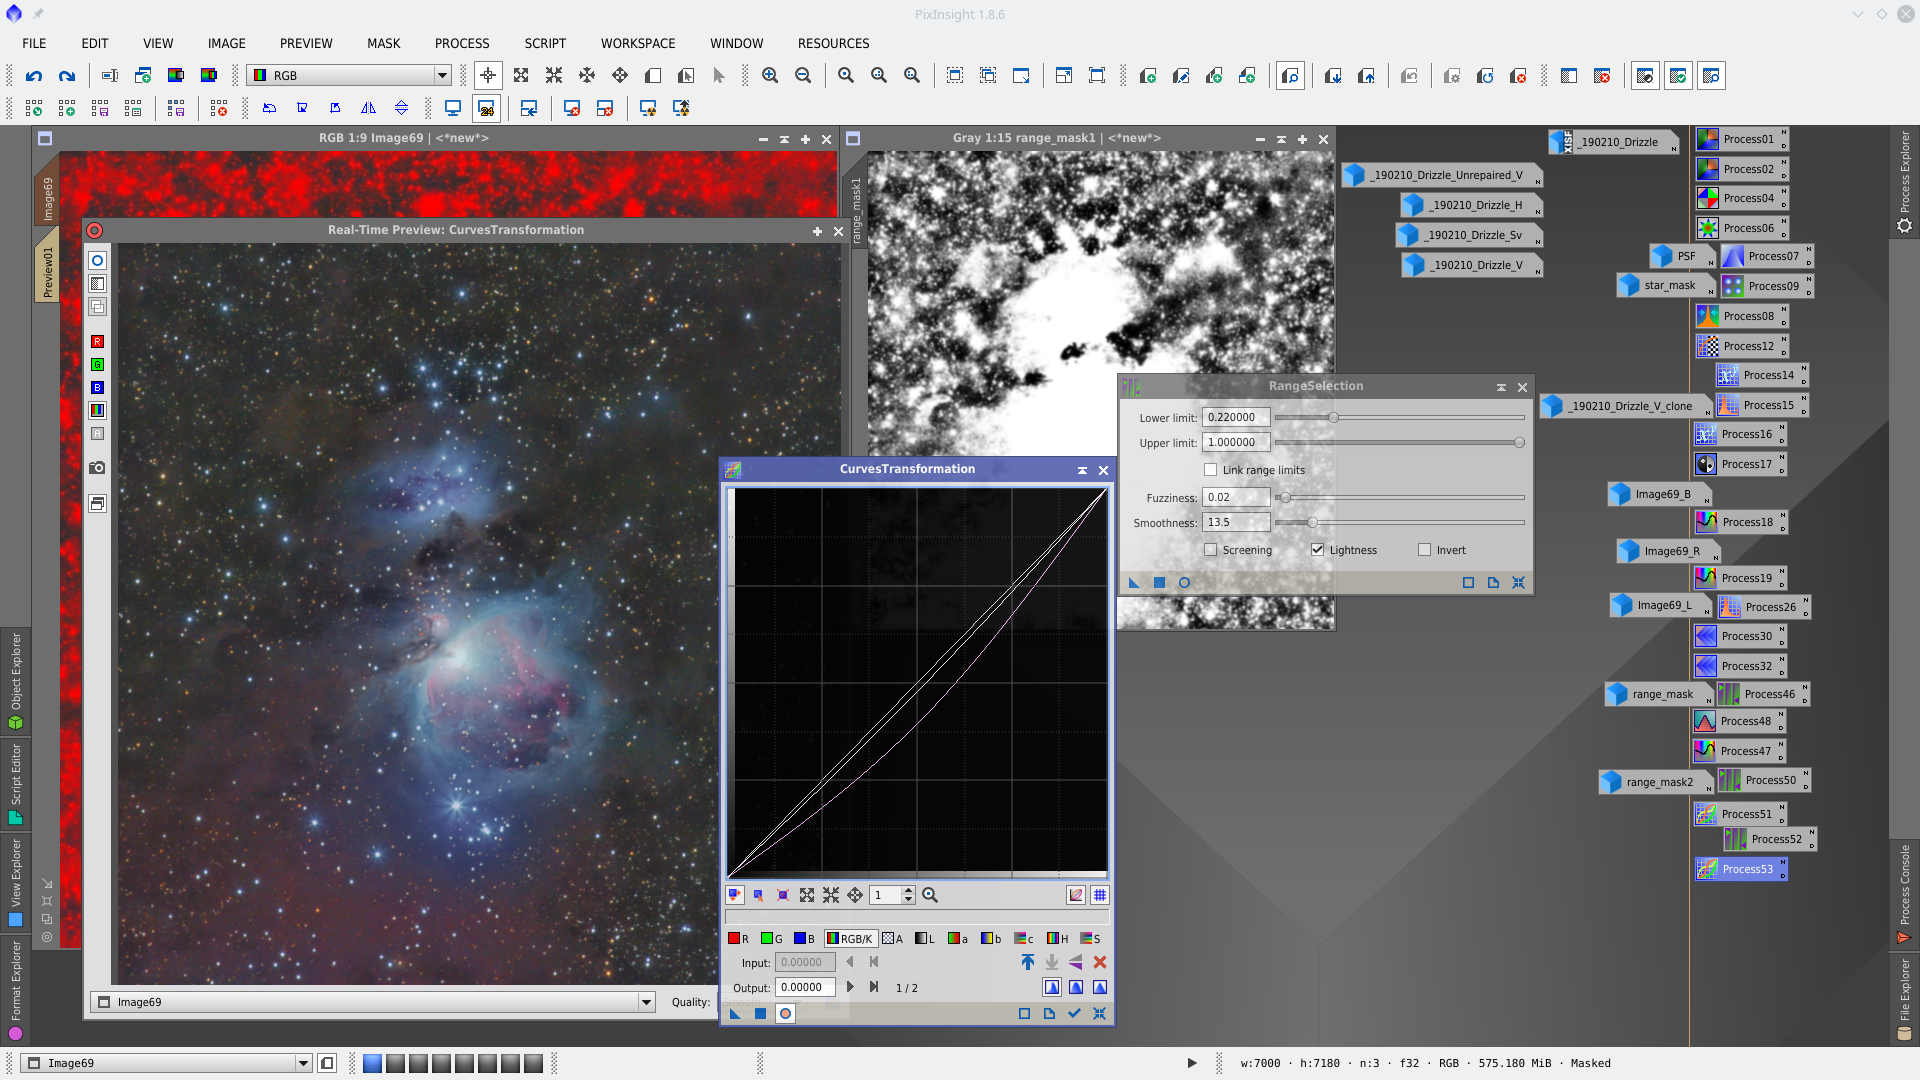
With Curves decrease saturation in the background using rangemask1 to protect the brightest parts of the image
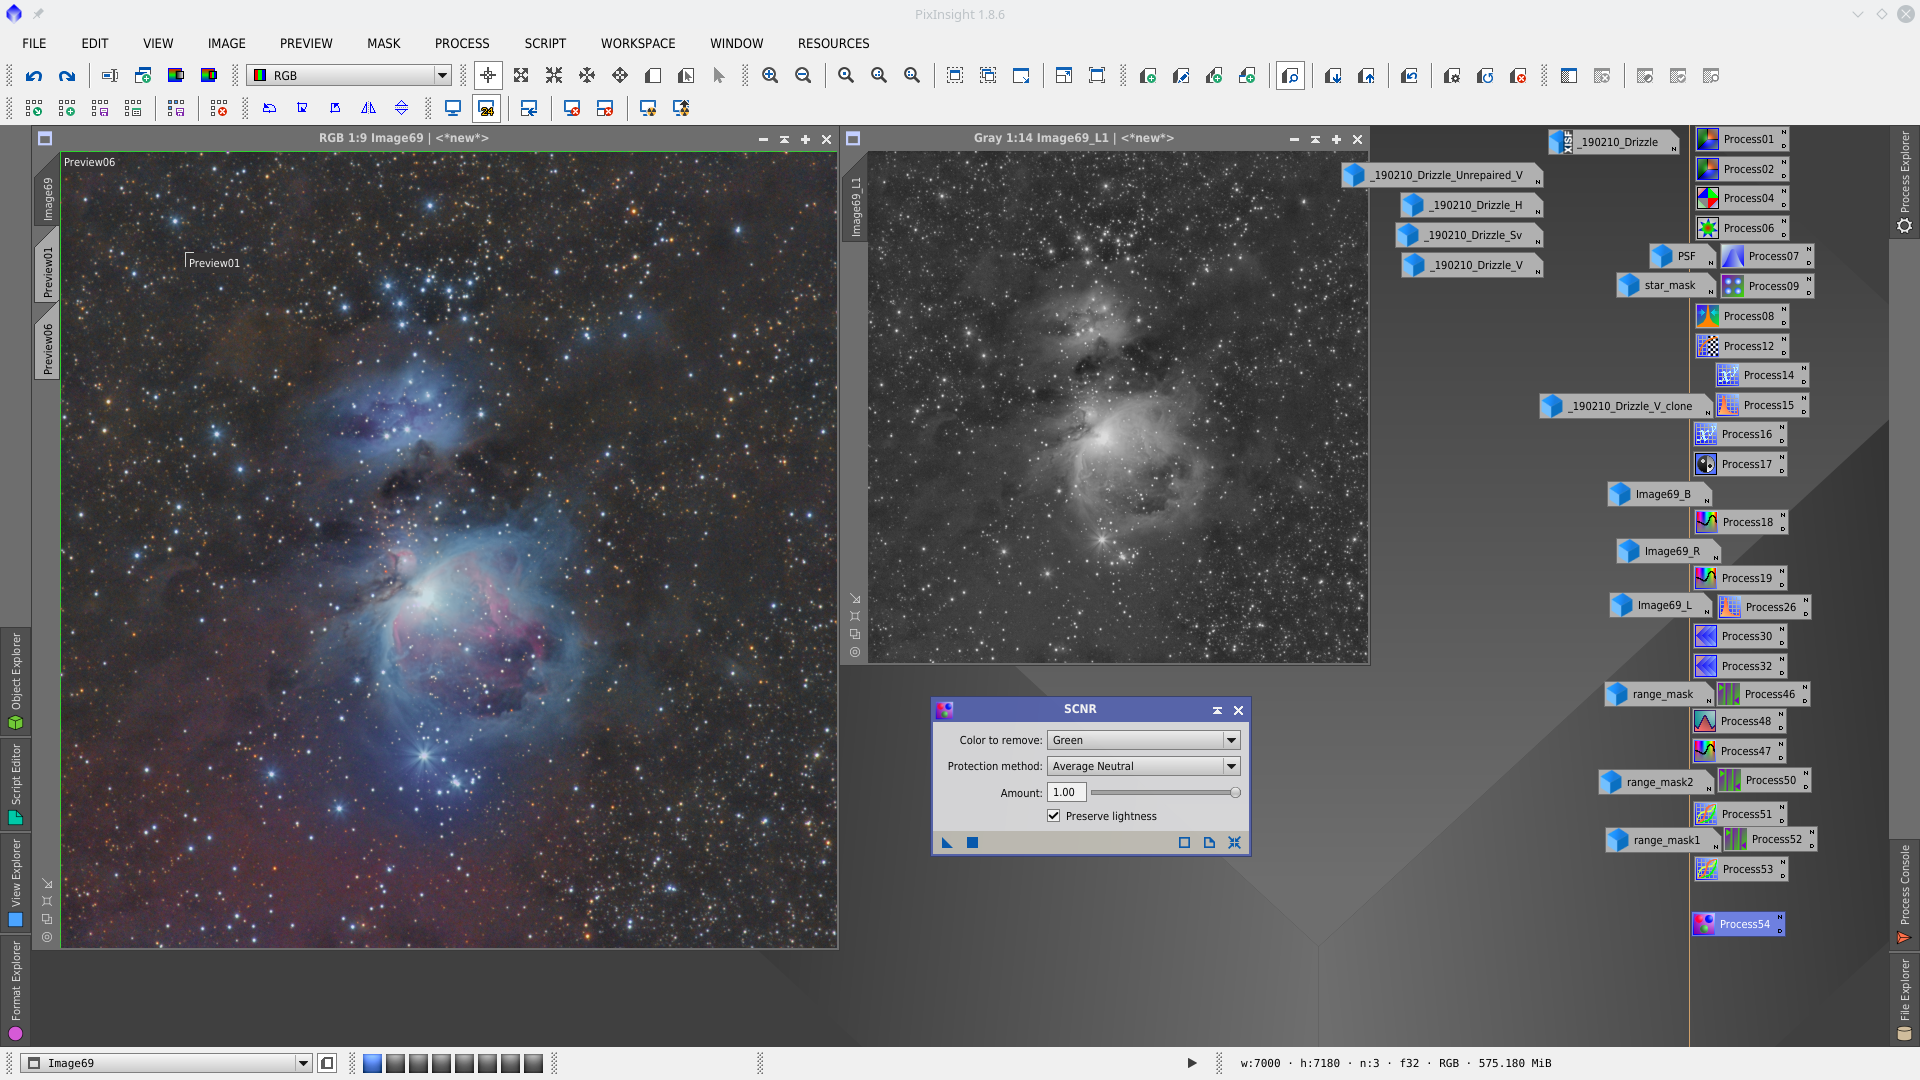
Remove greenish with SCNR protecting with Lightness mask
Clipping of shadows

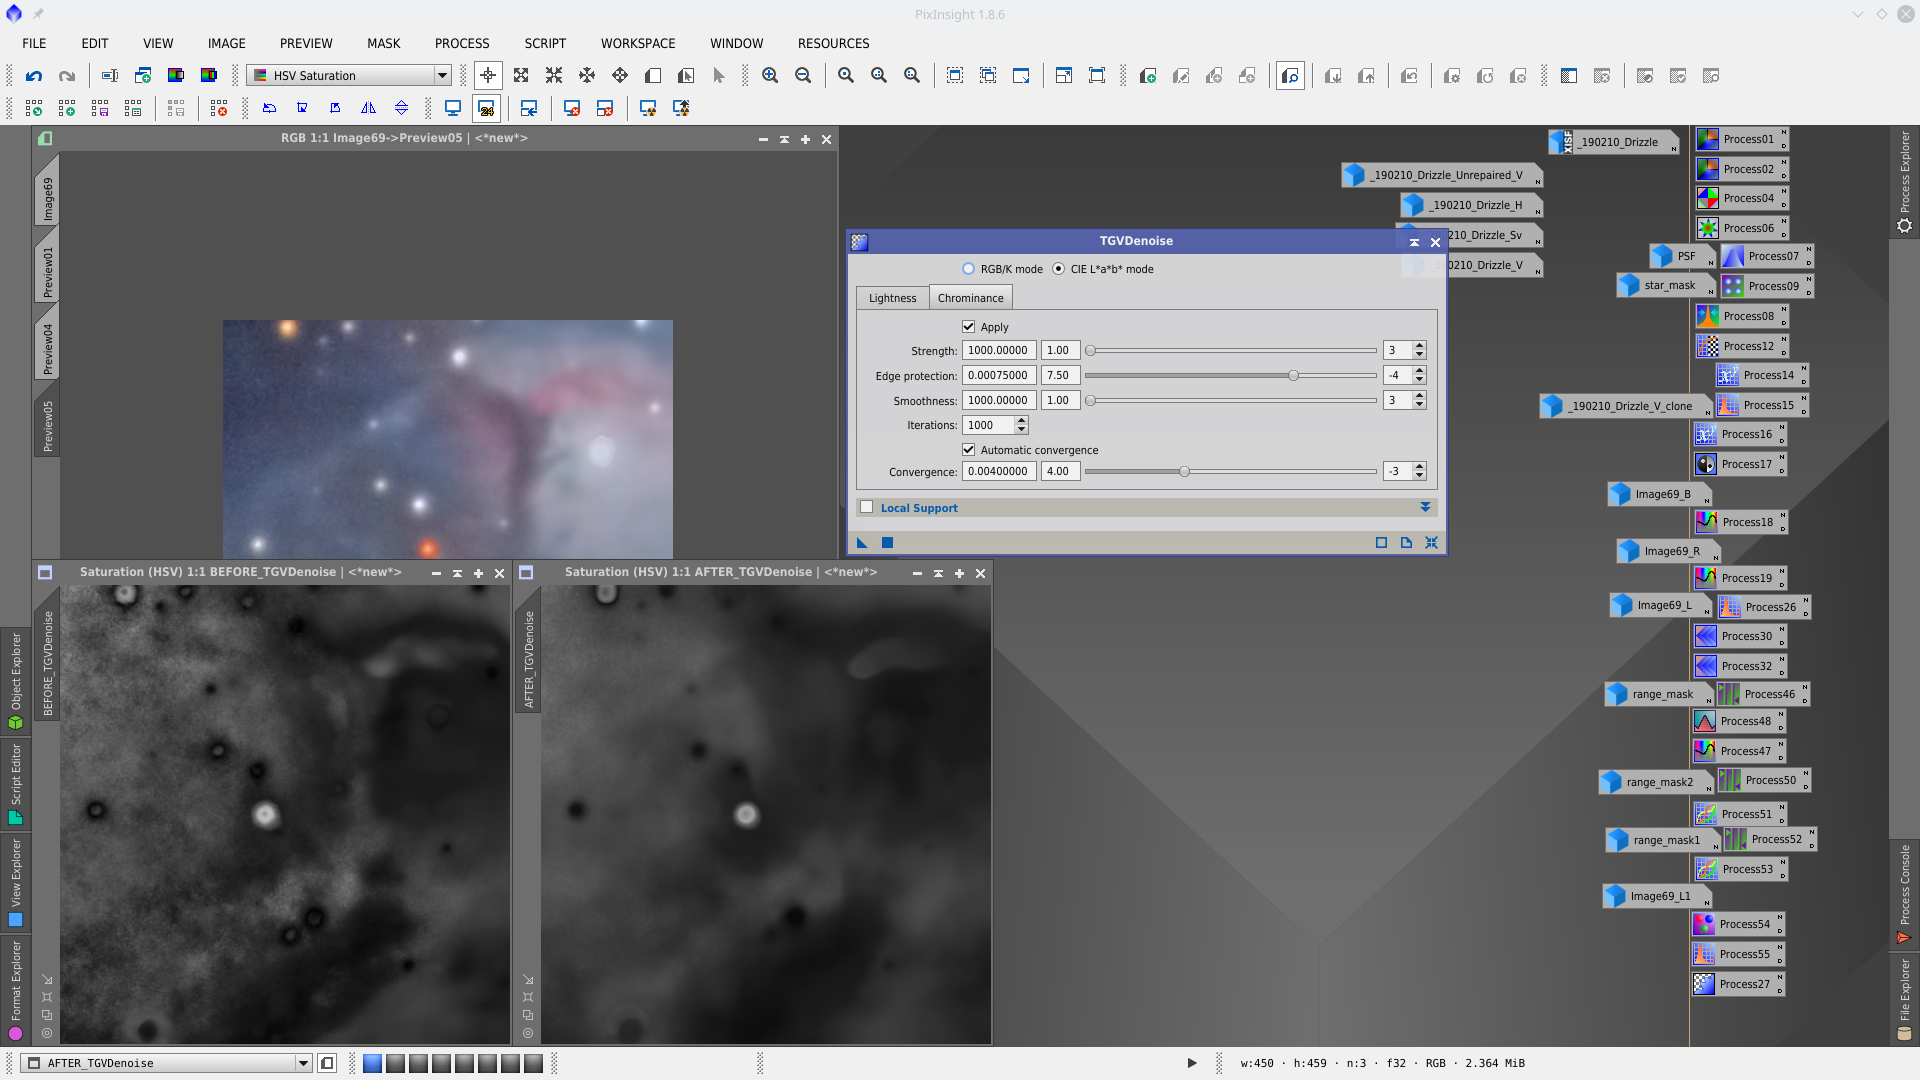
There is still some room to enhancing the nebulosity. For this first will reduce again chrominance noise using TGVDenoise tool. Applied without mask
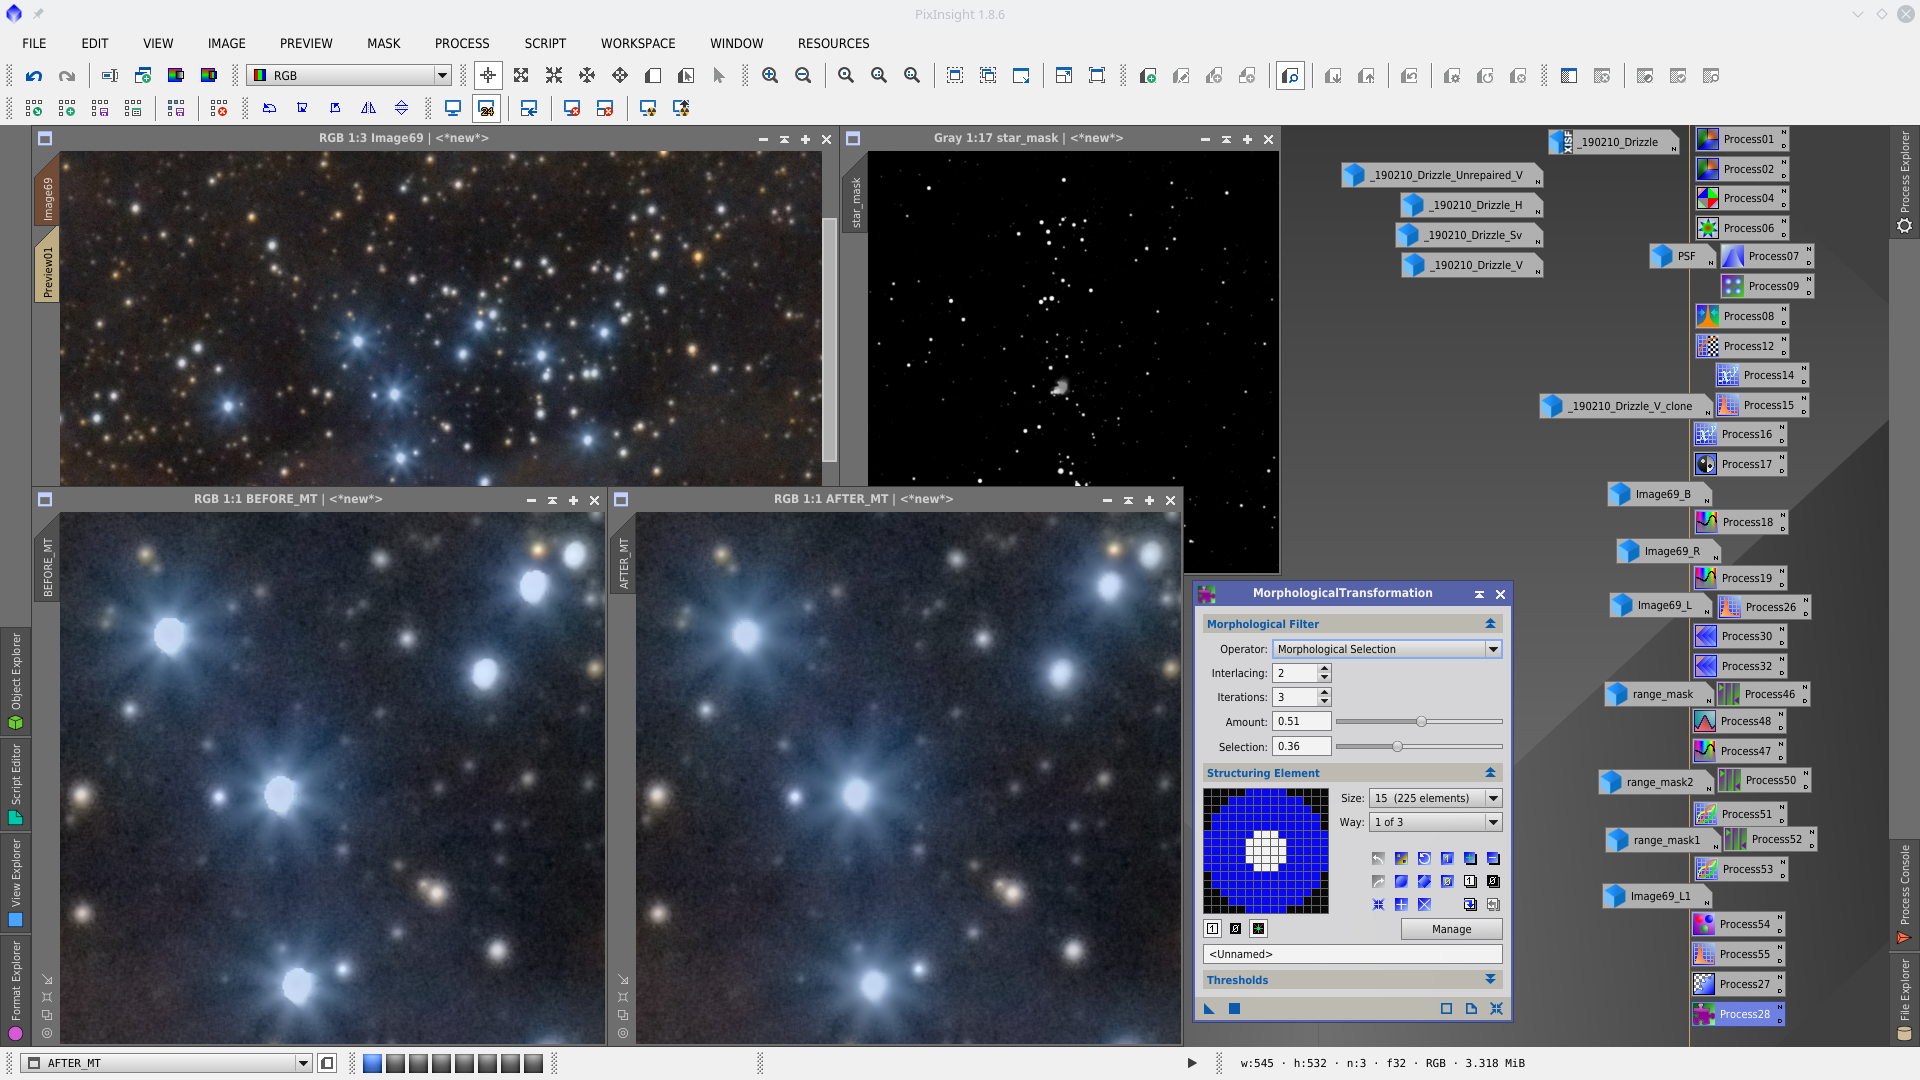
MorphologicalTransformation to reduce big stars protecting with starmask
Final Image
