M 16 - Eagle Nebula
by Alejandro Tombolini
Introduction
Publicated in Monthly Contest - Complete description of a RGB image - Main notes: Inspecting with HistogramEqualization, Deconvolution rings, HDRMultiscaleTransform, ExponentialTransformation, stars reduction.
Date: Aug 2012
Image Data
- Object: M 16 Eagle Nebula
- Camera: Canon 450 Digital Rebel XSi - Filter Type I
- Telescope: William Optics 132 FLT - Focal Lenght 925 mm - f/7
- Images: 26 x 10 minutes @ ISO 800
- Total Time: 4 hours 20 minutes
- Processing Software: PixInsight
- Comments: Guiding with Orion 100 and SSAG. From Trenel - La Pampa - Argentina
- Author: Alejandro Tombolini
Processing
This time I have used BatchPreprocessing script to calibrate and align using dark, bias and flat.
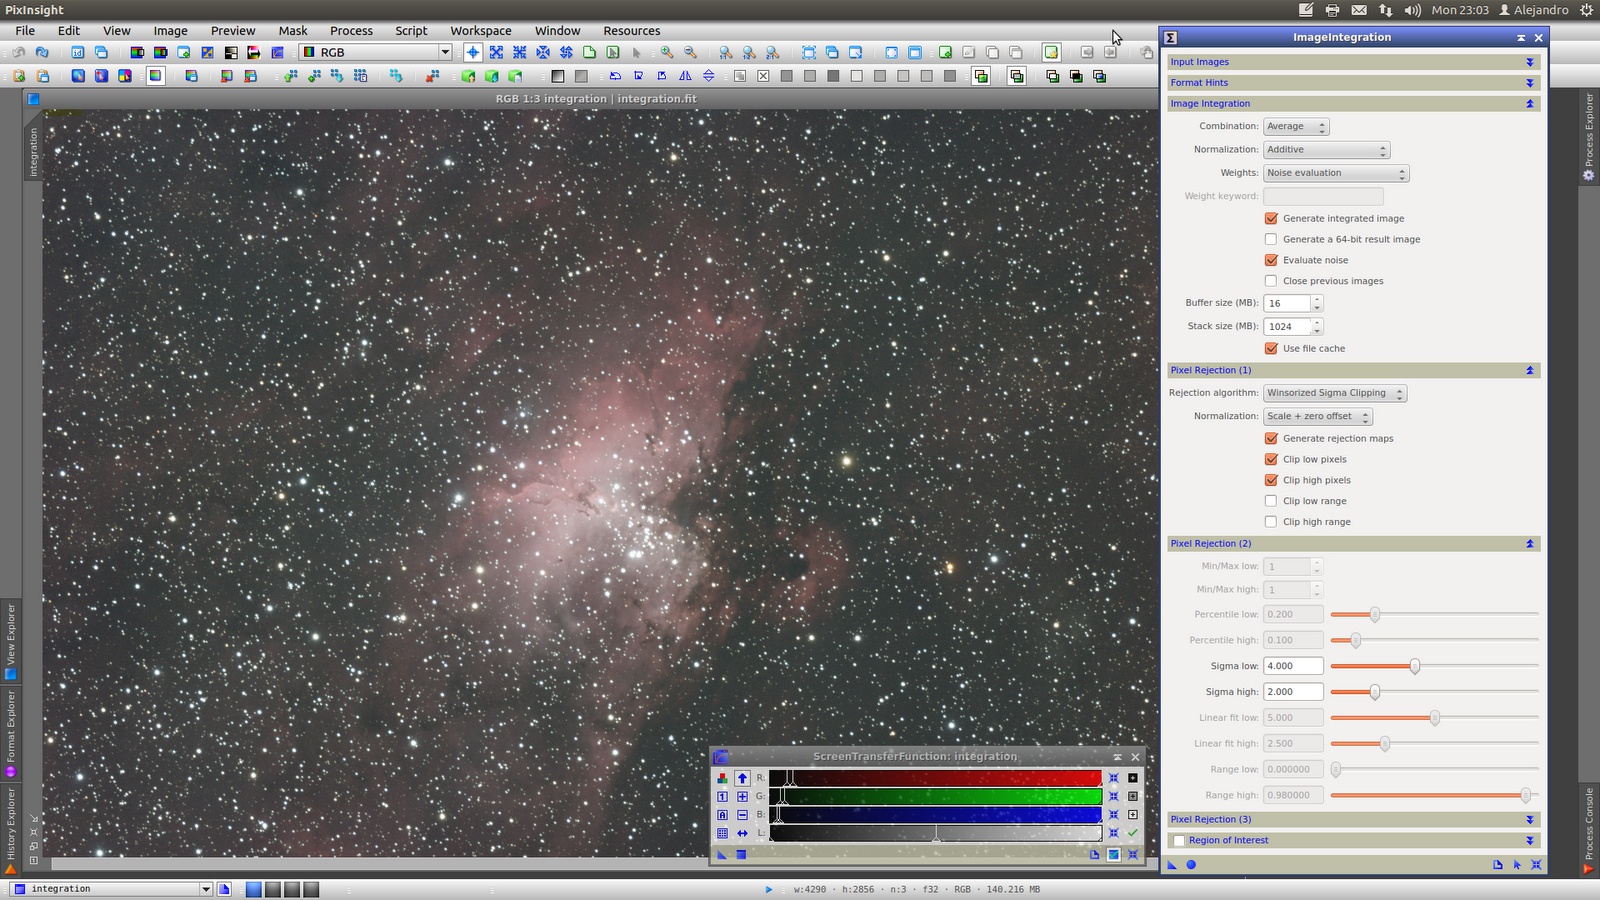
ImageIntegration with Winsorized Sigma Clipping as rejection algorithm with values of 4 and 2 for low and high respectively.
Result of the integration with STF (RGB not linked) applied:
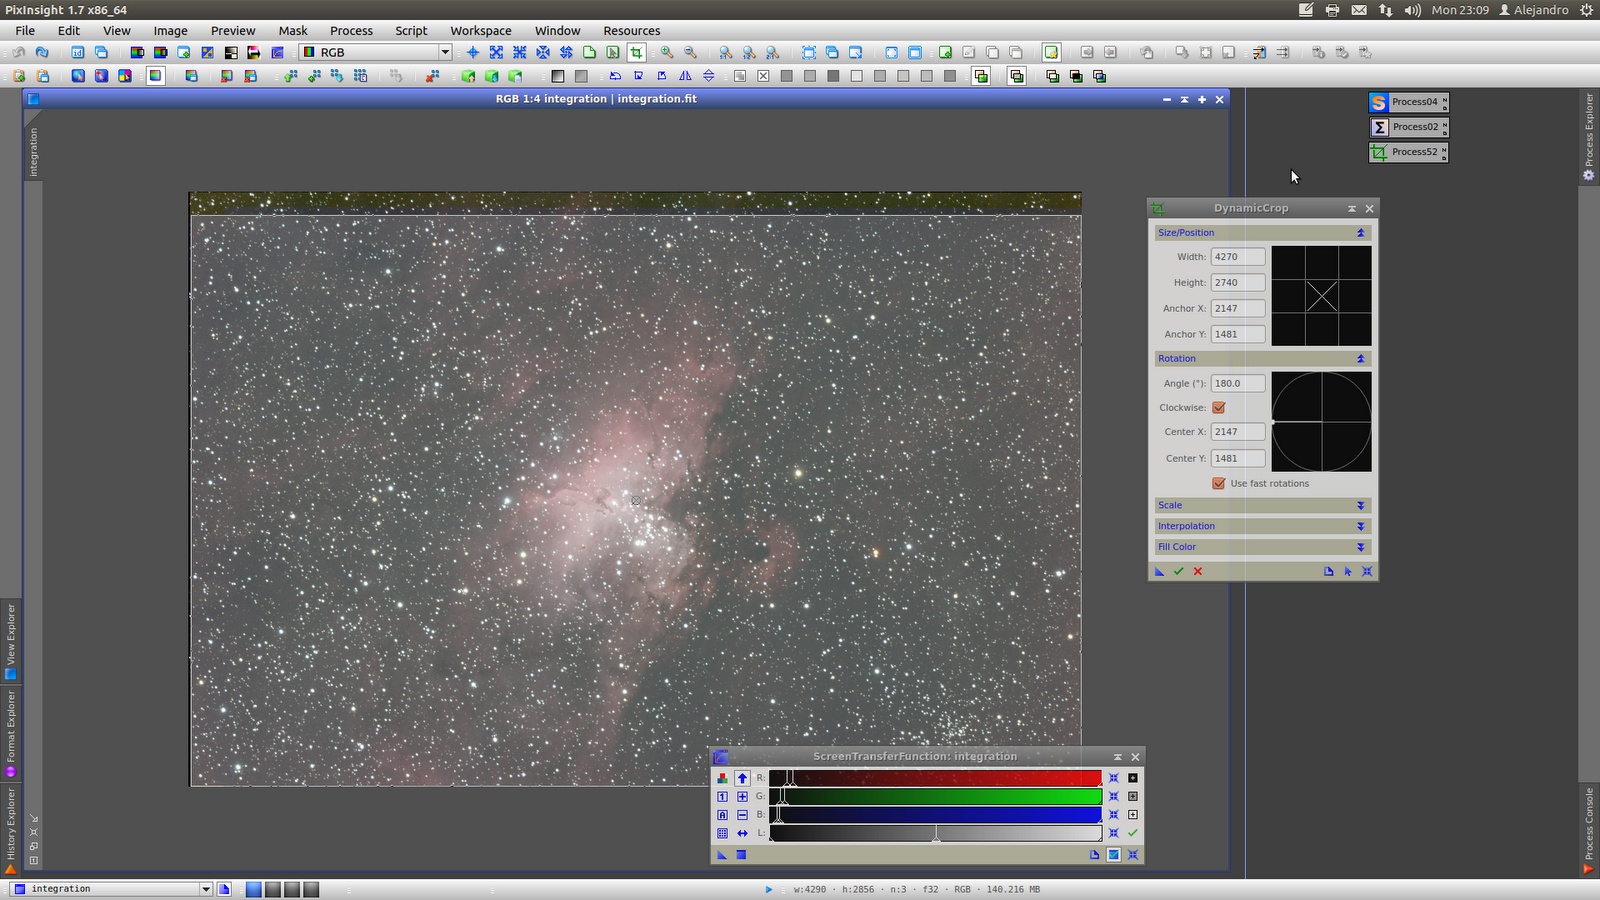
DynamicCorp to eliminate borders:
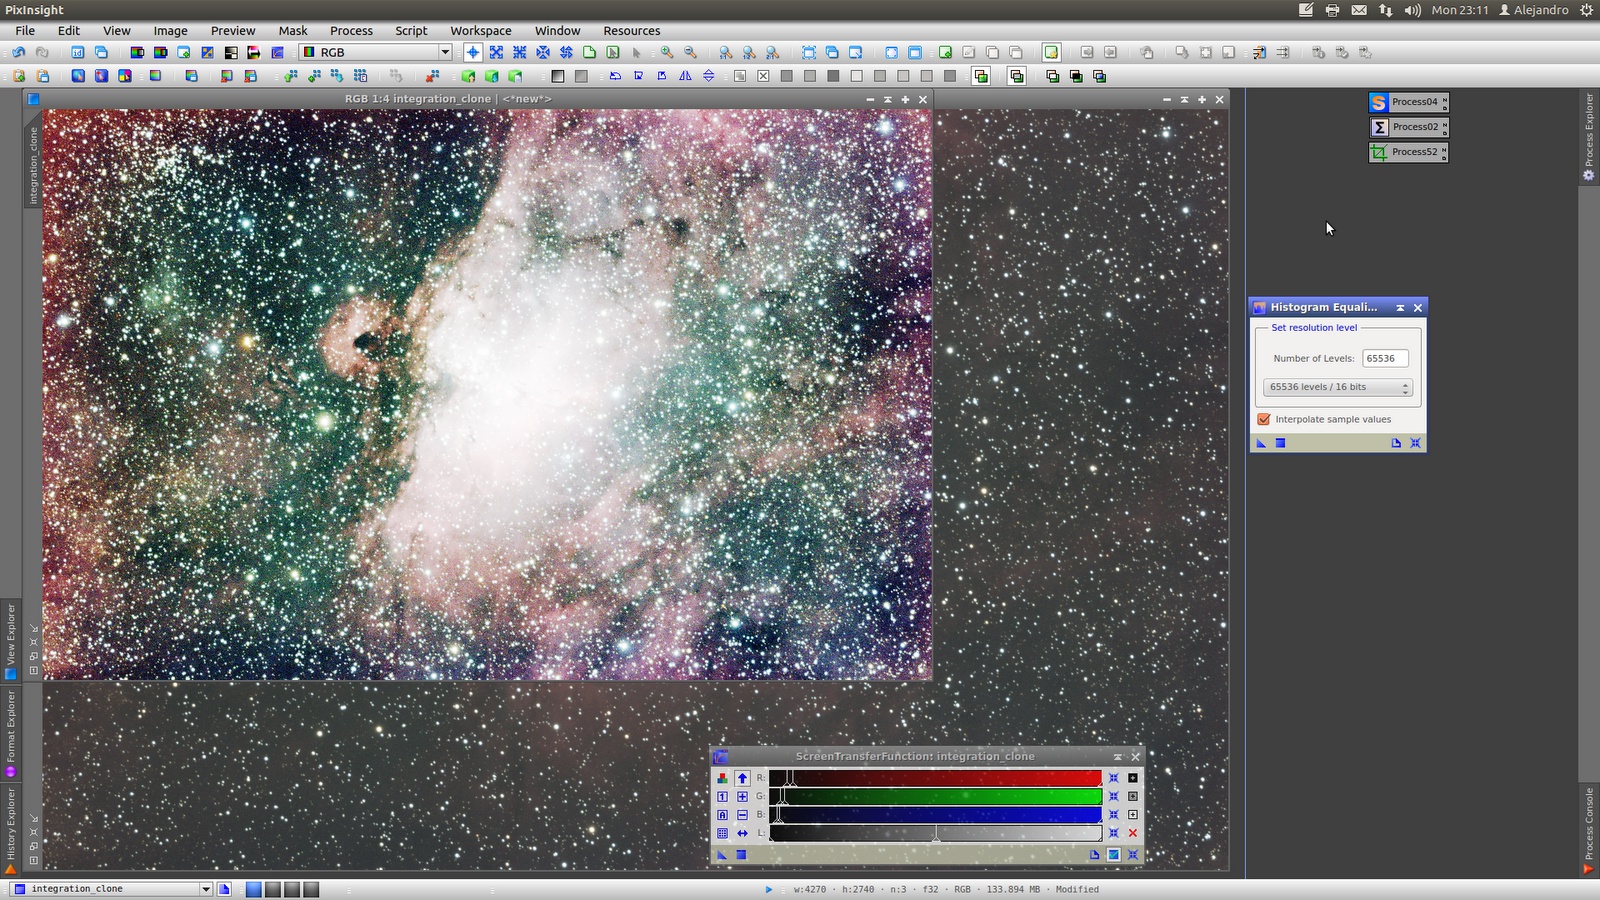
In order to see what is happening in the background and how much information there are, clone the image and apply HistogramEqualization.
Its seems will be needed to use CanonBandingReduction for Horizontal banding.
Besides there is some faint nebulousness that I will try to highlight:
Take a small preview to use in BackgroundNeutralization, and apply STF again:
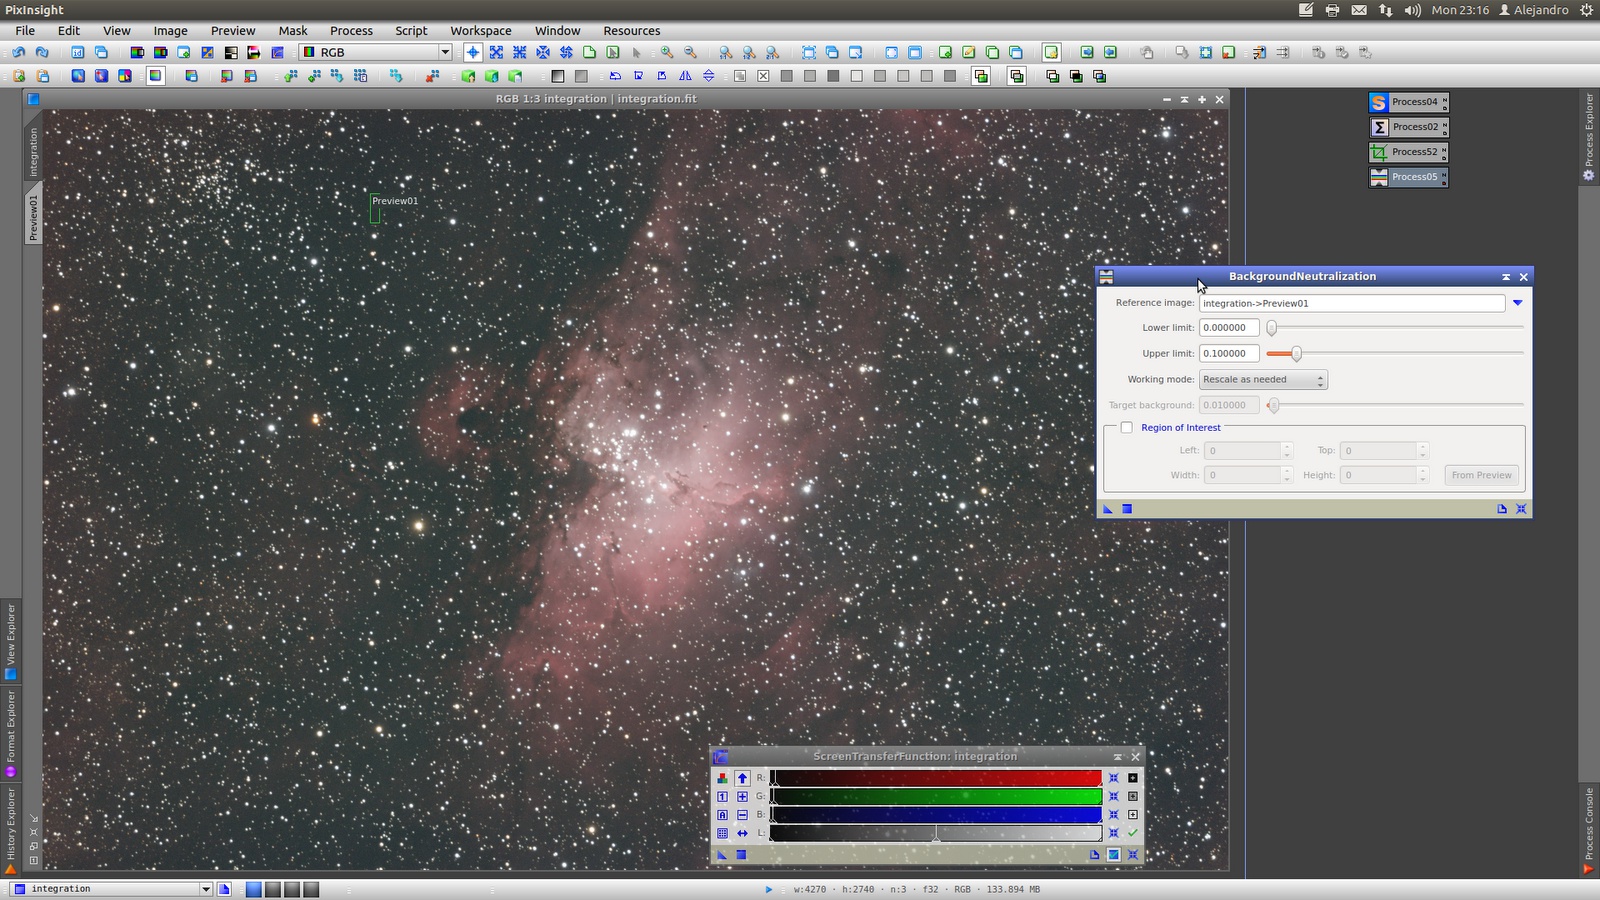
After BackgroundNeutralization, apply CanonBandingReduction with values by default to eliminate horizontal banding:
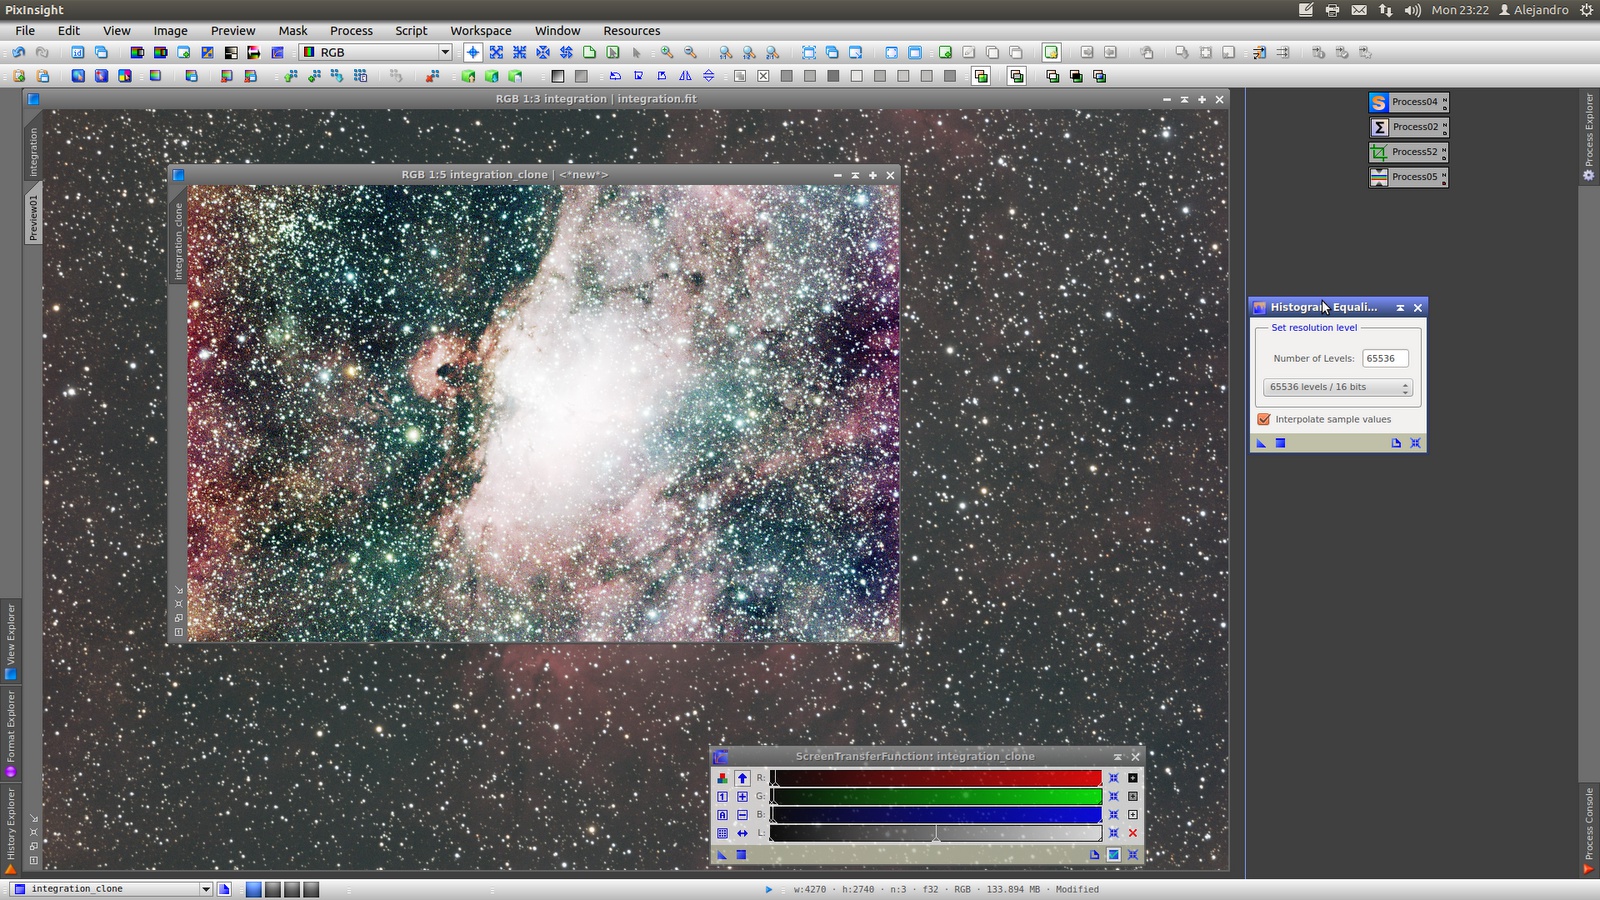
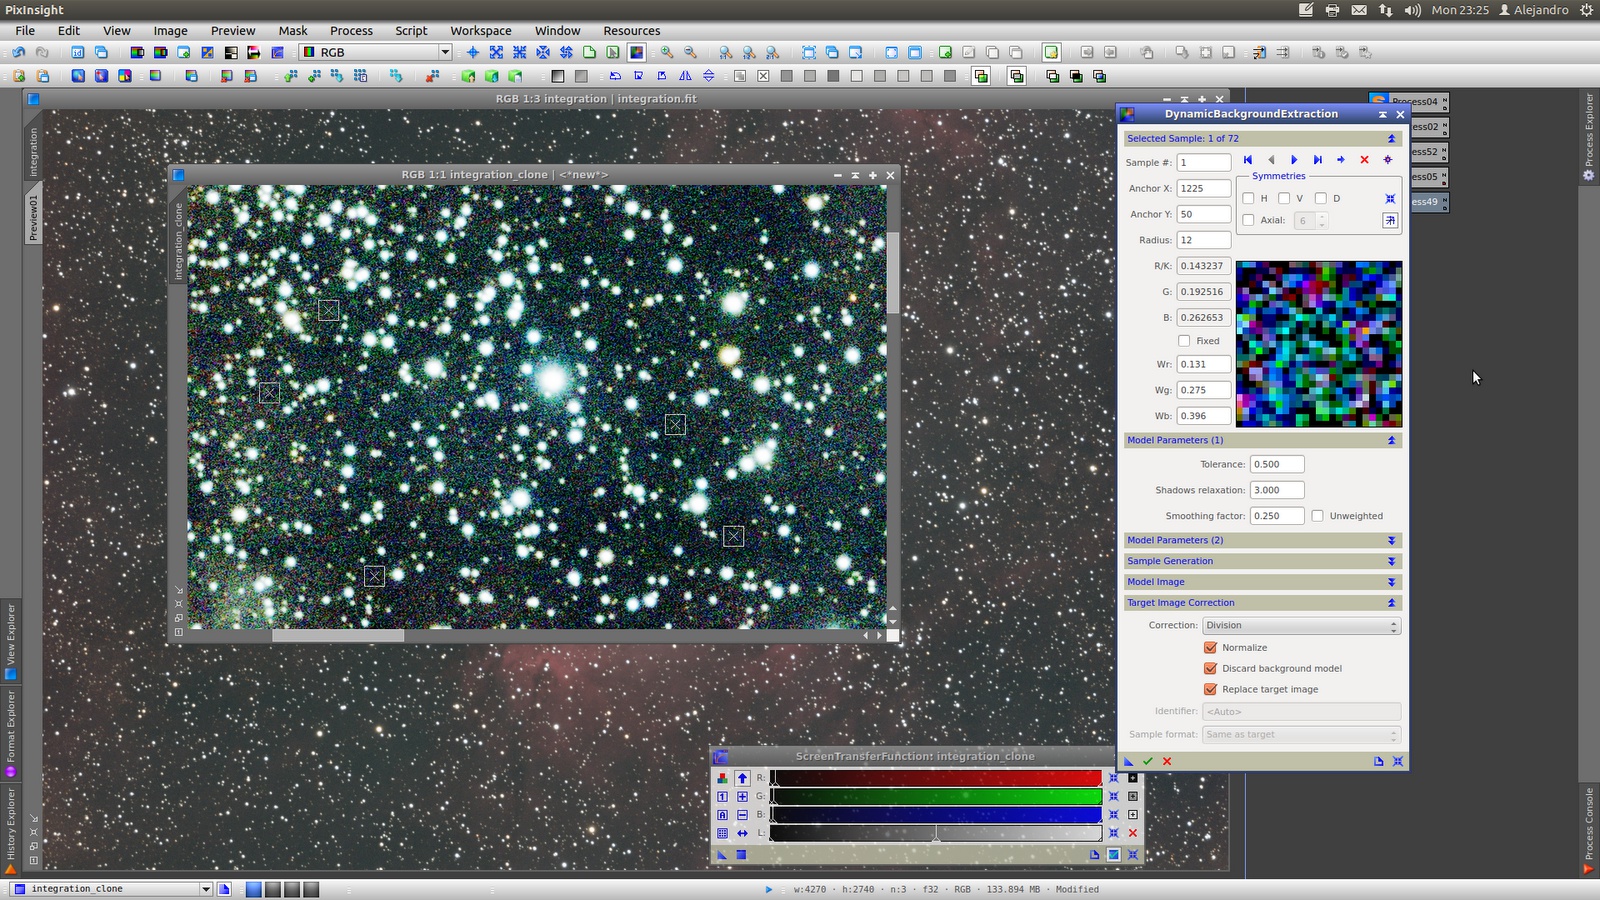
After CanonBandingReduction I inspect a clone of the image with HistogramEqualization and seems to be needed a DynamicBackgroundExtraction.
For DynamicBackgroundExtraction, first apply the samples over the clone to see easily where to put them and then generate a new DynamicBackgroundExtraction icon to be applied over image.
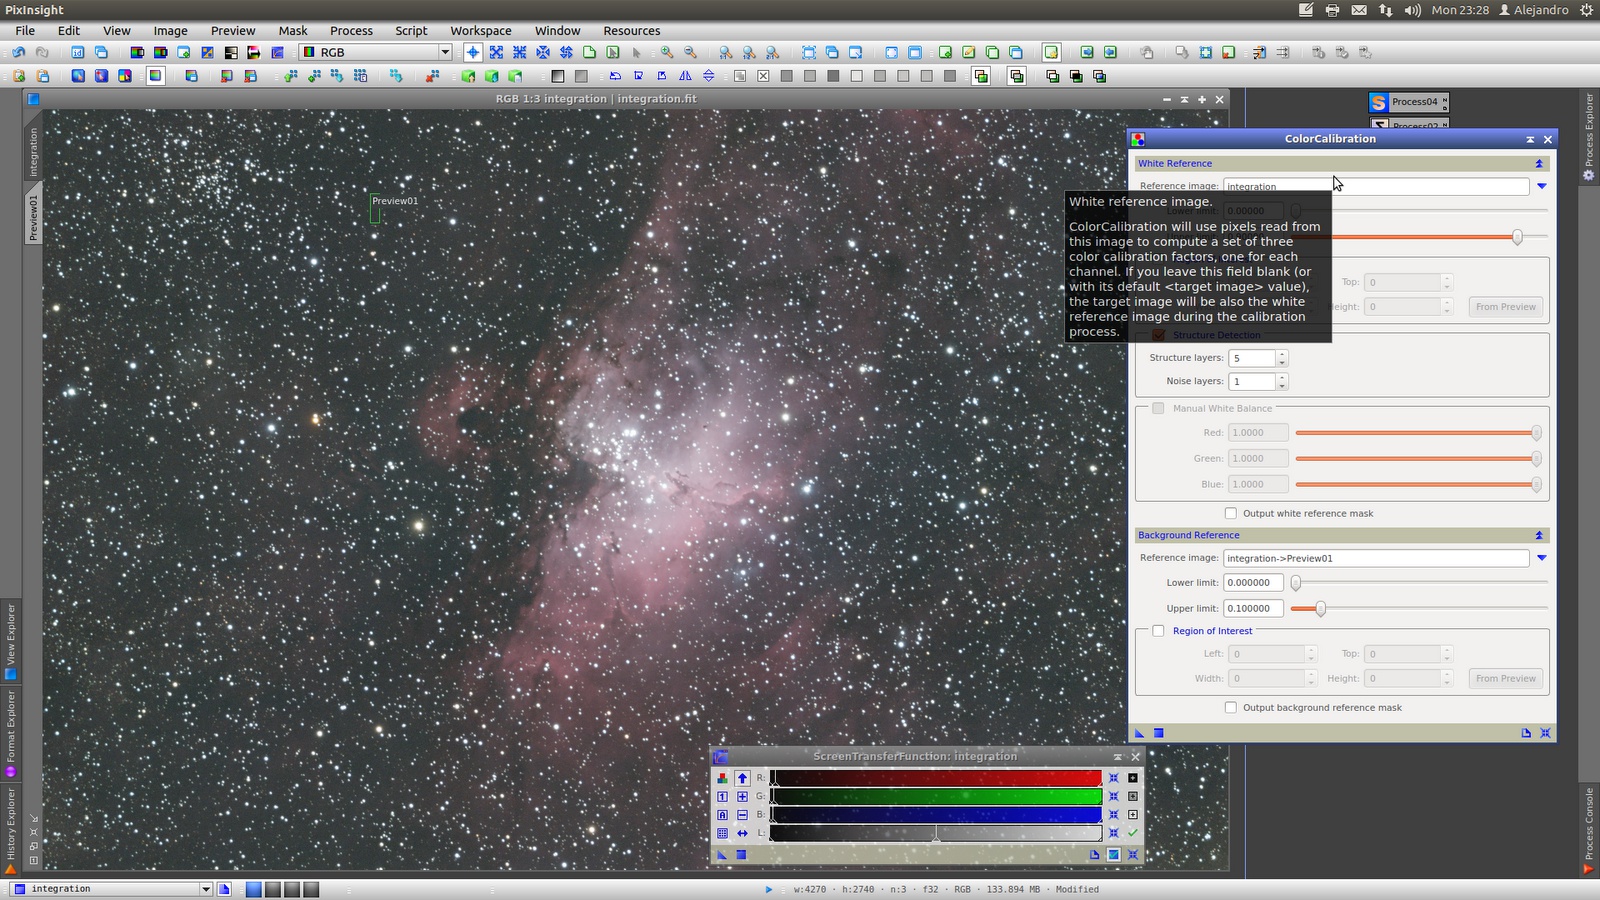
Followed, ColorCalibration using the same preview used for BackgroundNeutralization as Background Reference and the image as white reference:
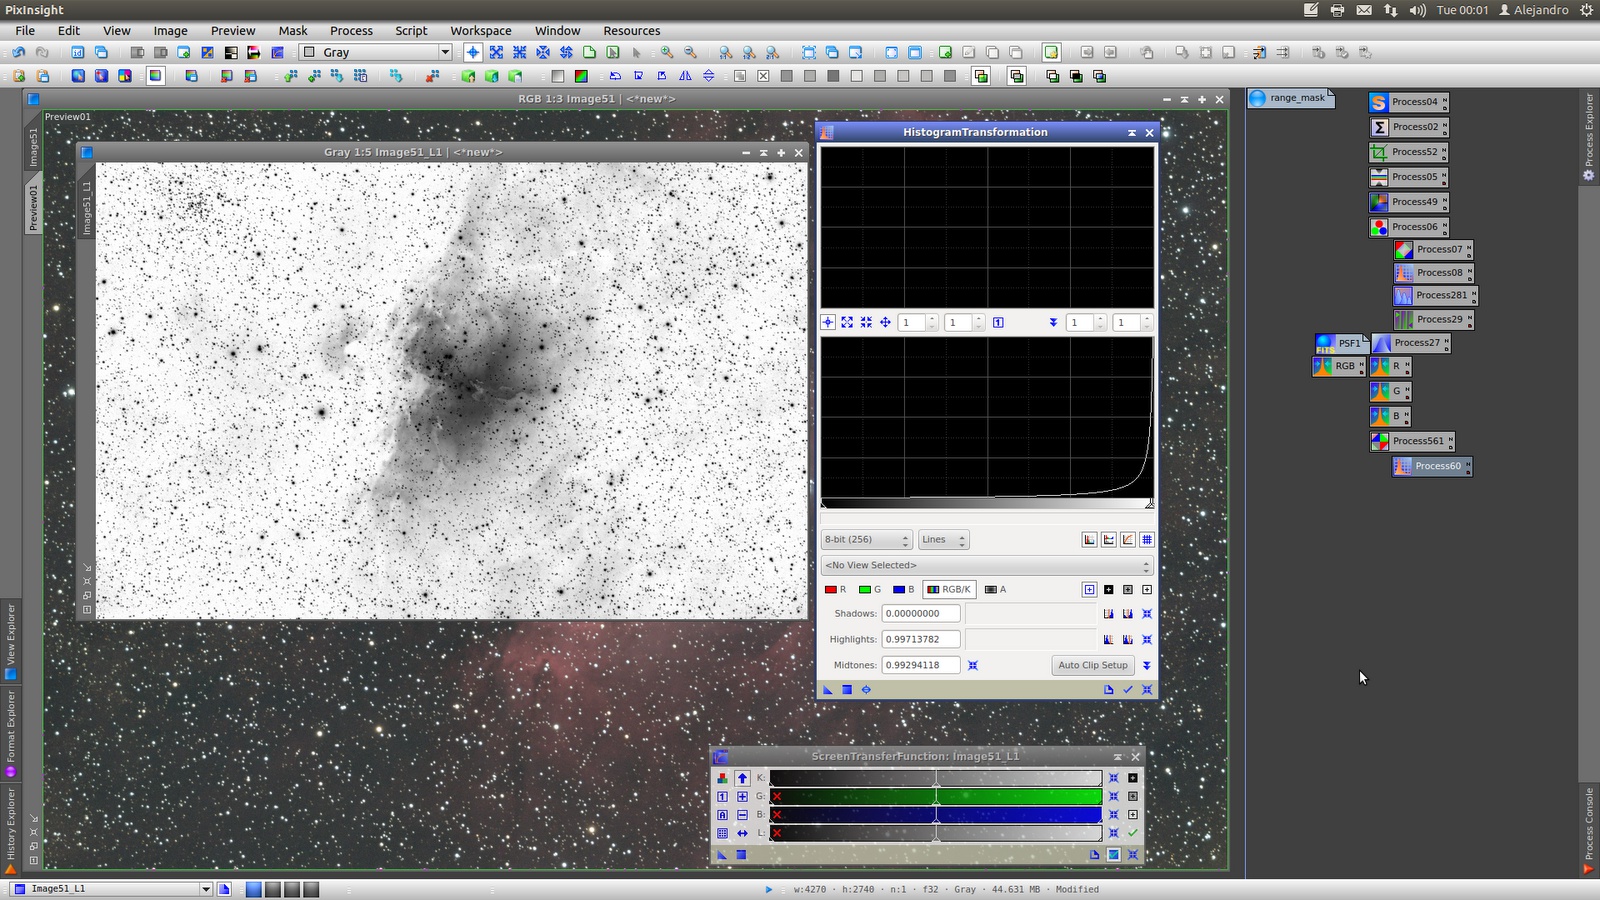
The following step will be Deconvolution but previously build a mask to protect some stars cores. The mask is made extracting CIE X from the image and applying HistogramTransformation and MultiscaleMedianTransform on it for intensify stars, and then generate a rangemask:

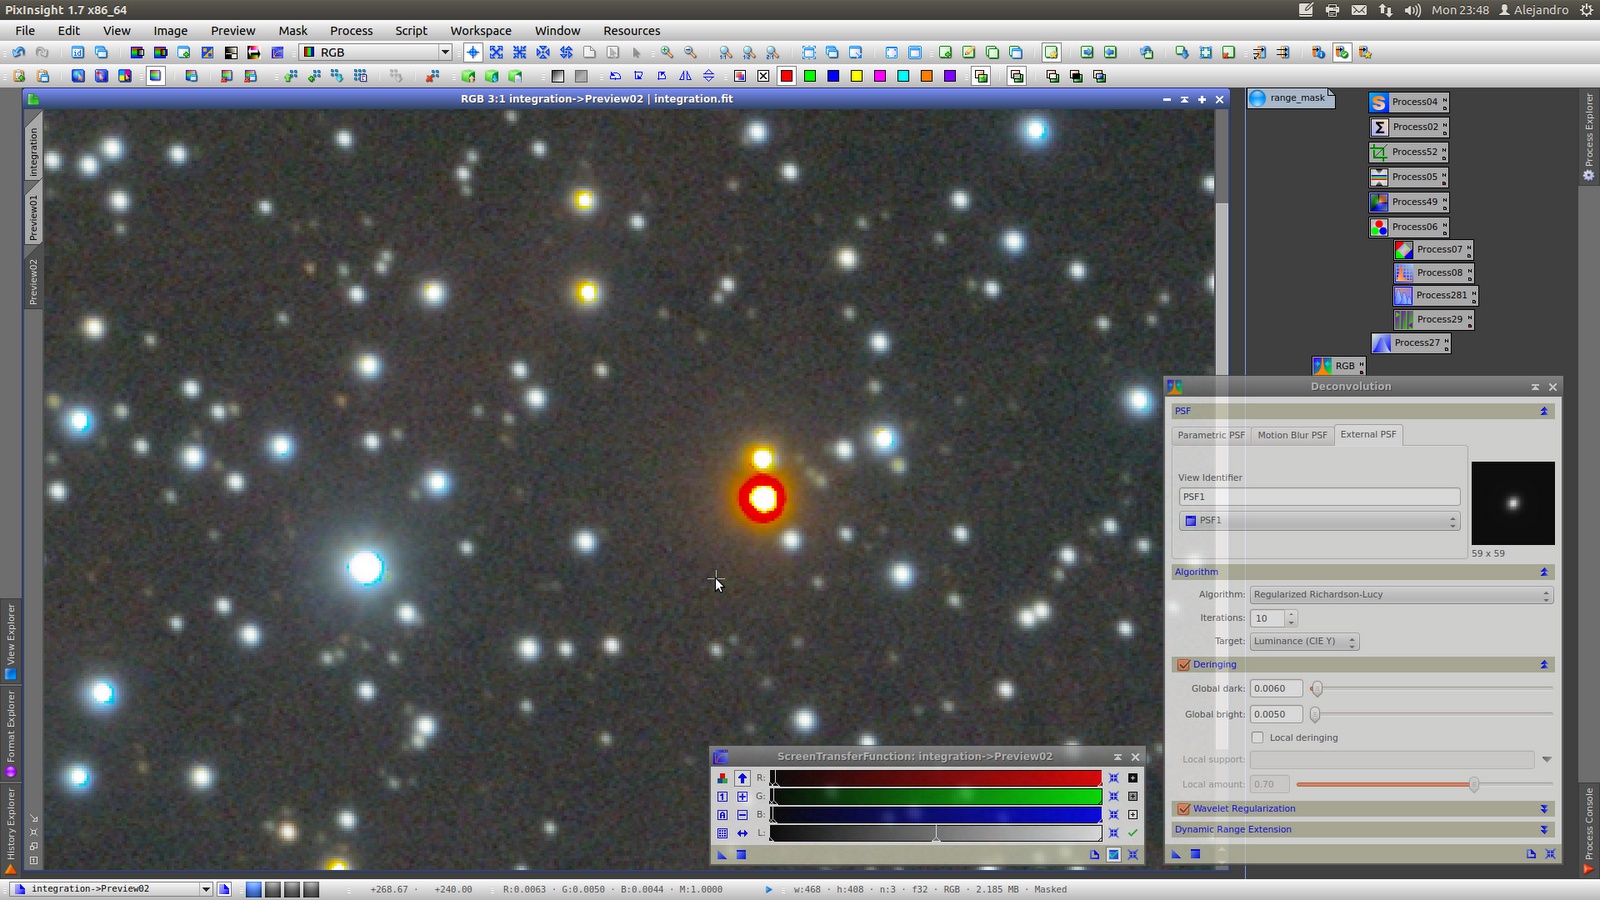
Generate the PSF to be used in Deconvolution using DynamicPSF tool, and by trying and error find the best parameters, varying mainly Deringing. Apply Deconvolution with the previous range mask protecting stars cores.
I found that some stars even with the mask active, have too intense color, and inspecting color by color can be seen that some channel where affected differently by deconvolution:
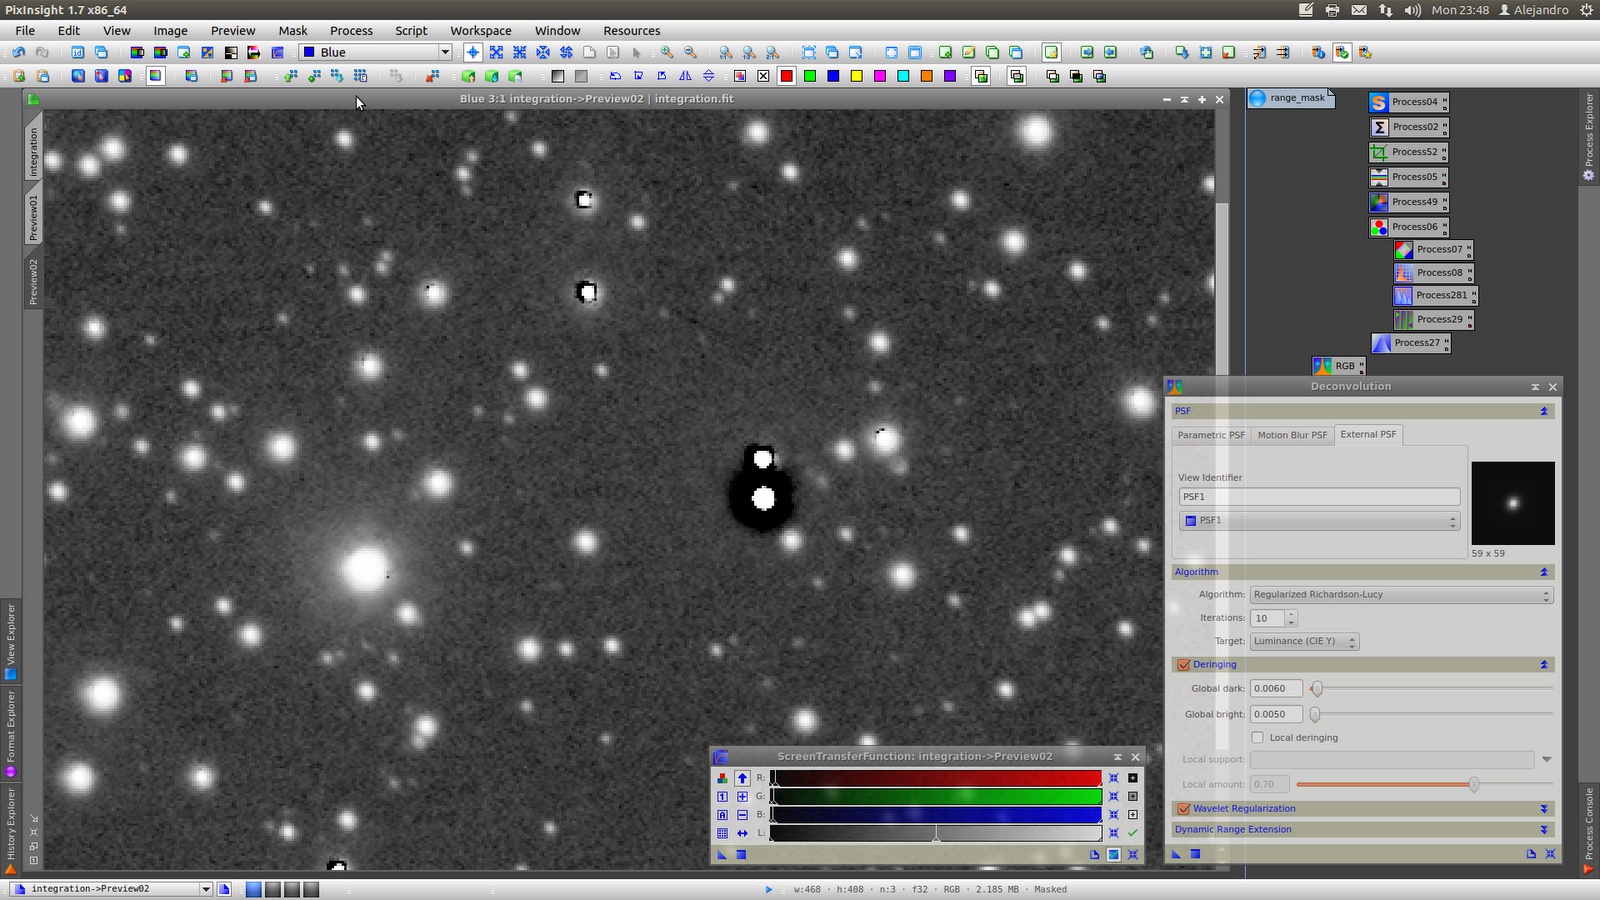
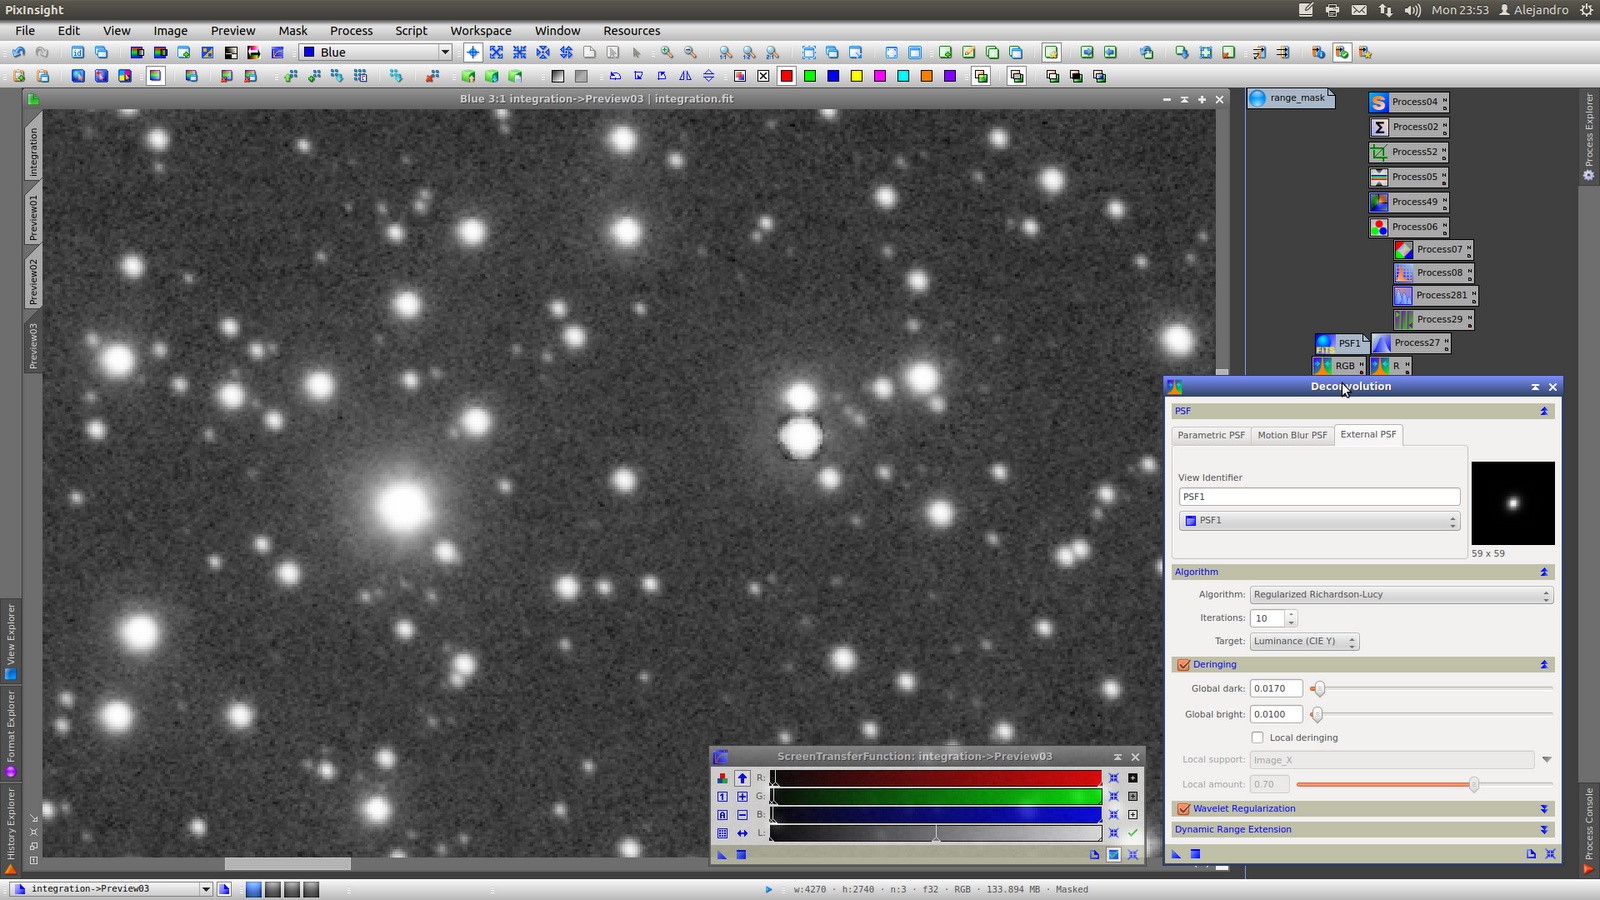
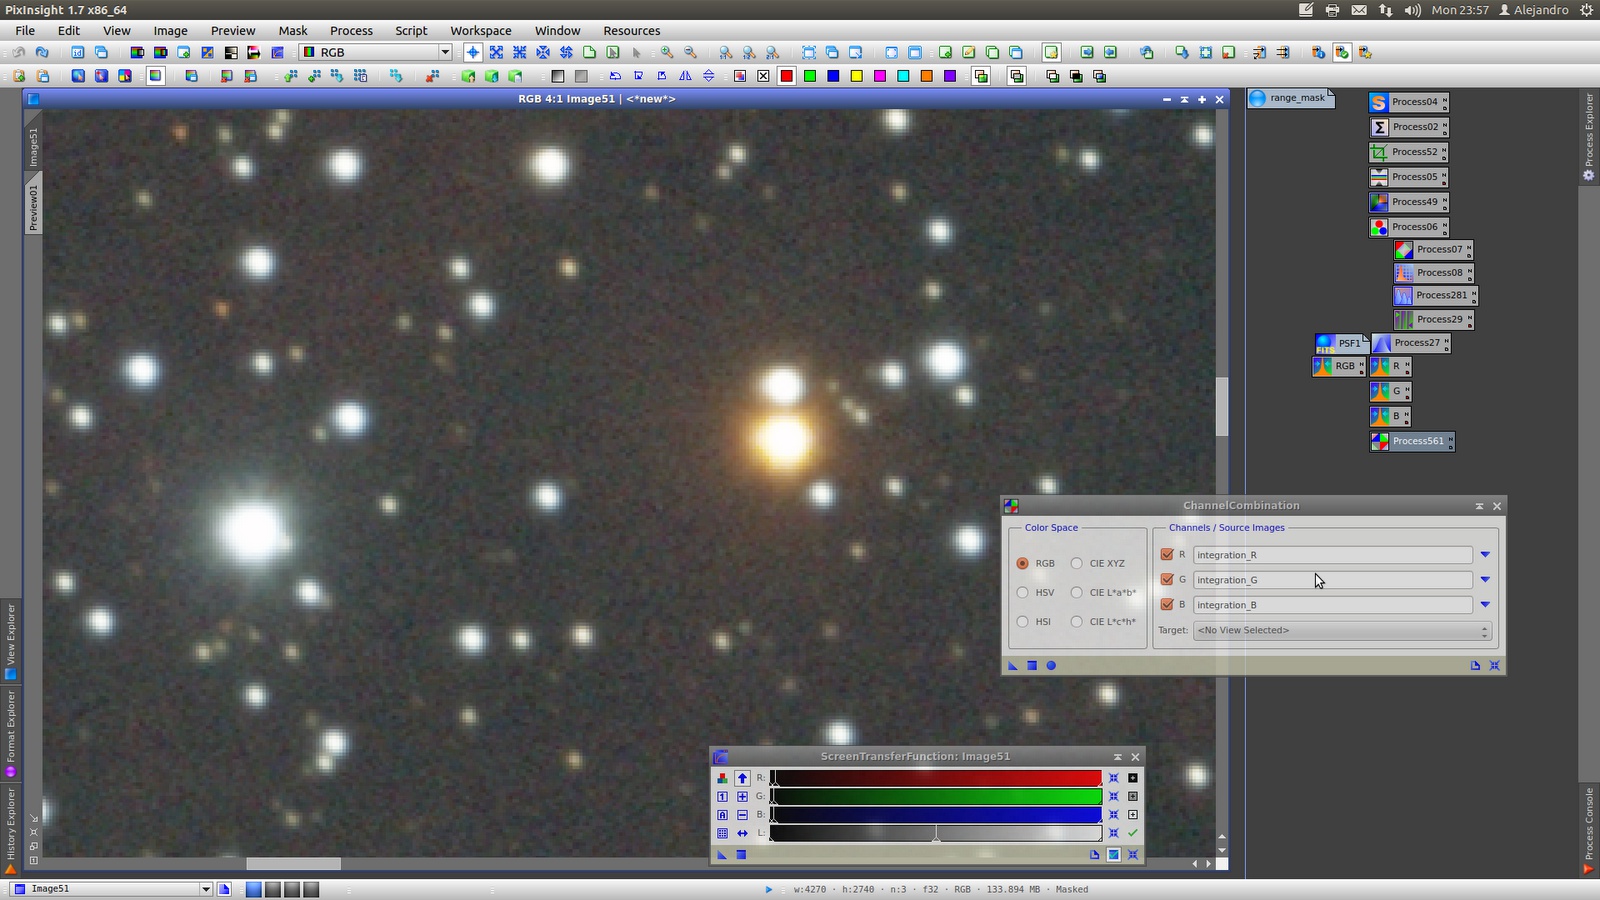
Then I looked for different Deringing values for each channel and applied separately, always protecting stars cores with rangemask and the result was better:
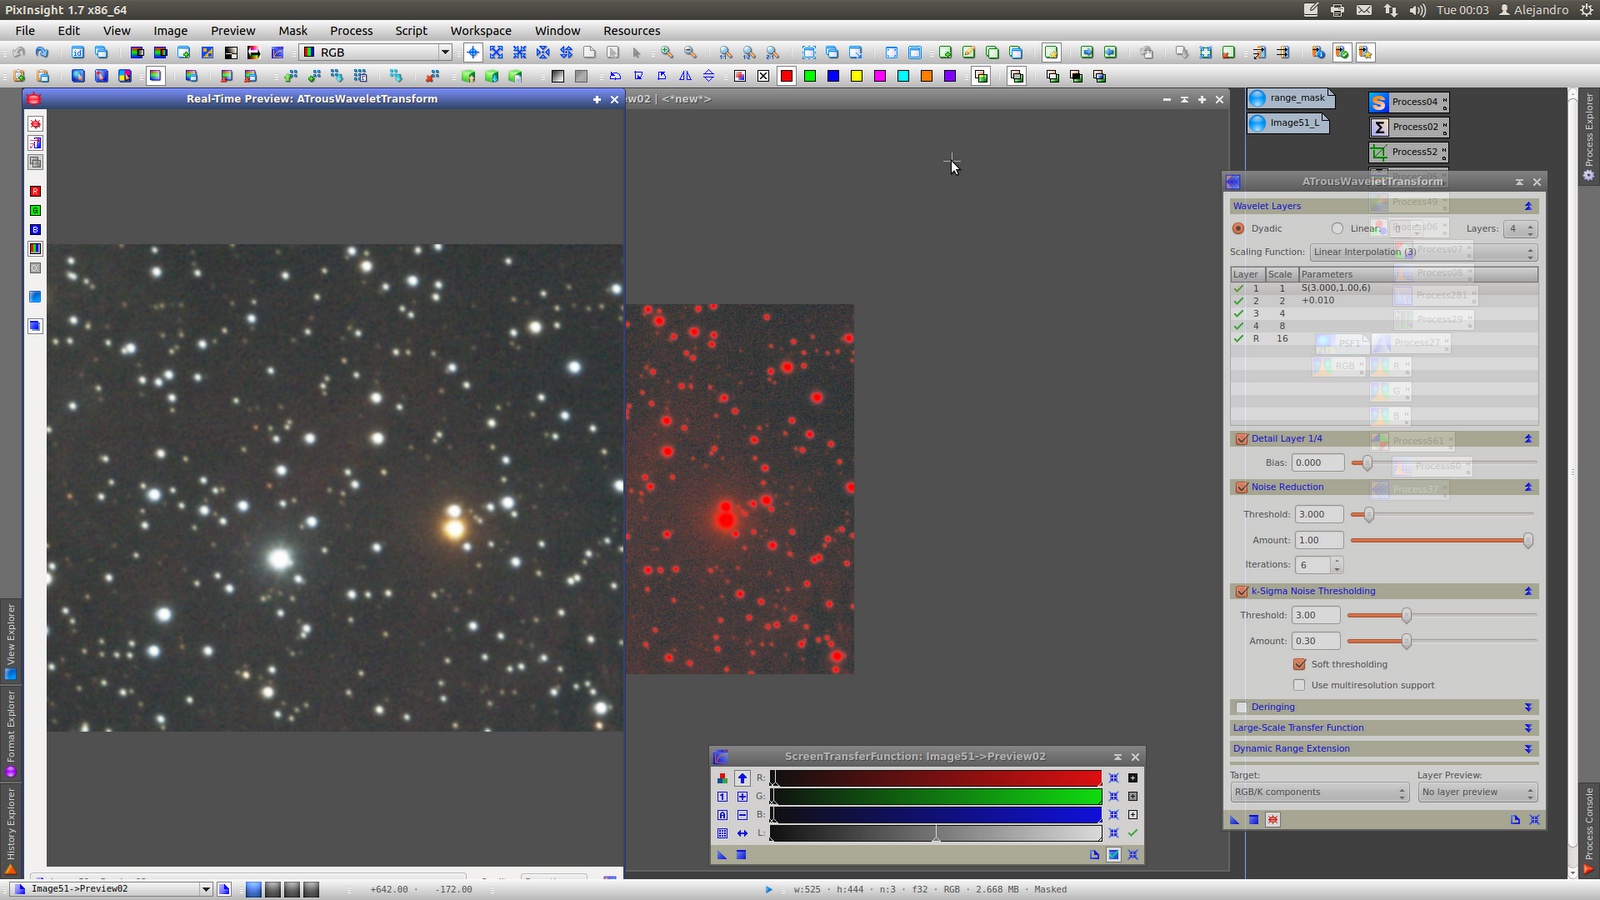
Before stretching I do some noise reduction using ATrousWaveletTransform. For that built a luminance mask to protect bright areas.
Apply using k-Sigma (not showed in the preview) that gives very good result in my pictures:
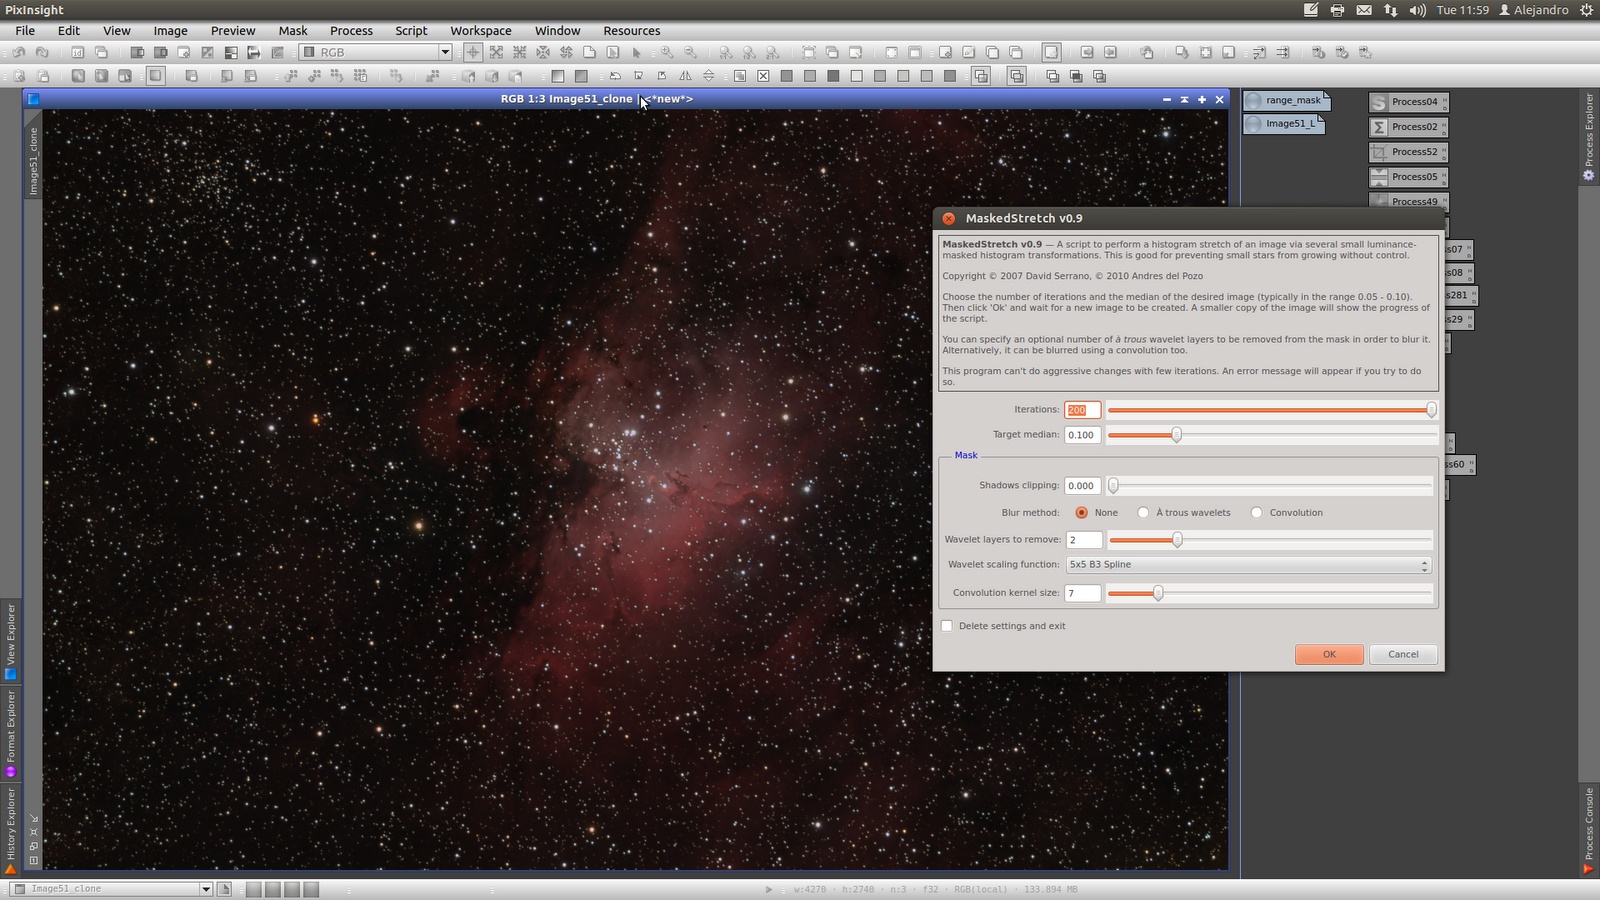
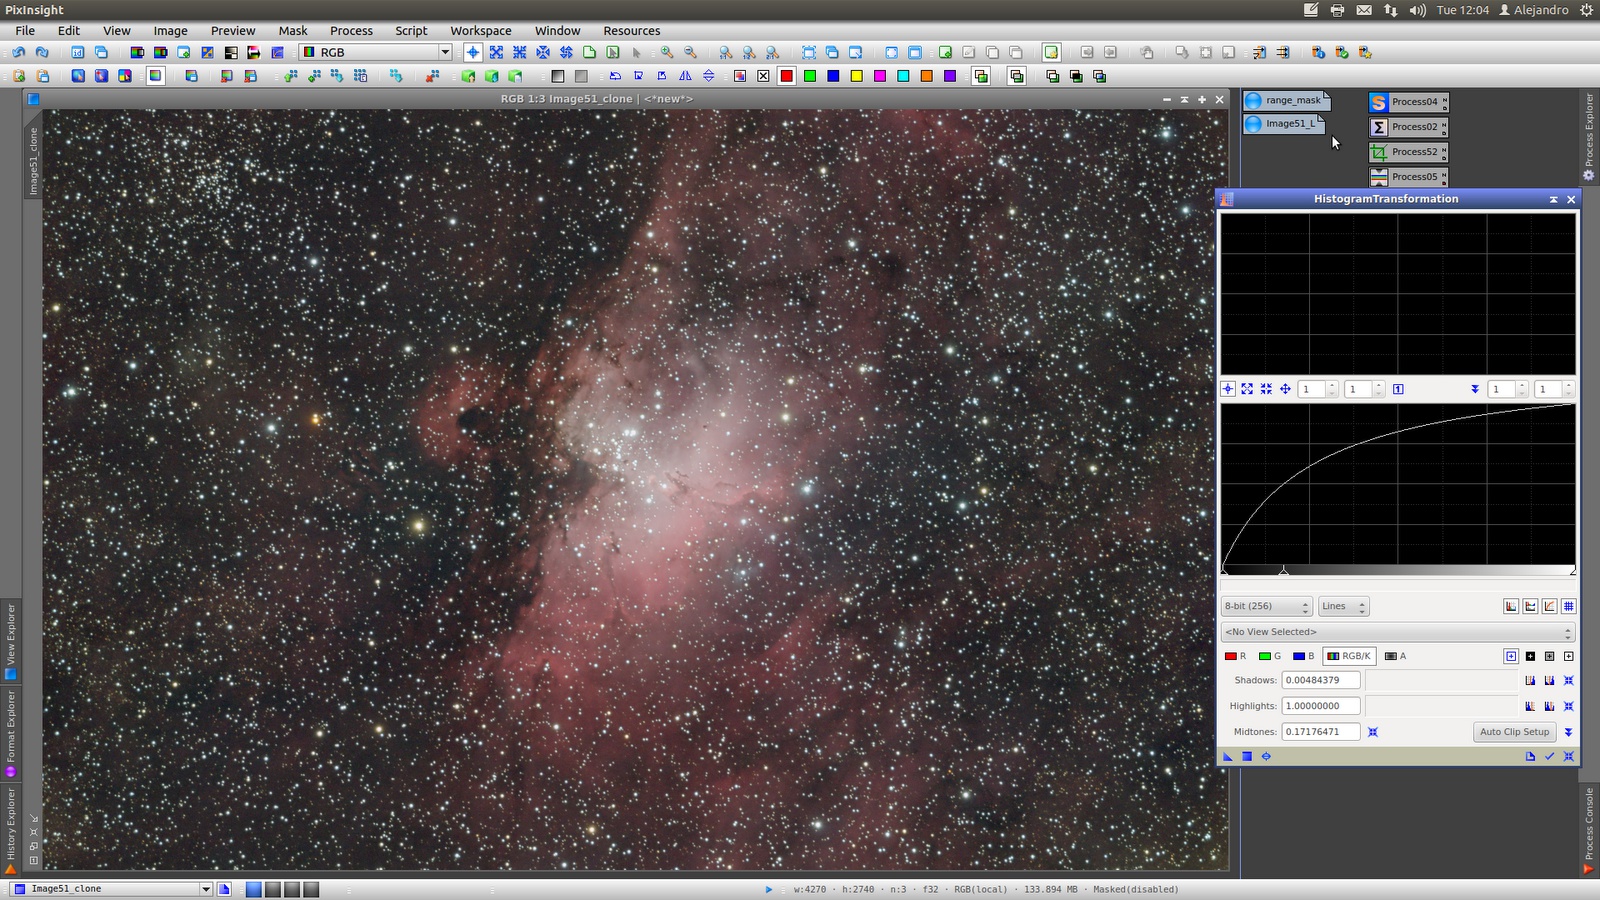
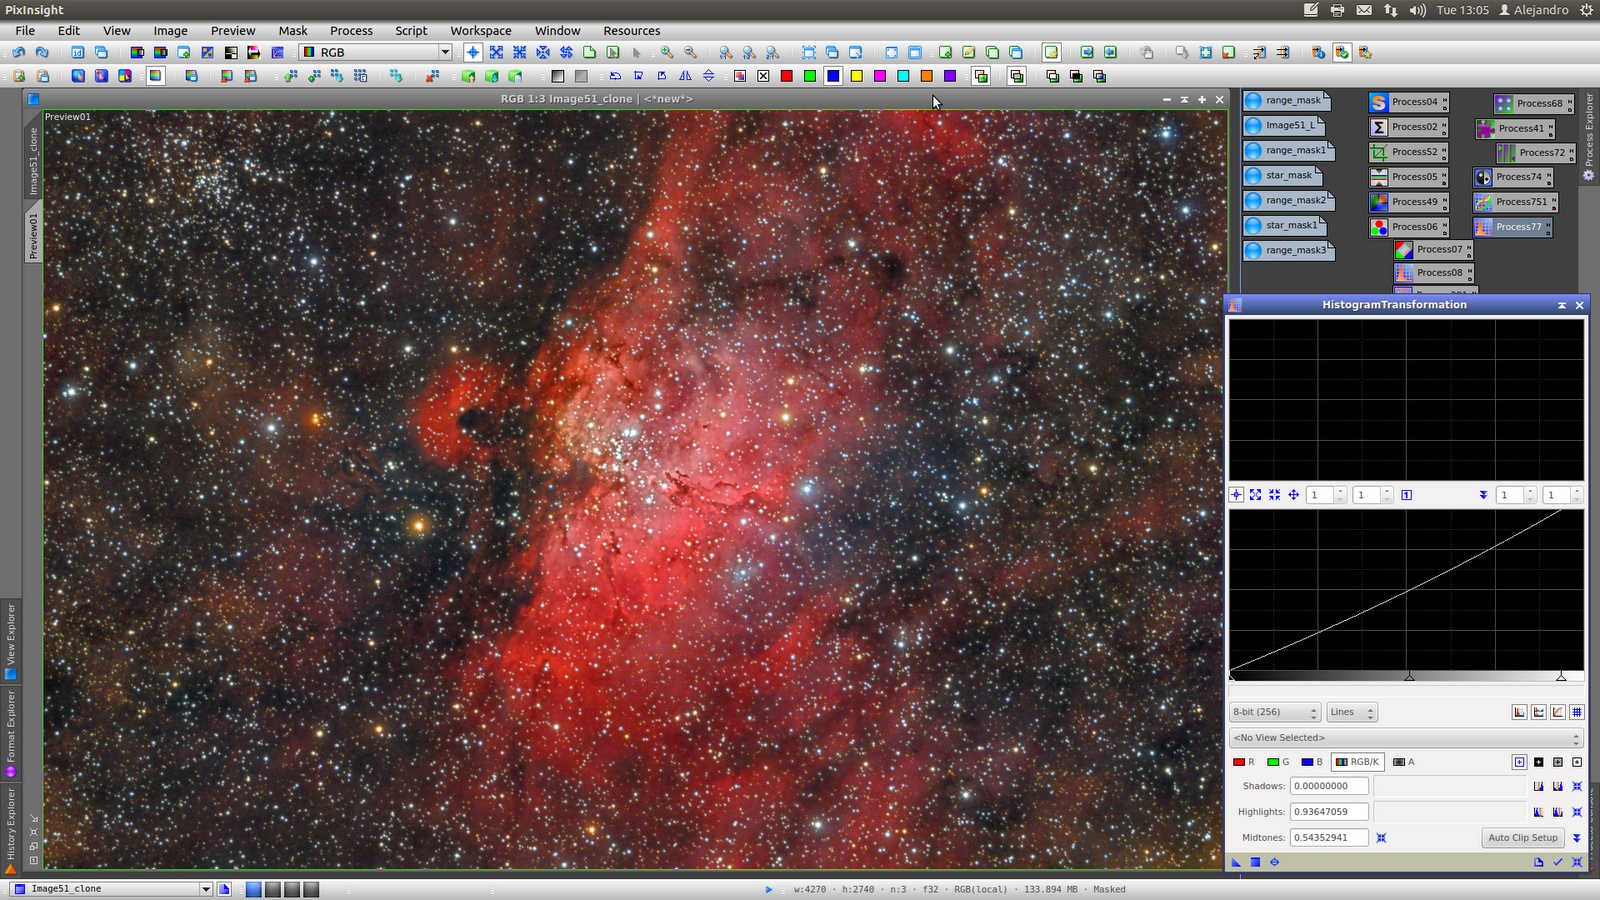
Now MaskedStretch increasing the number of iteration until 200 but with low target, only 0,1. And after that, HistogramTransformation to crop a little in shadows:
New stretch, this time with HistogramTransformation without masks:
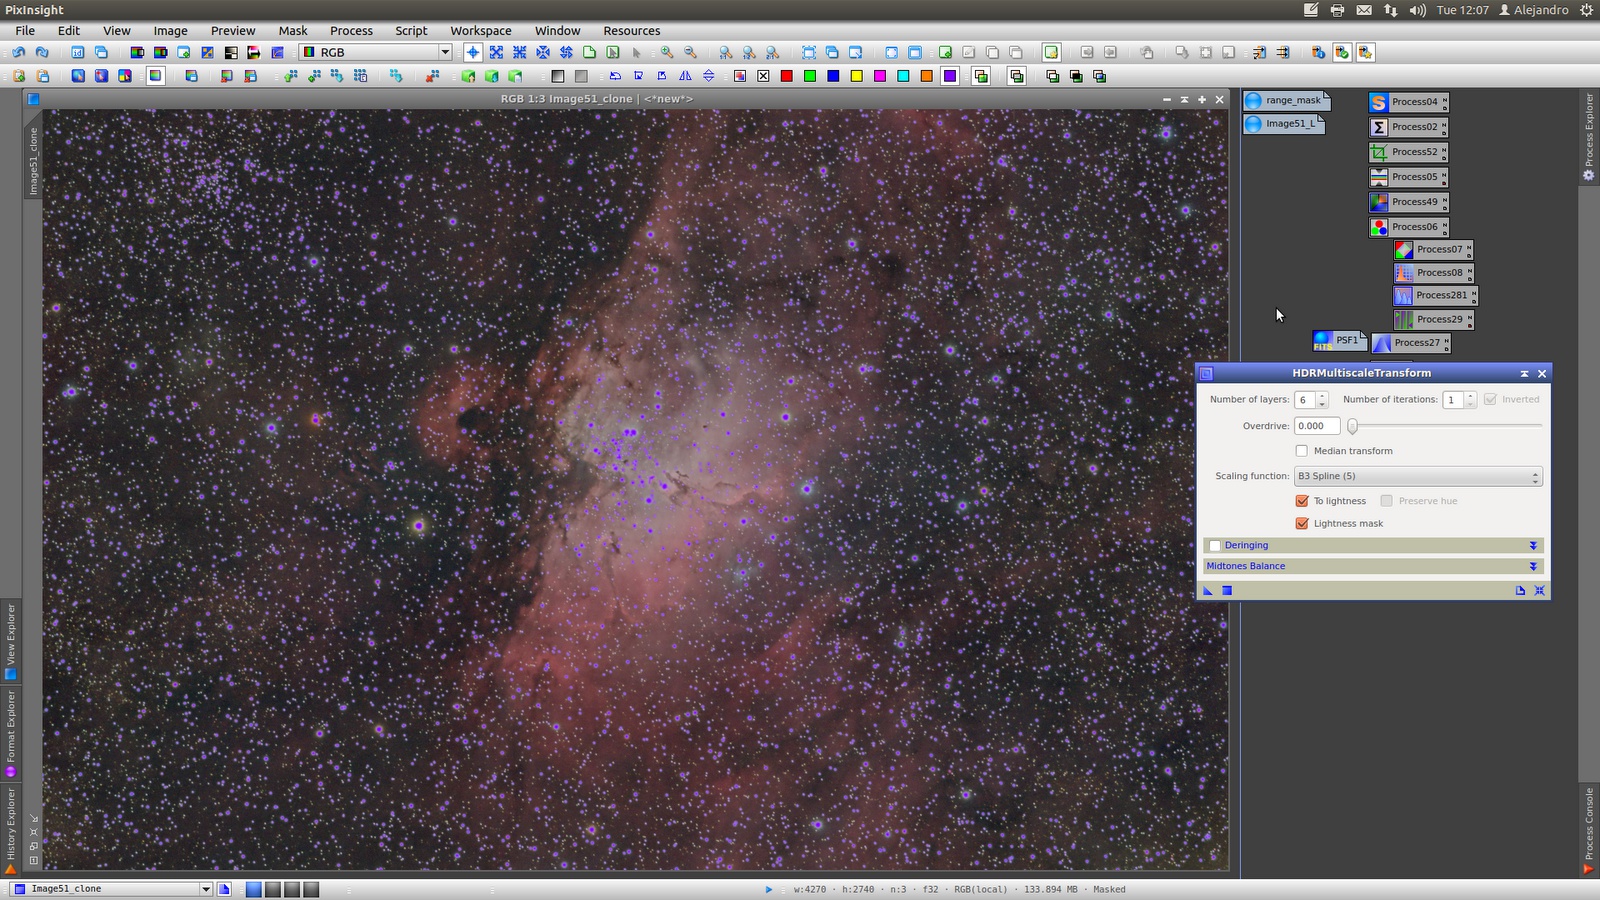
In order to achieve better contrast in the bright areas use HDRMultiscaleTransform protecting stars cores with rangemask:
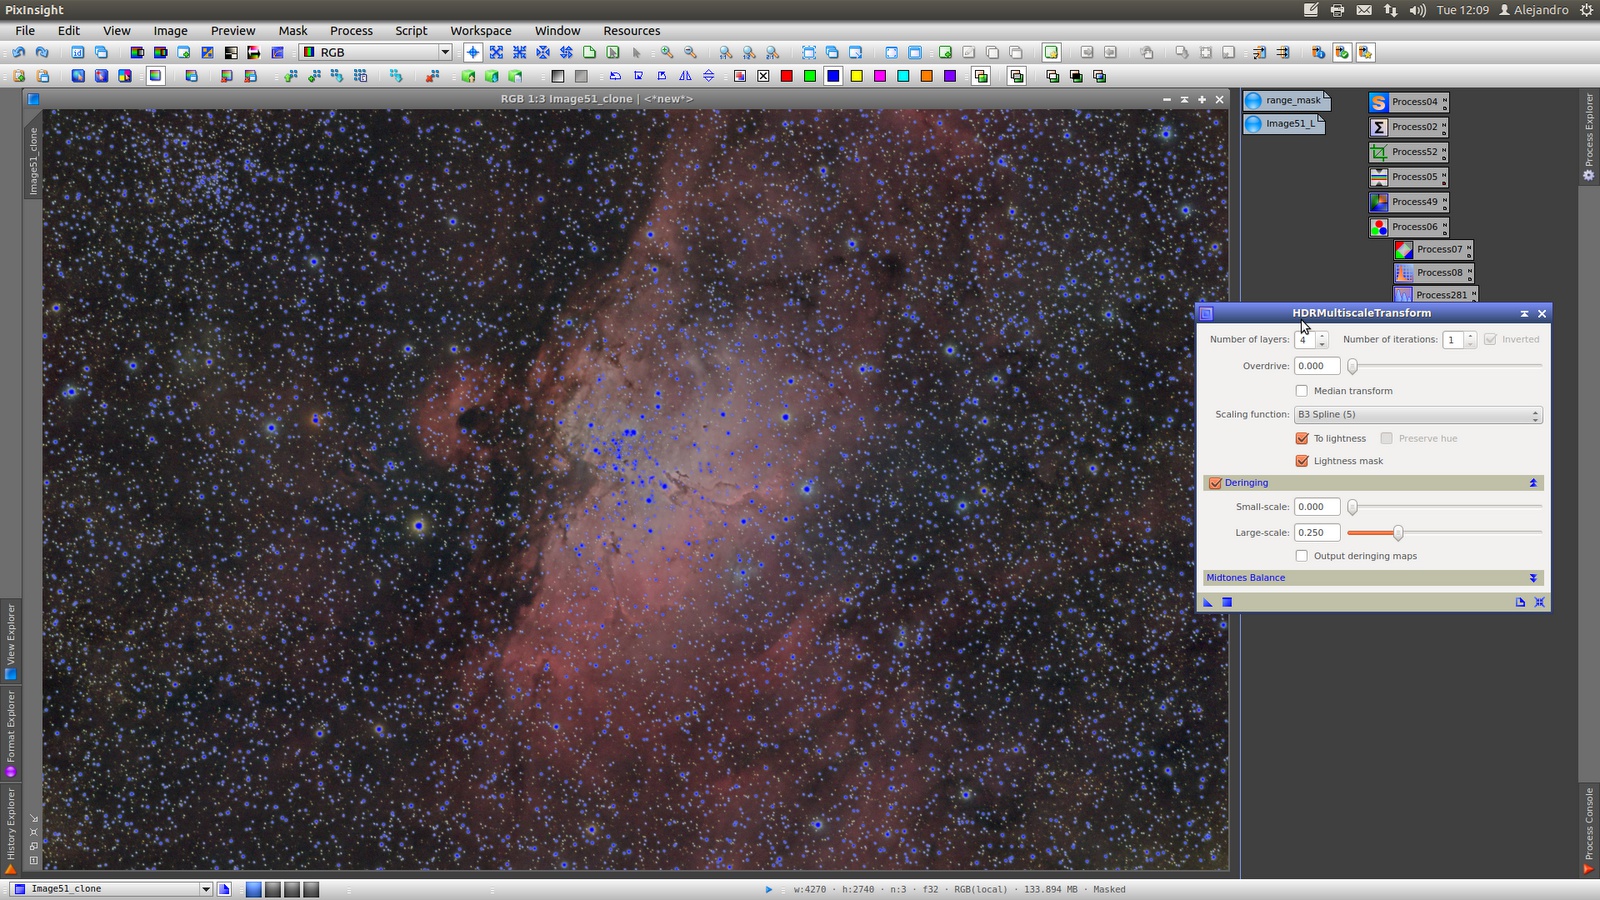
HDRMulitiscaleTransform once again but this time in four layers Deringing in large-scale:
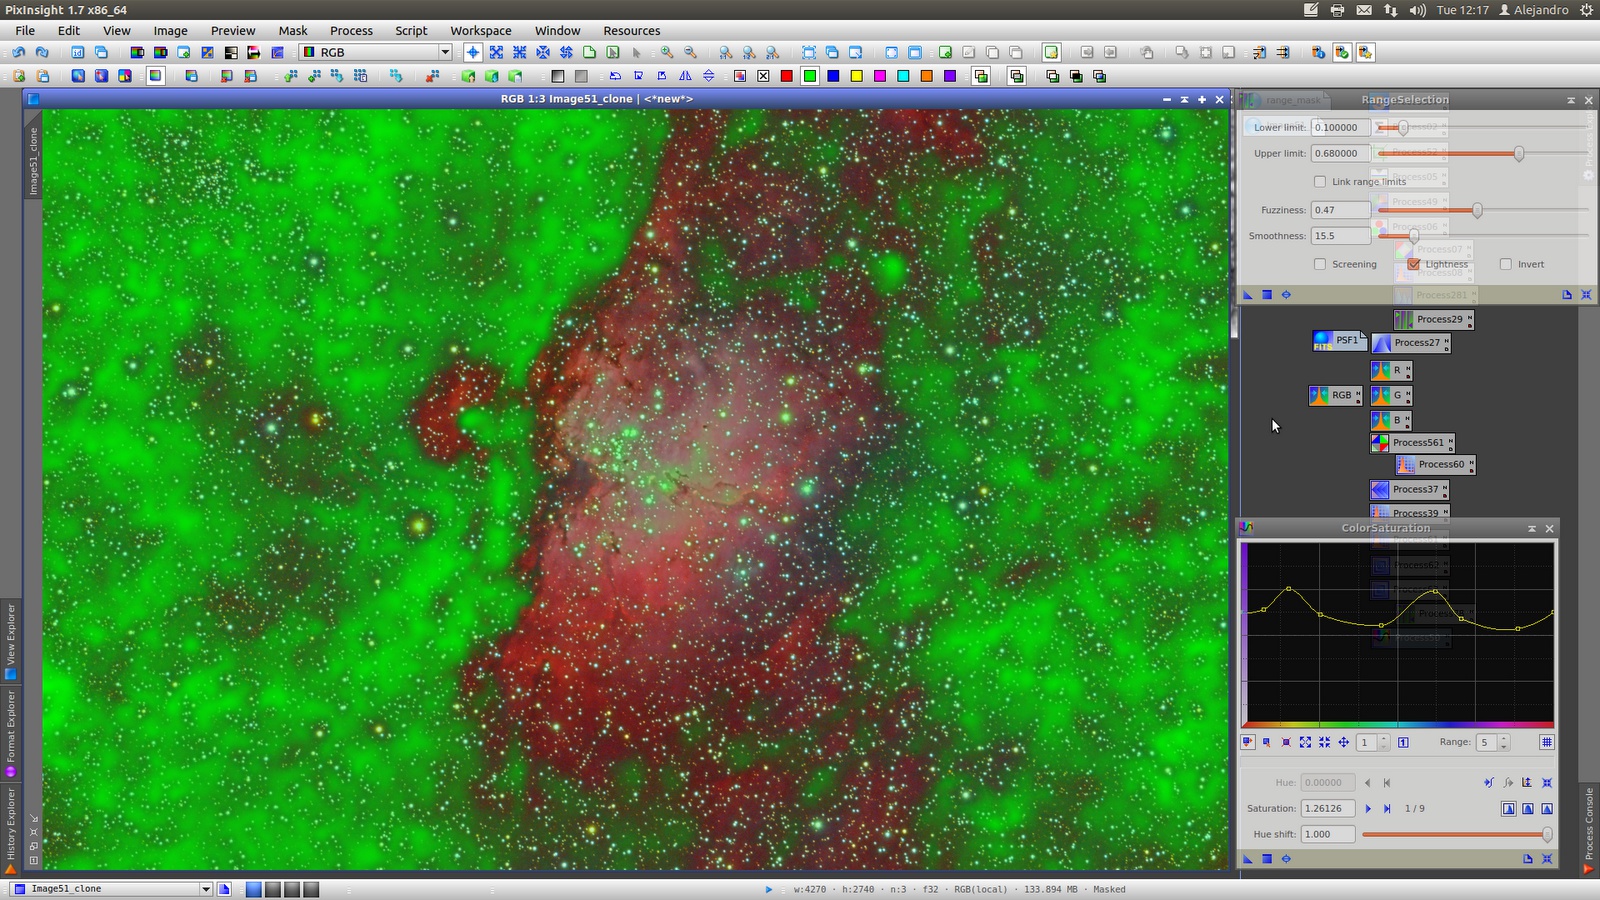
For ColorSaturation, build a new rangemask to protect background areas that increase too much the noise when saturate. My choice is saturate mainly blue and orange:
Without mask apply SCNR to eliminate greenish:
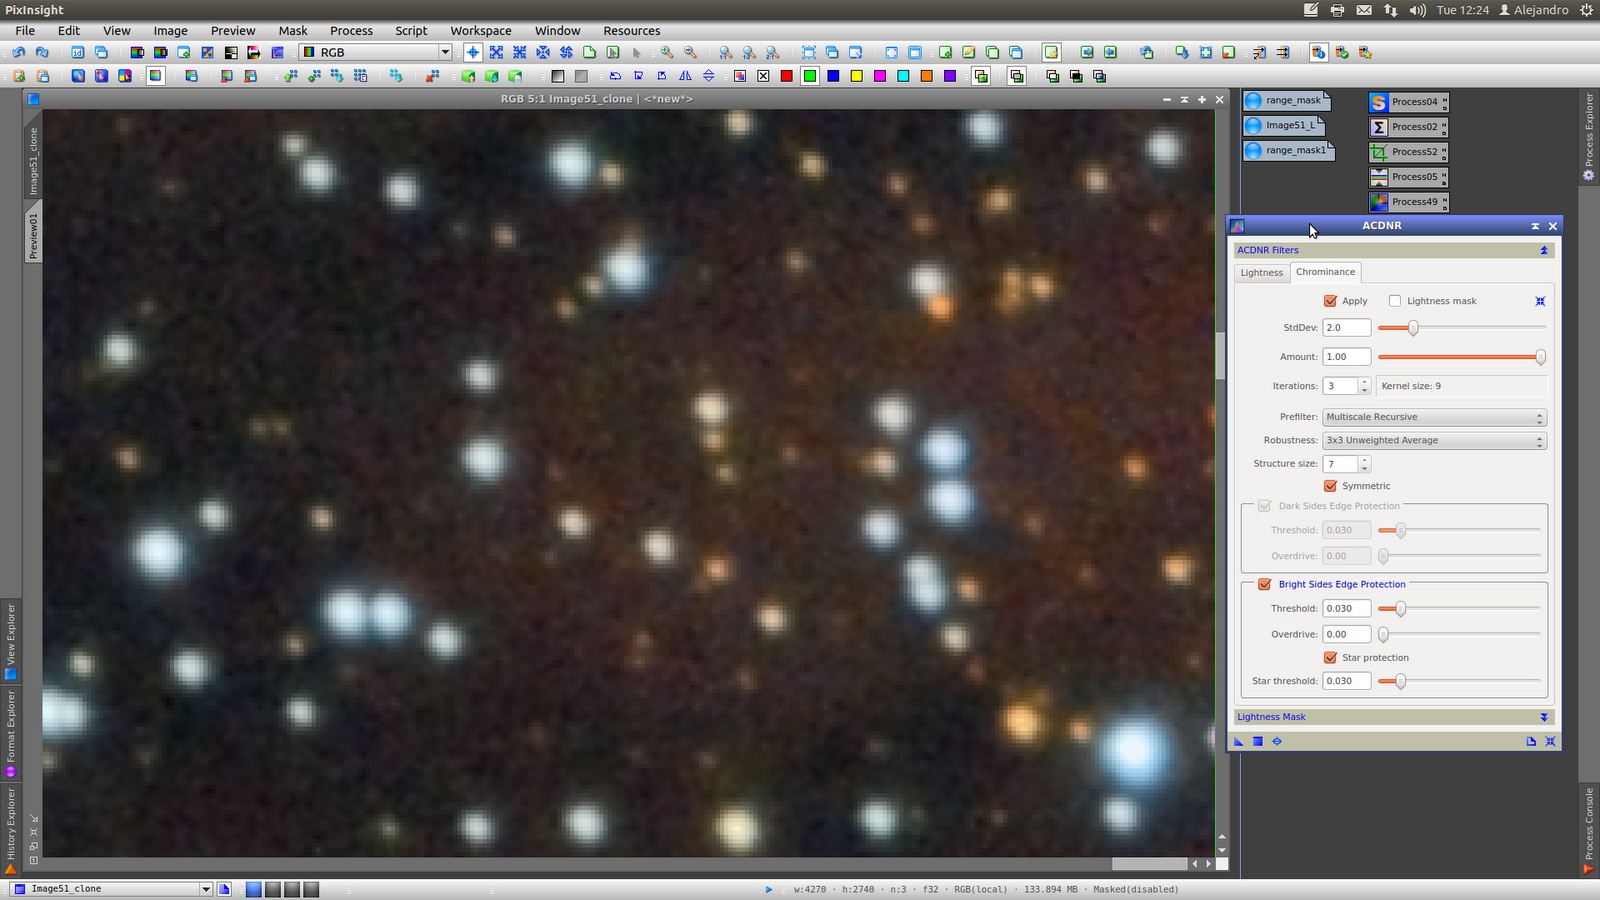
As ColorSaturation has increased Chrominance noise, apply ACDNR with the "aggressive" Multiscale Rescursive Prefilter without mask:
Before:

After:
Now look for more details using LocalHistogramEqualization. Star protection is needed in order to avoid stars increase the brightness. I use Truncation in StarMask Tool to have very well protected area in the stars cores and surrounding:
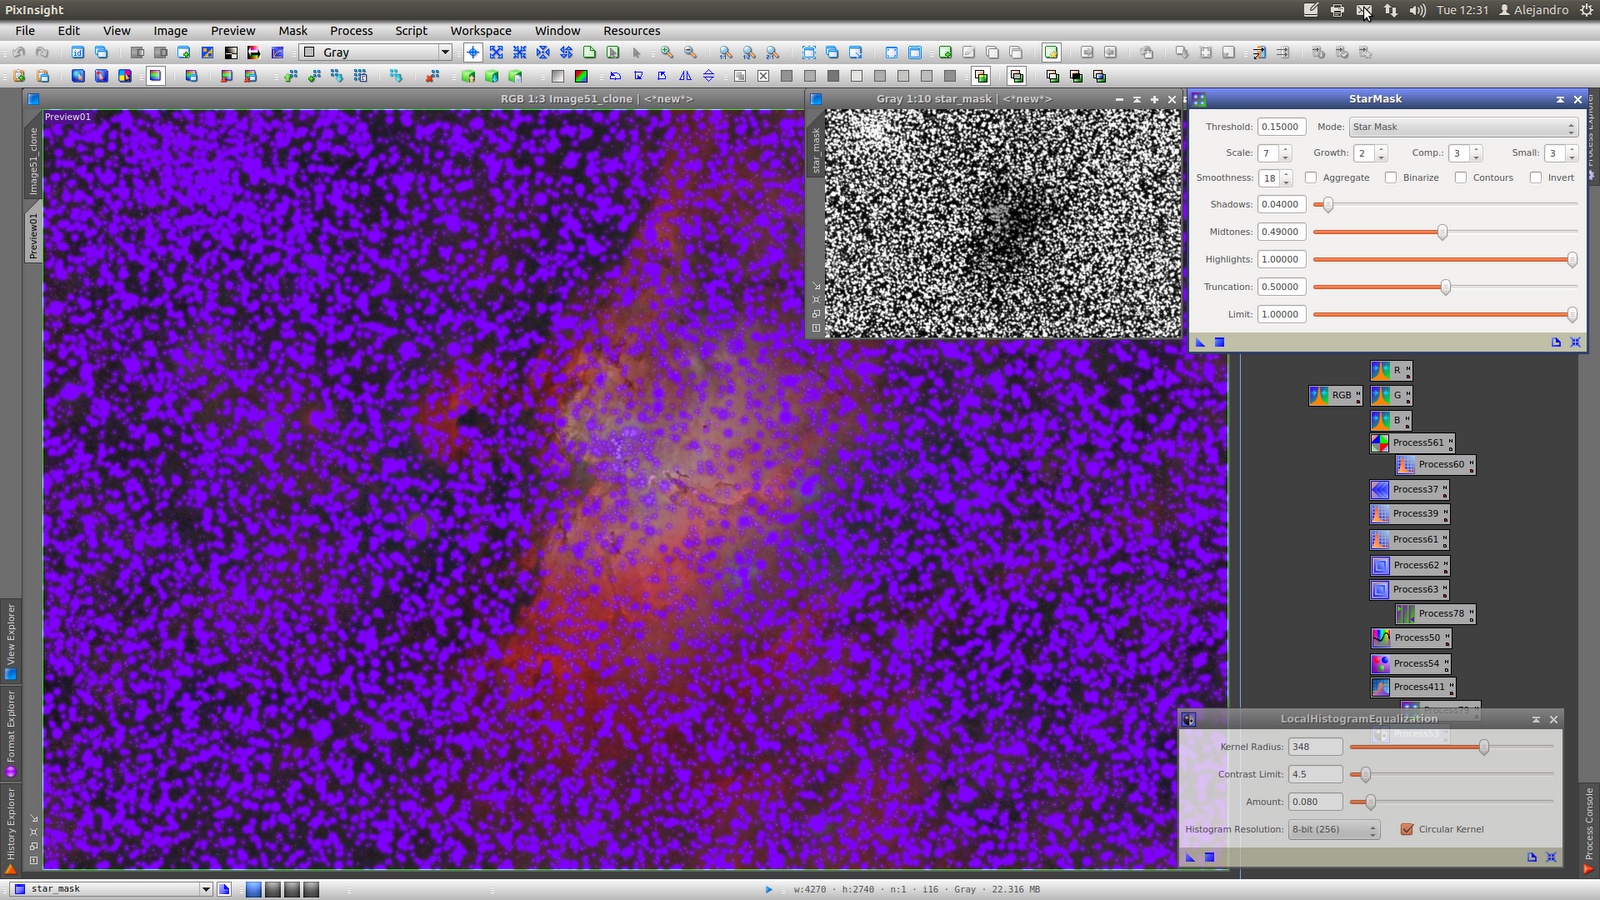
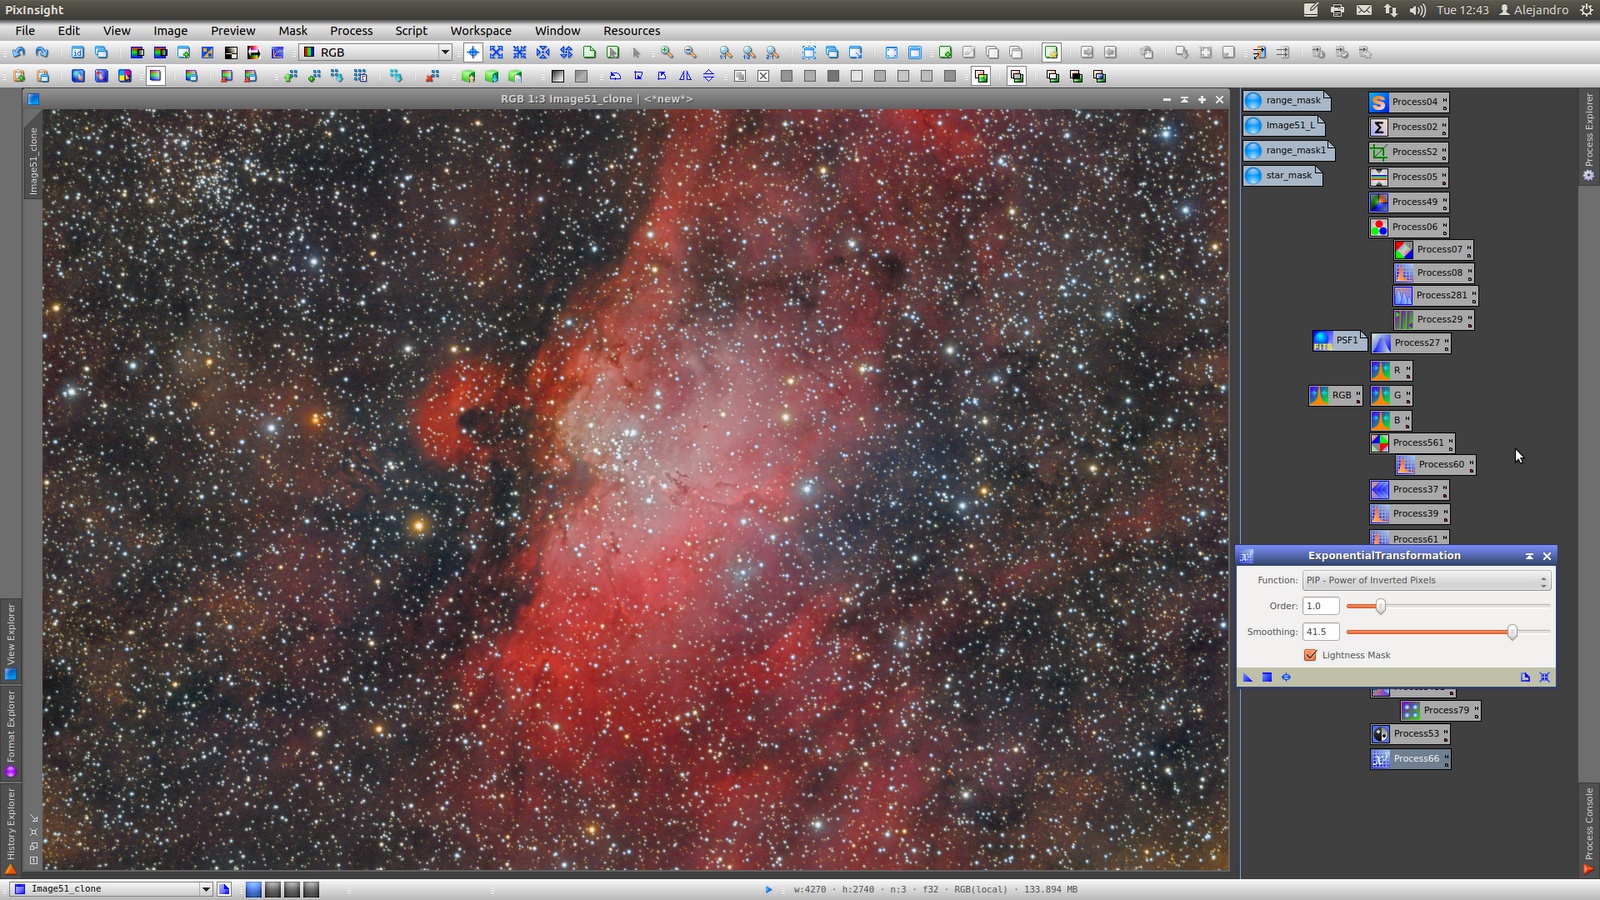
To increase the brightness of faints nebulae in the background use ExponentialTransformation with high smoothing:
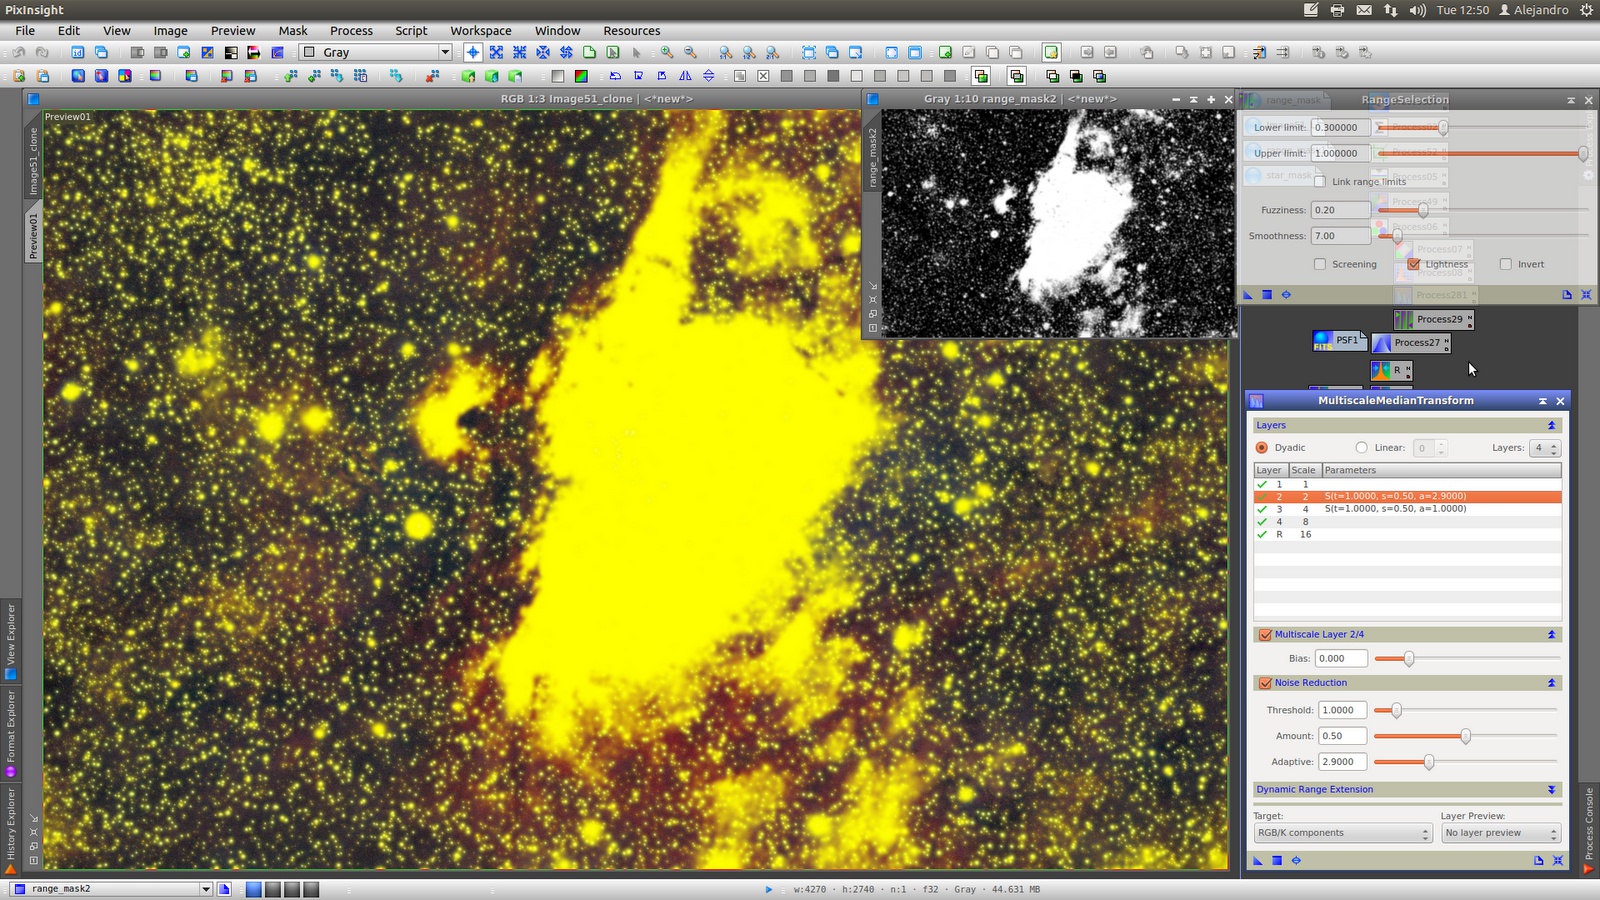
MuliscaleMedianTransform for better definition of structures protecting stars with starmask to avoid increasing of bright:
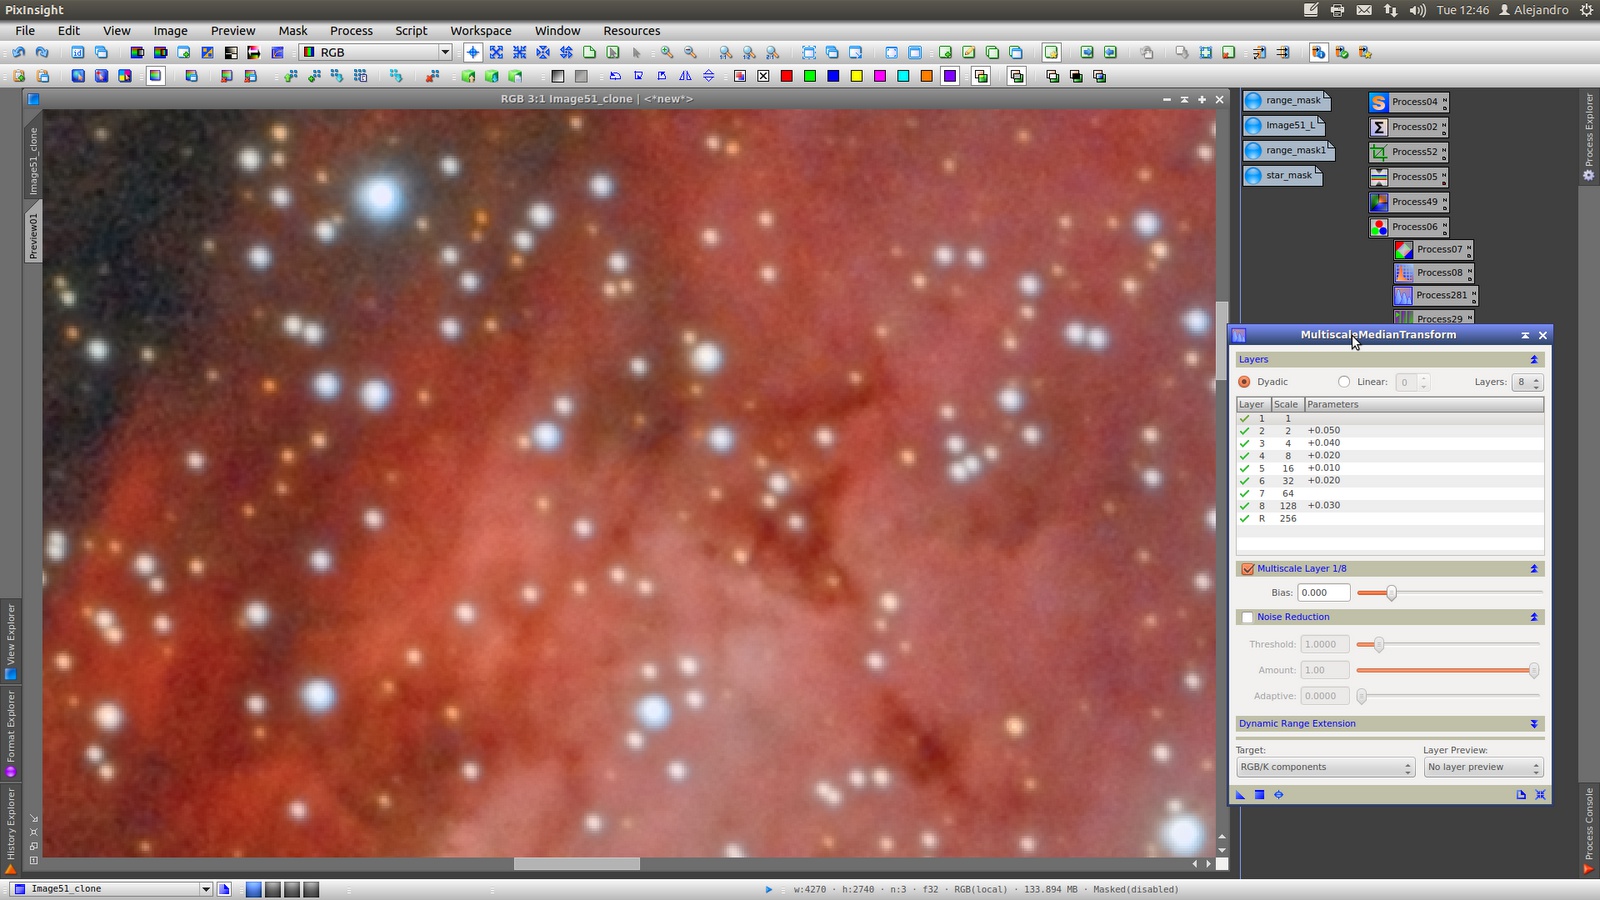
The ExponentialTransformation tool increase the noise a little. Then I apply a new reduction using MulitiscaleMedianTransform in layers number 2 and 3:
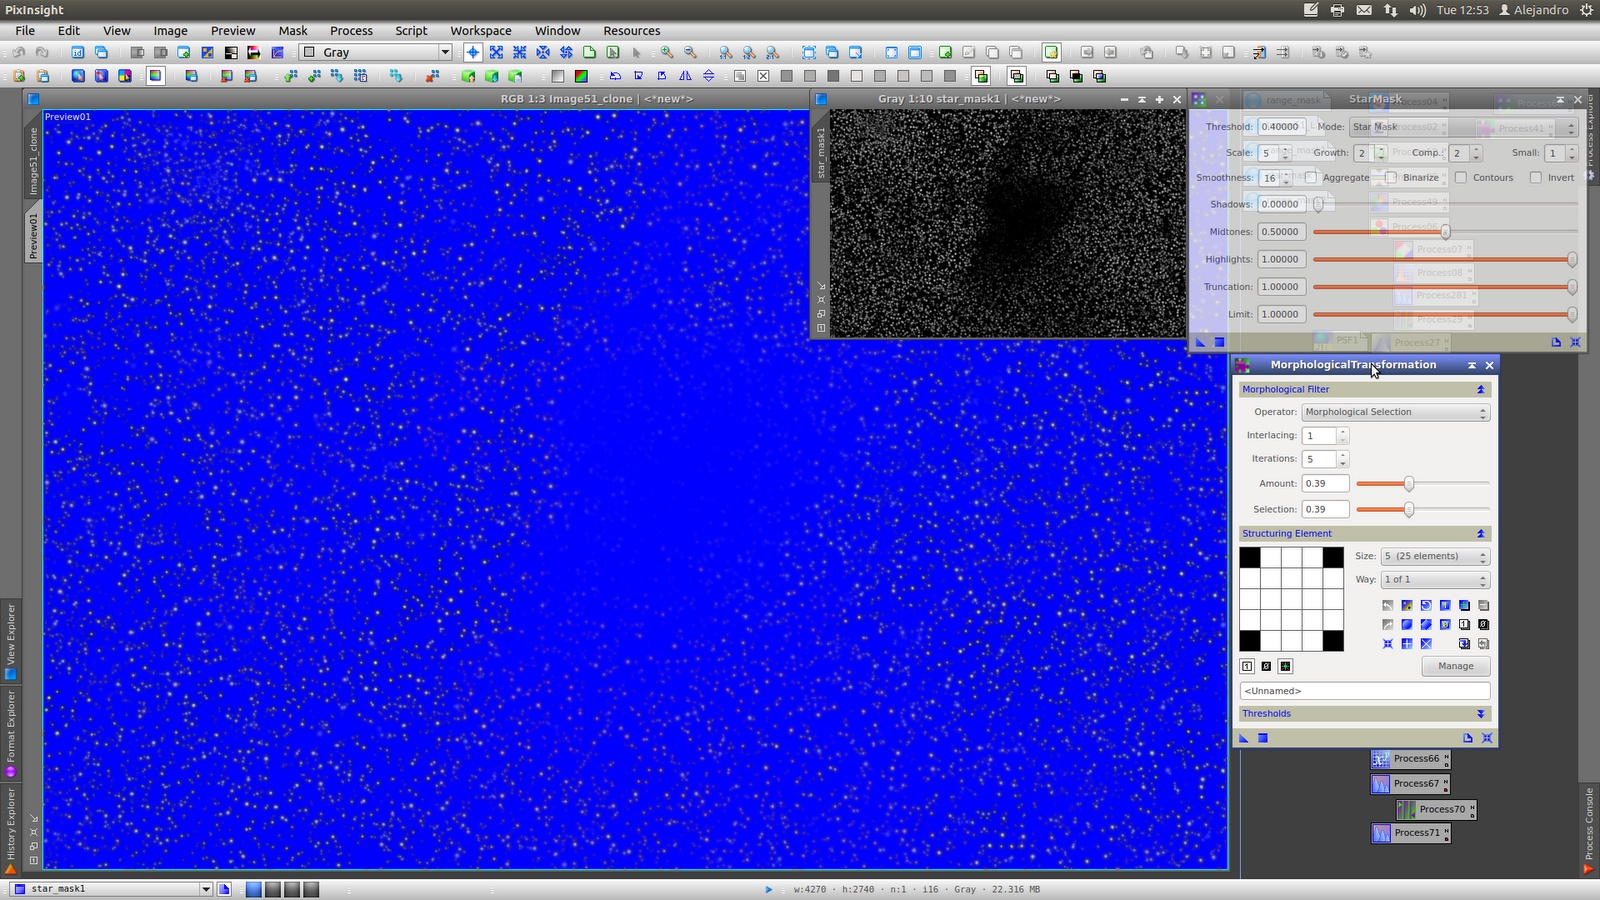
With a new starmask protecting nebula apply MorphologicalTransformation (selecting Morphological Selection as operator) to stars to reduce them a little:
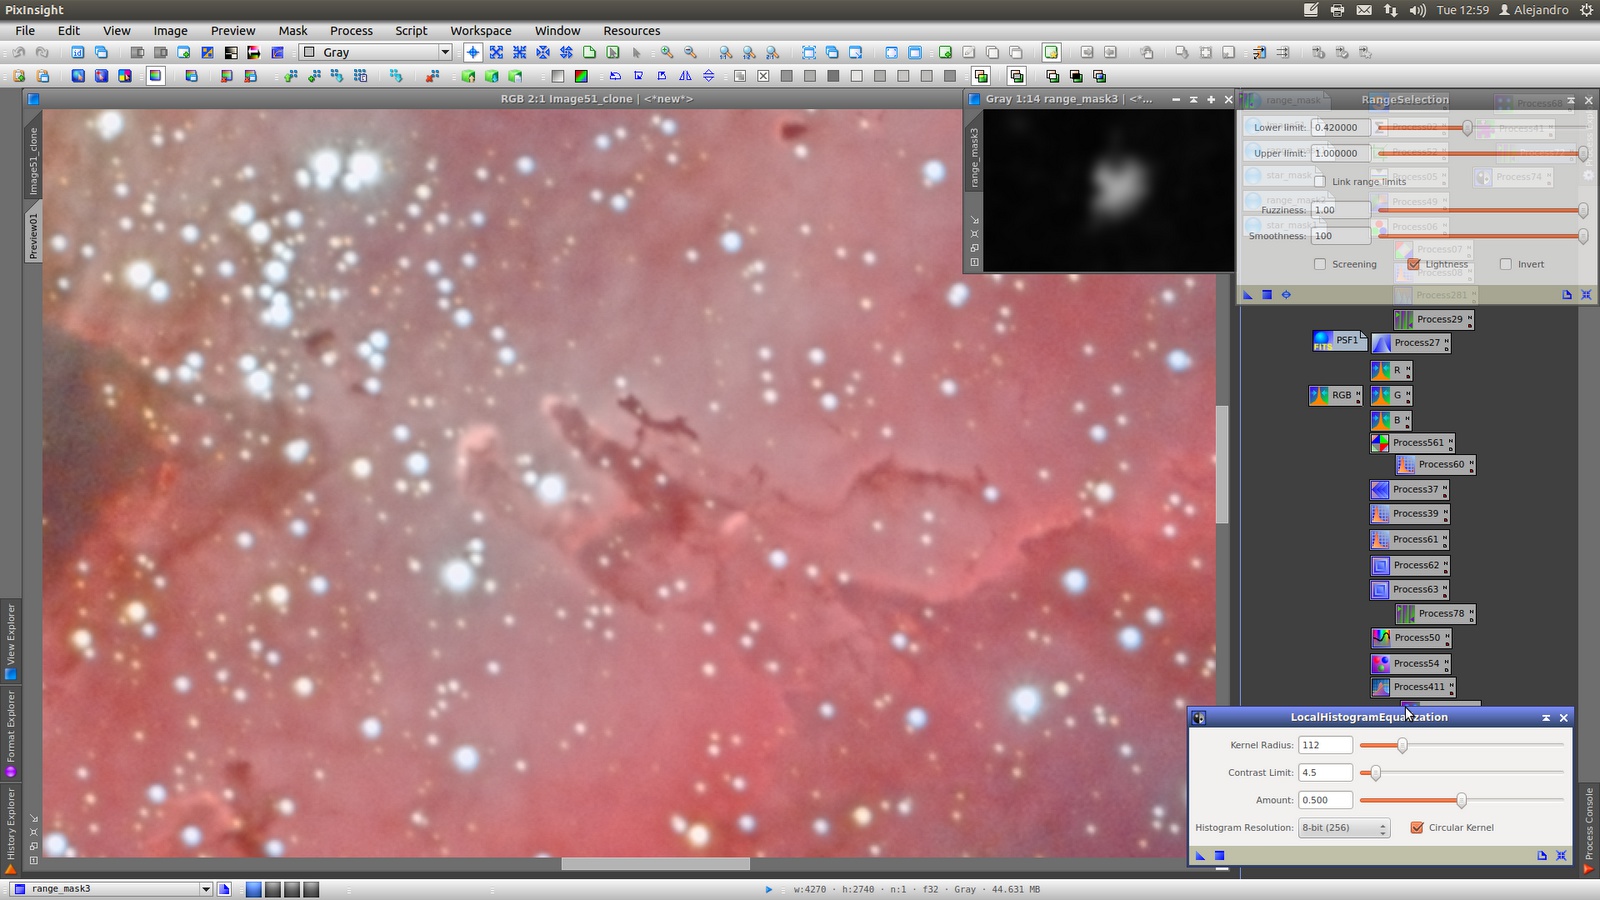
The main nebula has zones where the contrast can be improved. For that build a rangemask using RangeSelection tool that allow working only in the bright regions and apply LocalHistogramEqualization:
Before:
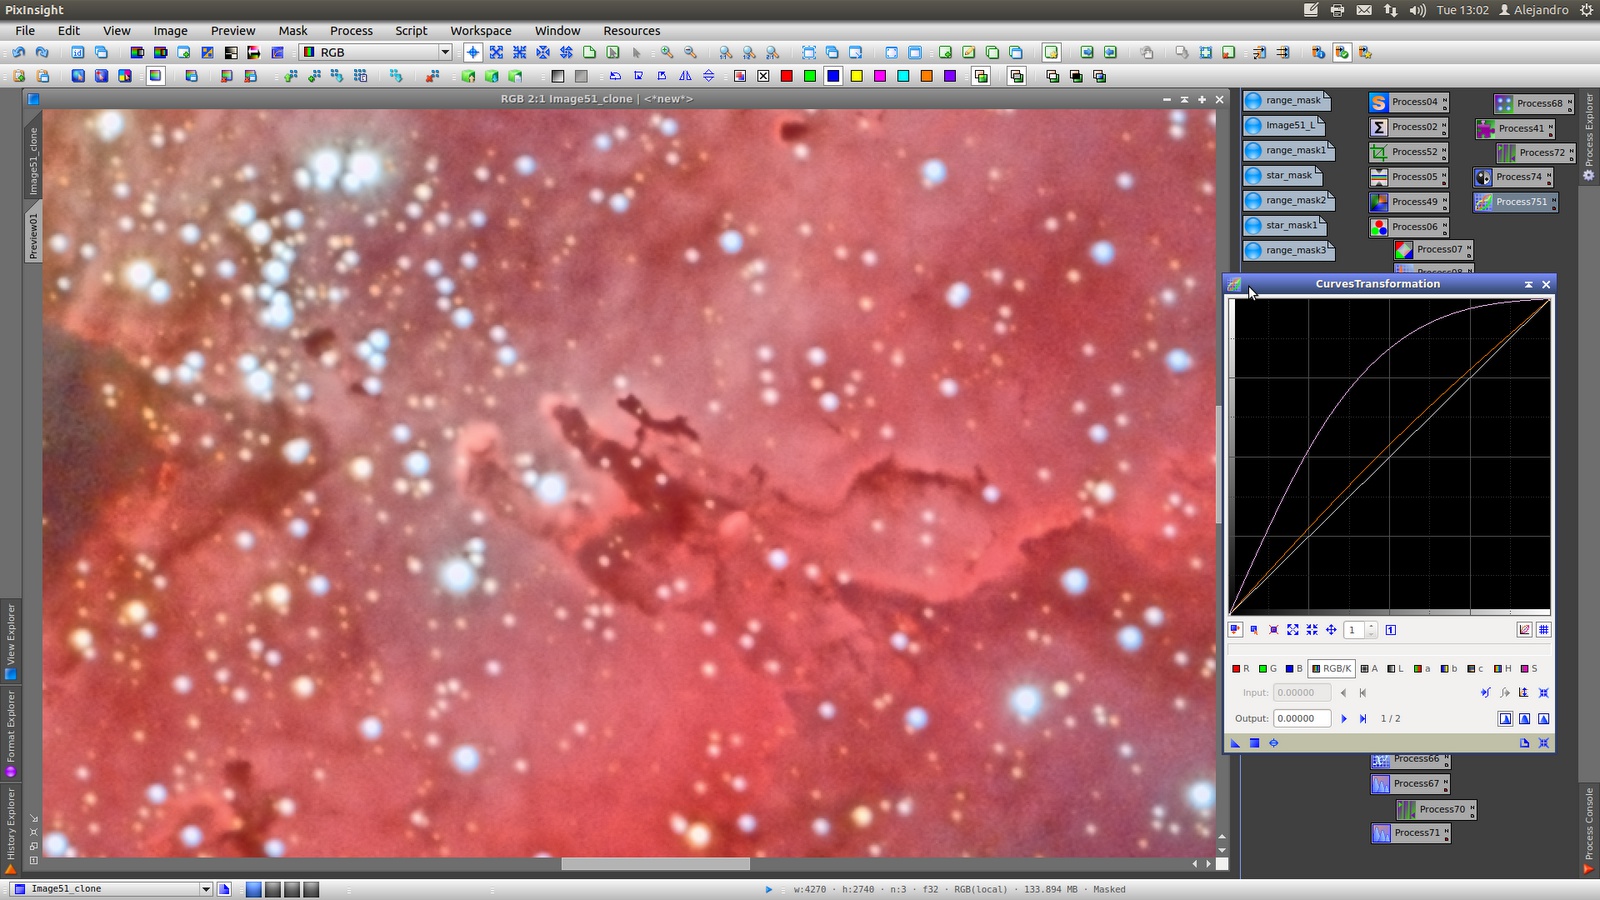
After:

CurvesTransformation to increase again the saturation lost during LocalHistogramEqualization. With the same mask in order to affect the bright areas:
Finally a little decrease of RGB channels:
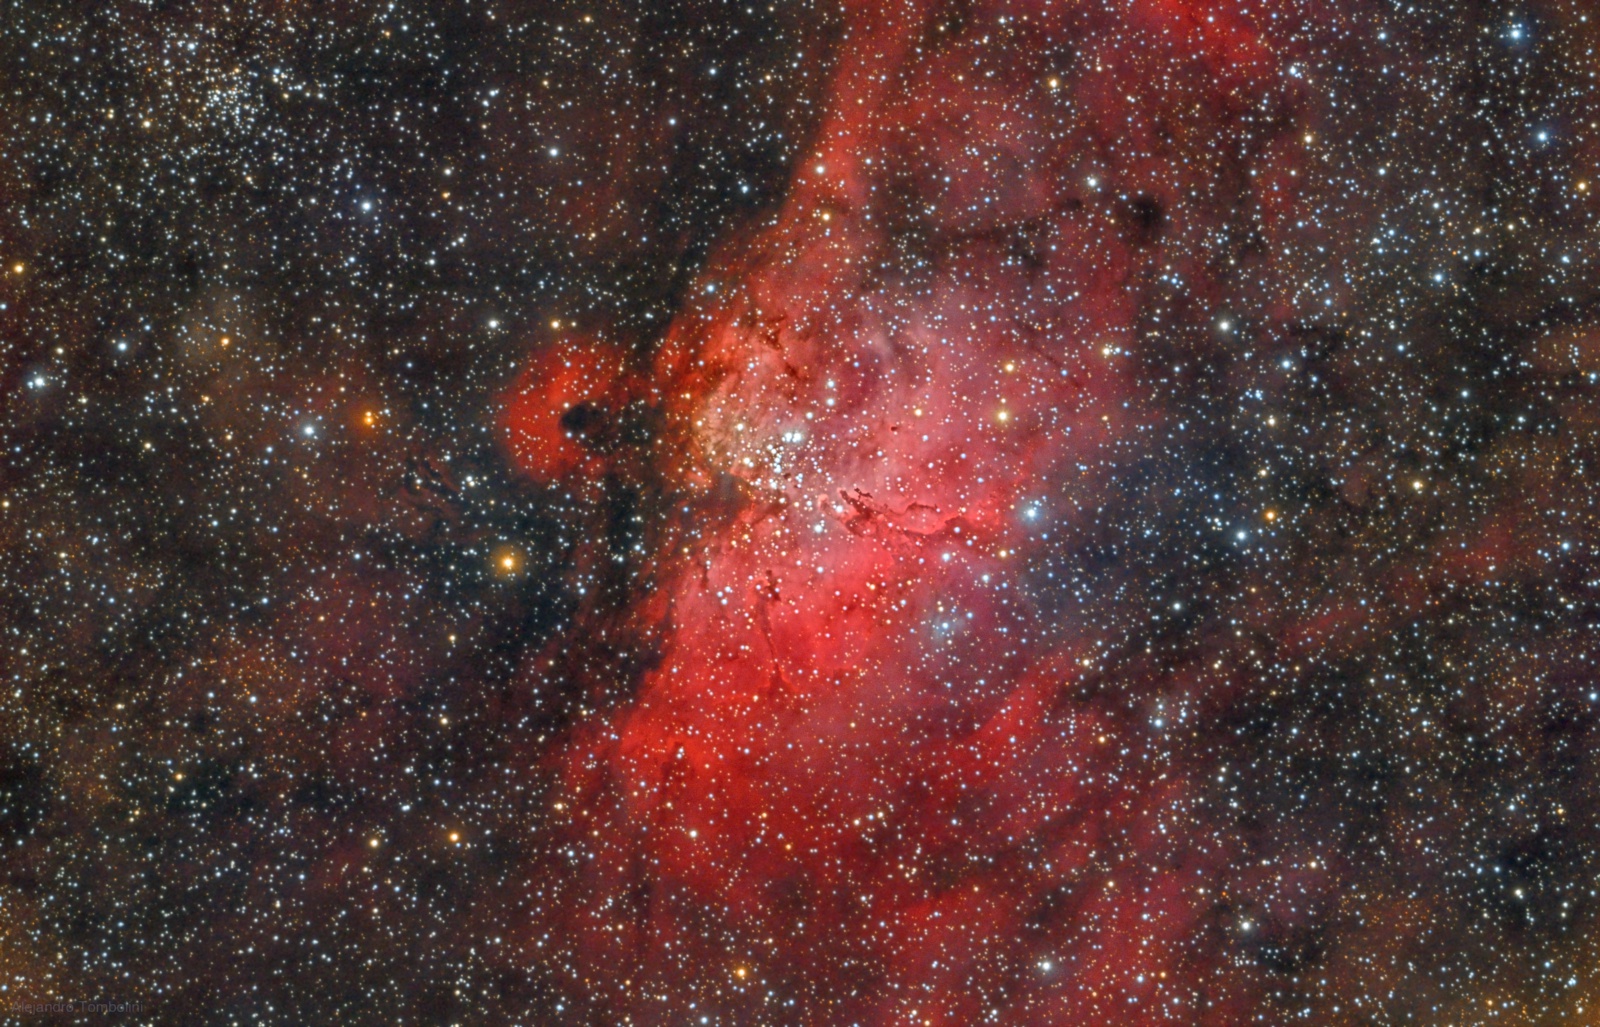
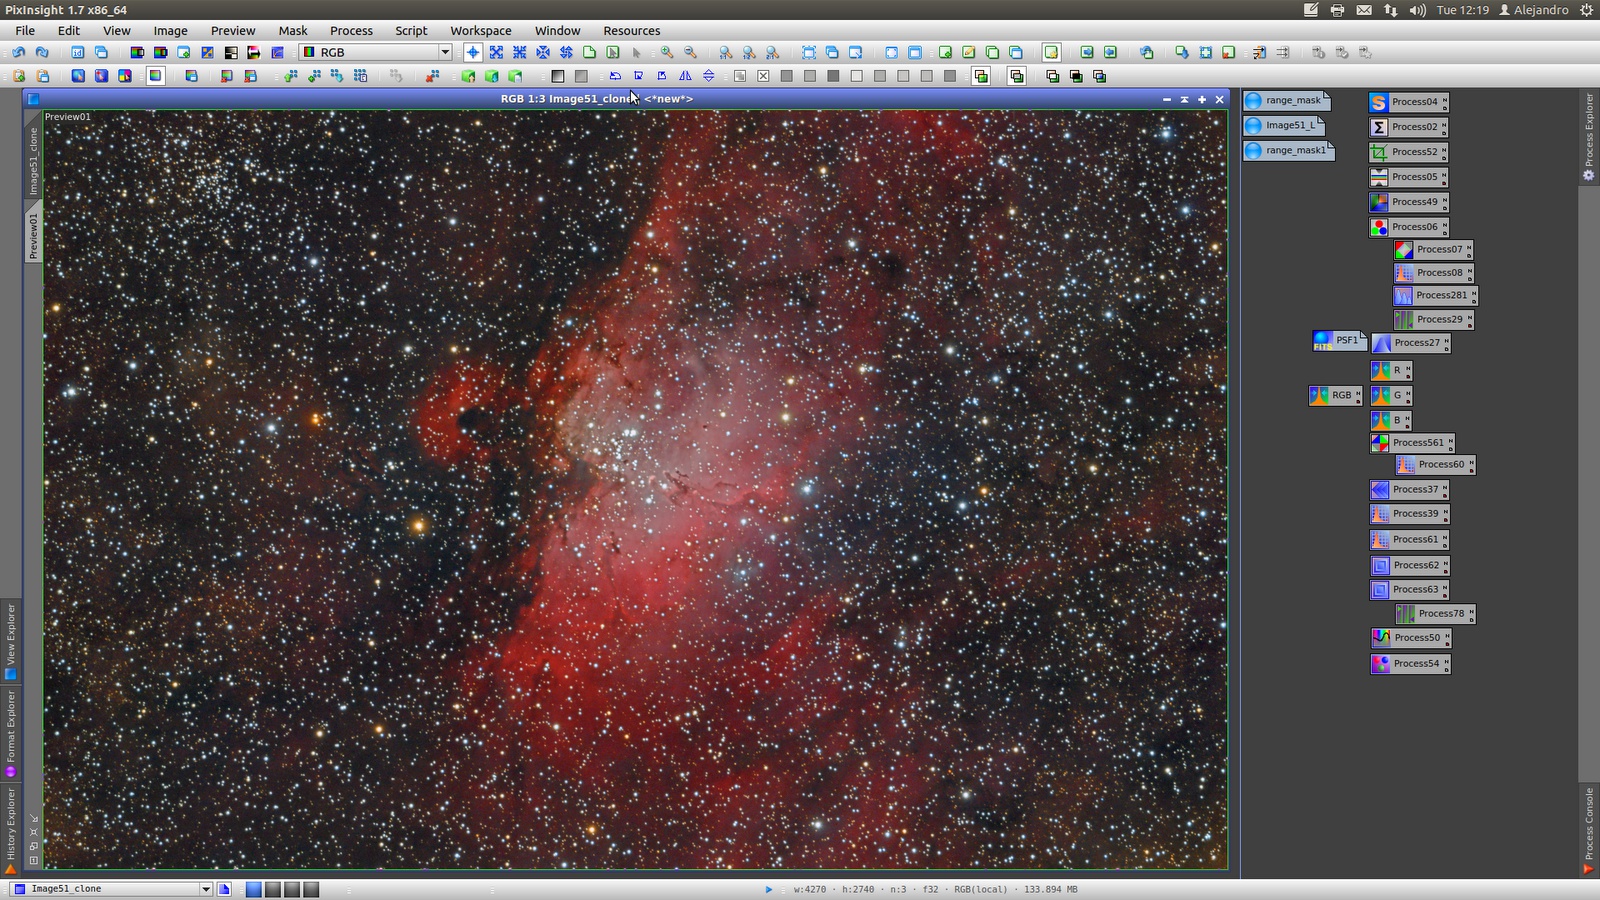
Final result after resample to 1600x1060 and Signature with DrawSignature Script: