Pre-processing and Linear post-processing of M101
by Alejandro Tombolini
Introduction
Preprocessing steps and linear post processing until the first non-linear stretching.
Image of Steven_usa publicated in PixInsight Forum - Preprocessing steps and linear post processing until the first non-linear stretching - Main notes: SuperBias, BPP for calibration, Manual StarAlignment and ImageIntegration. Optical distortions corrected with StarAlignment.
Processing
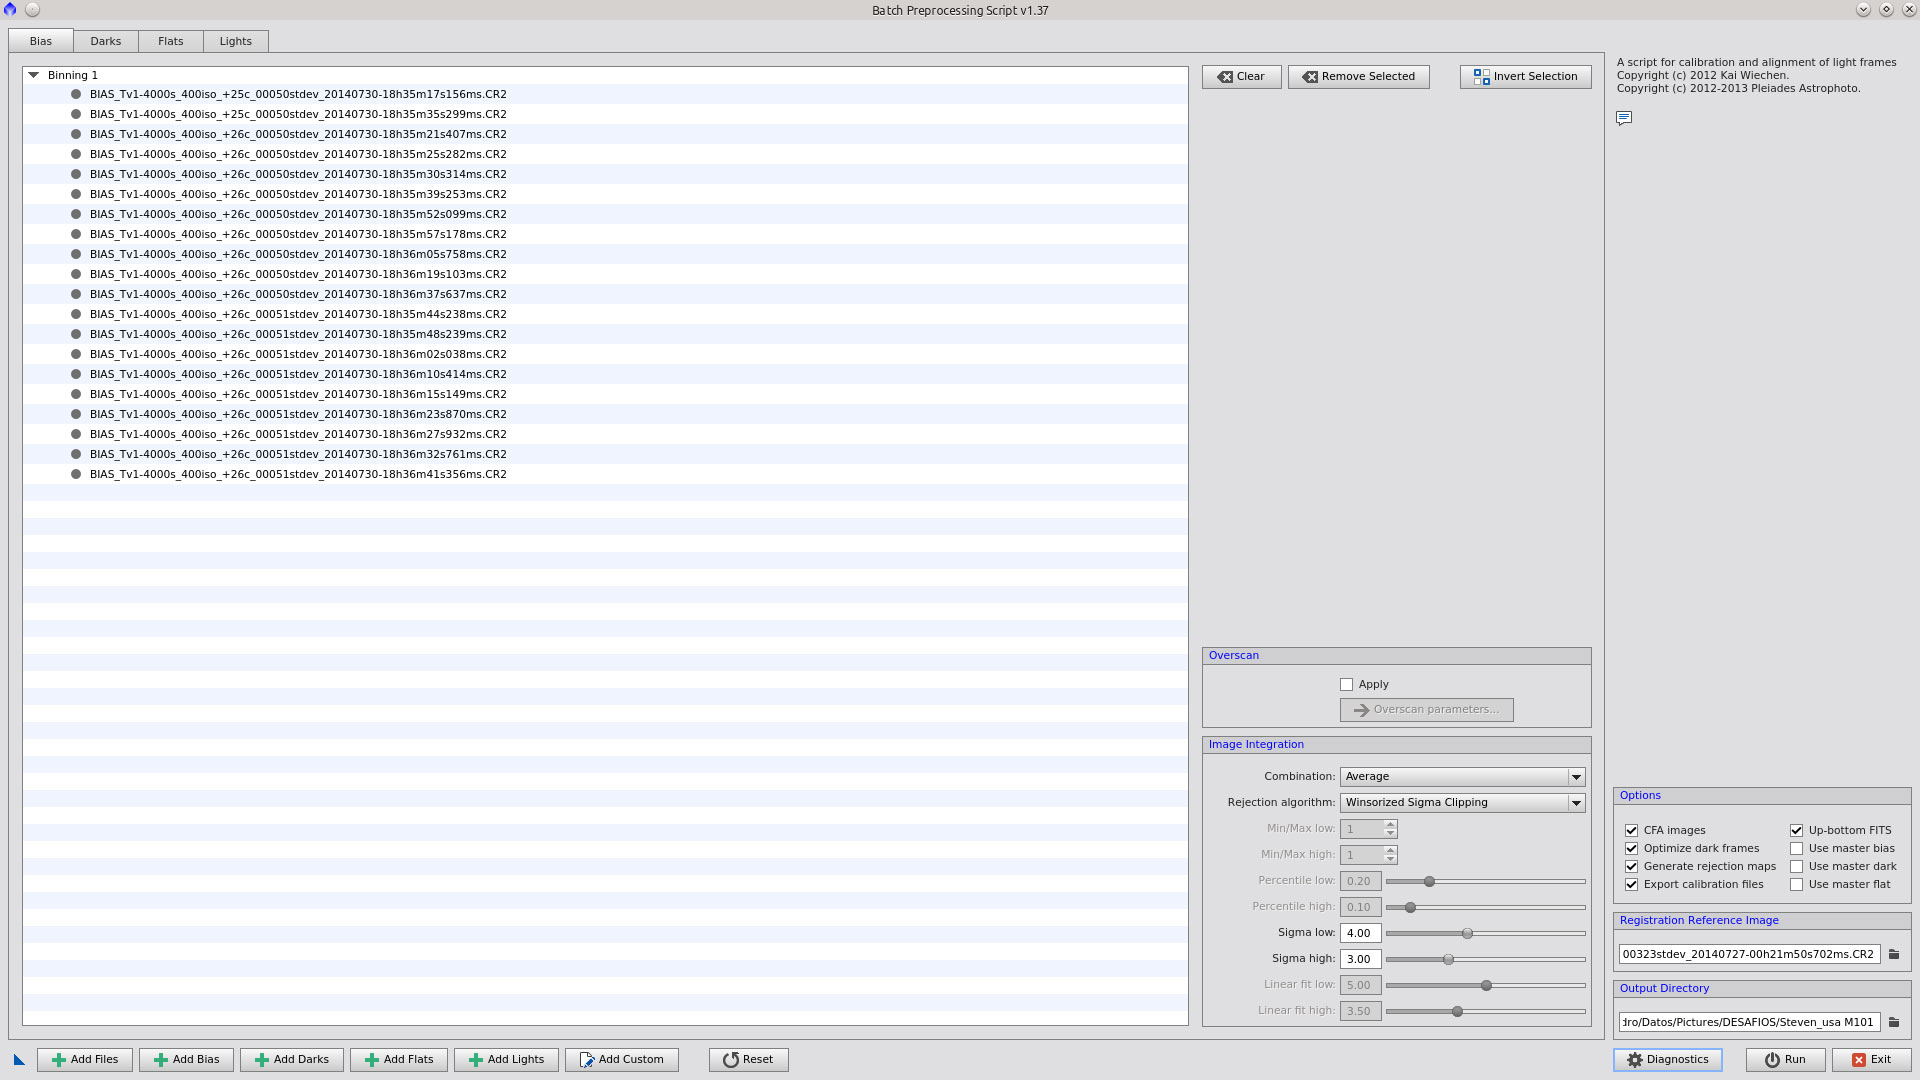
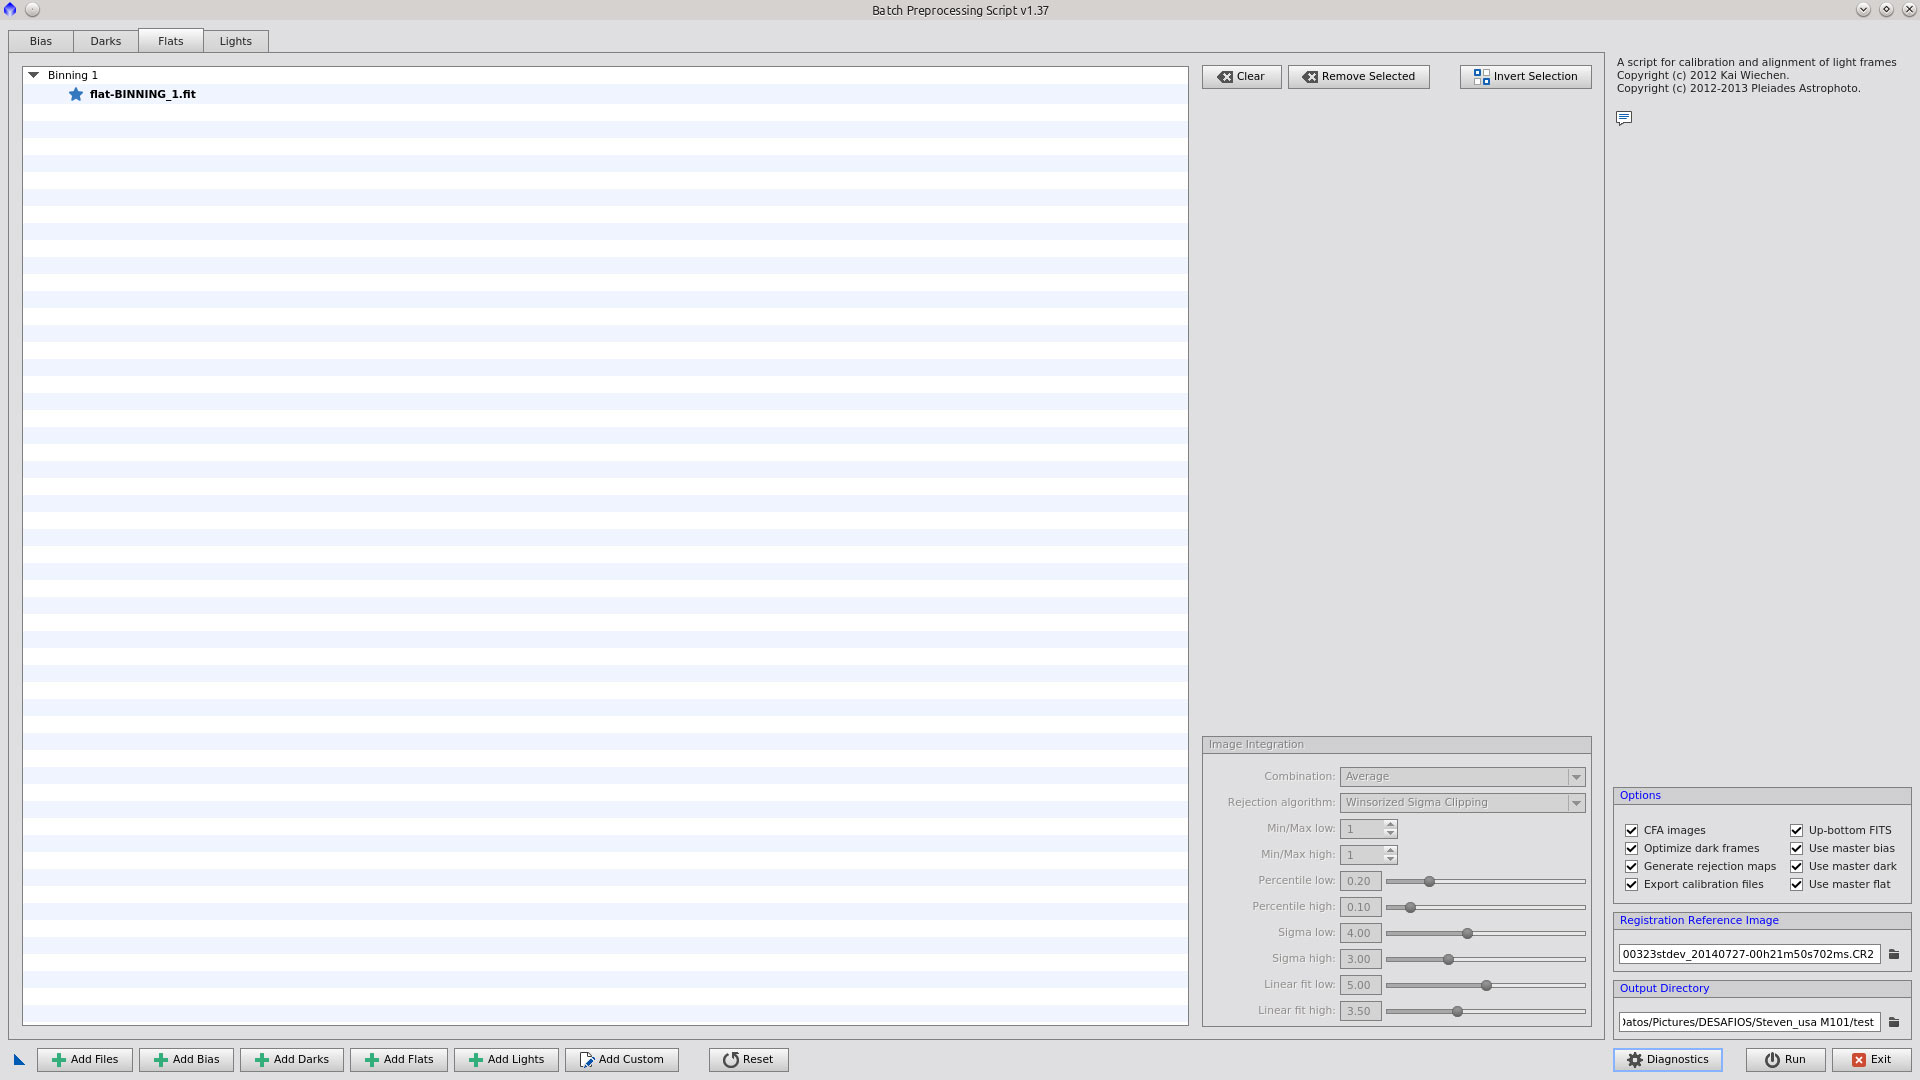
Open BPP and add Bias: (See video of how to add Bias)
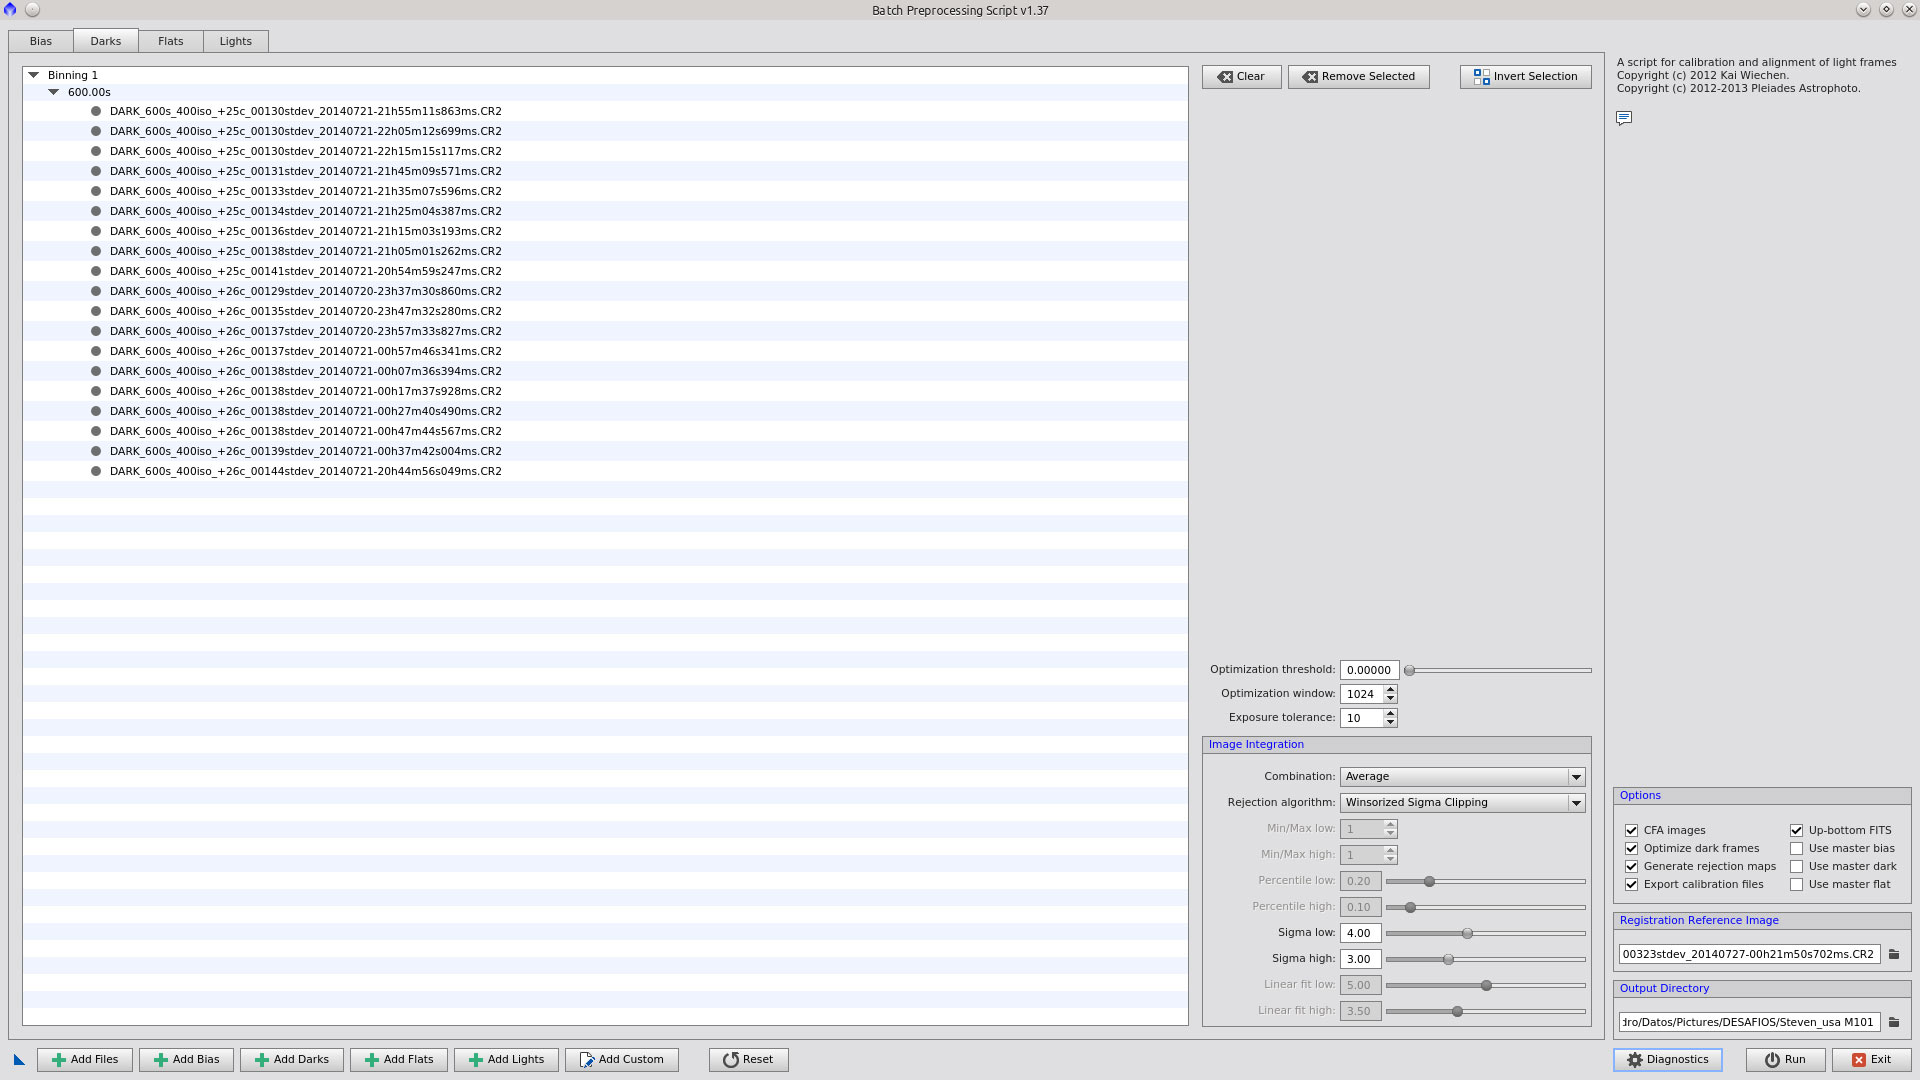
Add Darks: (See video of how to add Darks)
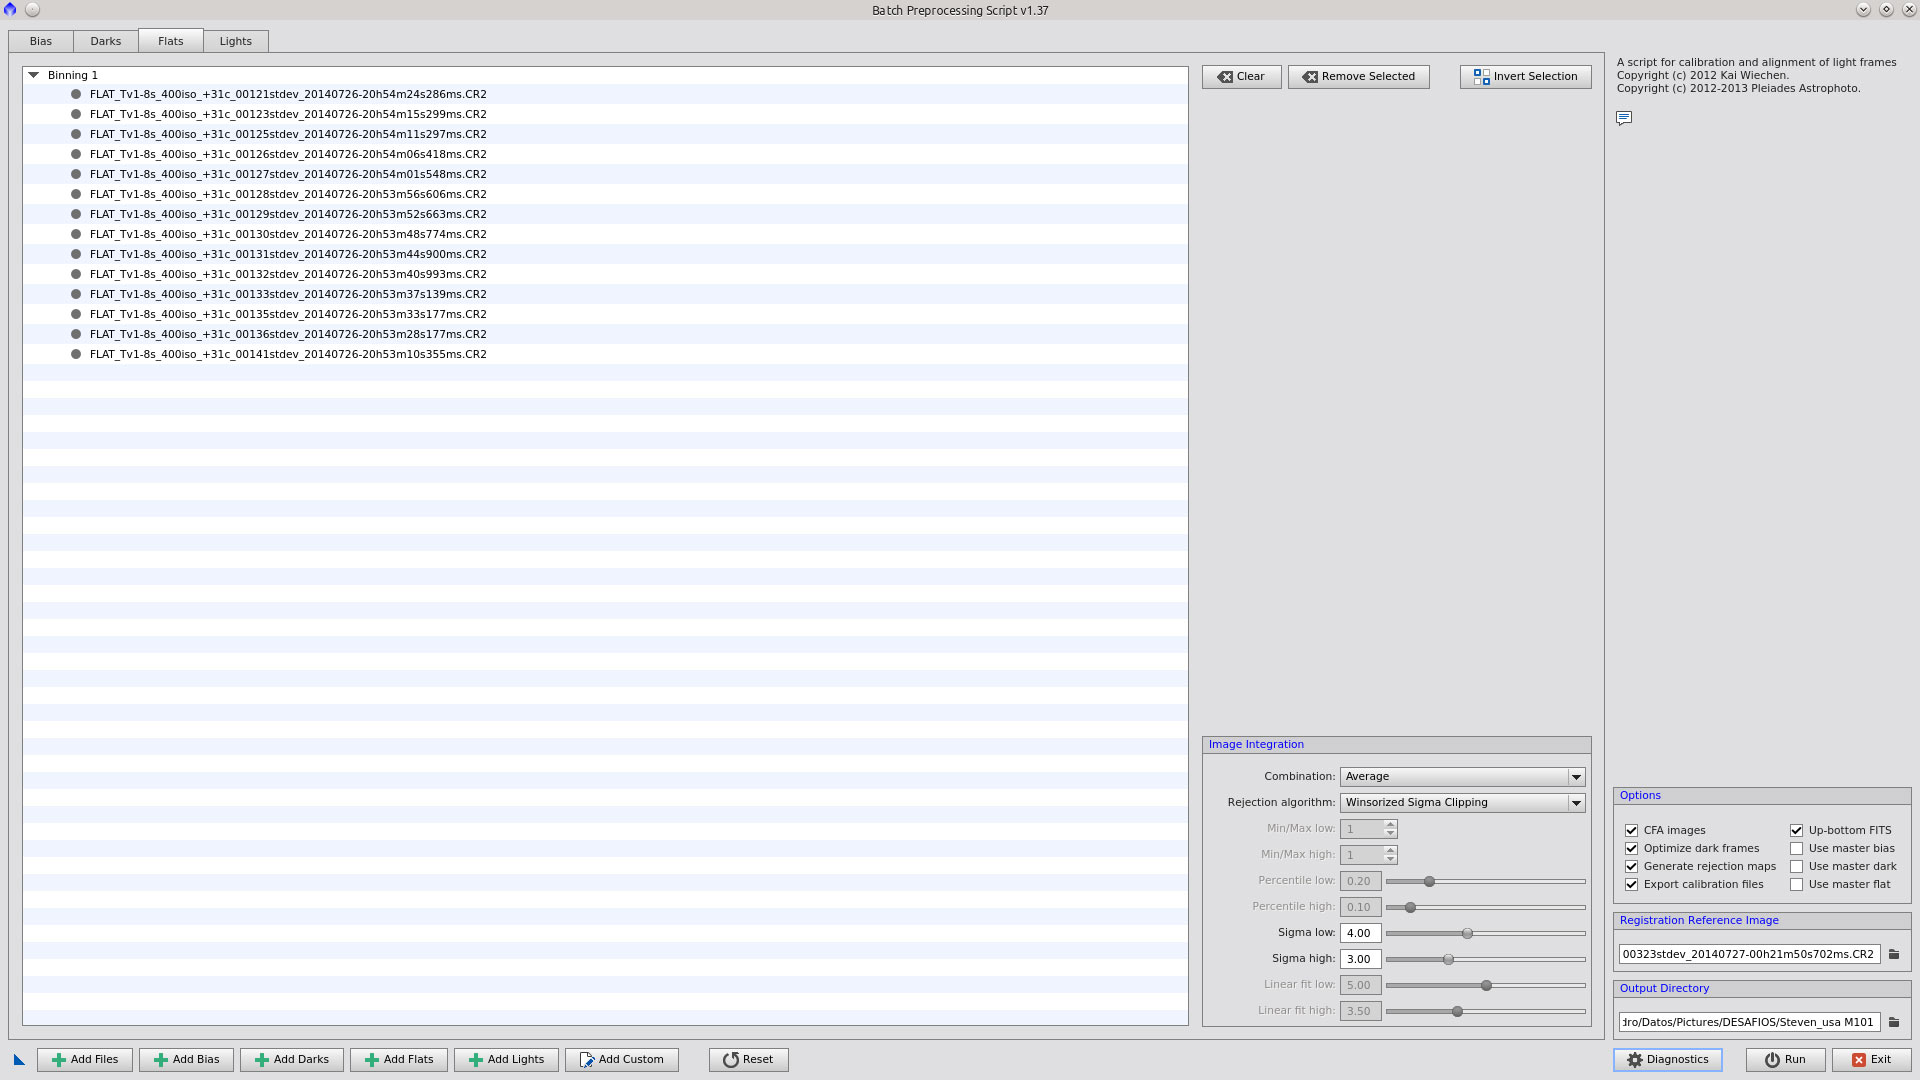
Add Flats: (See video of how to add Flats)
Add Lights: (See video of how to add Lights)
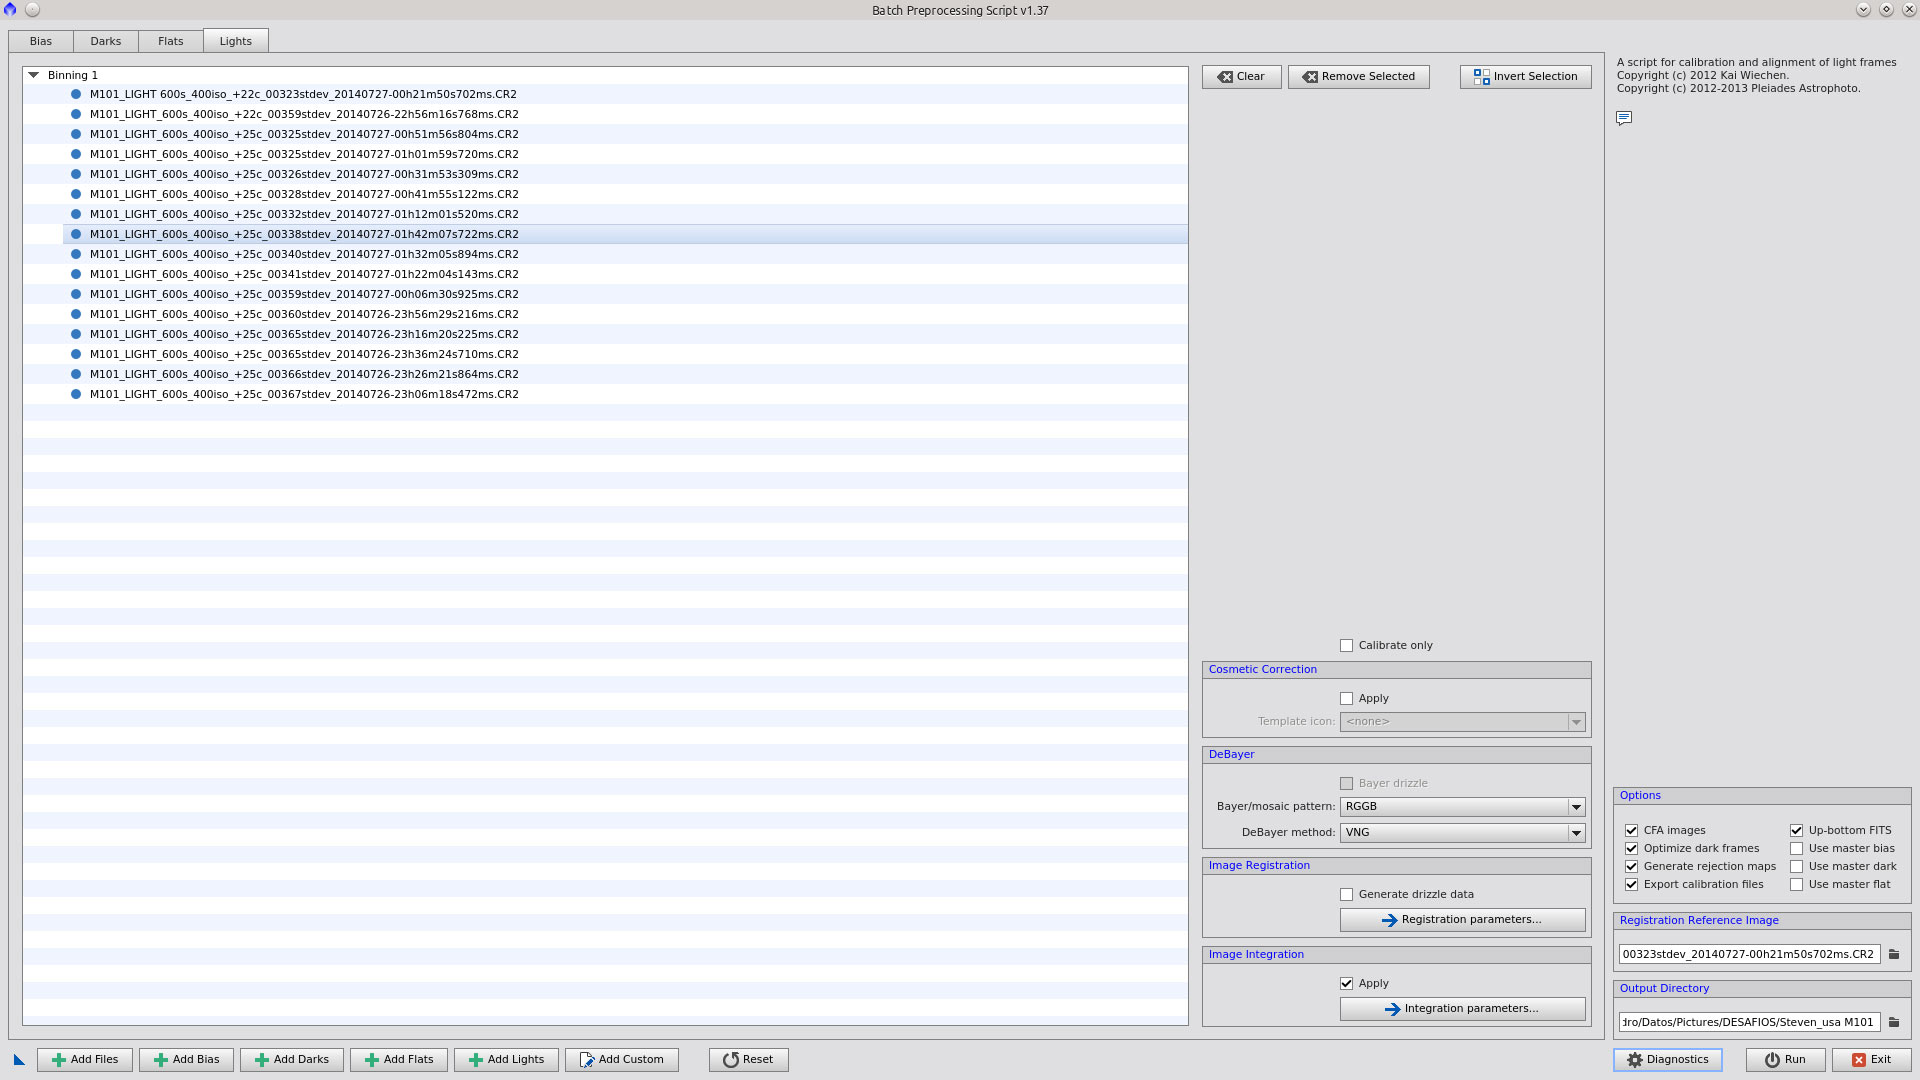
Be sure to check CFA and select a light as reference image for registration. Finally select and output directory and Diagnostics to be sure you did not forget anything.
BPP generated the MasterBias, MasterDark and MasterFlat without problem, also calibrate the lights but as you have mentioned failed during registration of the calibrated and debayered lights ( _c_d )

If you open Blink tool and load the _c_d images, will see that there are movements and distortions in the images, I think that could be the cause why default StarAlignment parameters fail.
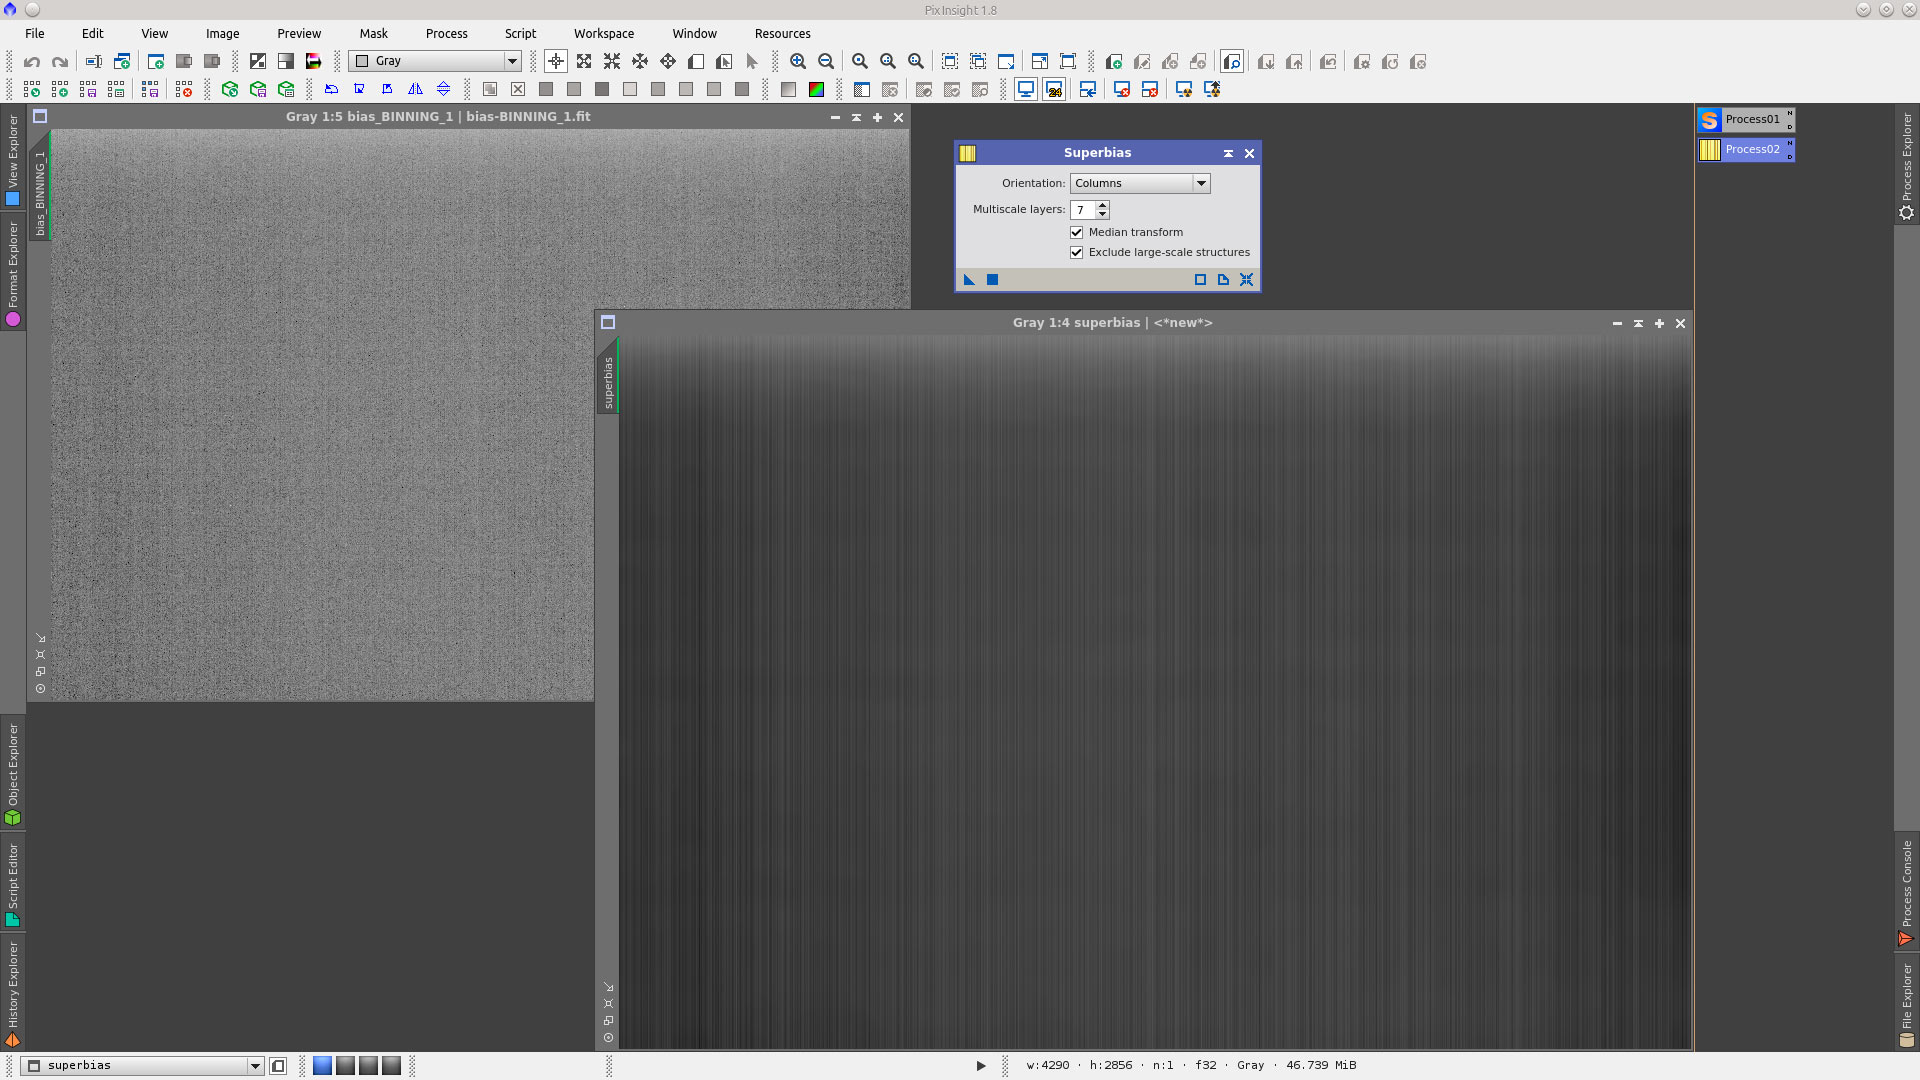
The generated MasterBias is poor as it is made with a low quantity of bias frames. To improve that, can be use SuperBias tool as described in this practical example by Vicent.
Now I will run again BPP, but this time using a more adequate SuperBias and the already generated MasterDark and MasterFlat to calibrate the files again. I select "Calibrate only" for further use of StarAlignment tool.
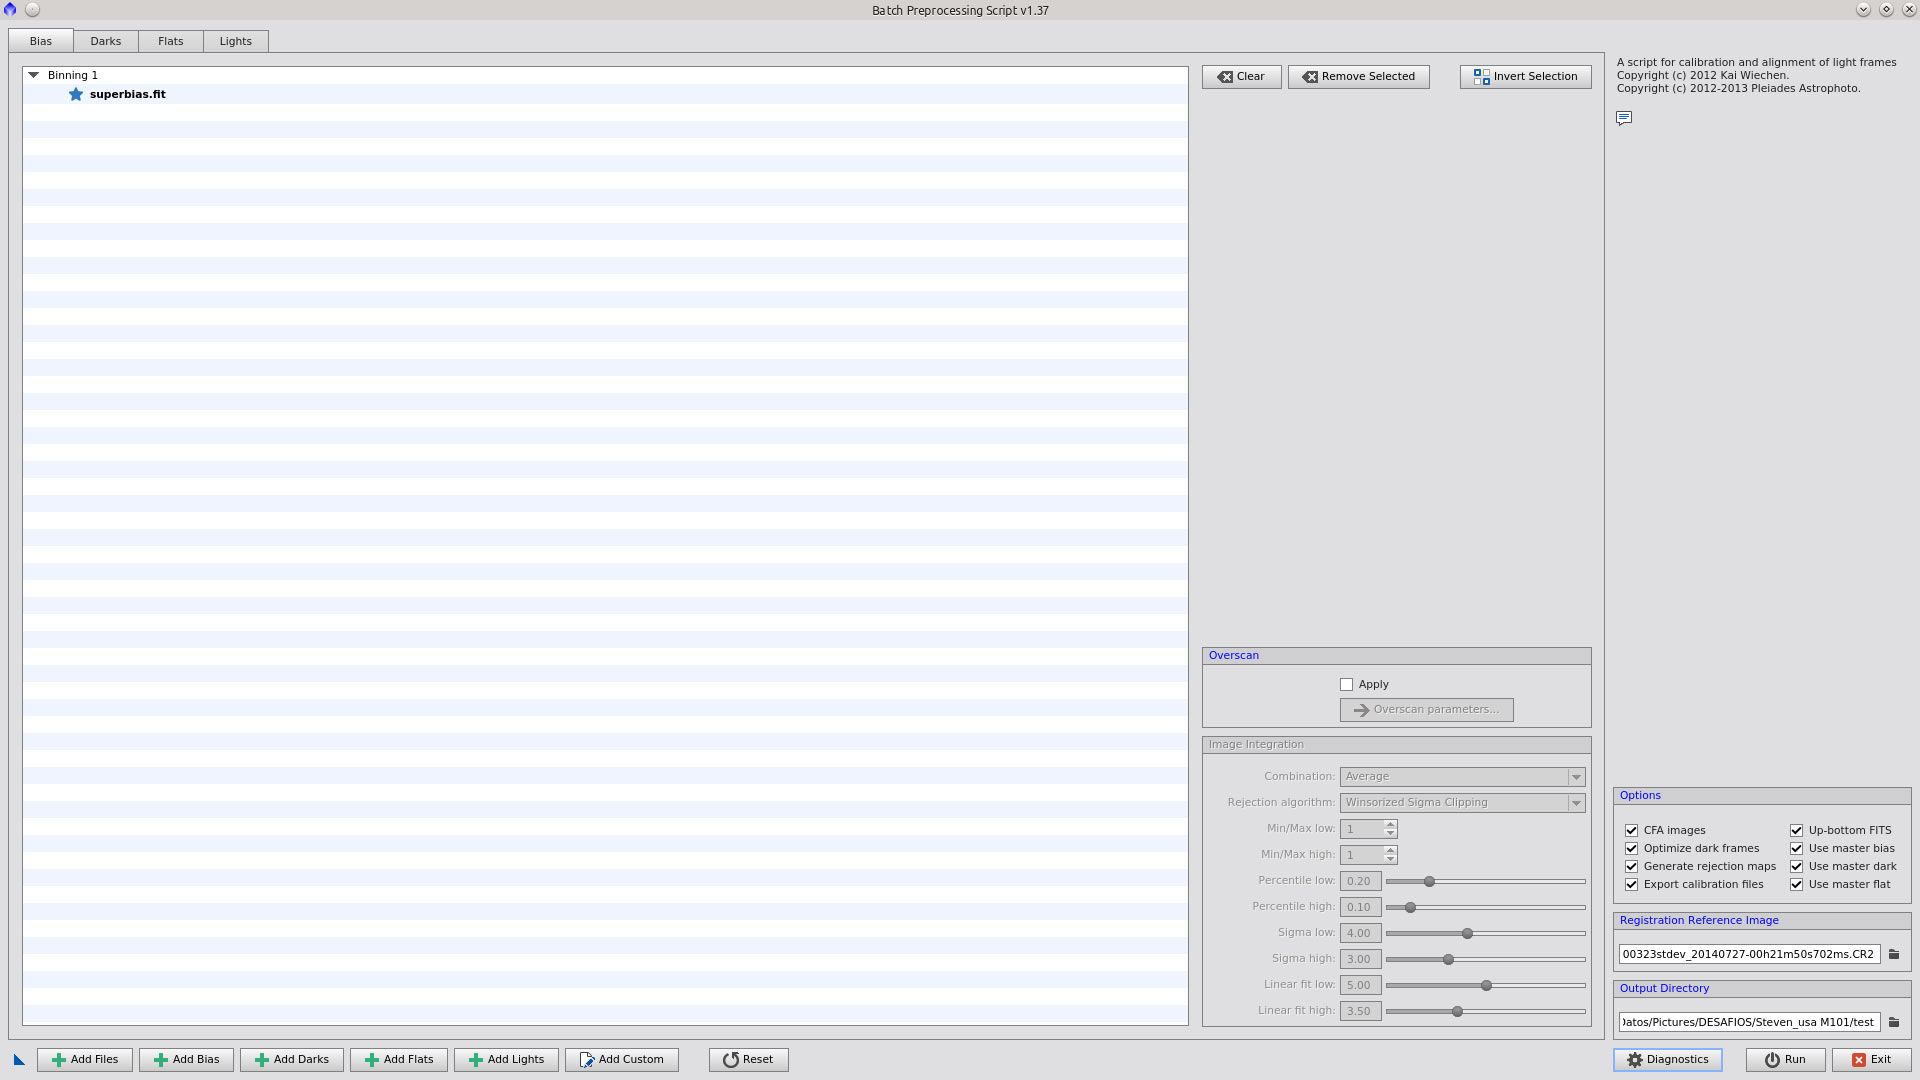
Add SuperBias:
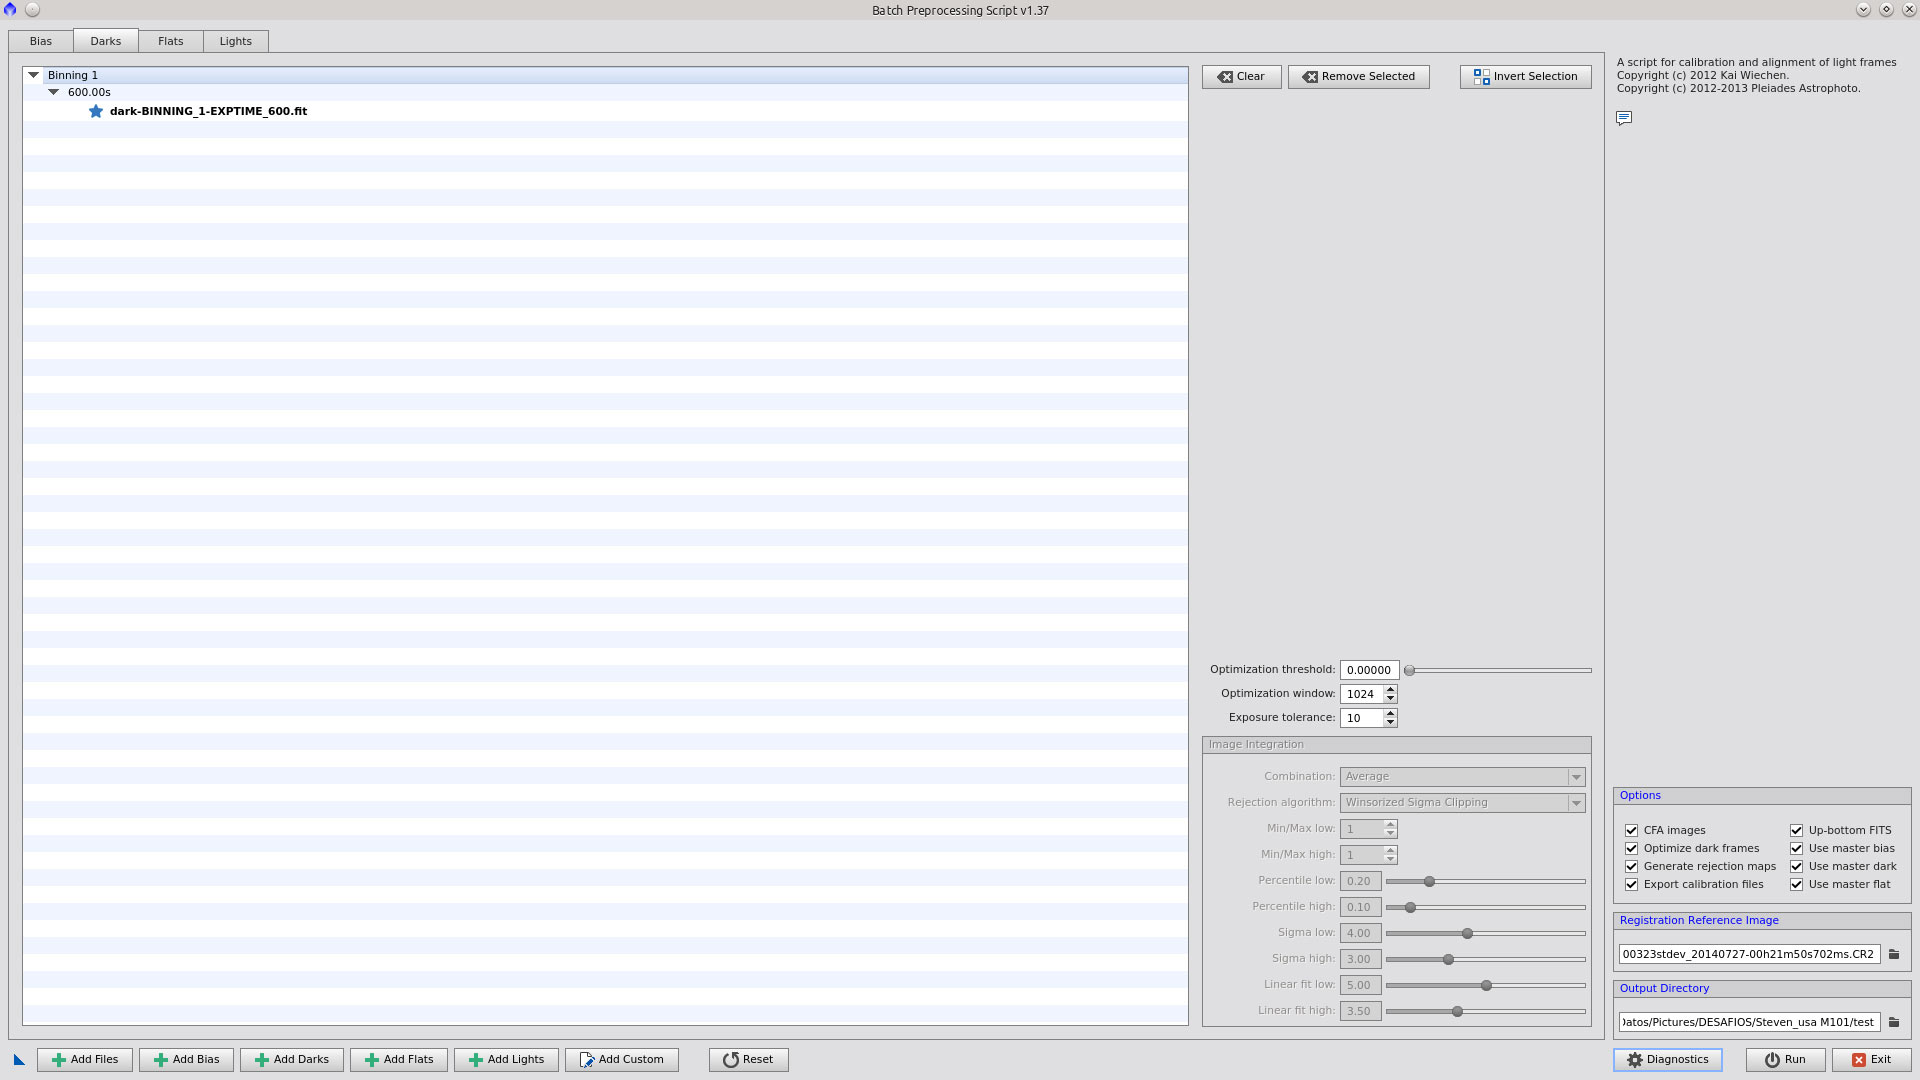
Add MasterDark:
Add MasterFlat:
Add Ligths:

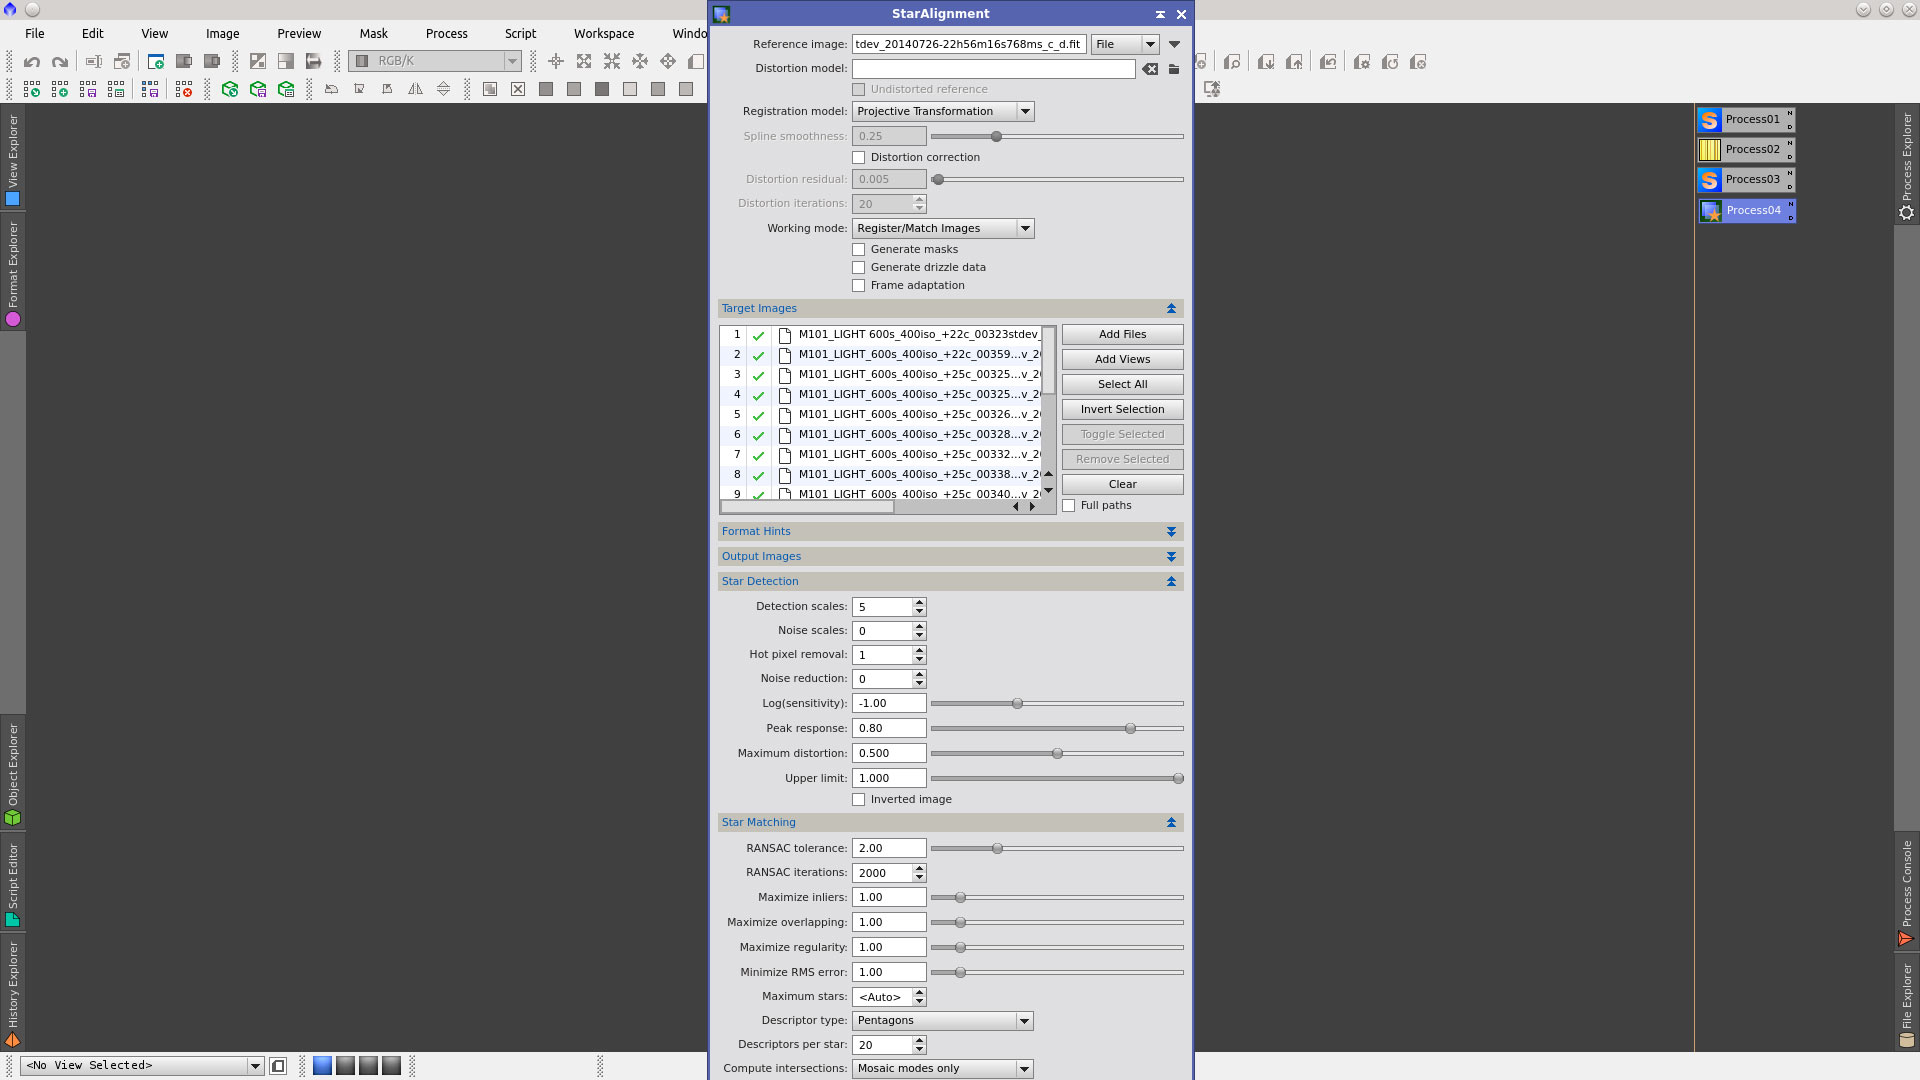
Open StartAlignment tool and load the _c_d files. With the following parameters the registration was successful.
You can use Blink again, loading the _c_d_r files to inspect them and easyly see how the hot pixels were removed
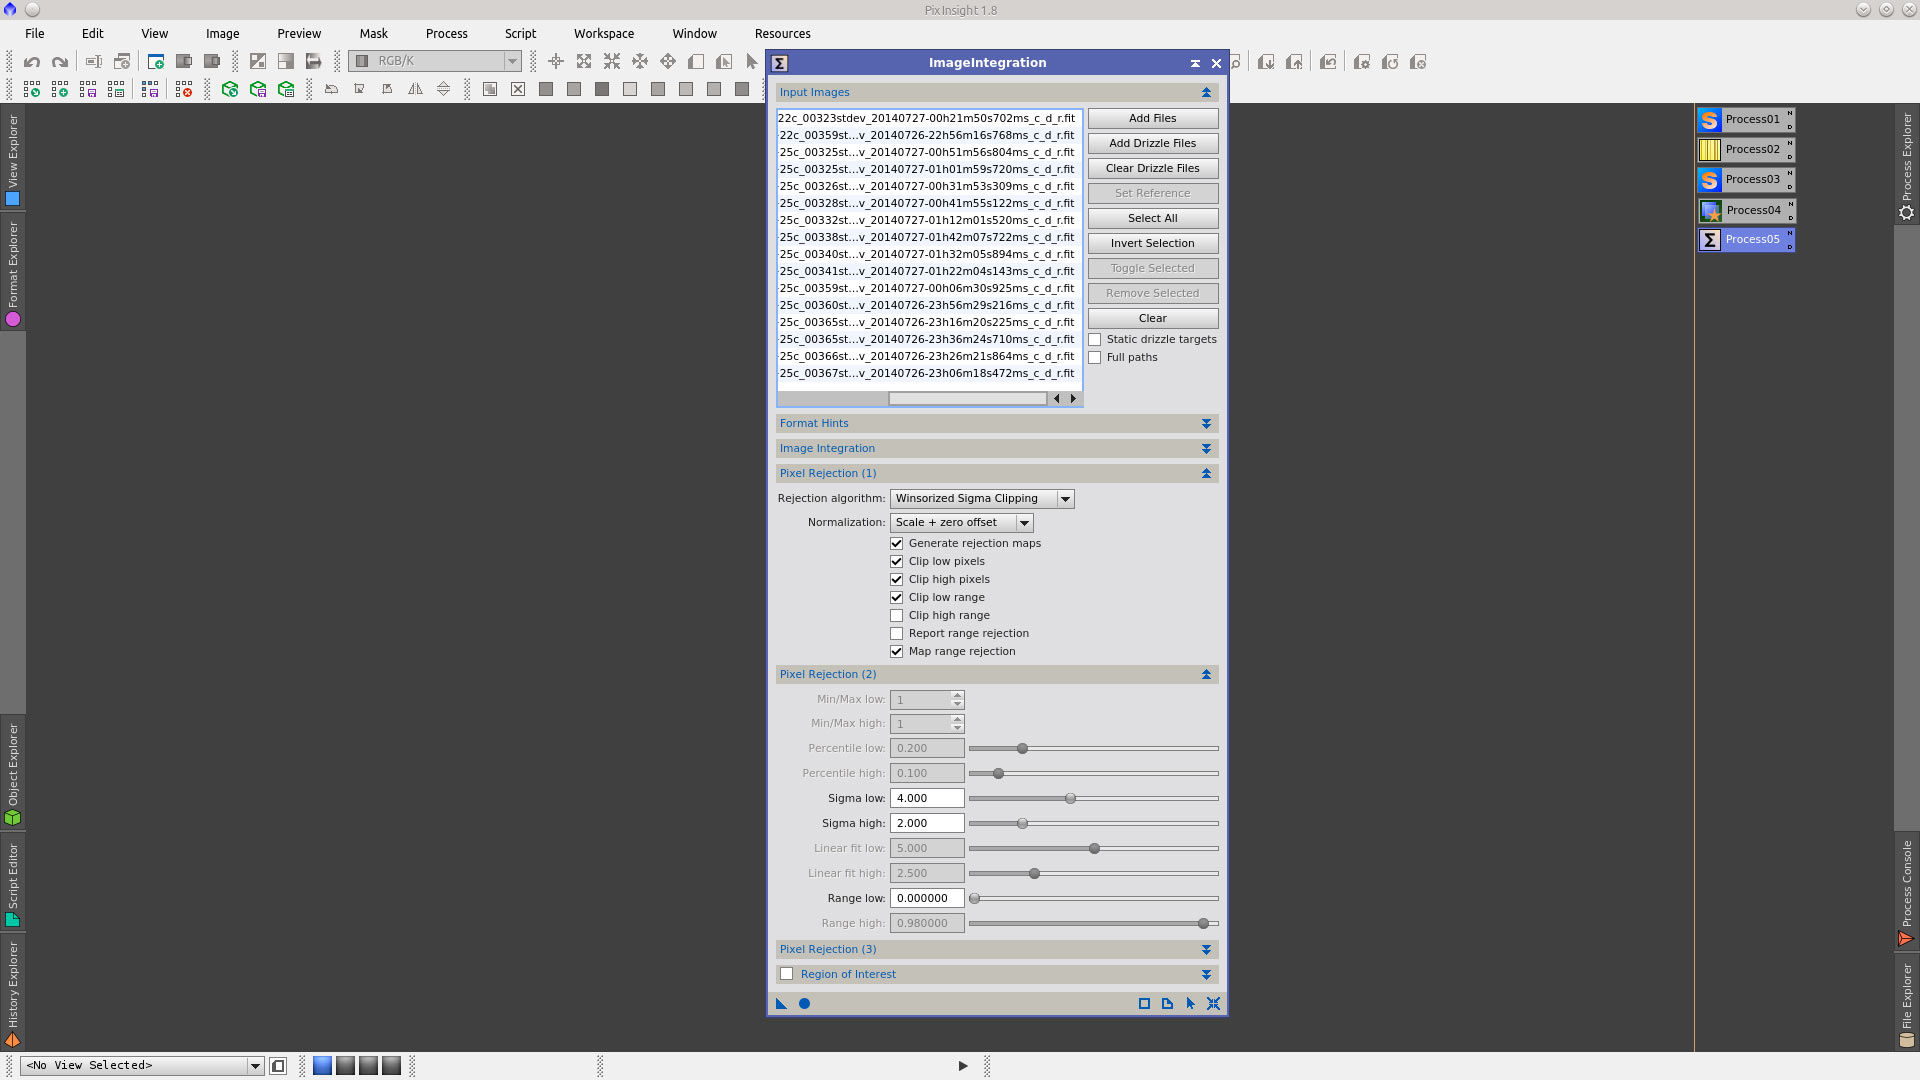
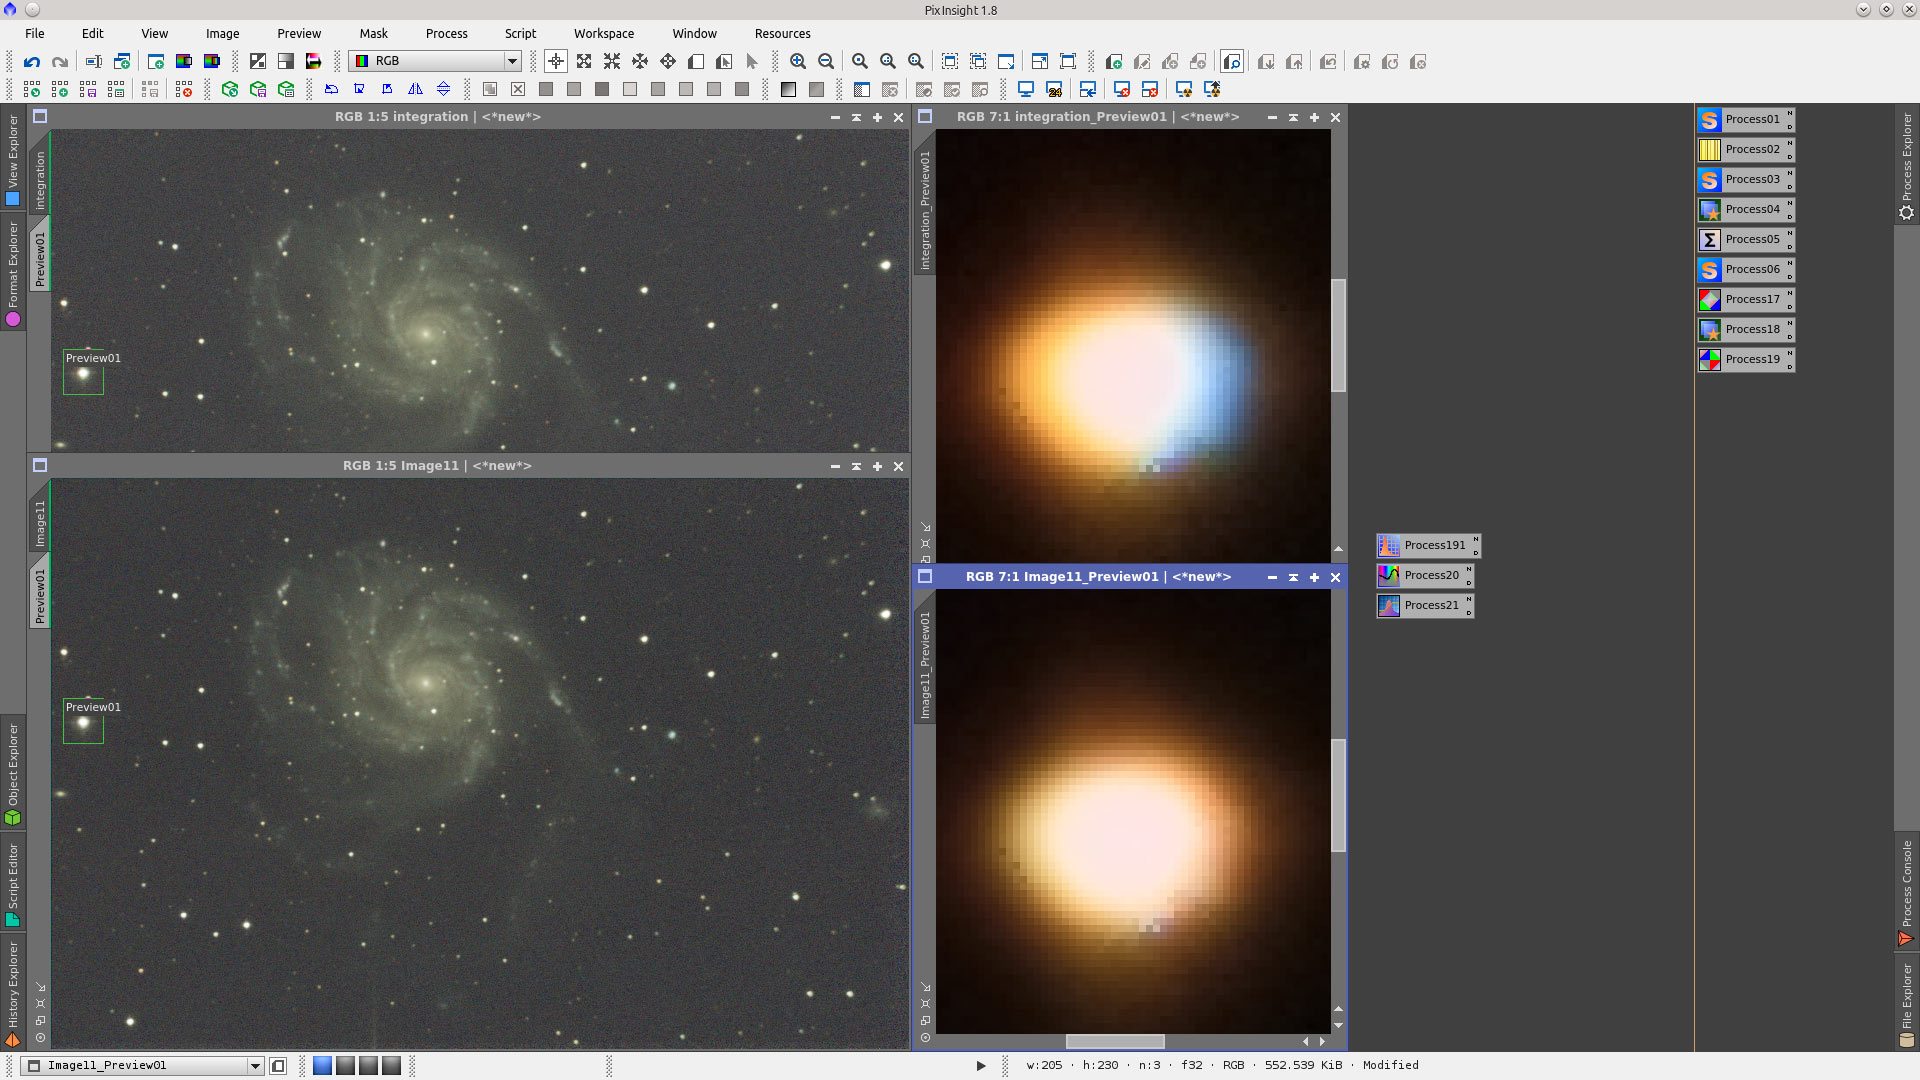
Finally open ImageIntegration and select the _c_d_r files to integrate them. I select Winsorized Sigma Clipping as Rejection algorithm and let sigma values by default
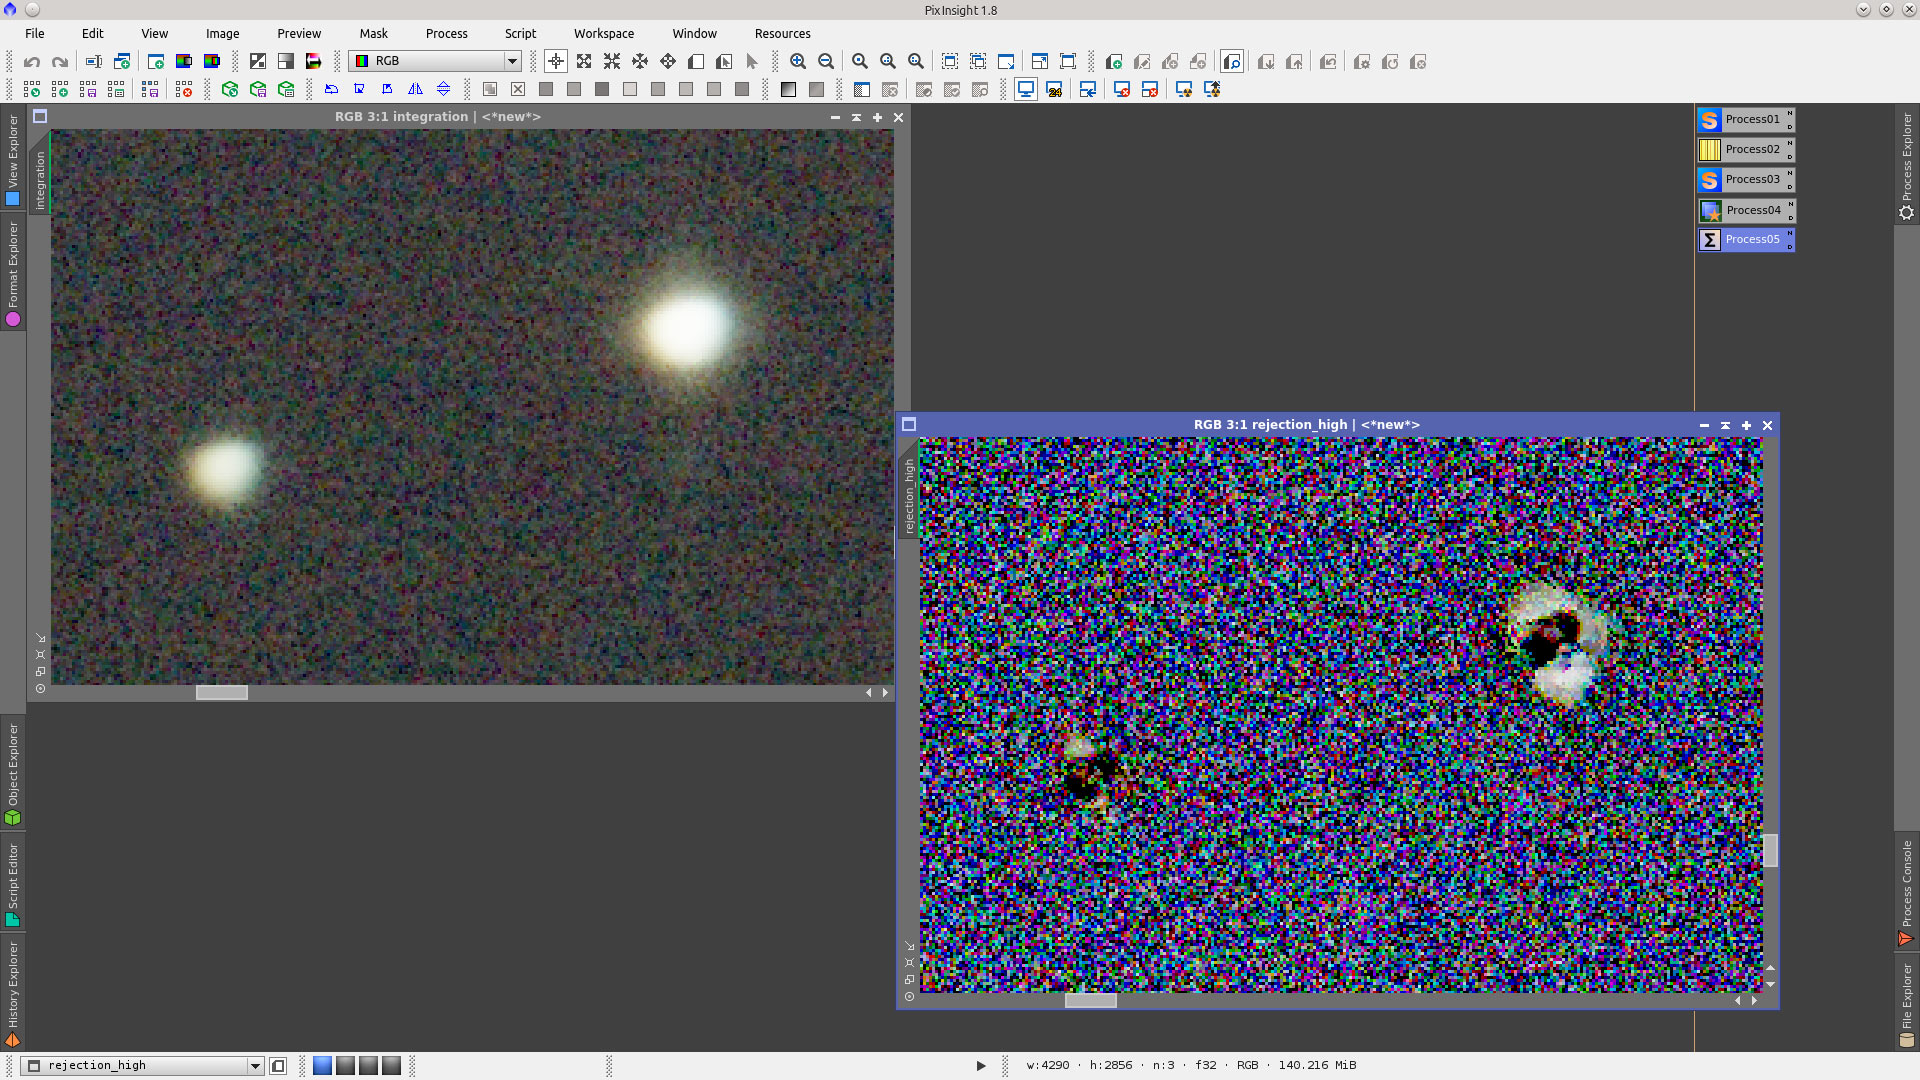
You can inspect the rejection maps and see if it is needed to carefully move the values of sigma high and low to improve the Integrated image. In the rejection_high map can be seen how some moved stars were rejected.
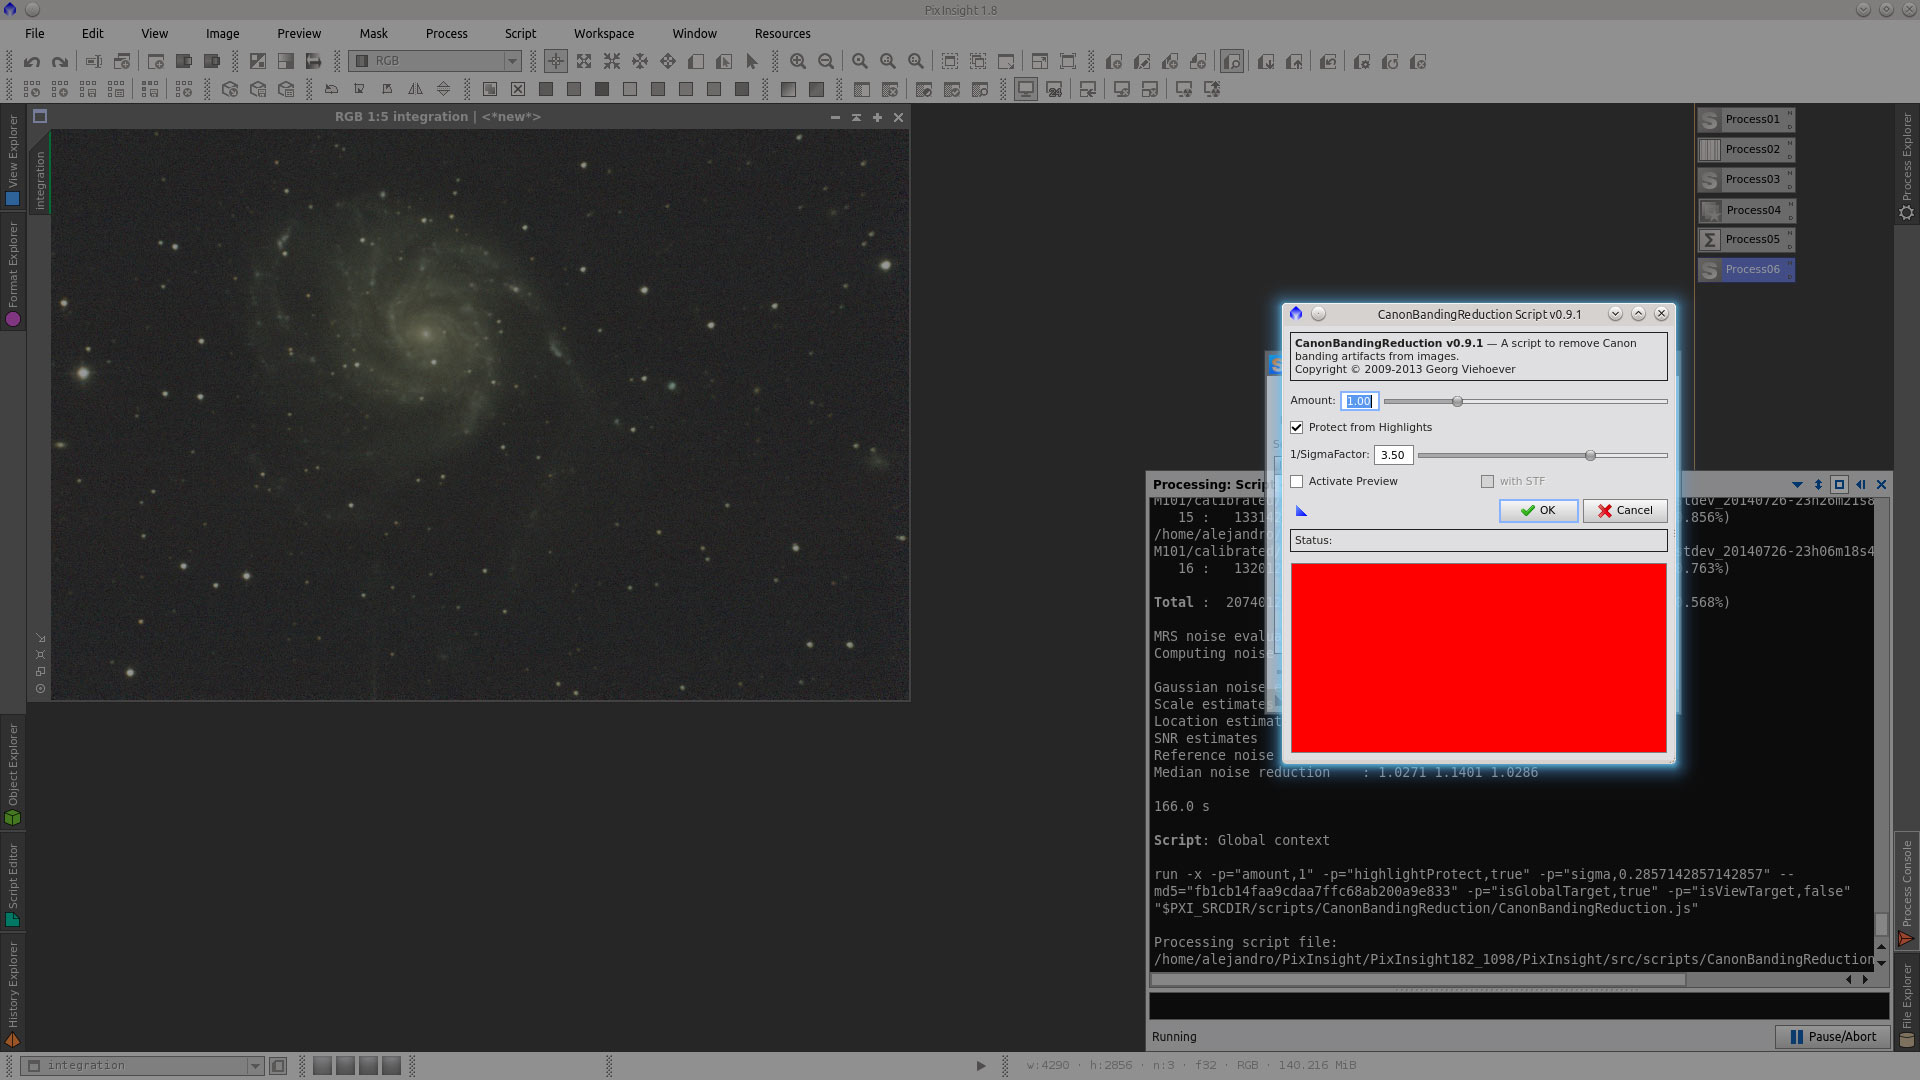
Run CanonBandingReduction script located in Script>Utilities for removing horizontal banding that are usually present in Canon images. In this image it is needed to increase considerably 1/Sigmafacor as it will protect bright areas avoiding the generation of dark horizontal lines.
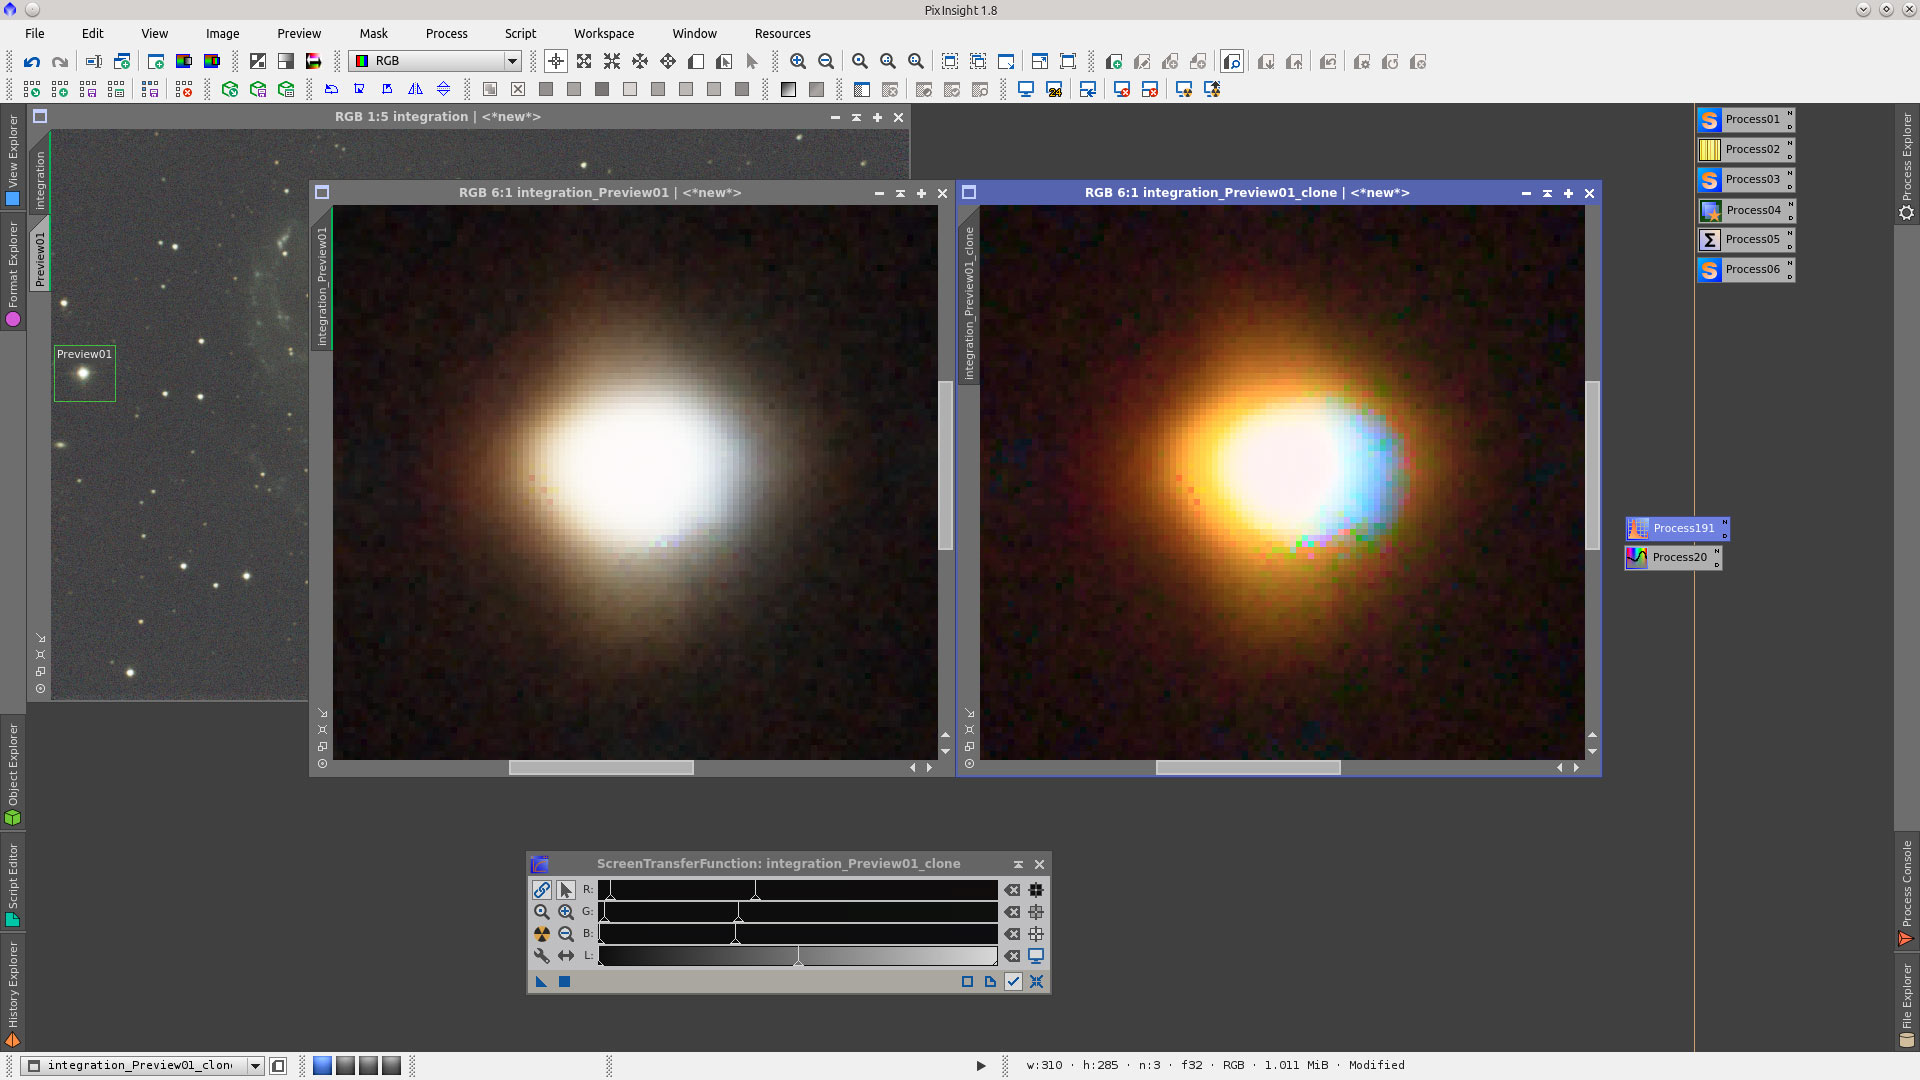
Due to optical issues, the stars that are in the periphery of the image present the channels misaligned. This defect will be evident even more later when saturate the image.
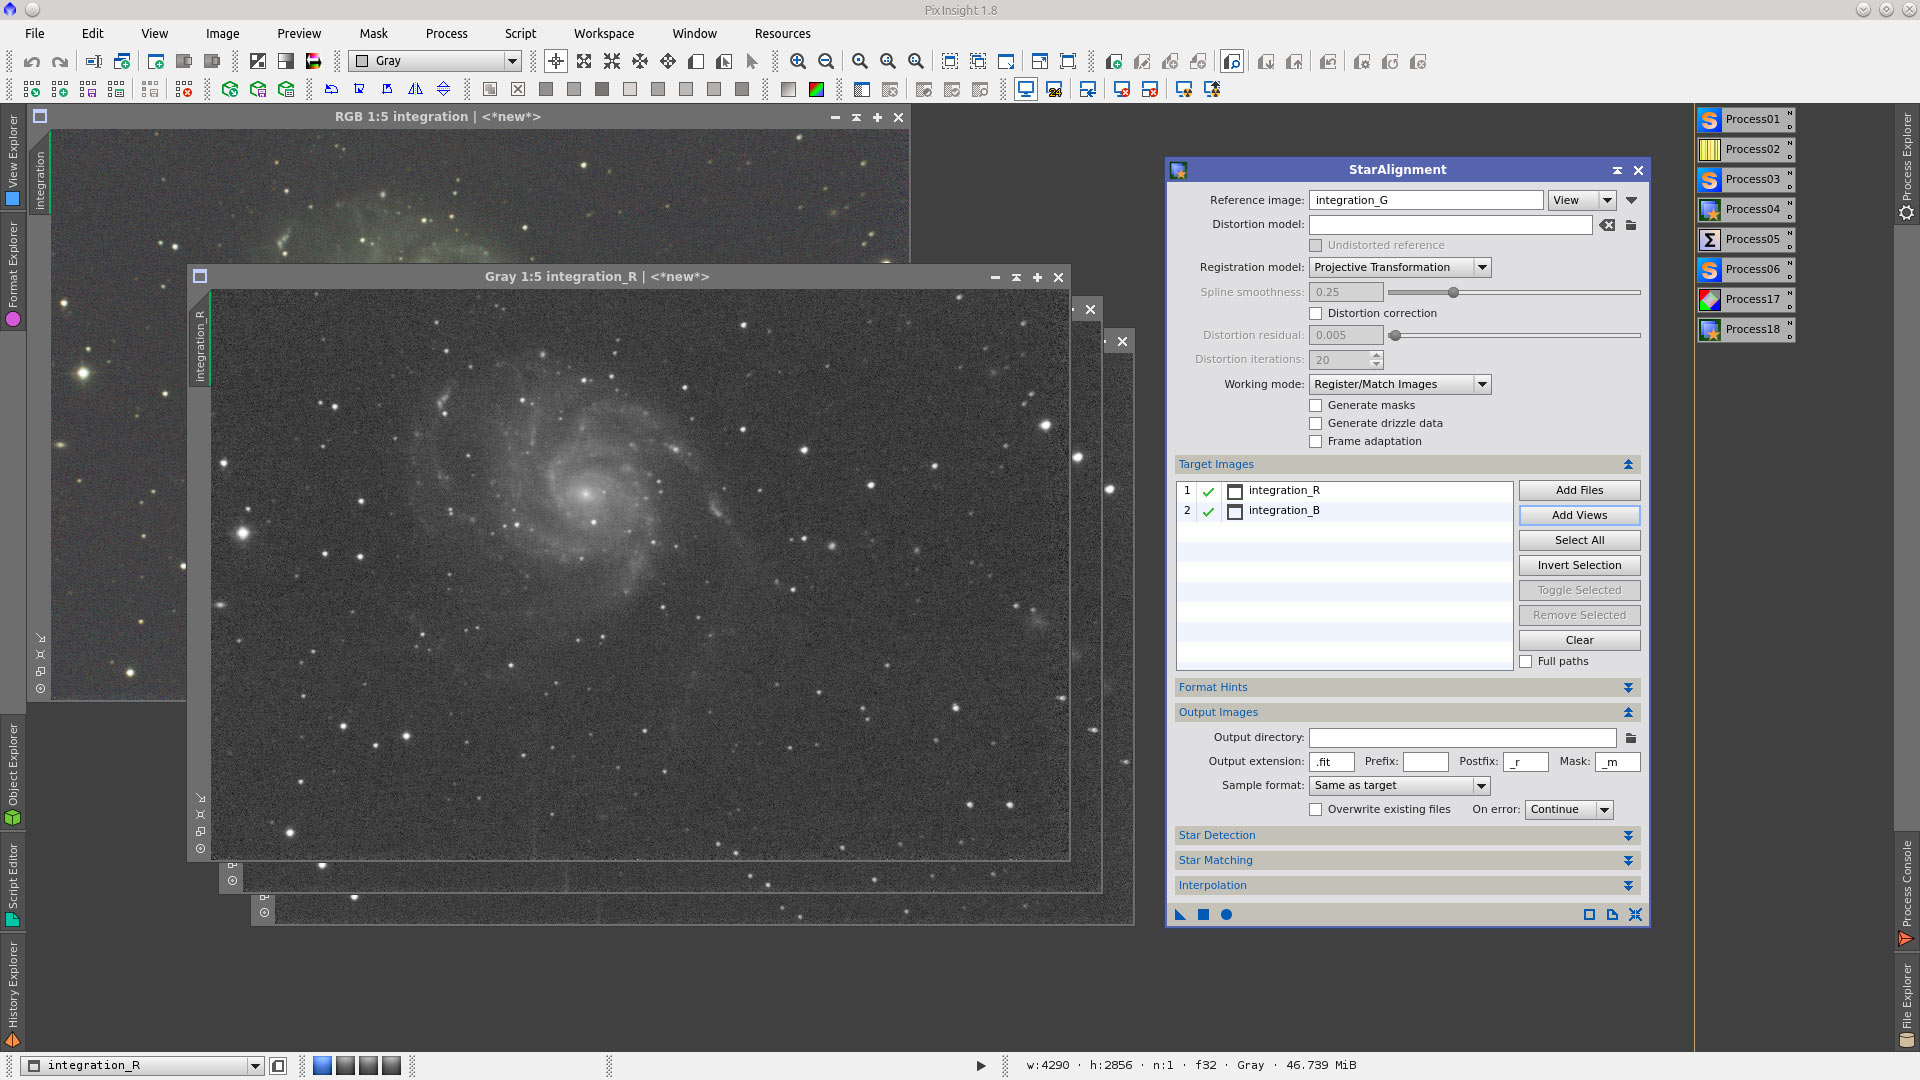
To improve it, separate R, G and B channels using ChannelExtraction tool

Using StarAlignment tool register _R and _B channels with _G channel as Reference image.
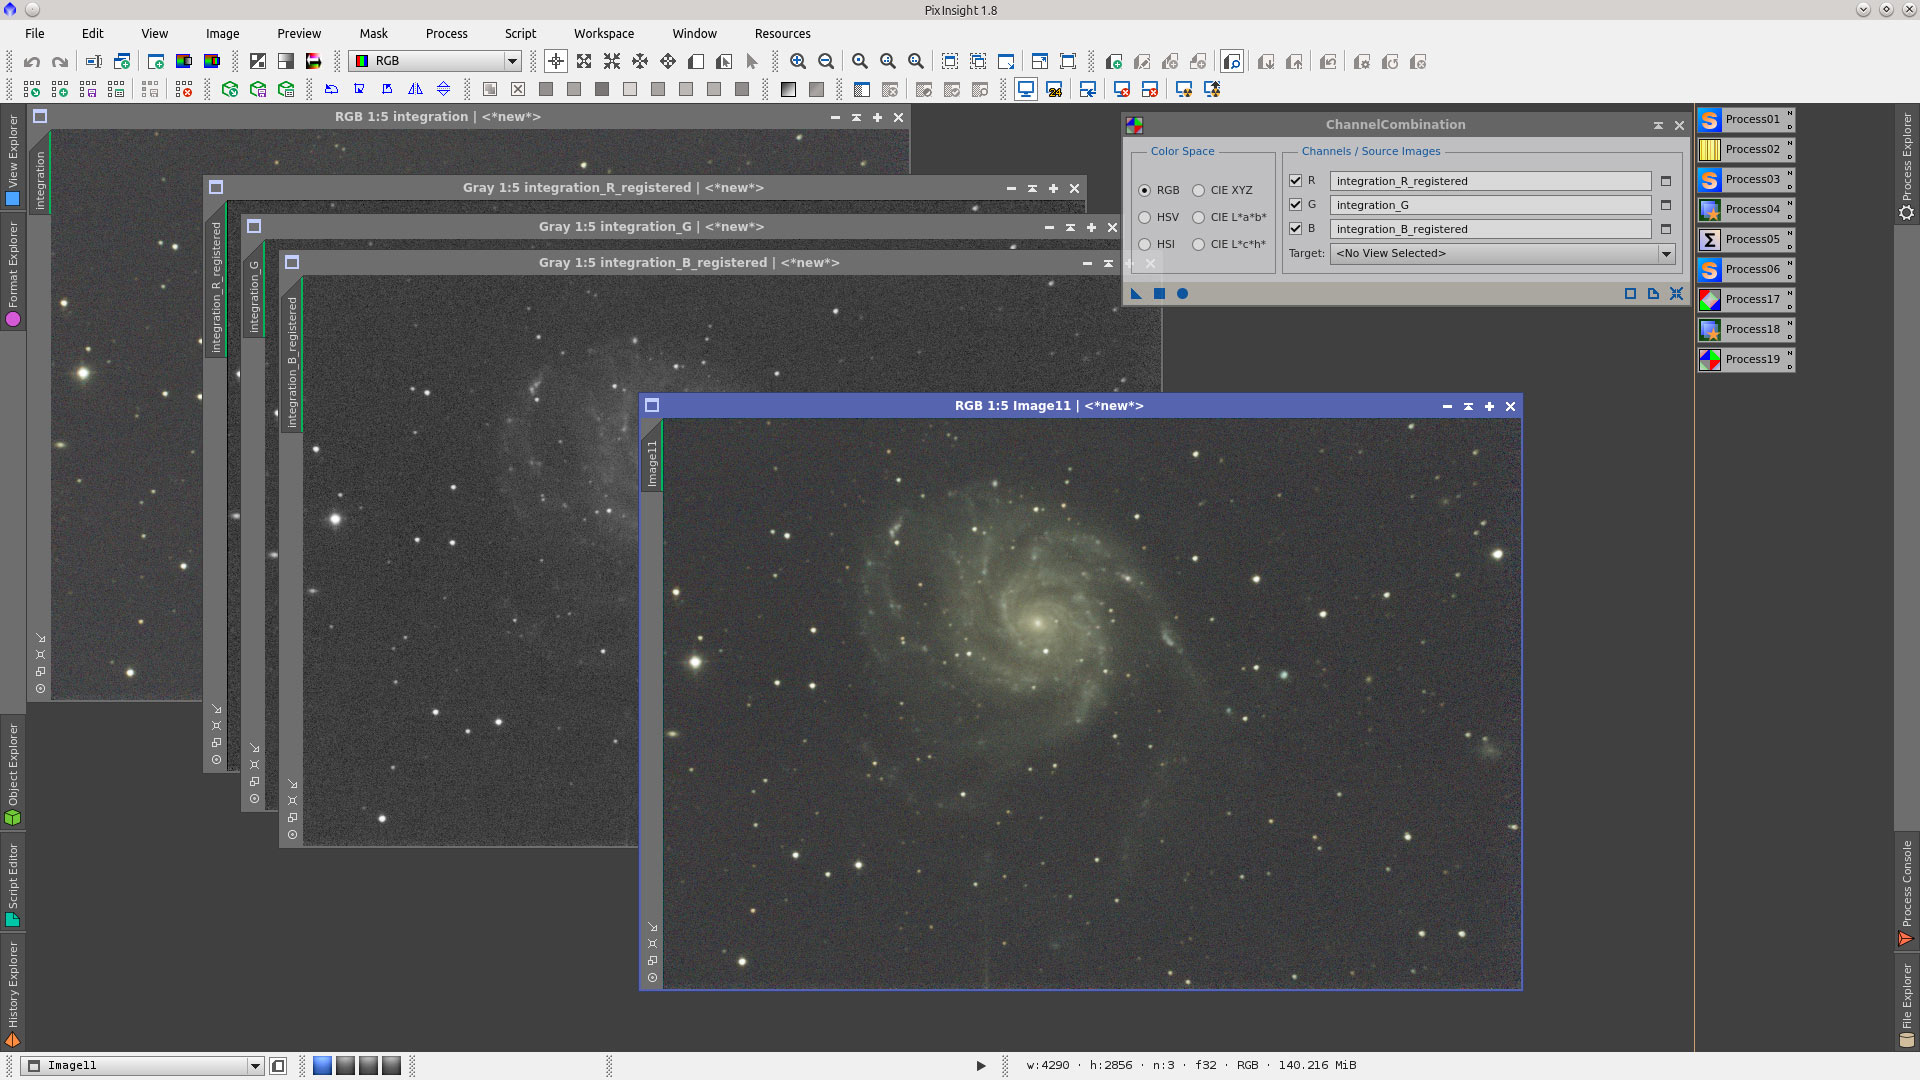
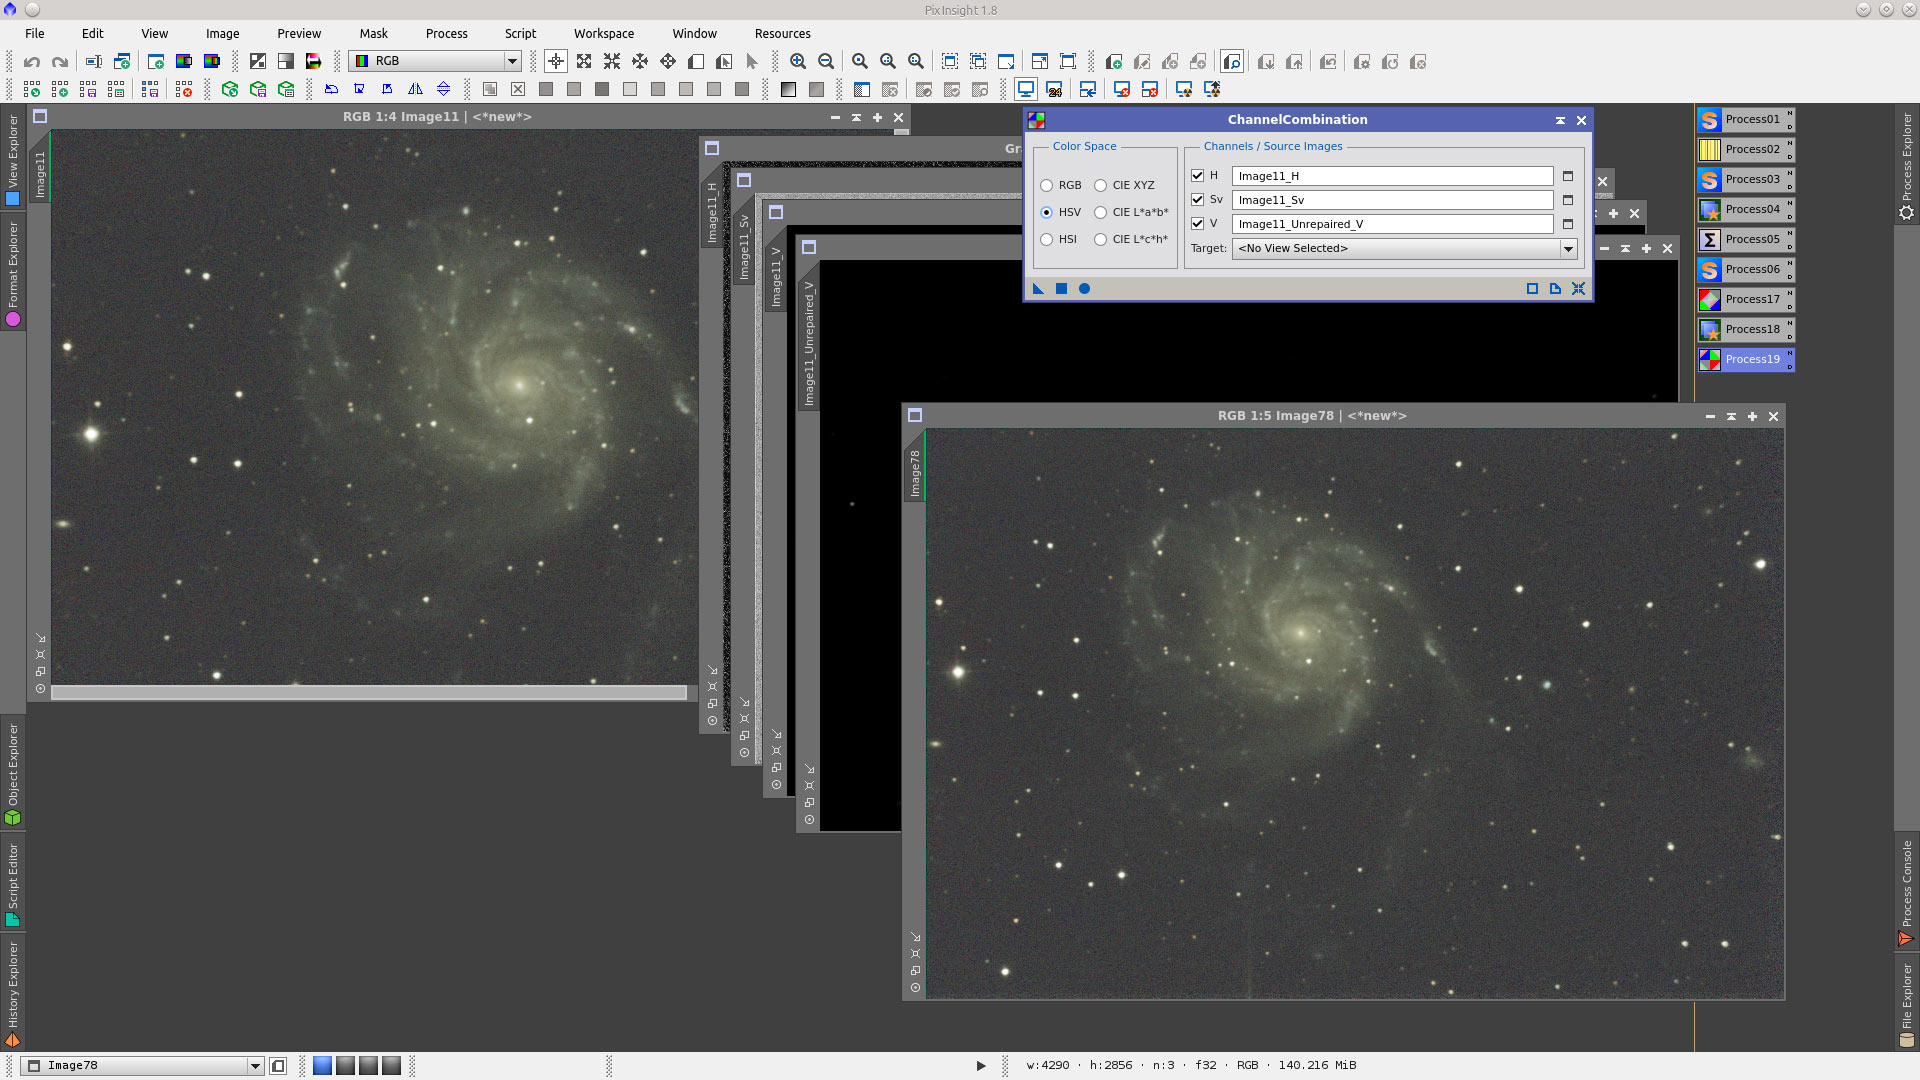
Take out the original _R and _B channels and instead use _R_registered and _B_registered in ChannelCombination tool to generate the new image.
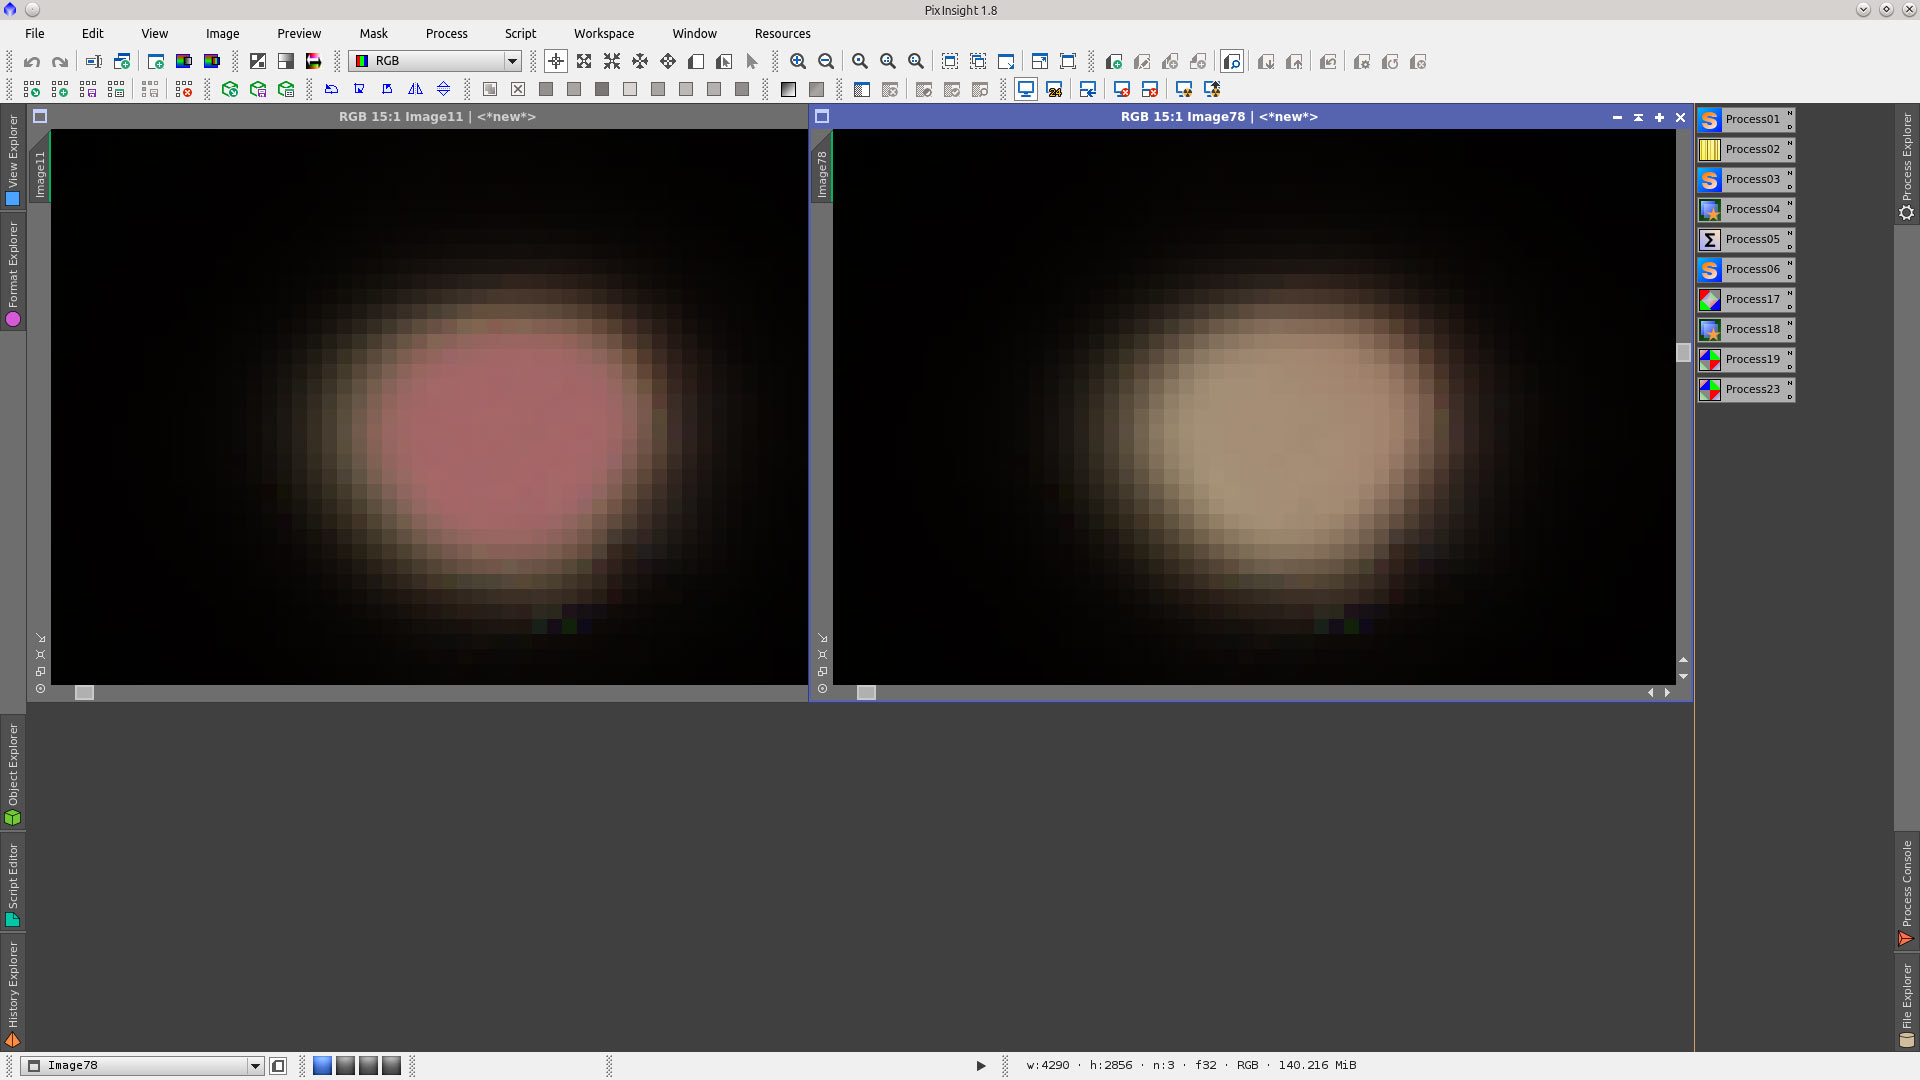
Note that after stretching, saturation and noise reduction the alignment of channels gives the star an appropiate distribution of color.
You can now run the script Repaired HSV Separation which will repair the saturated core of the stars
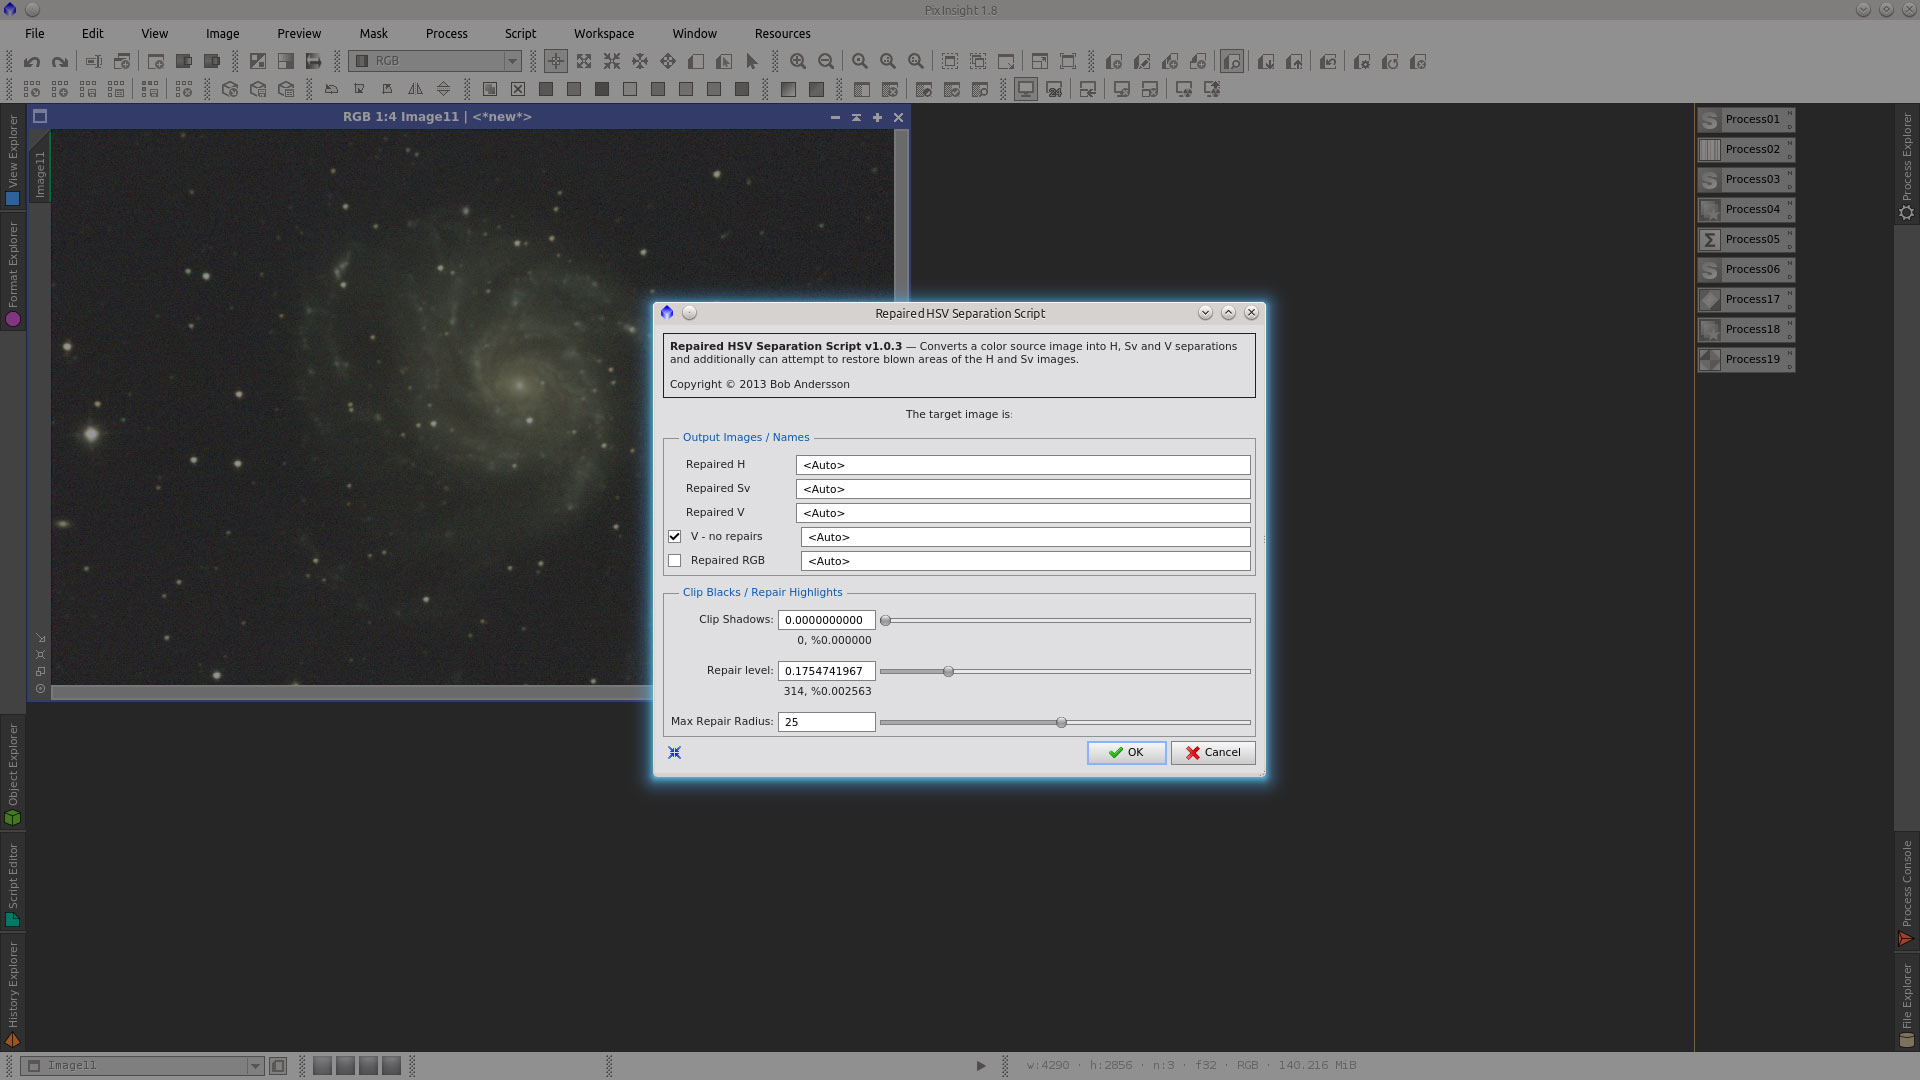
In this case I will use the new _H and _Sv channels but with the Unrepaired_V channel.
Note the difference in saturated stars in the following image. More information about the script can be seen in this processing example.
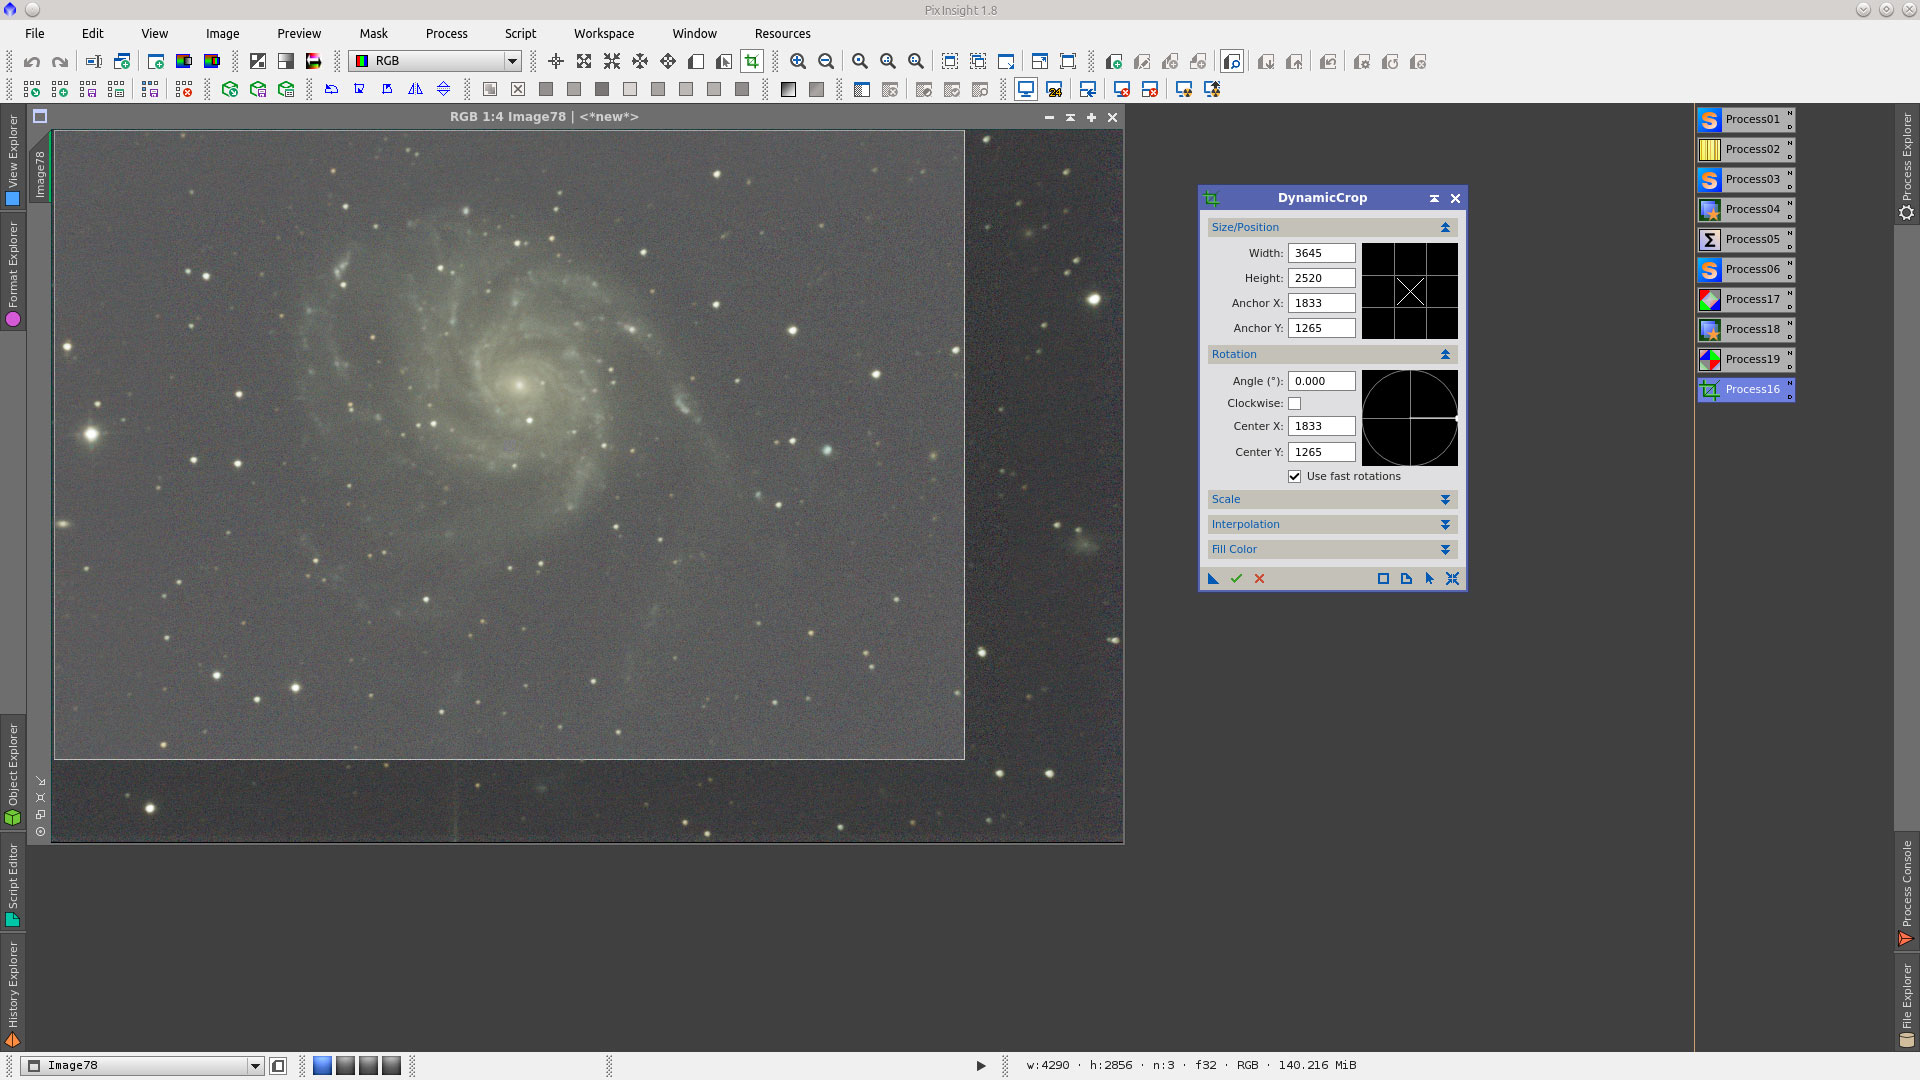
Crop the image conveniently.
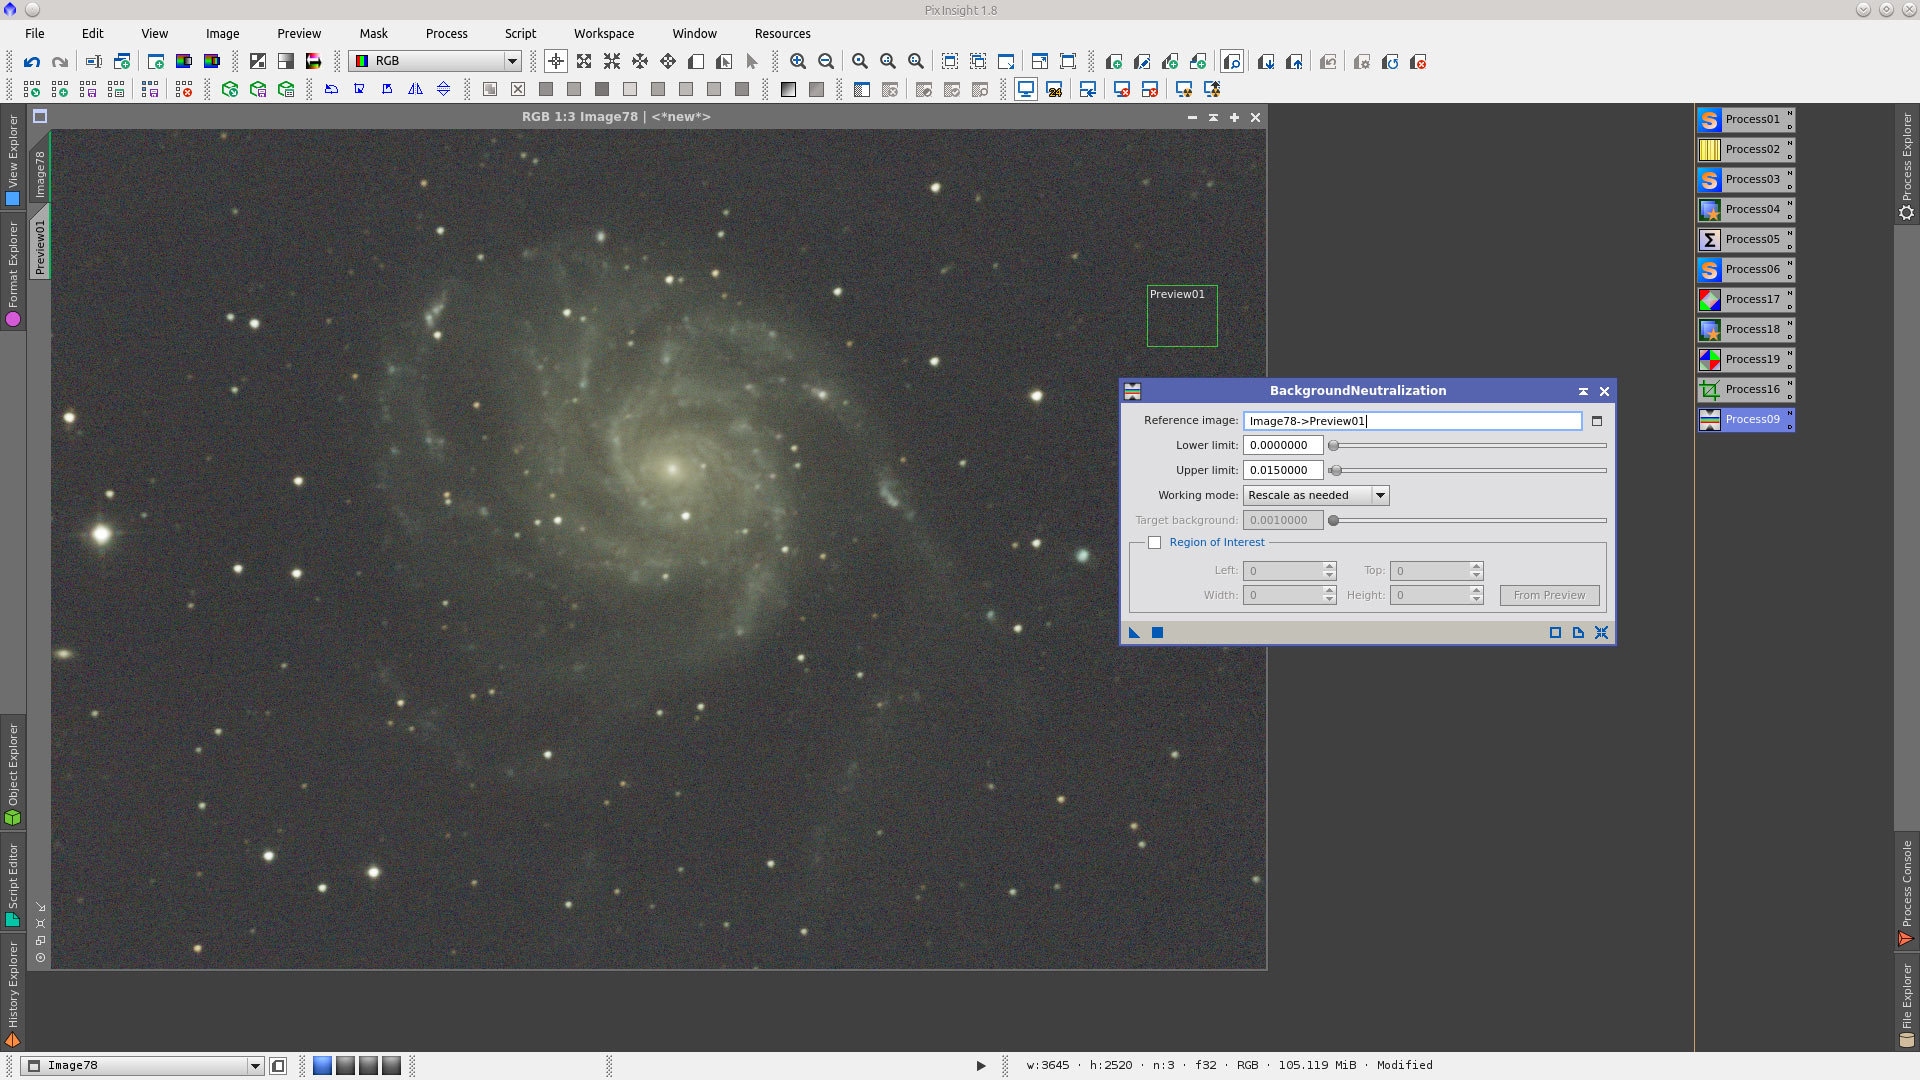
Select a preview that represent the background of the image and use it as Reference image in the BackgroundNeutralization tool
ColorCalibration using the preview as Reference image of the background Reference and the target image as Reference image for white reference
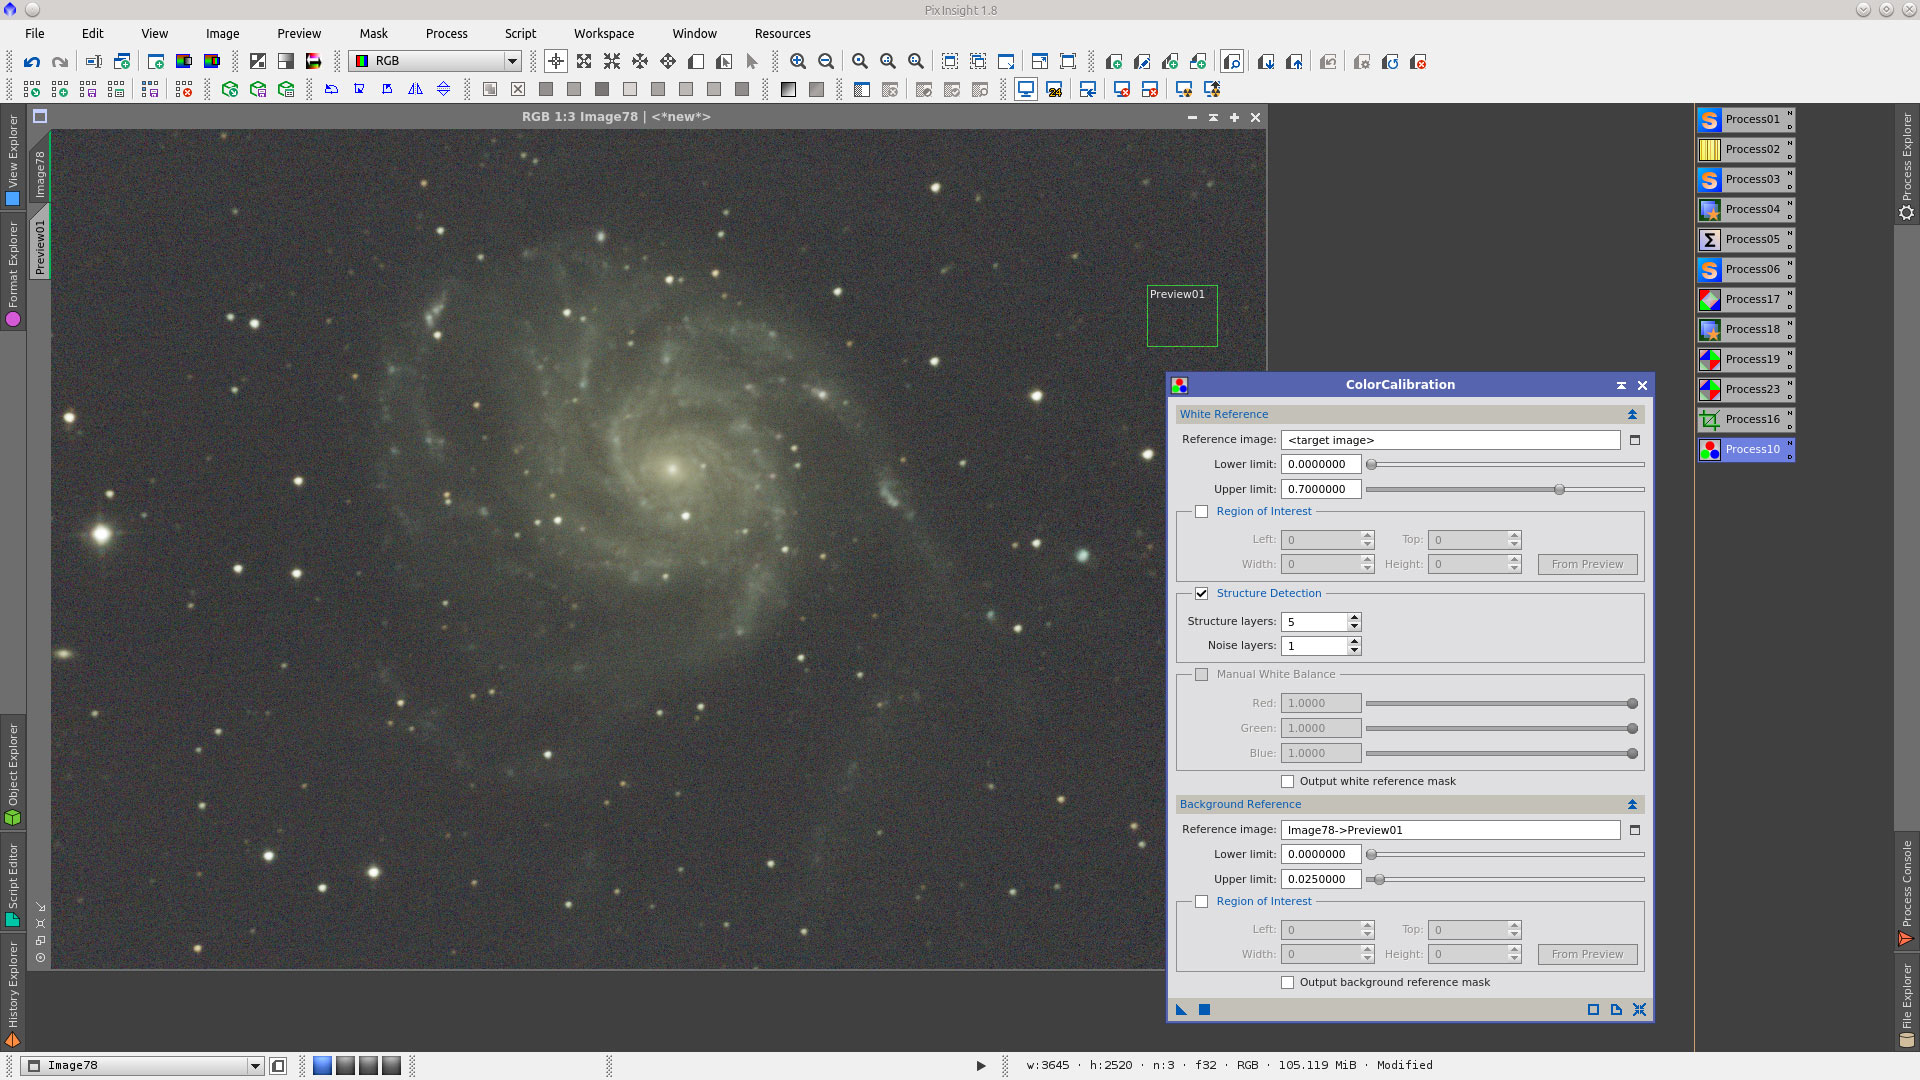
See more about how to use BN and CC tools in this video.
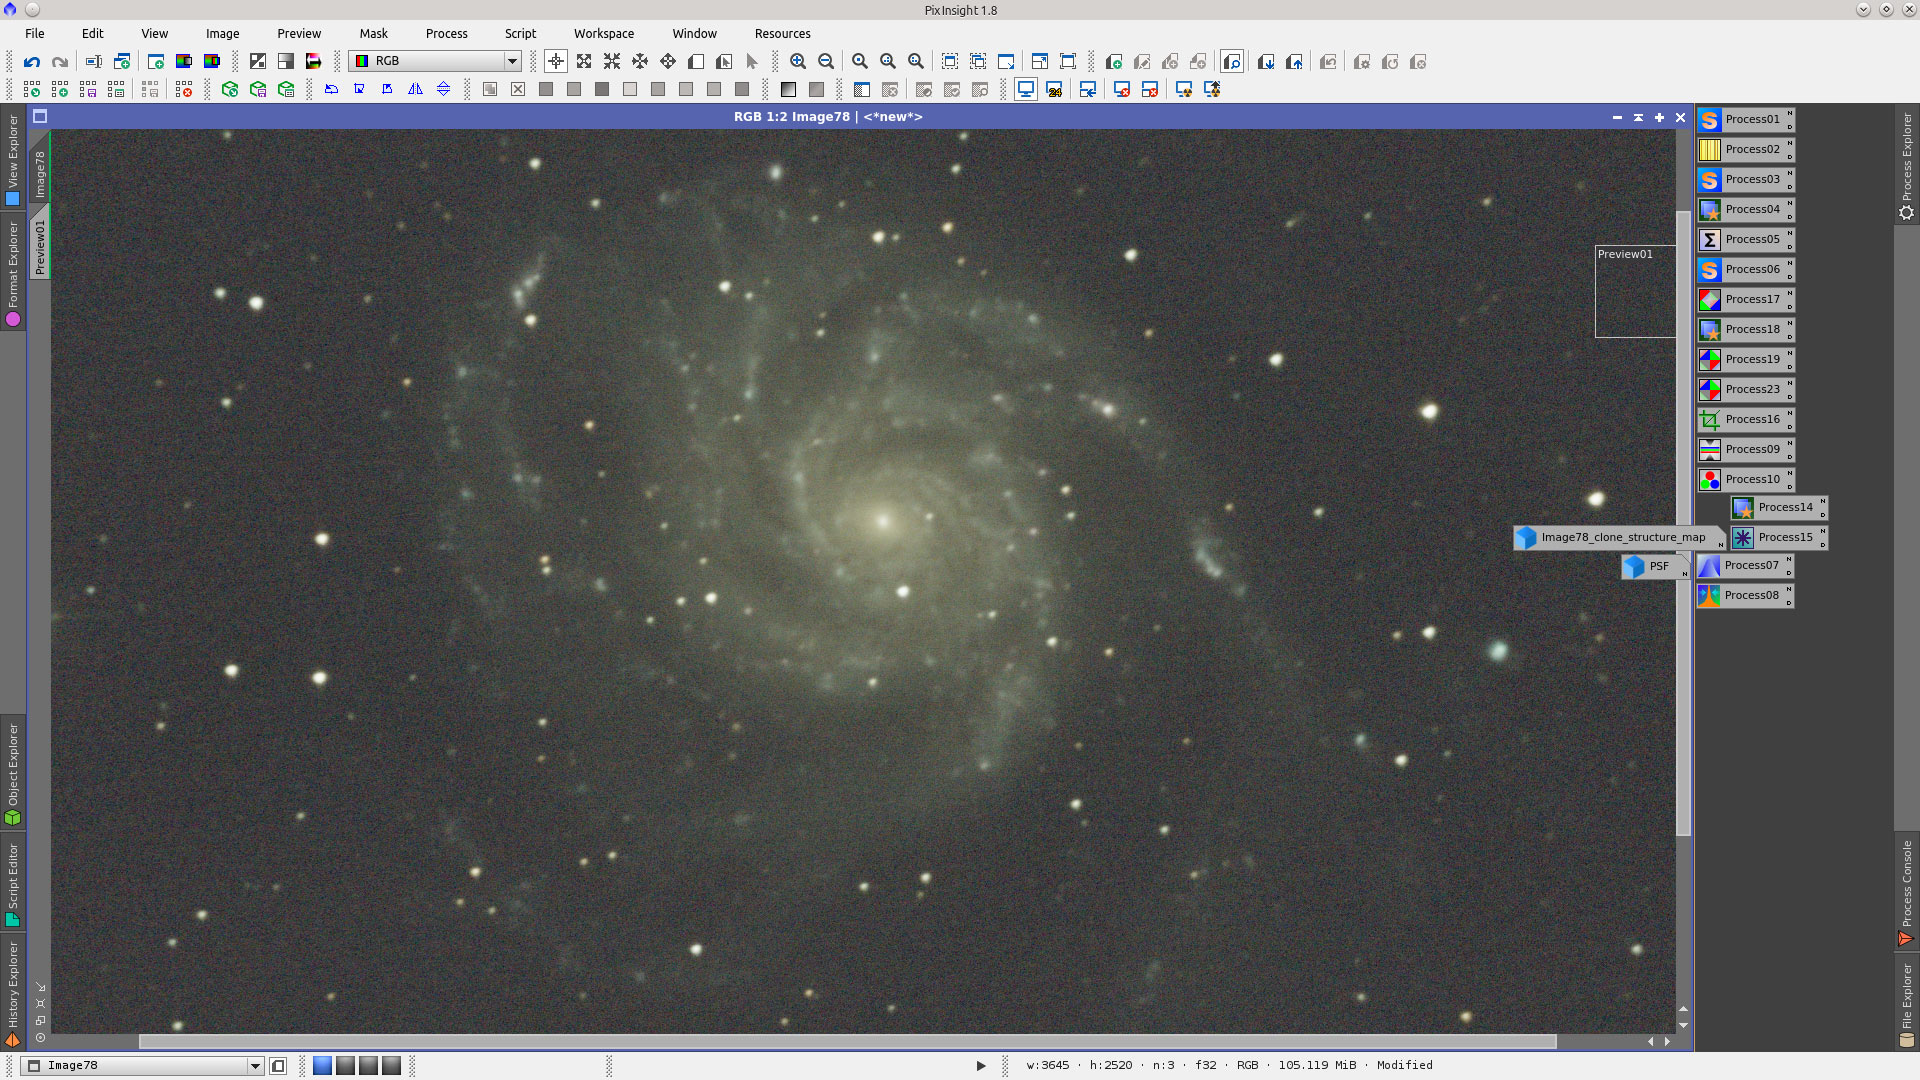
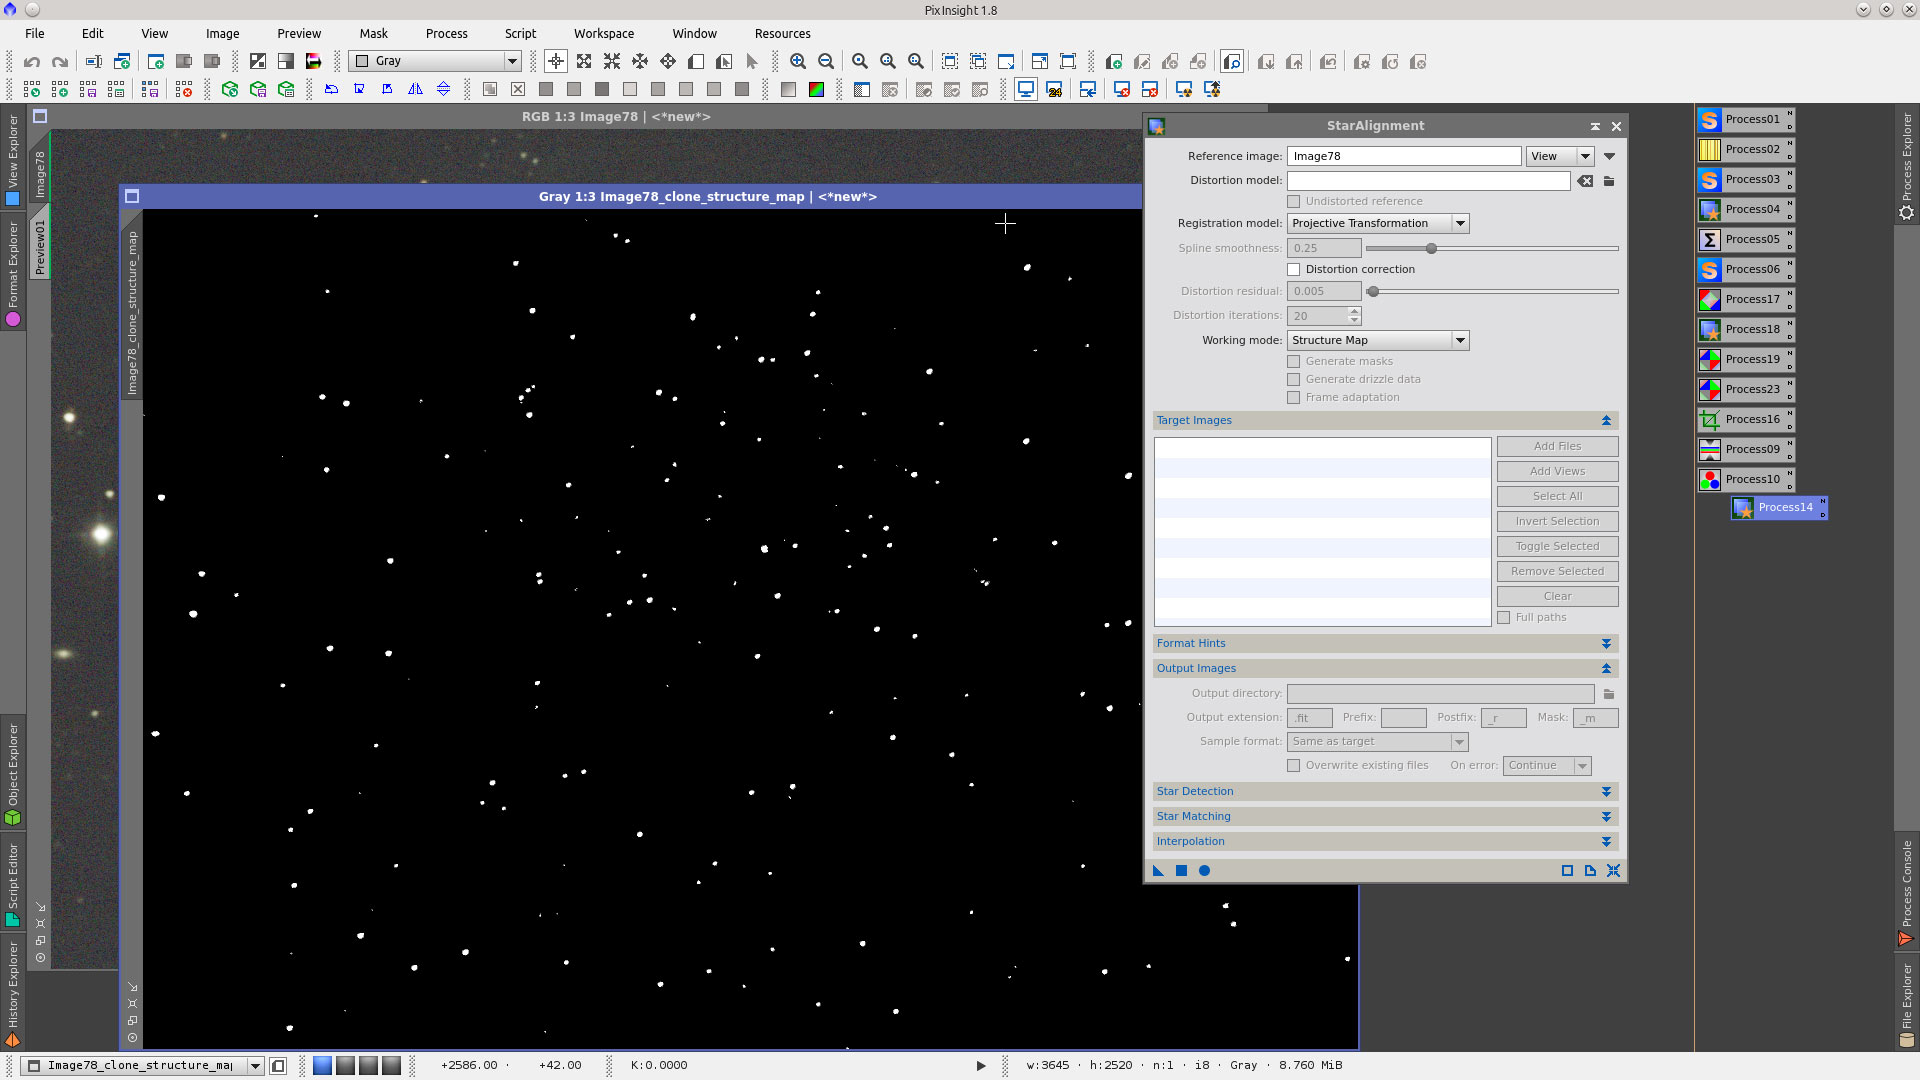
The next step is Deconvolution of the image. The cores of big stars can be damaged by this process, that is why we need to construct a mask to apply on the image and protect big stars.
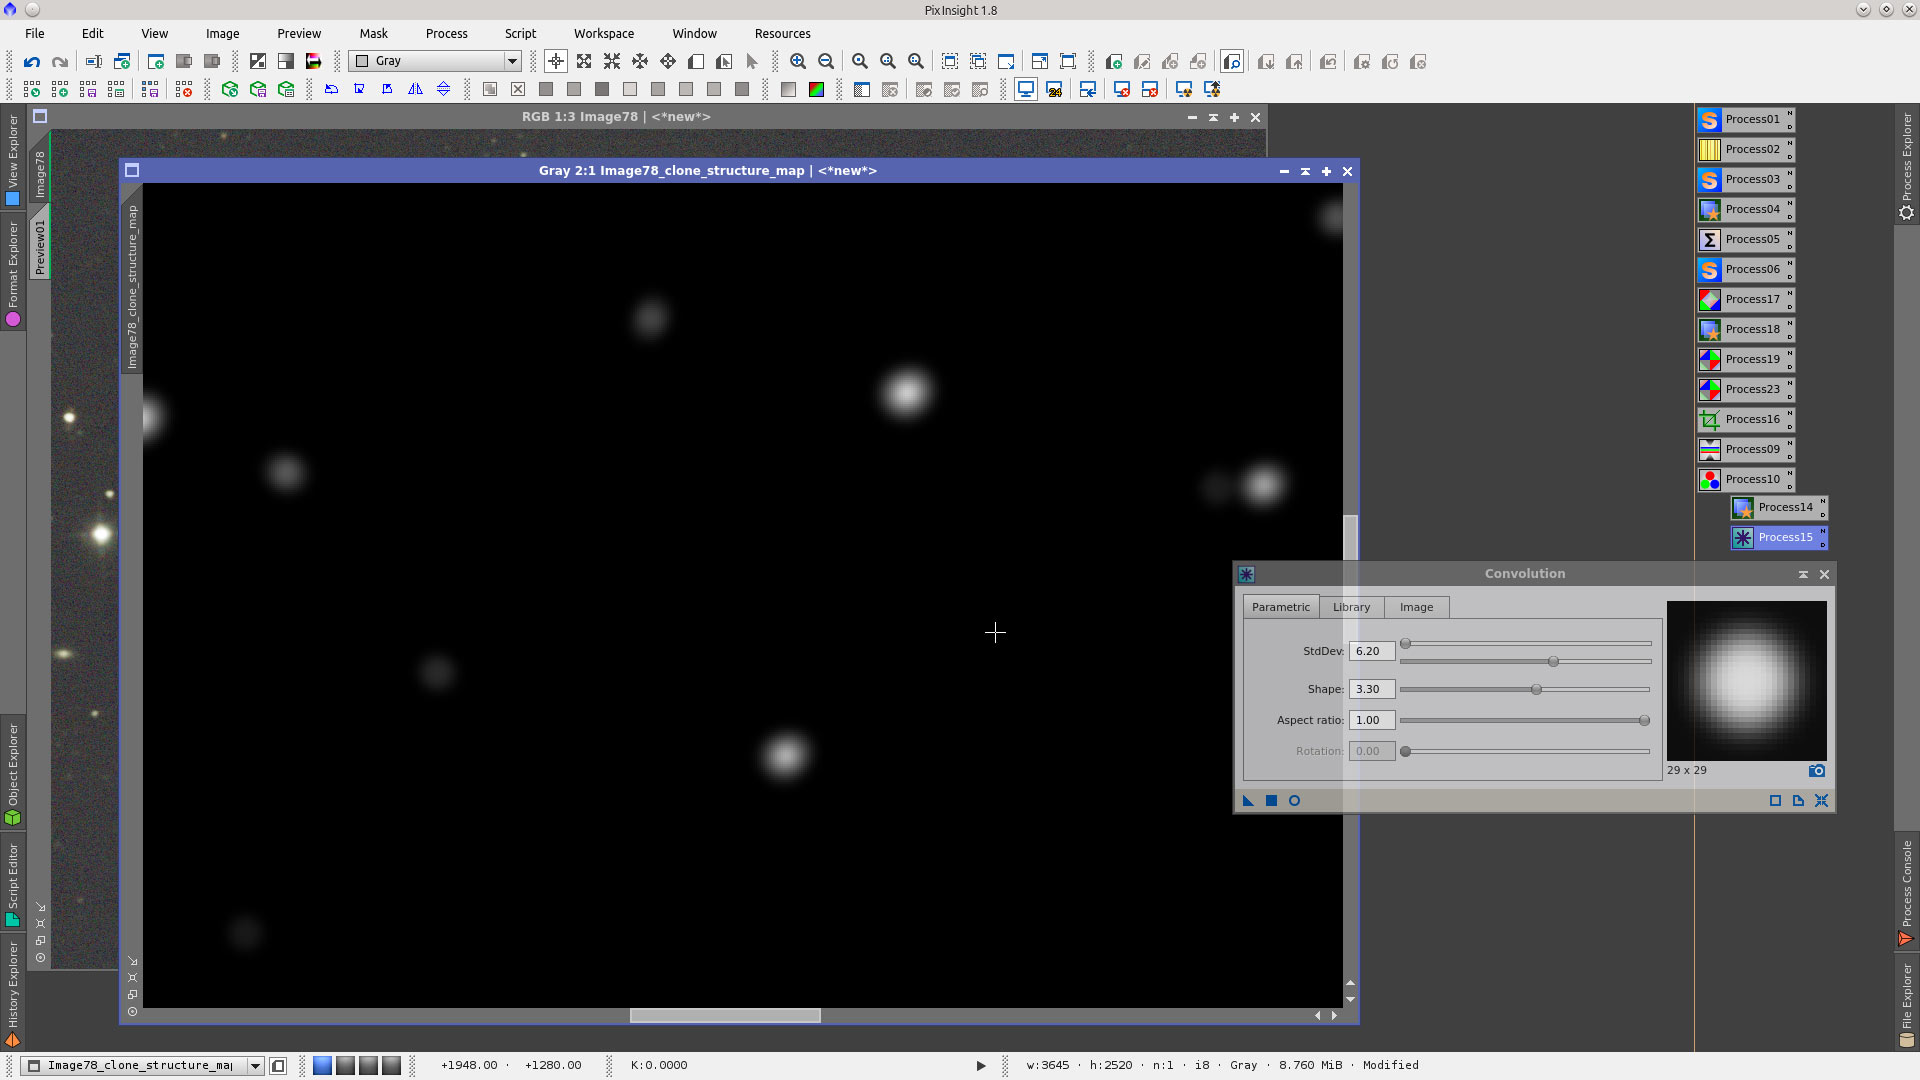
The mask can be generated with StarAlignment tool in Structure Map working mode and applying a Convolution to smooth the stars.
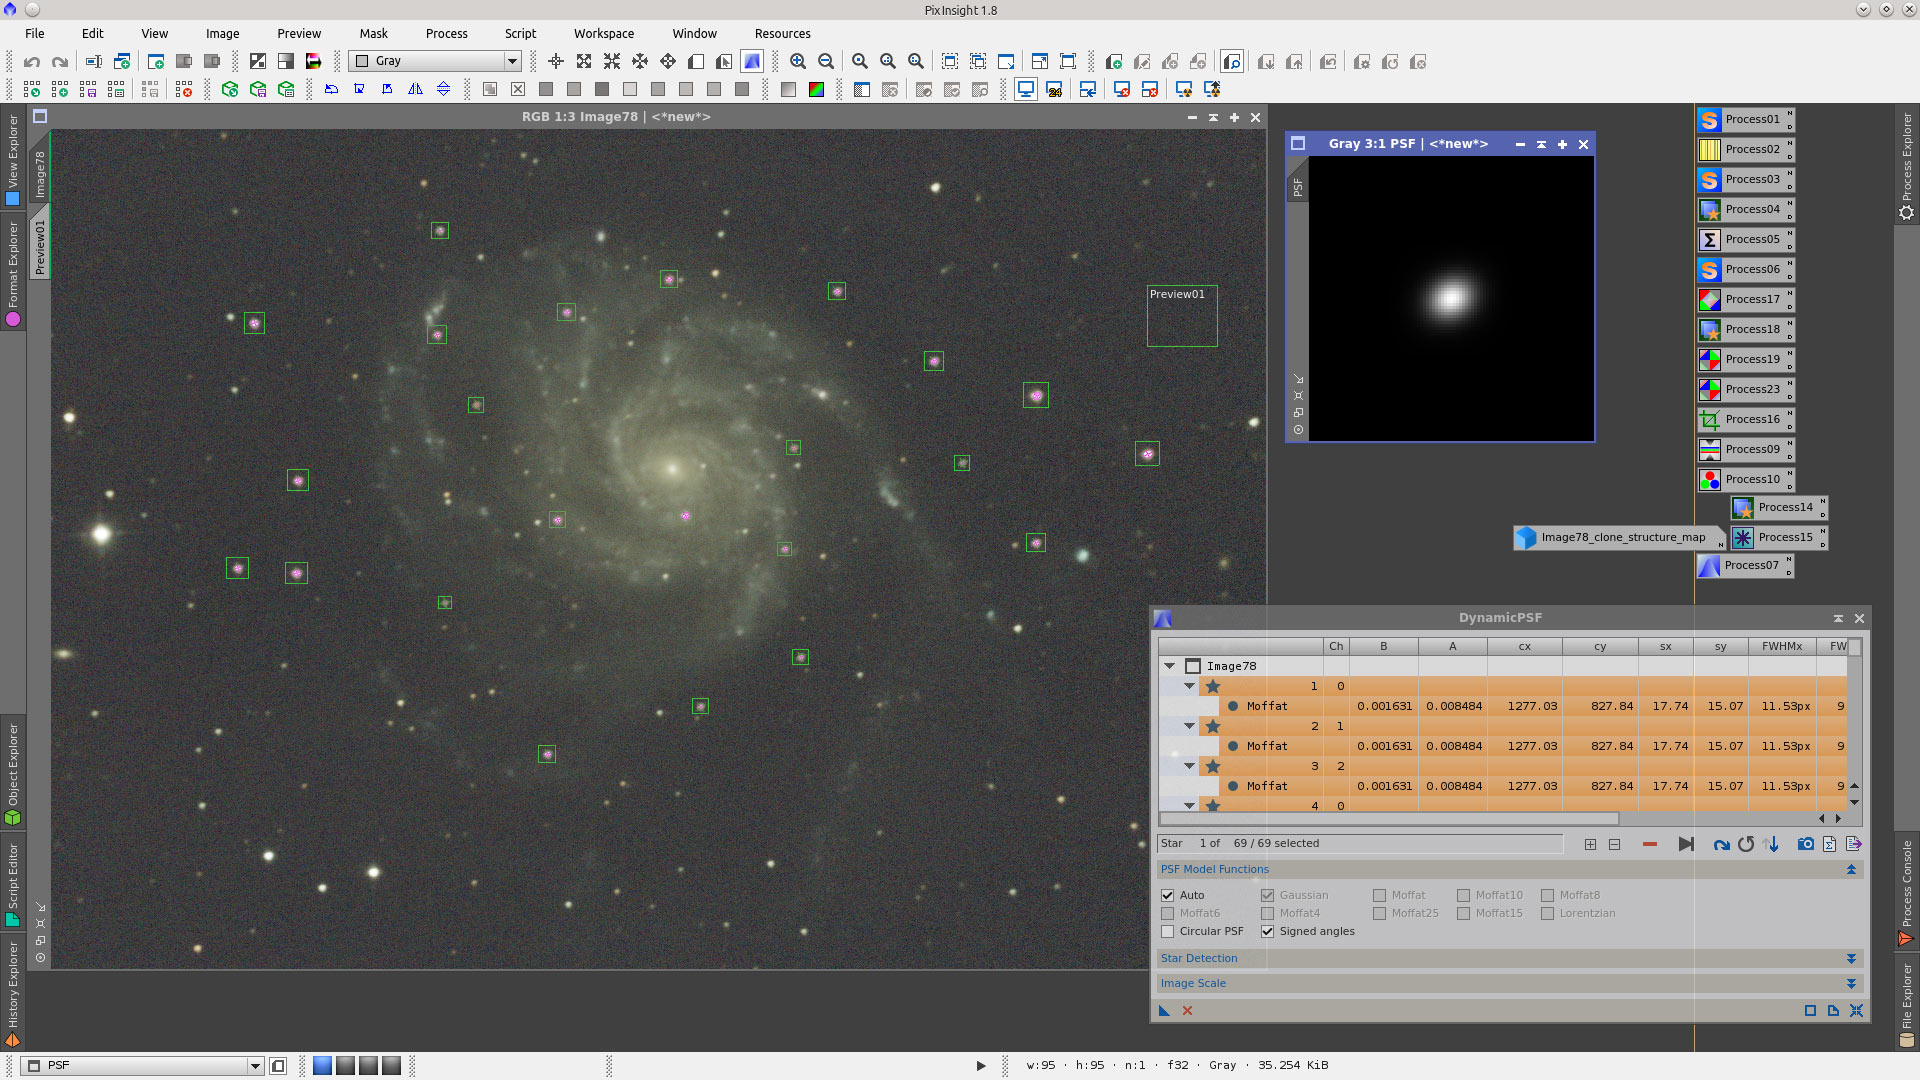
Open DynamicPSF and generate the PSF to be used as reference star in Deconvolution
Apply the starmask to protect the cores of the stars. Set Global dark Deringing conveniently to avoid rings on stars and Wavelet Regularization parameters to have an smooth background without artefacts. This will improve details in the galaxy.

Now the image is ready to stretch and start non-linear processing