Leo Triplet with DSLR
by Alejandro Tombolini
Introduction
Post processing of an integrated DSLR image.
This image is from Marc Hoeppner published in PixInsight Forum - Post processing until the final image of an integrated image taken with Carbon Newton 200/800, Canon 1000Da, EQ6, Mgen autoguider. Only 25*180 seconds light, 10*180 seconds darks, 20 bias and 20 flats. - Main notes: CanonBandingReduction and DBE to control background, MultiscaleMedianTransform for noise reduction and contrast in the galaxies and Morphological Transformation and MultiscaleLinearTransform to process stars.
Processing
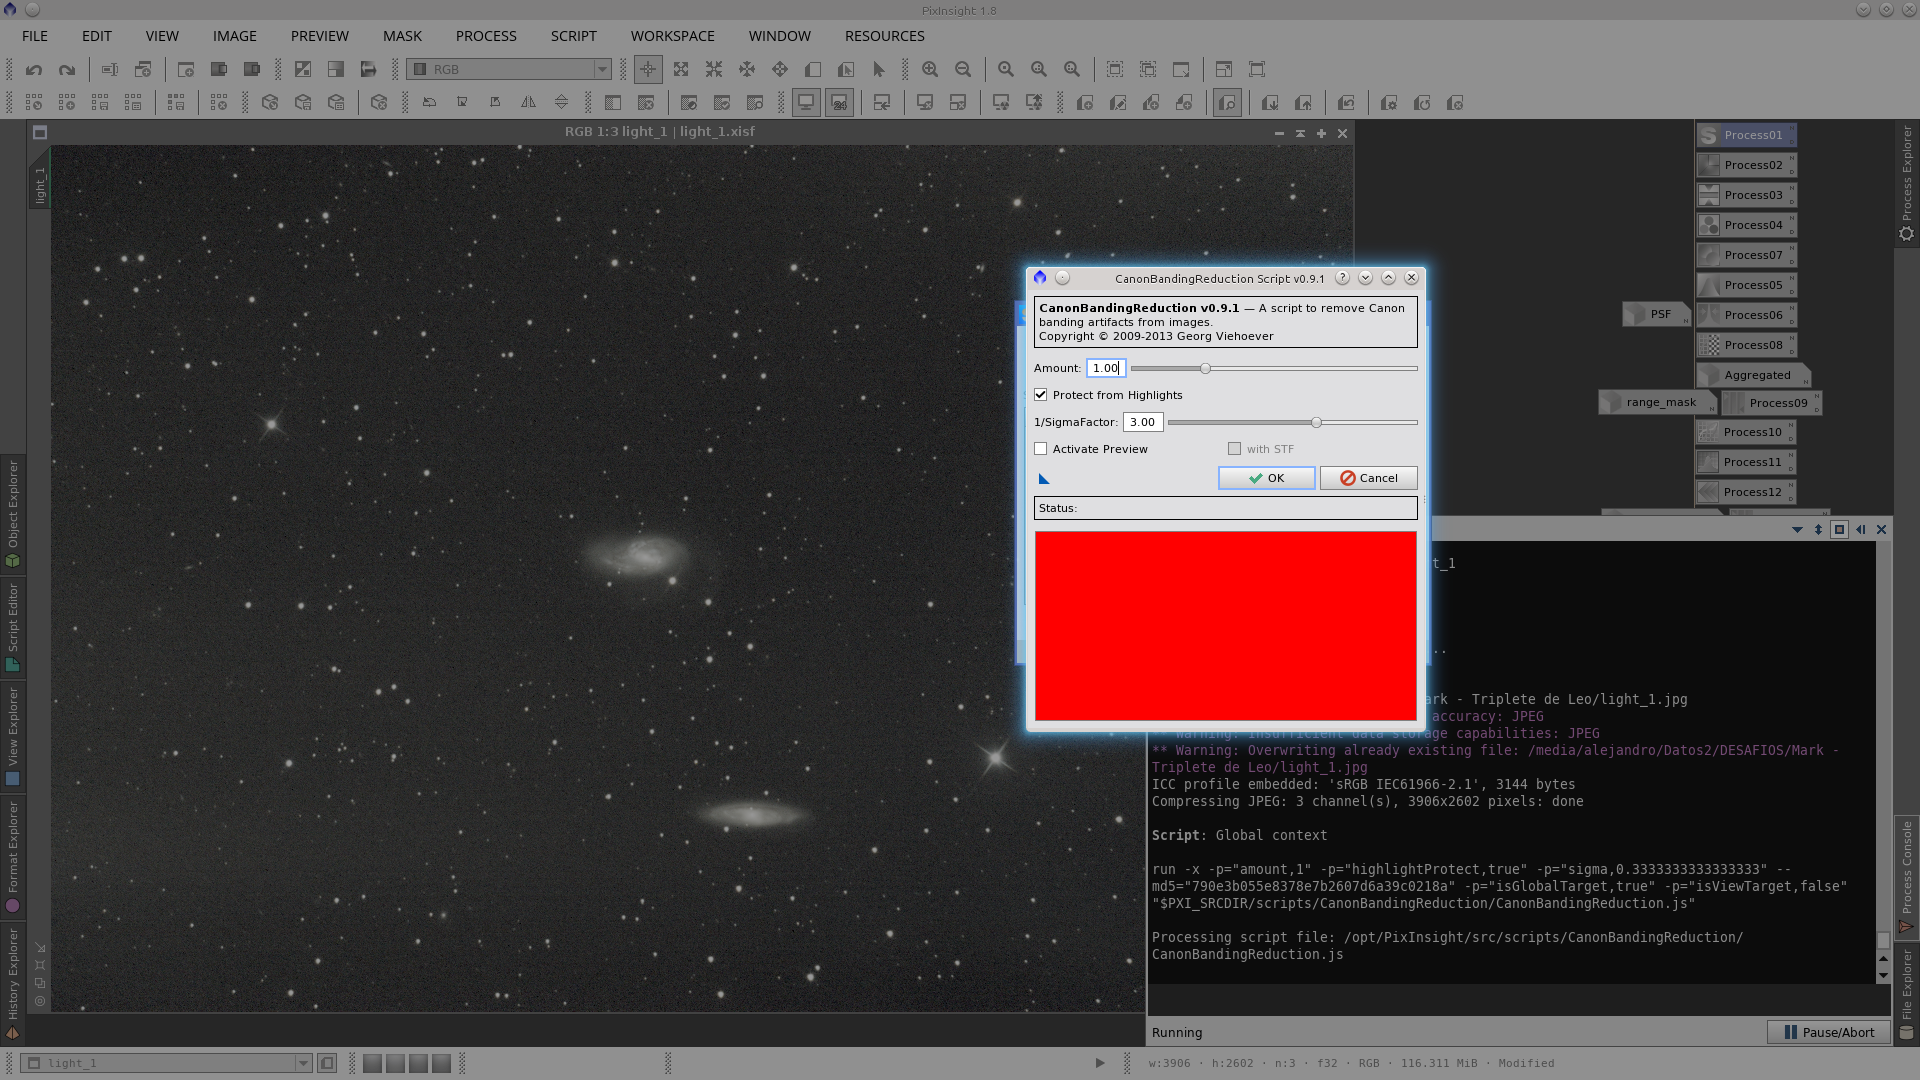
The first step is to apply the CanonBandingReduction script to reduce some banding. Check "Protect from Highlights" to avoid some dark banding where the galaxies are located.
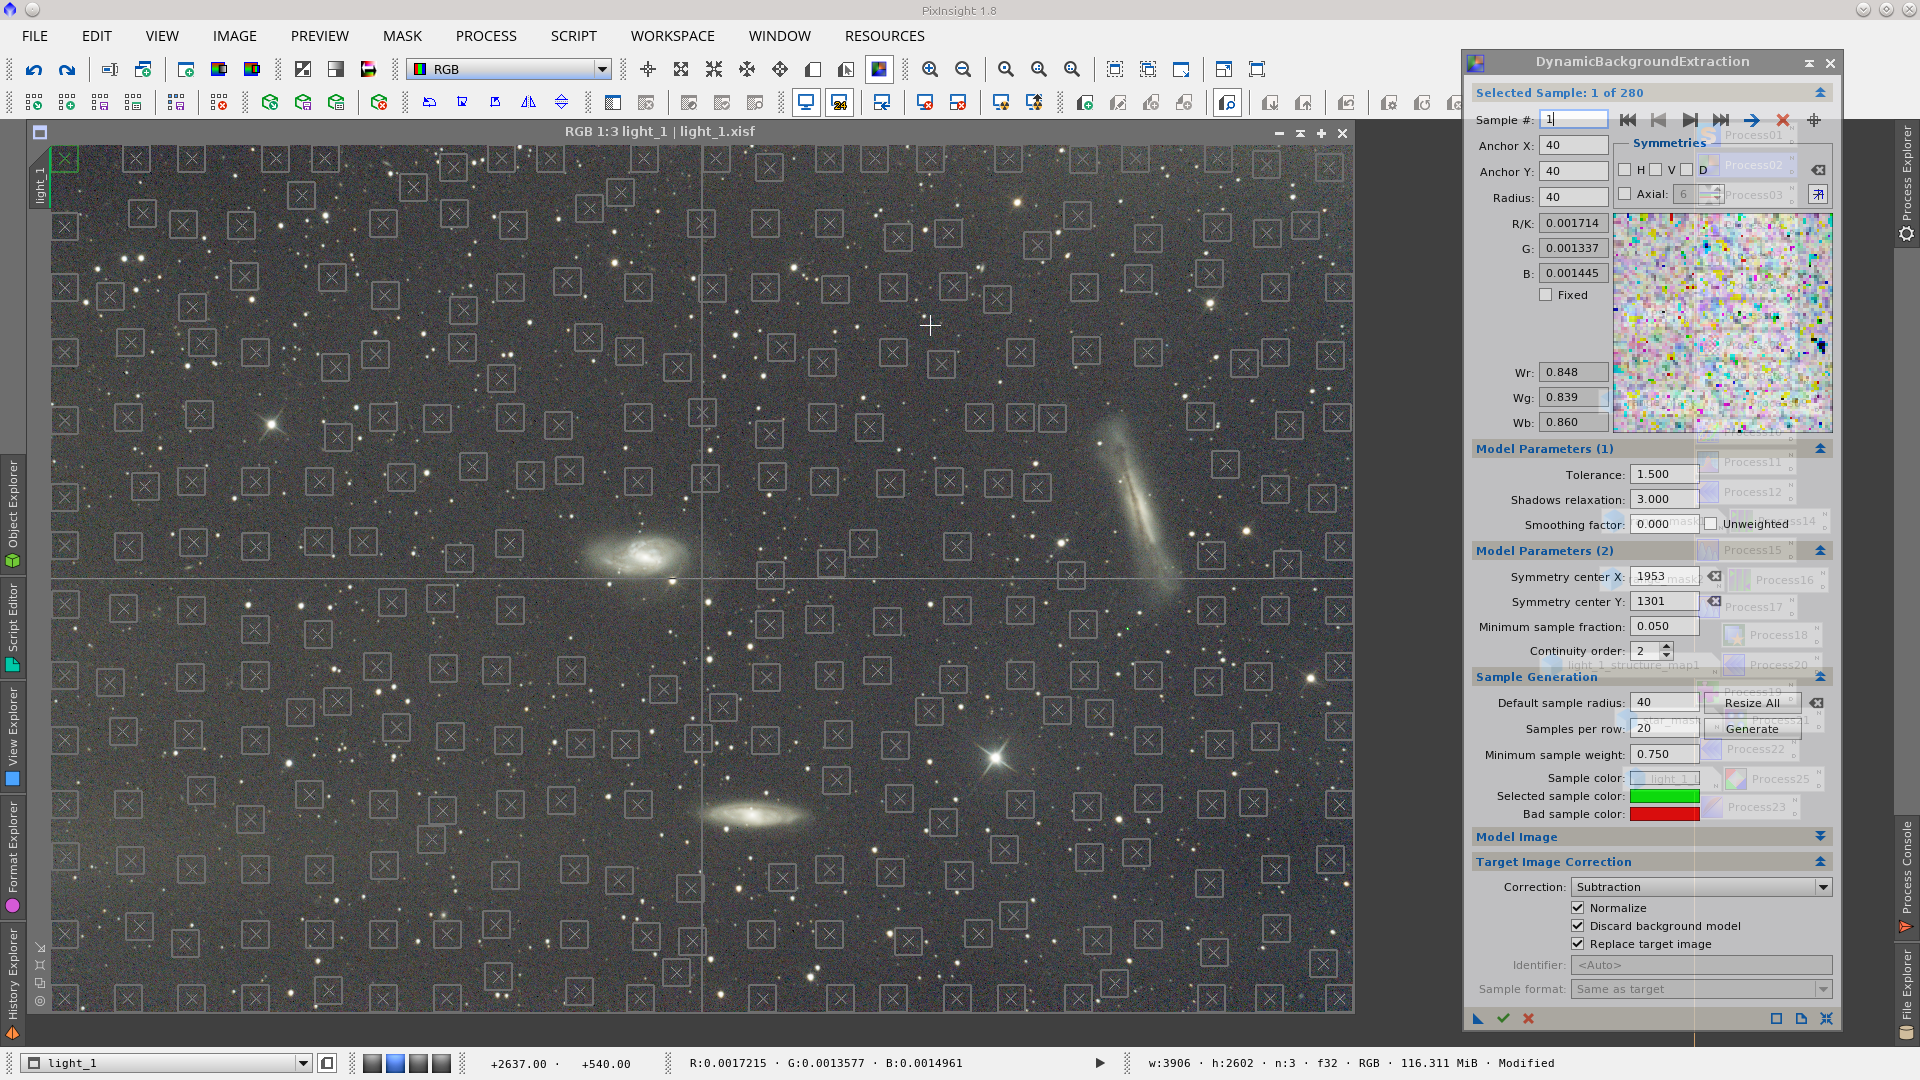
Apply DynamicBackgroundExtraction to extract some background gradient. The pattern is a little odd and I will reduce the smoothing factor to remove it, so in this case it is important to carefully place the samples where there are no stars.
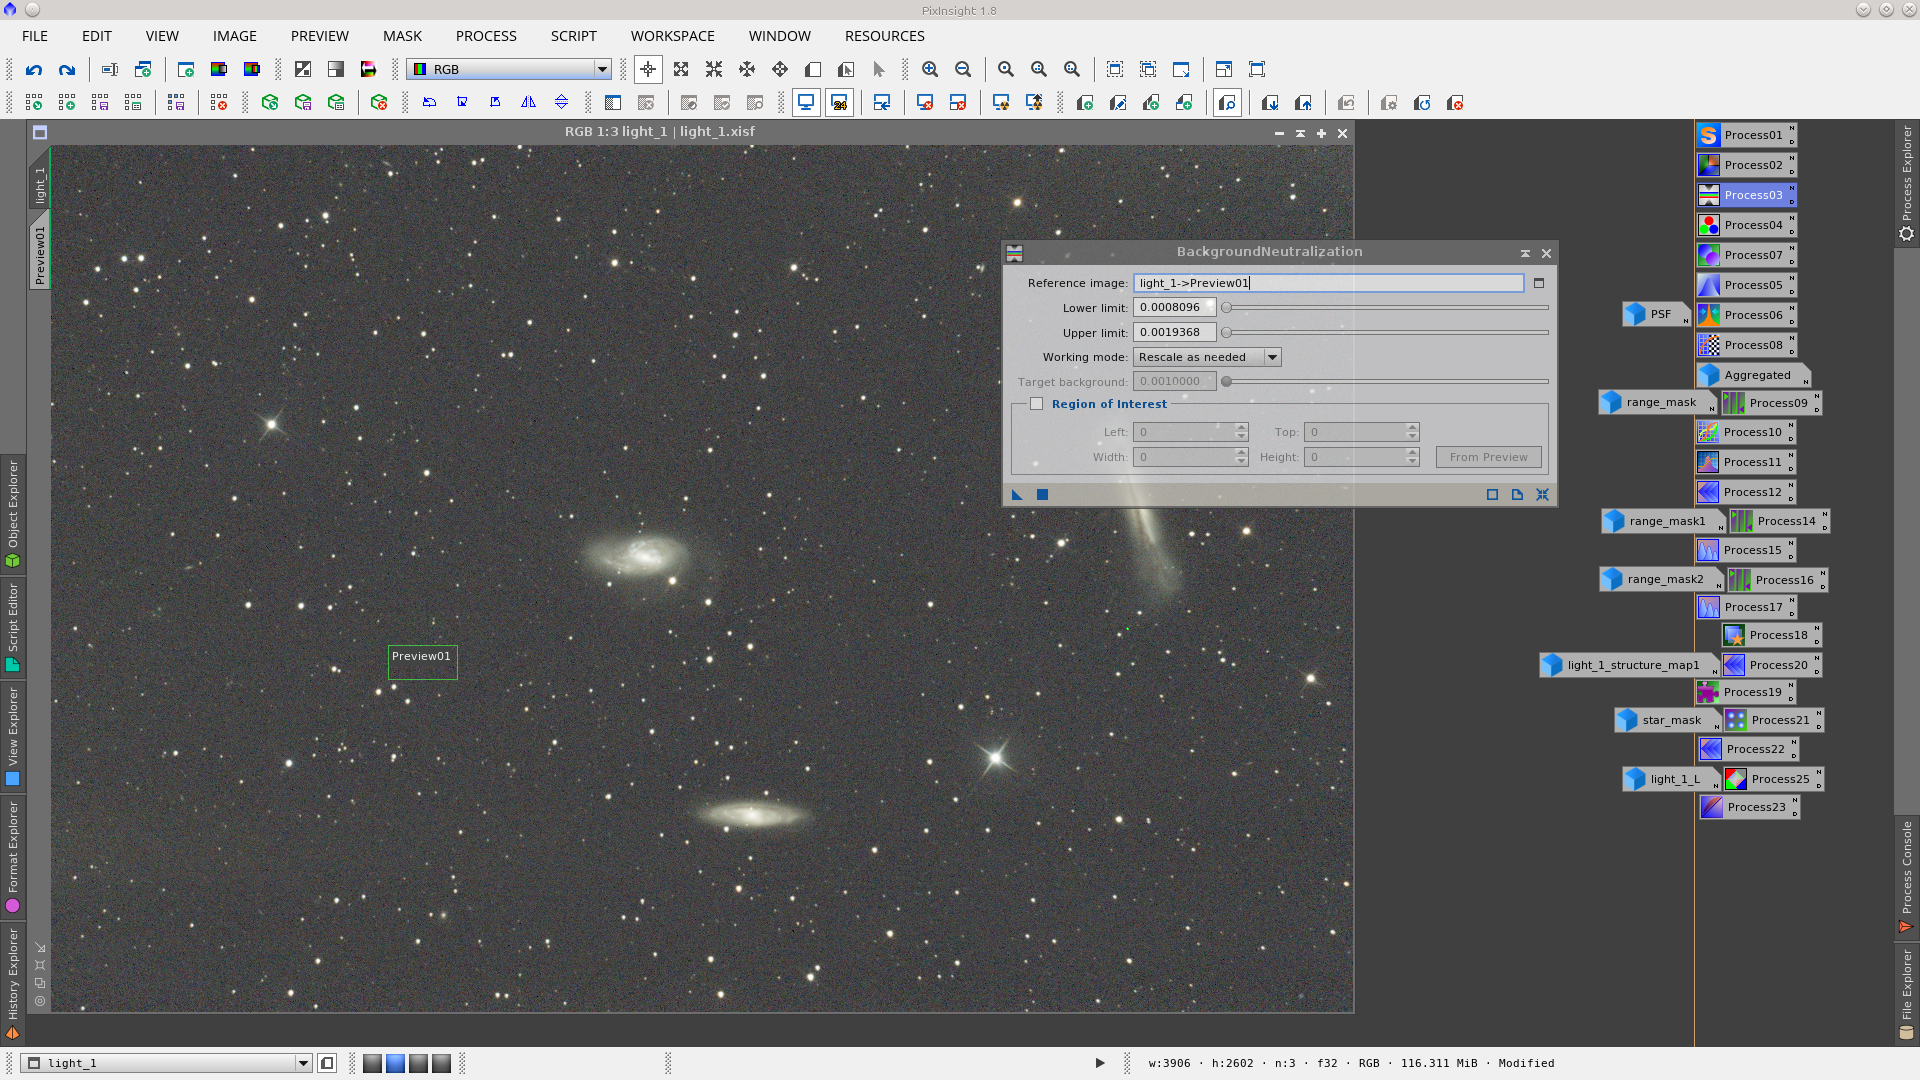
Select a preview that represents the background of the image and apply the BackgroundNeutralization tool. The values of the upper and lower limits can be extracted from the Statistics tool.
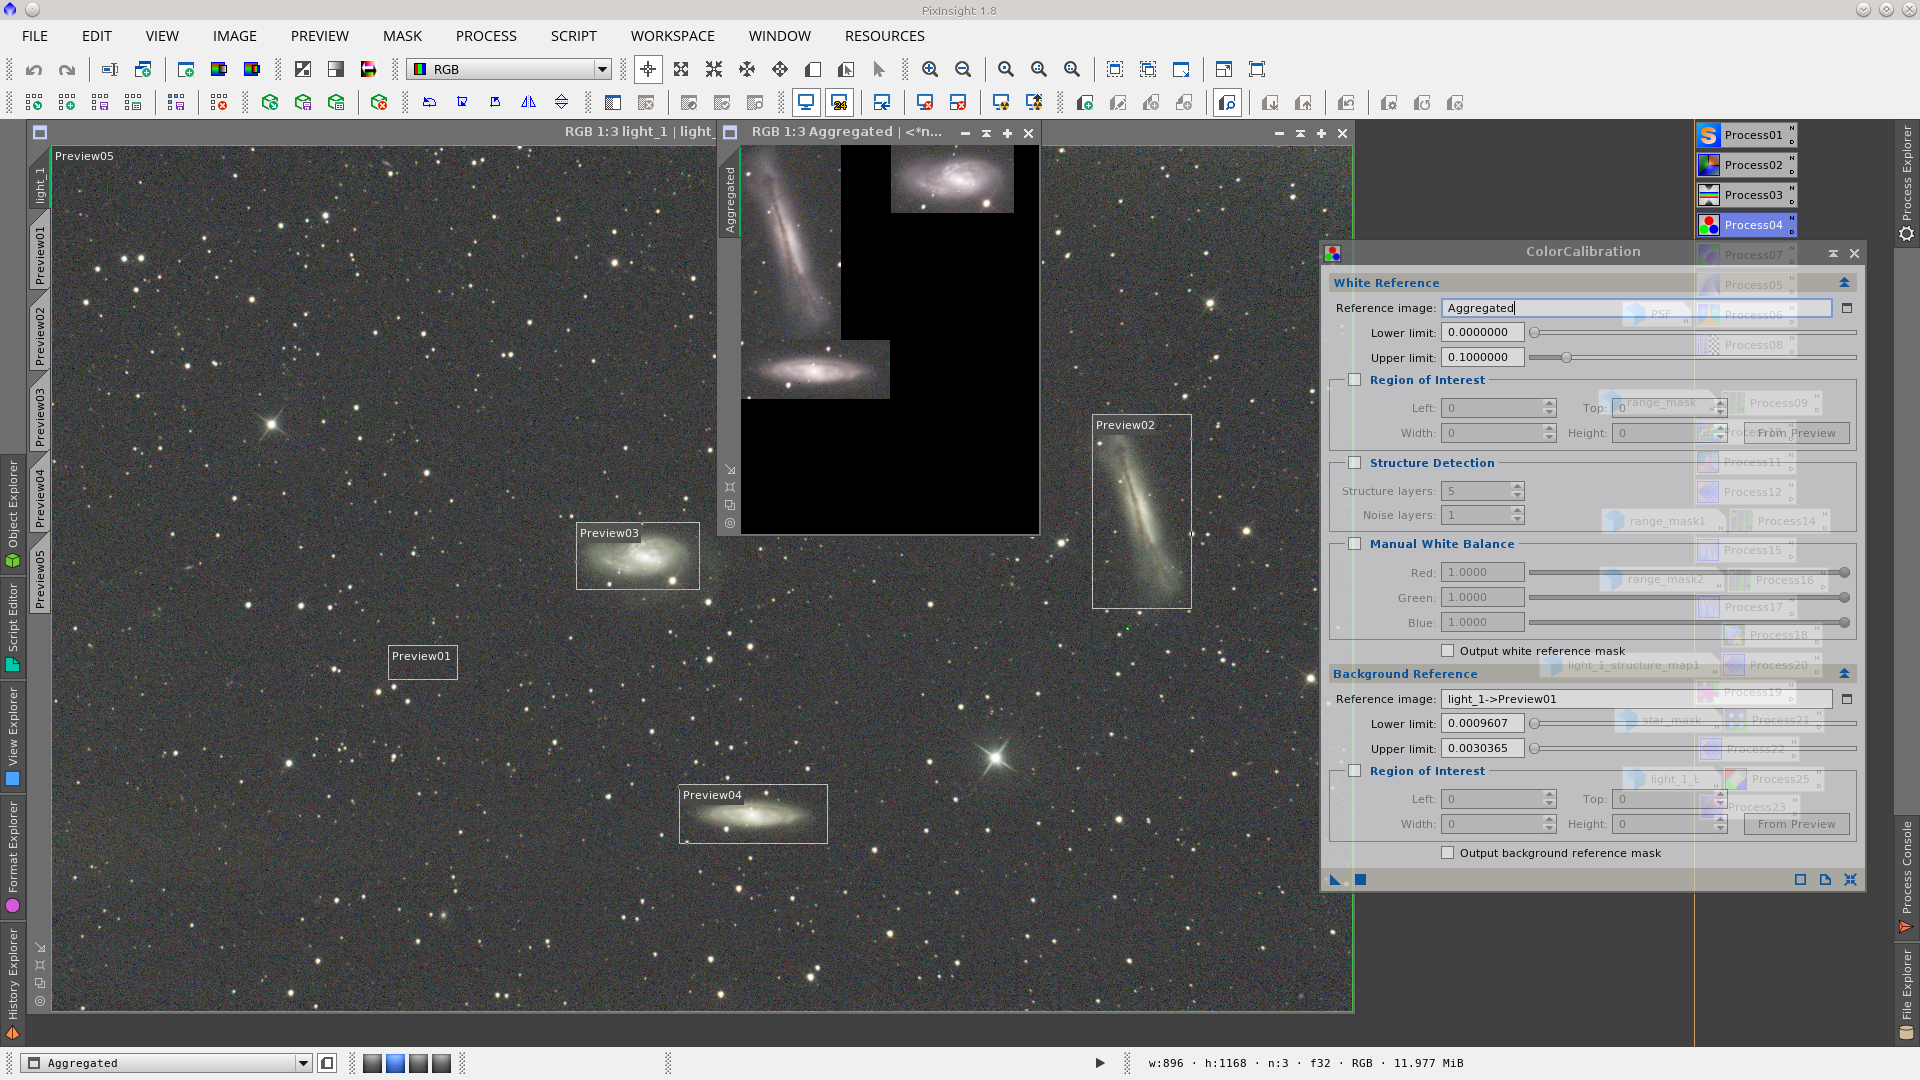
For calibrating the color use the same preview used to neutralize the background as reference for the background in the ColorCalibration tool with the new corresponding values updated. Make an Aggregated image that includes the three galaxies to be used as the reference image of the white reference.
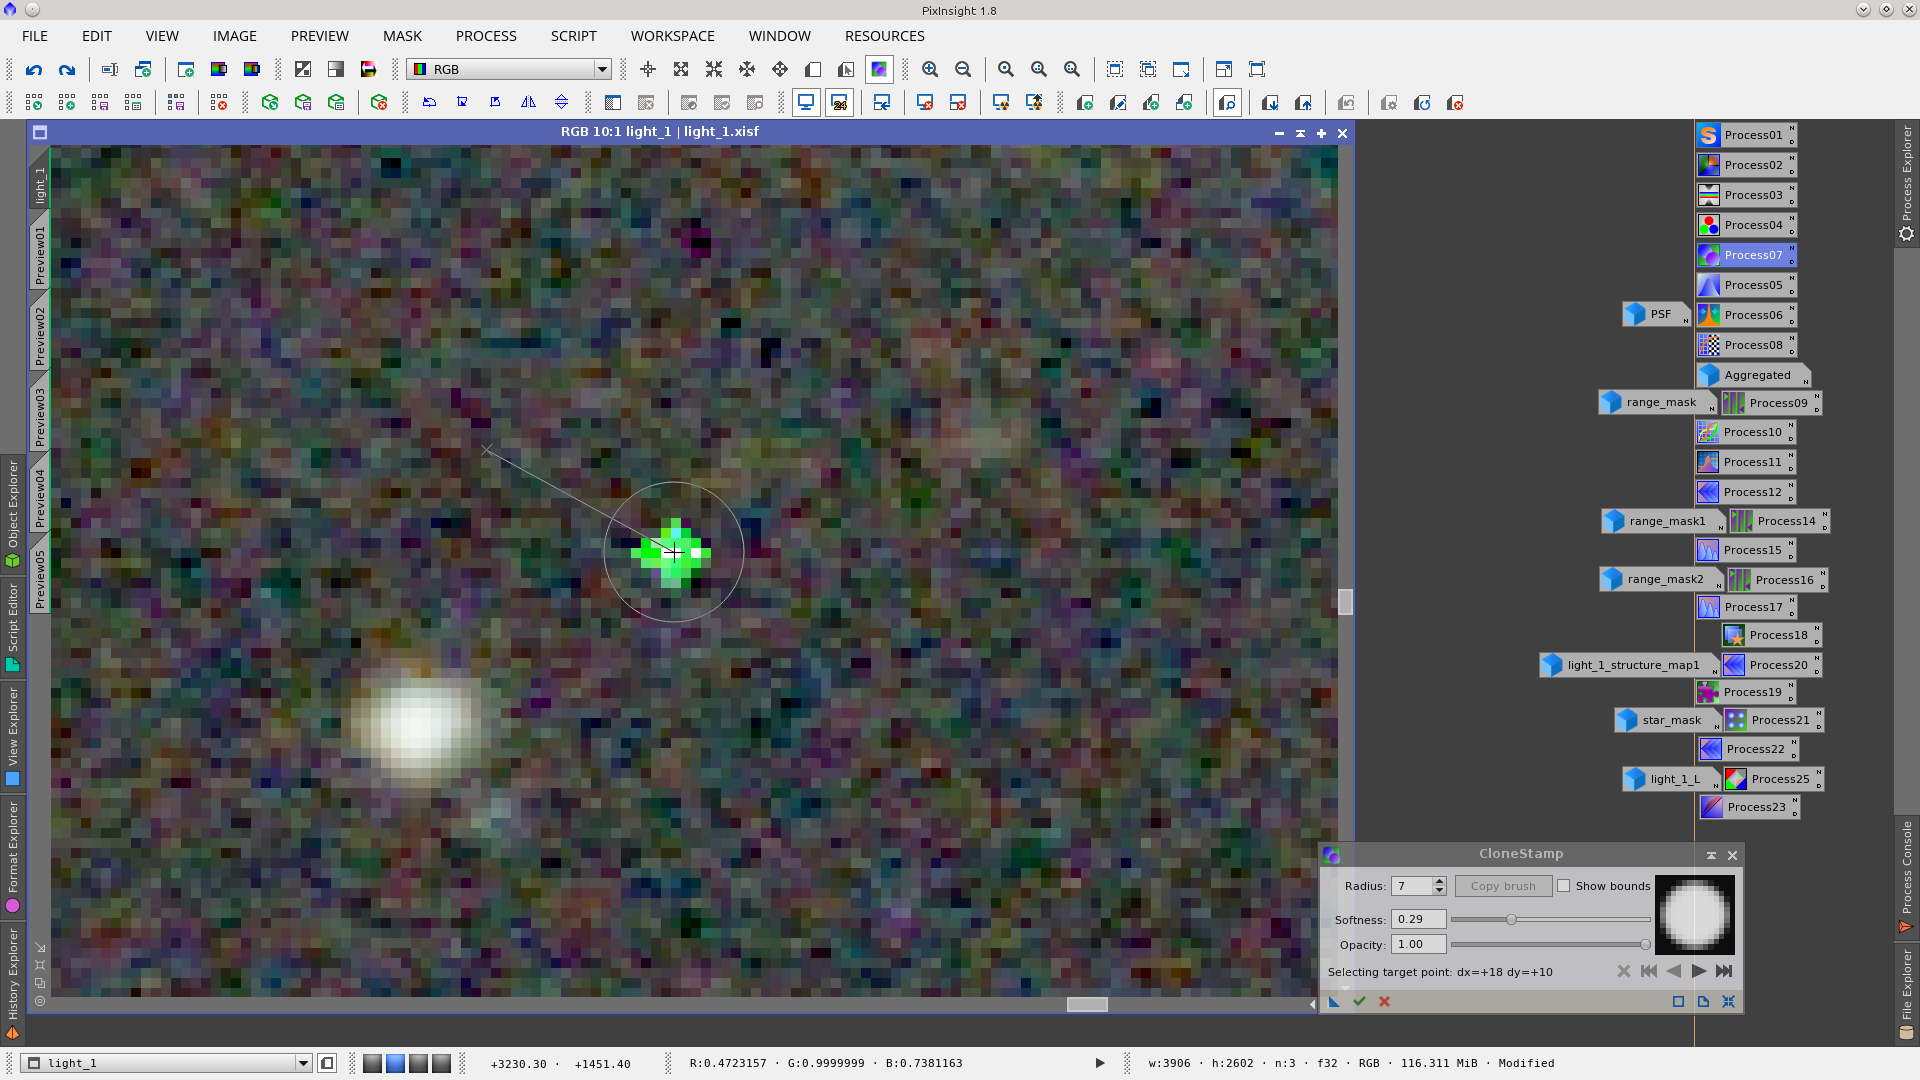
Use the CloneStamp tool to delete a green hot pixel near one of the galaxies.
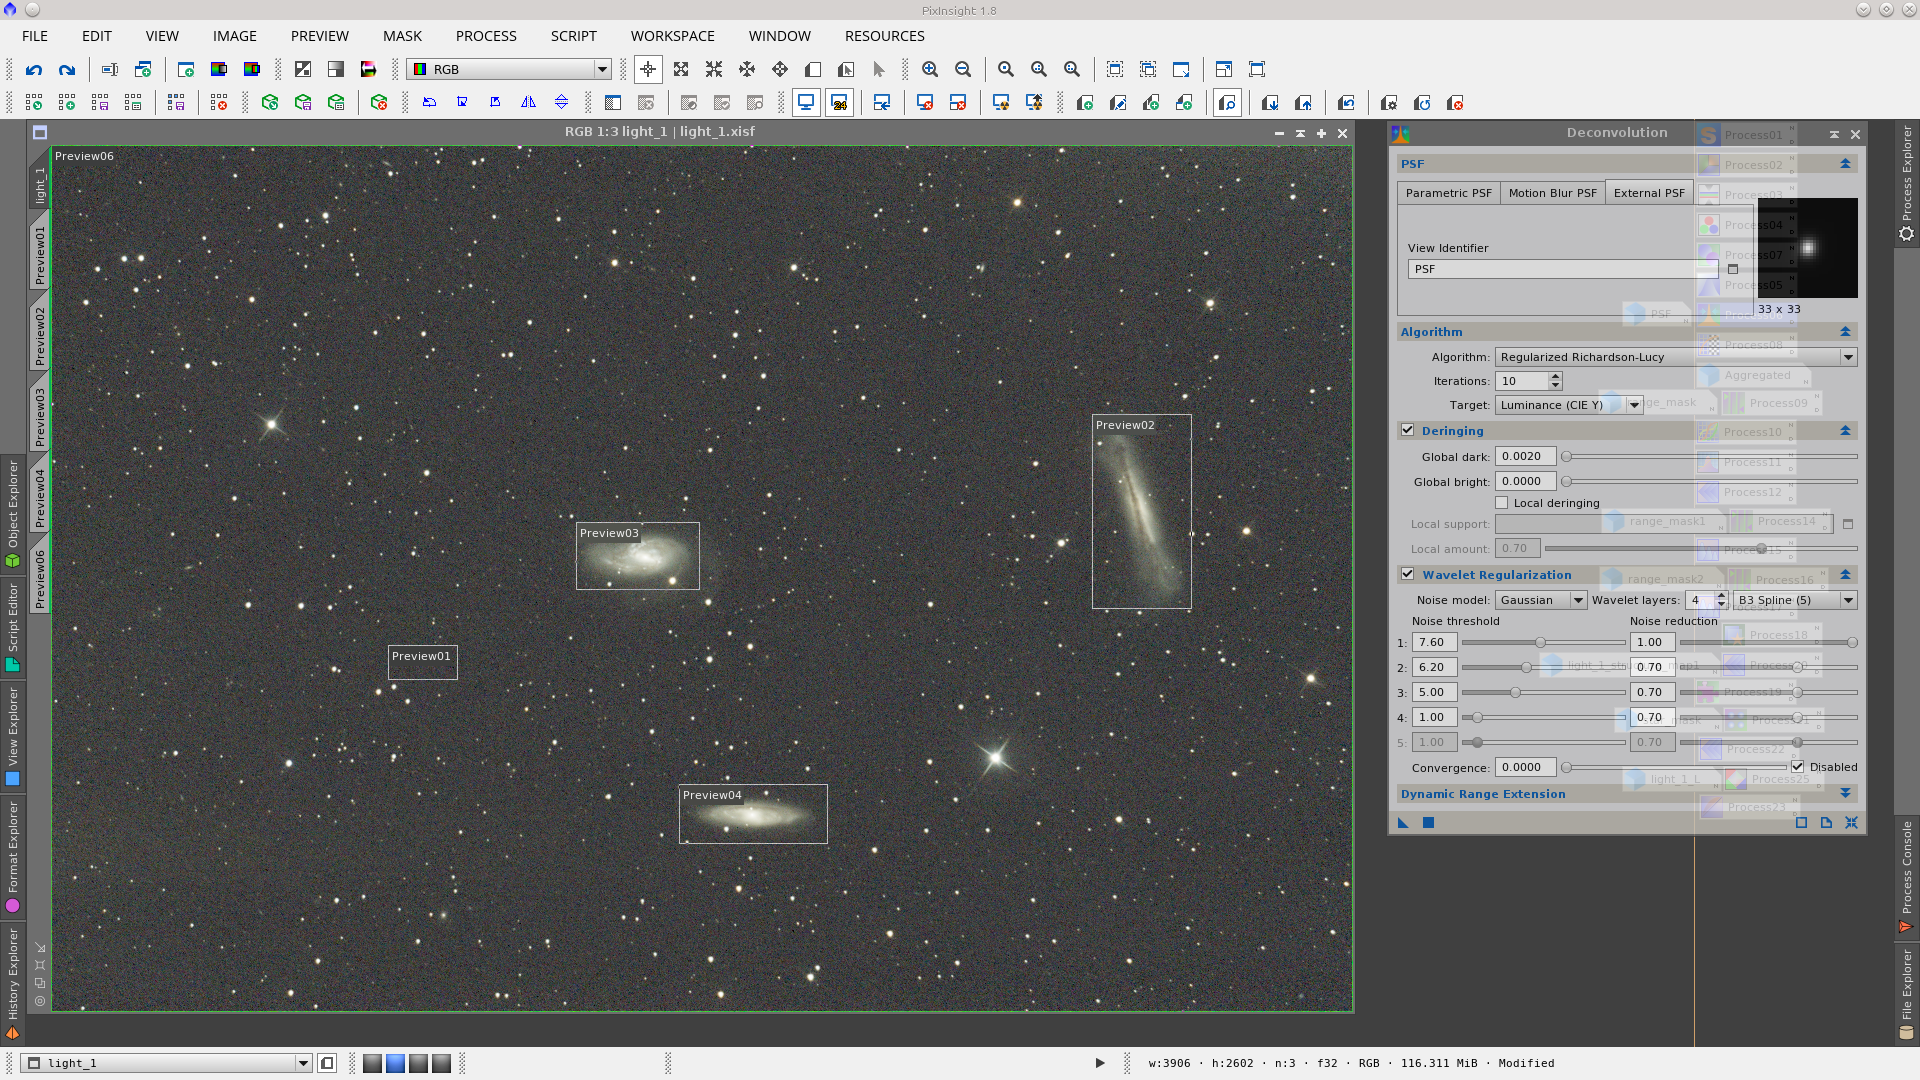
Generate a PSF with DynamicPSF tool to be used as External PSF with the Deconvolution tool.

Apply Deconvolution to increase details in galaxies and to improve star profiles, controlling the ringing with the appropriate Deringing value determinated by trial and error.
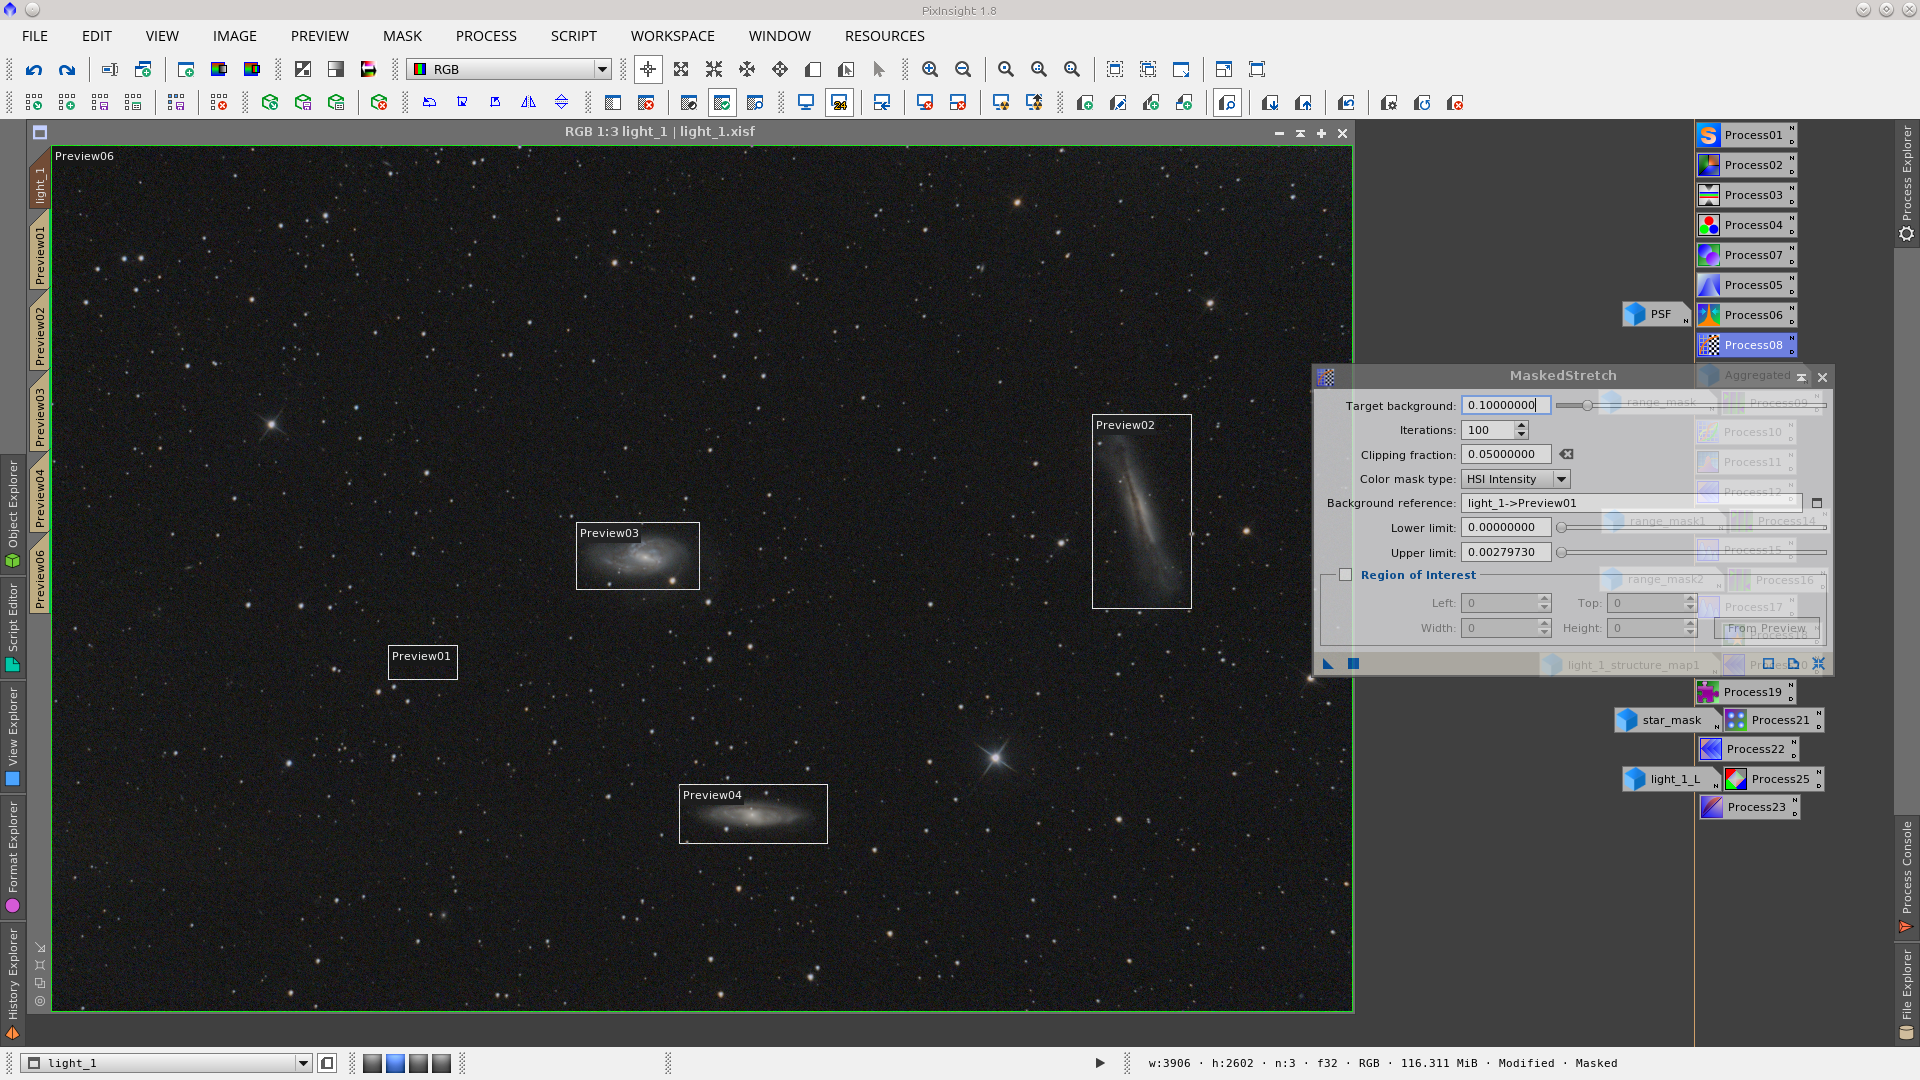
Stretch the image using the MaskedStretch tool. Set the value of the Target background a little lower than default and select the same preview previously used as background reference.
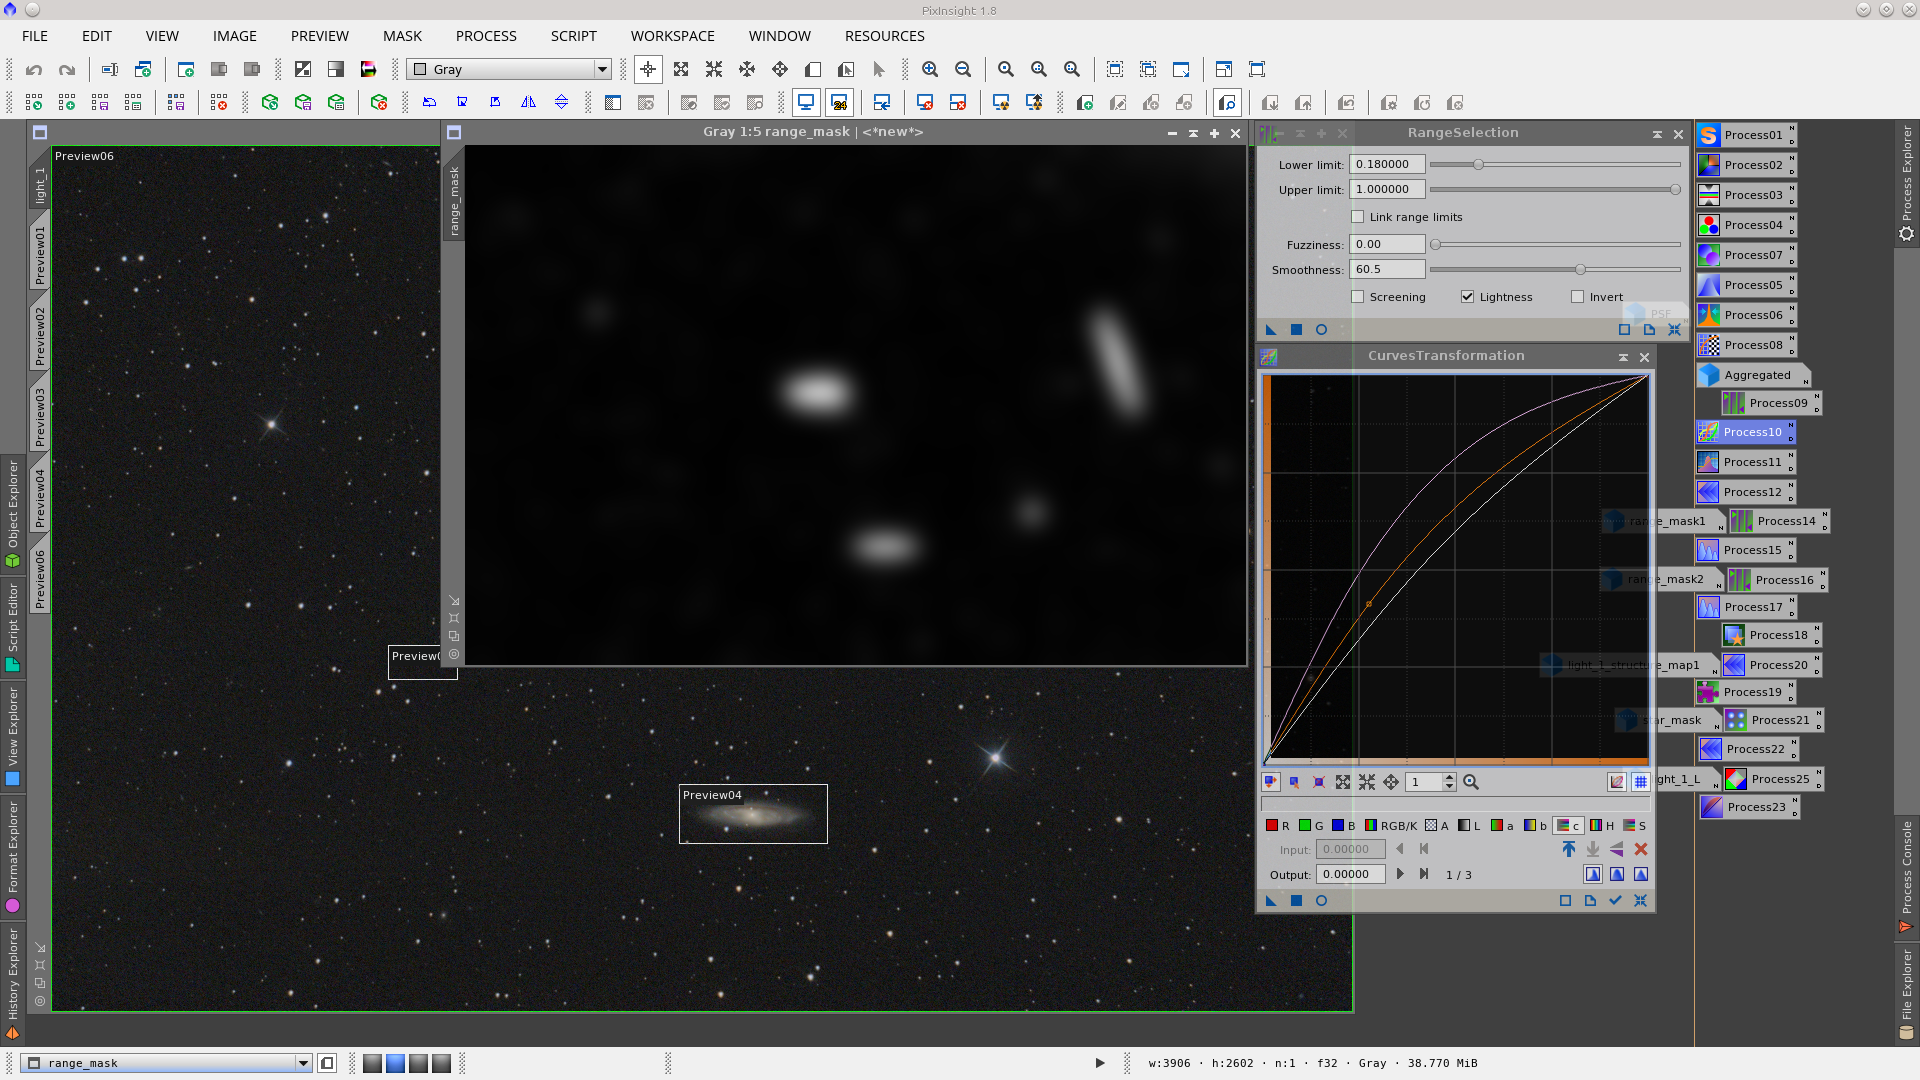
Generate a mask to protect the background and saturate the images. Apply CurvesTransformation while protecting with the mask.
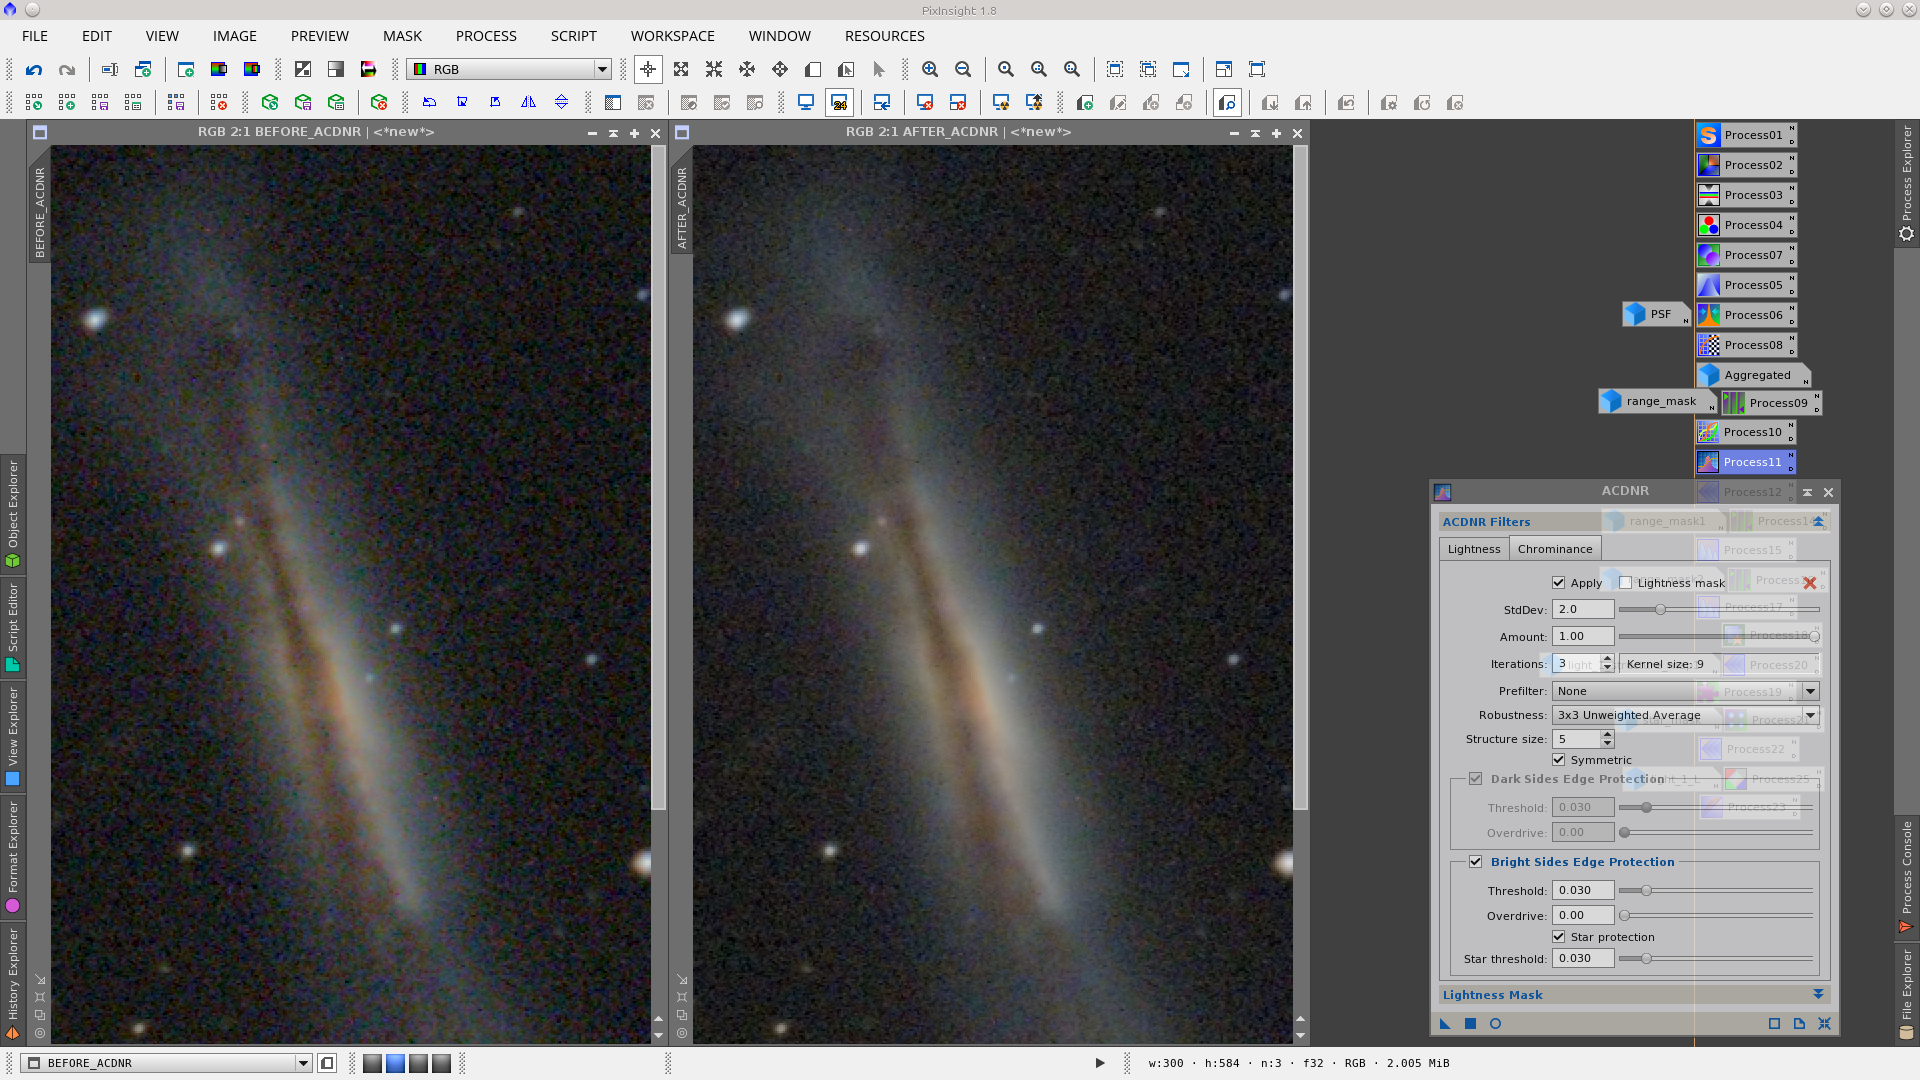
Normally saturation increases the chrominance noise. To reduce the noise apply ACDNR only to chrominance (uncheck lightness) without using a mask. See before and after noise reduction:
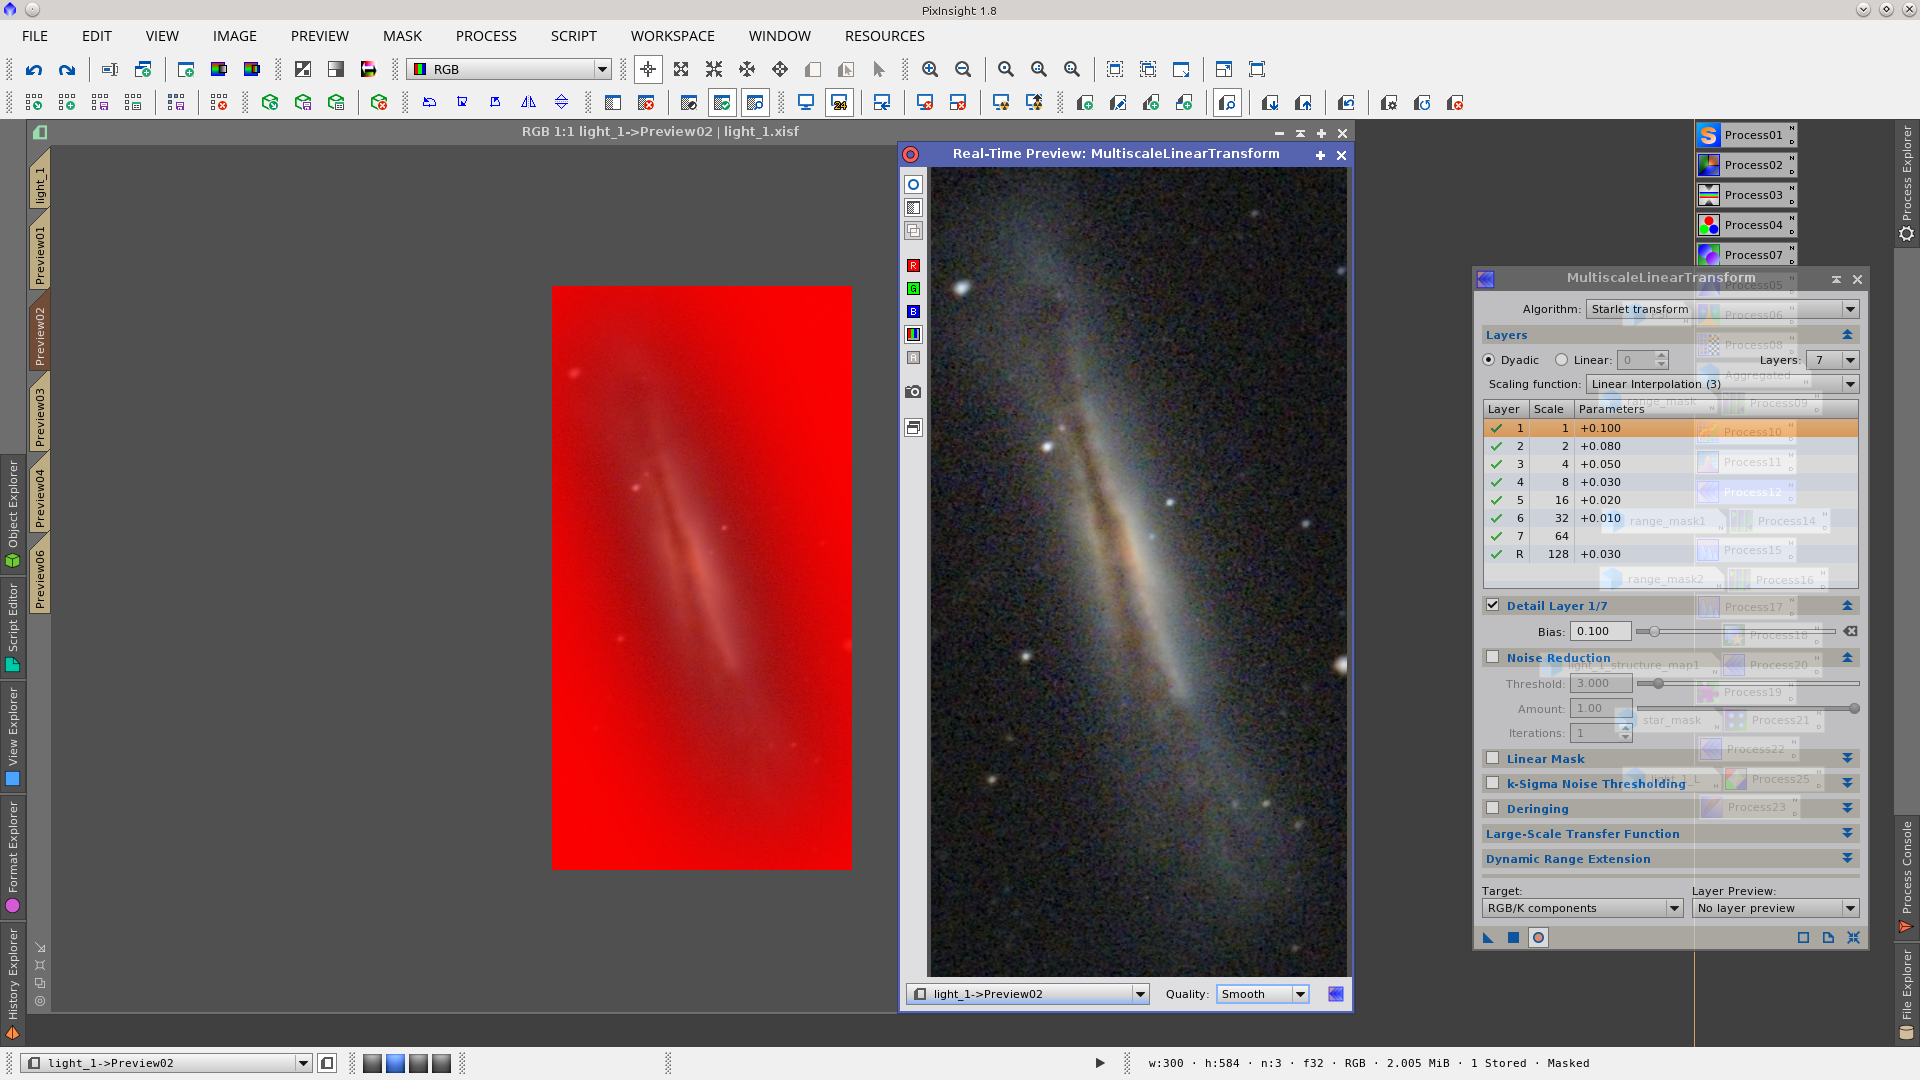
Protecting the background with the previously created range mask, apply MultiscaleLinearTransform to increase details in the galaxies.
The next two steps are two consecutive applications of MultiscaleMedianTransform to noise reduction in the galaxies using two different range masks to protect the background. Create as shown:
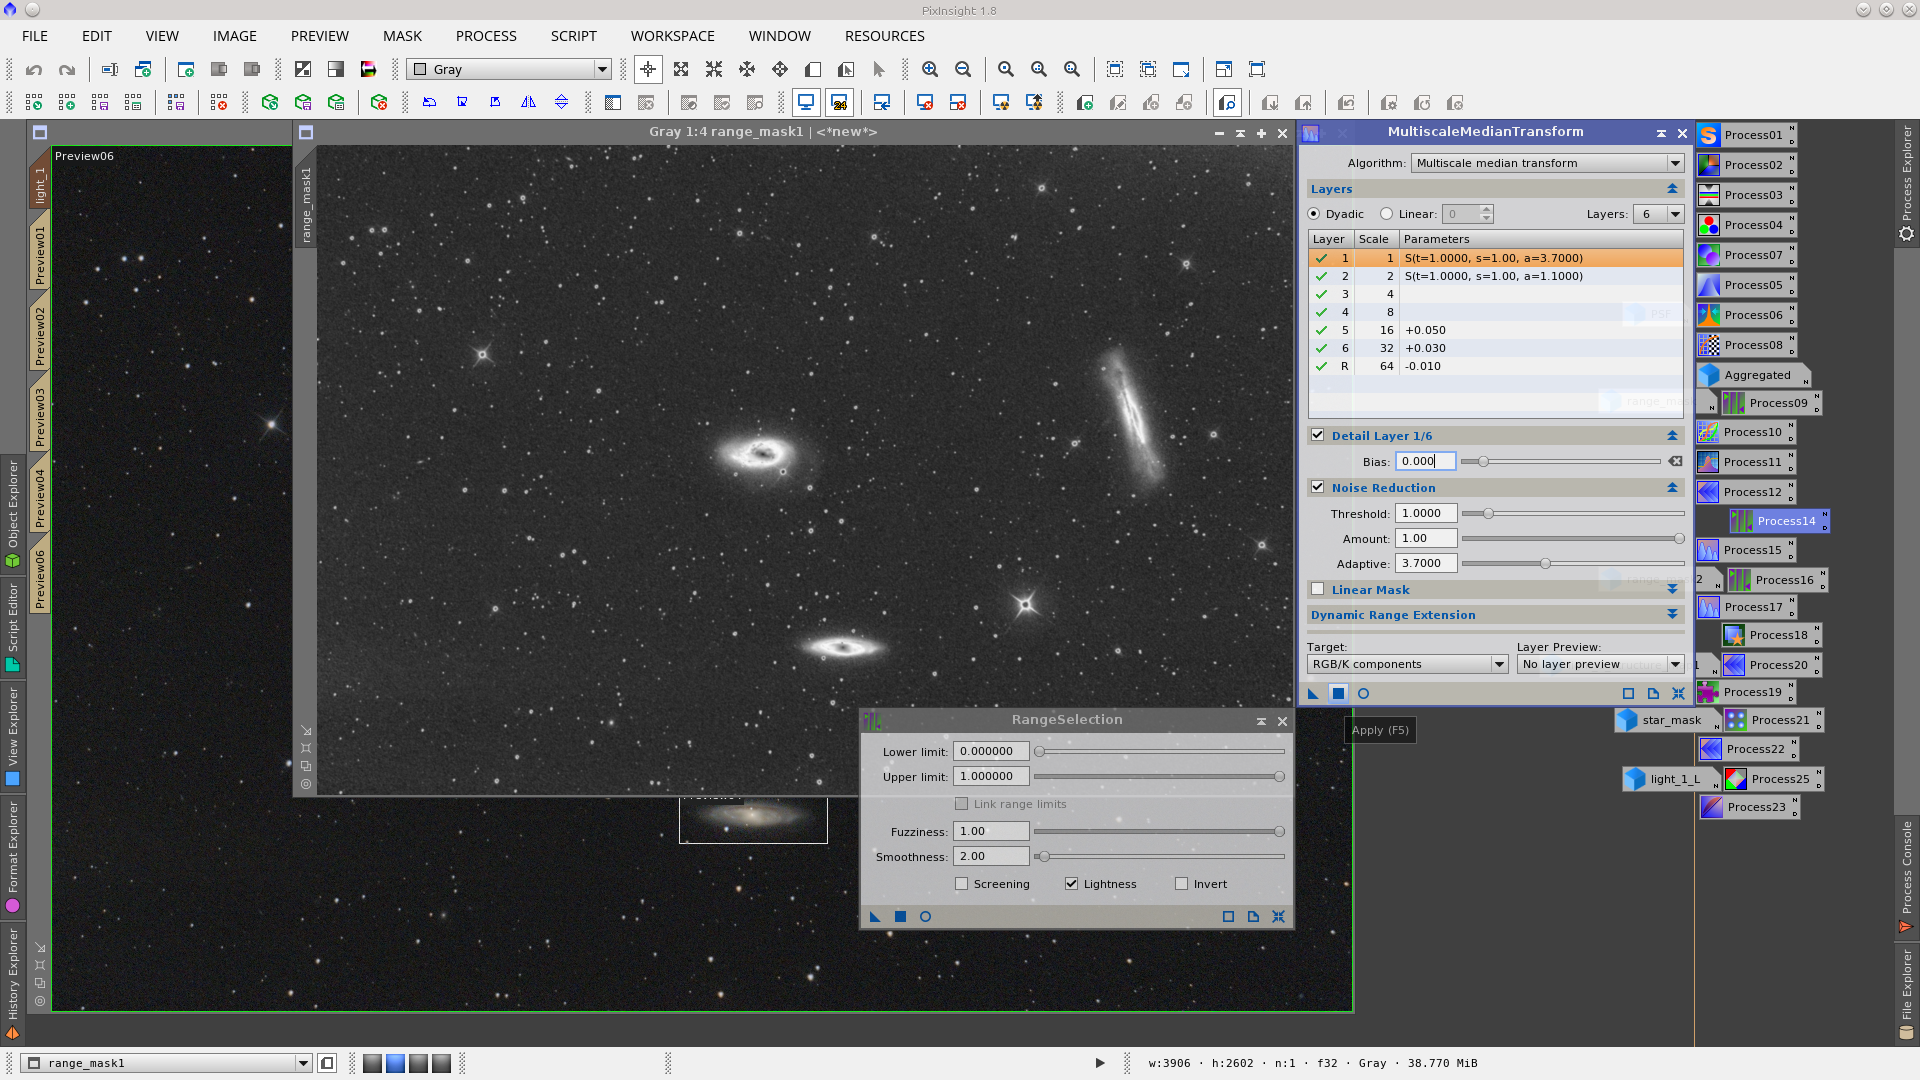
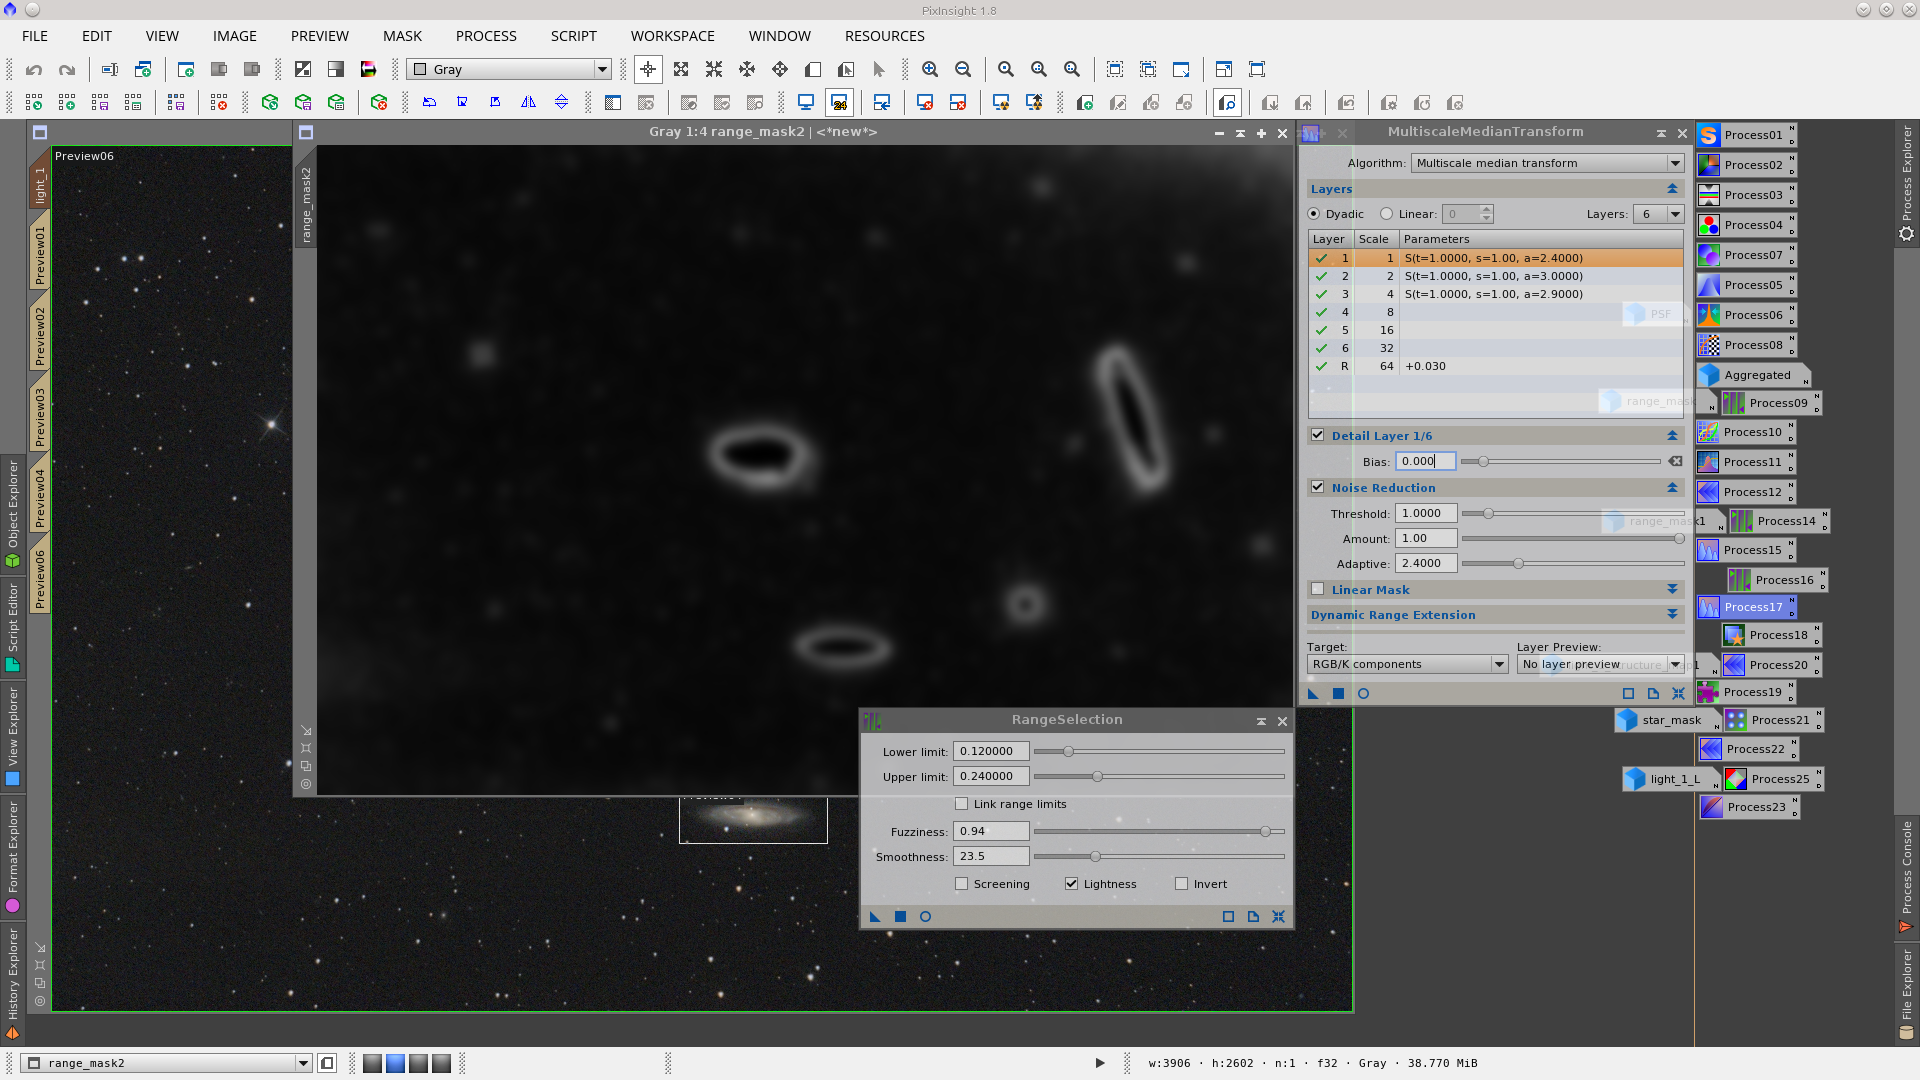
Note that besides noise reduction I have also fine tuned the Bias in some layers to increase contrast.
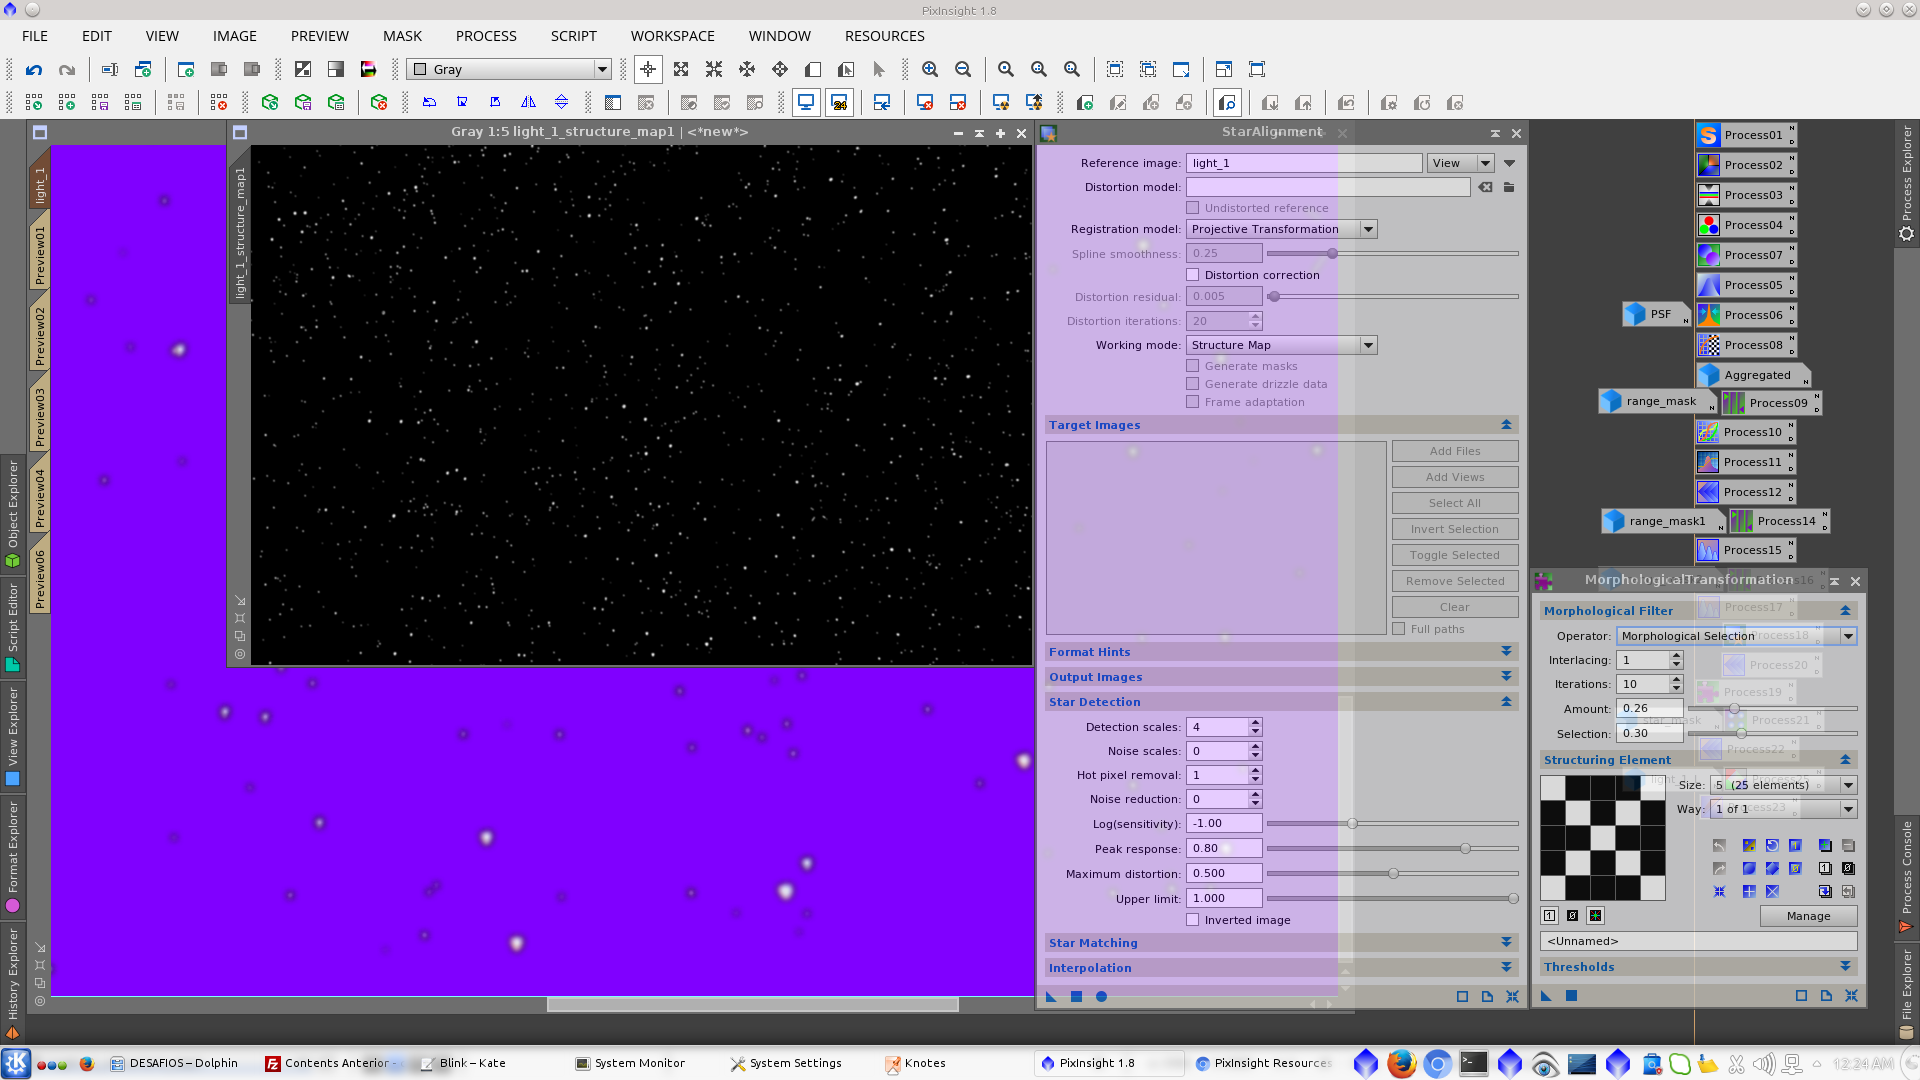
Now generate a structure_map mask with the StarAlignment tool and adjust the numbers of layers to avoid detecting structures in the galaxies. Using that mask to protect the background apply the MorphologicalTransformation tool to reduce stars.
Generate a new mask with the StarMask tool that includes the biggest stars of the image, with the objective of repairing their saturated cores.

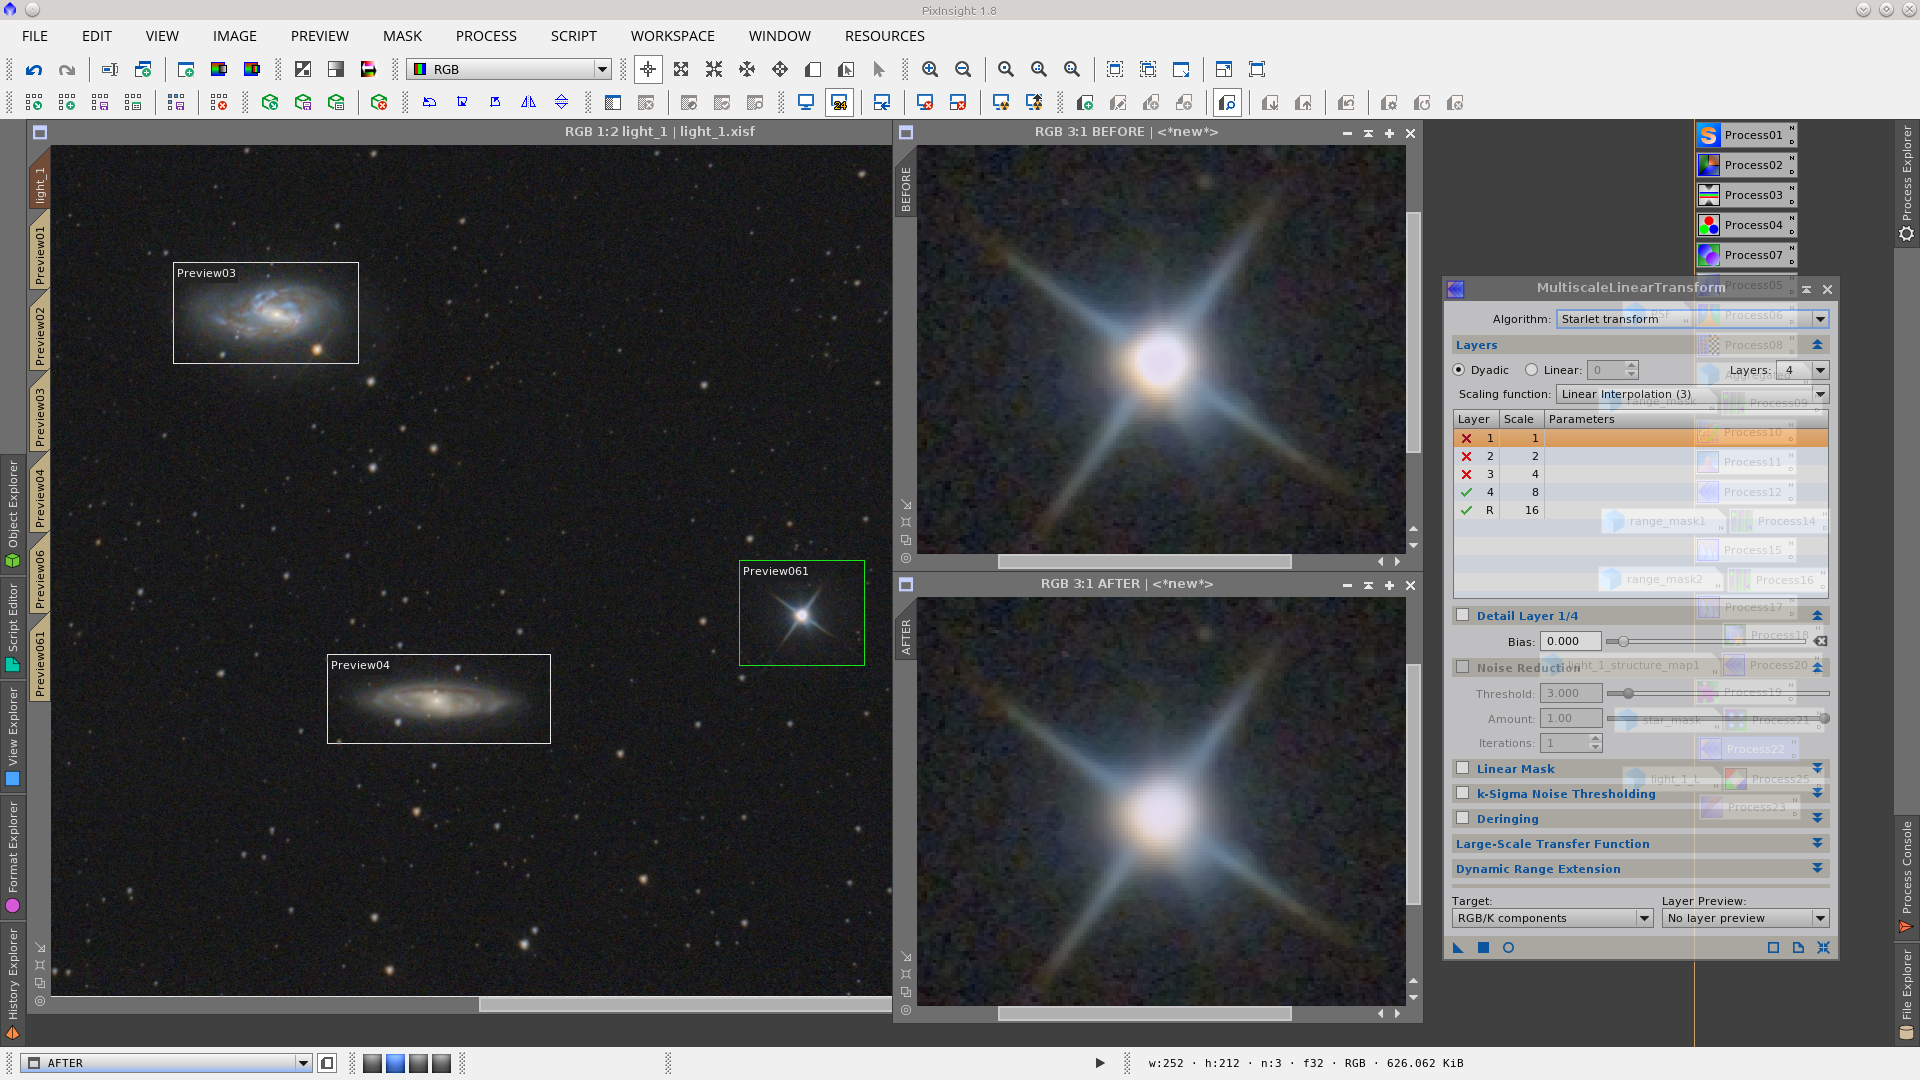
Apply MultiscaleLinearTransform, deleting the first three layers to make a better profile on these stars.
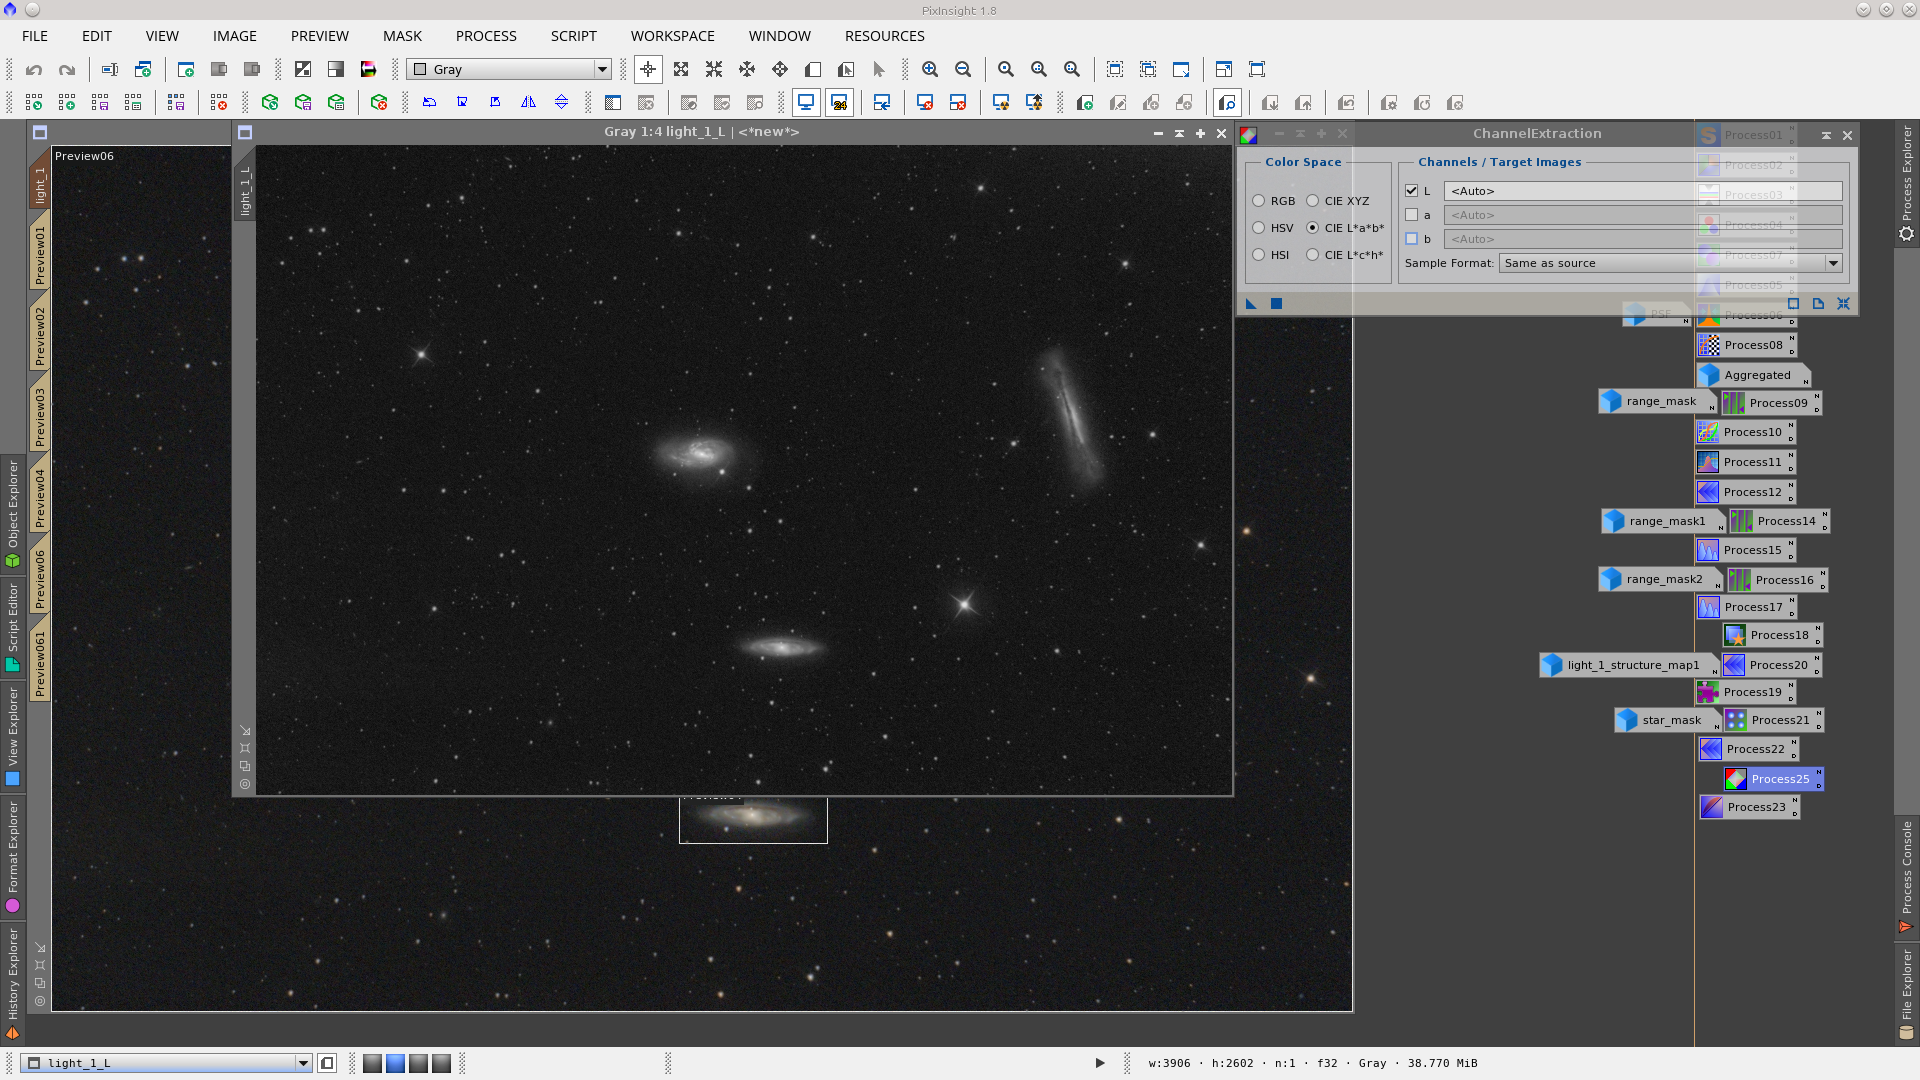
Finally extract the Lightness of the image to use as a mask to protect bright regions while adjusting the brightness of the background.
Apply GammaStretch to reduce the brightness of the background while protecting the galaxies. You can choose here how much to darken the background.
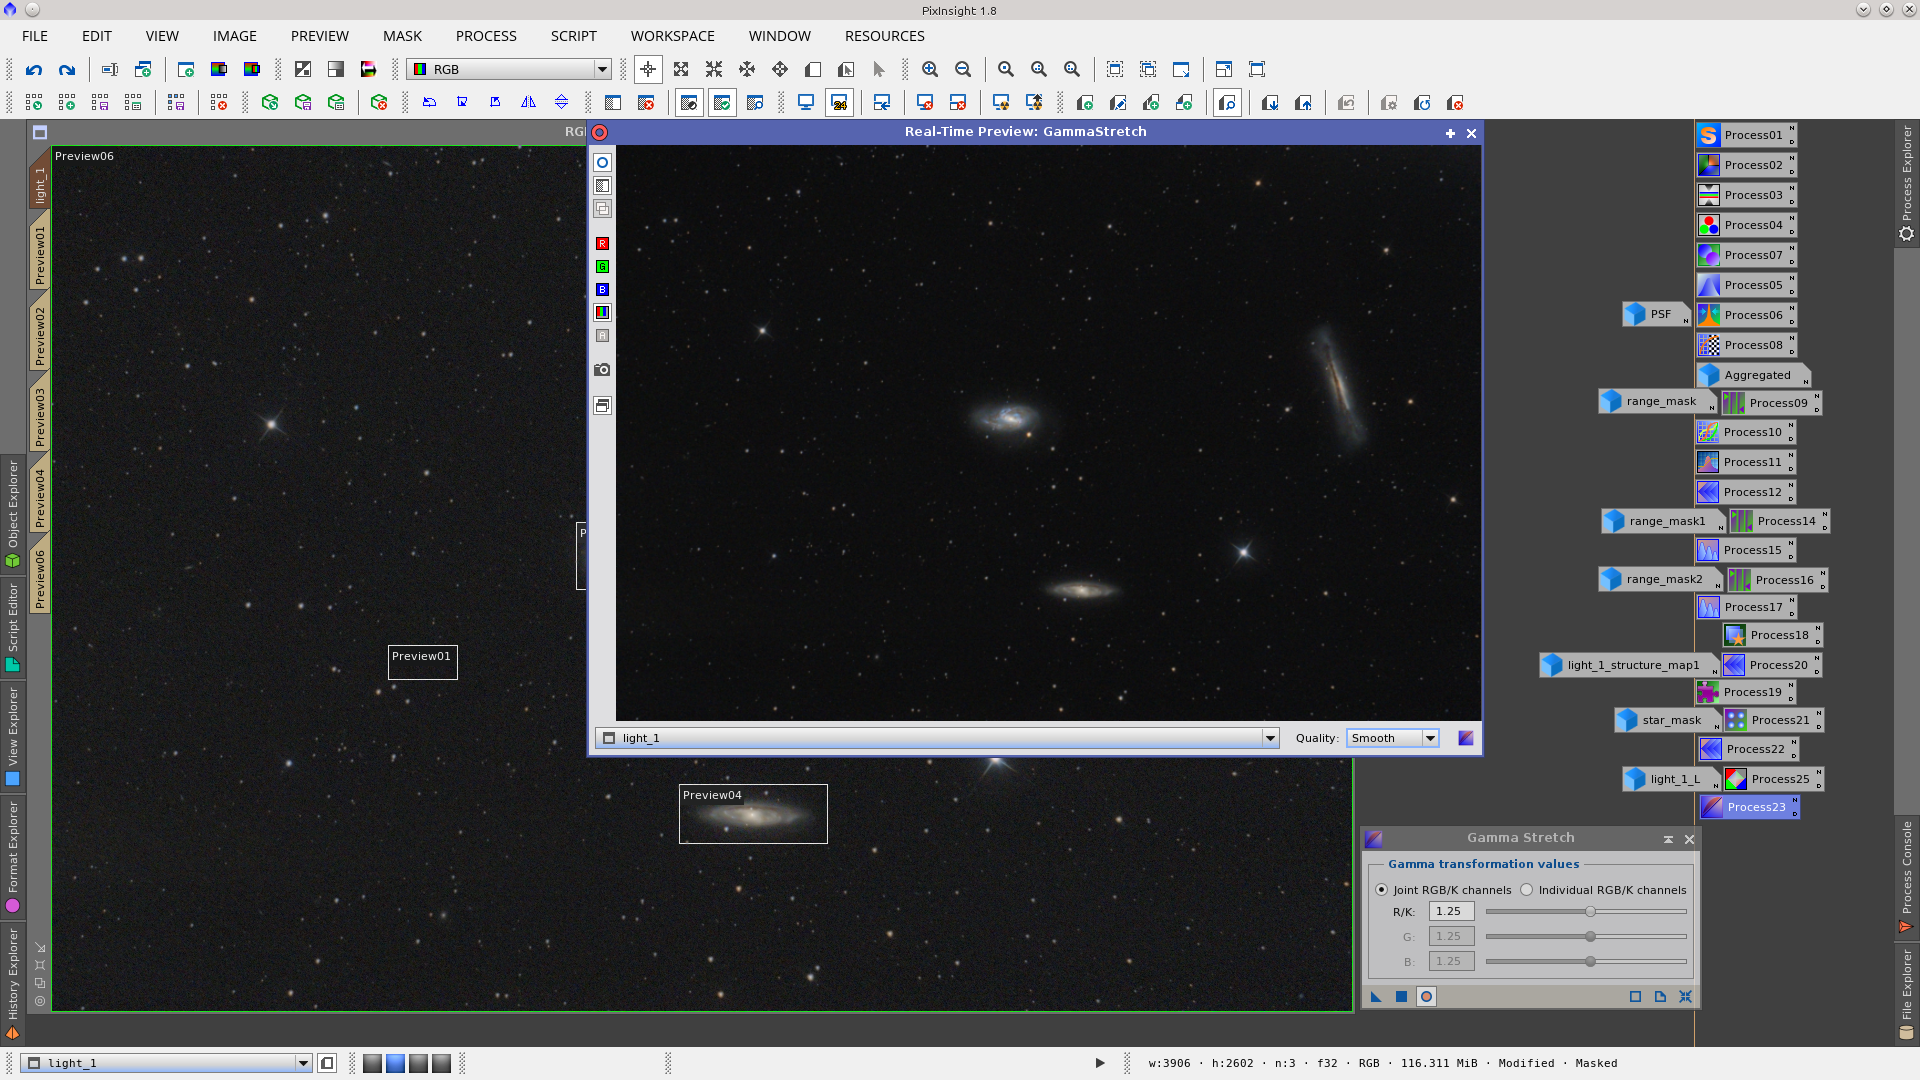
Final image:
